Actually this photo was taken a couple of years ago when we visited Arizona. That’s not where we’re going this time. In the next couple of weeks I’ll – hopefully – post a few photos of our journey. We’re going to Las Vegas, Salt Lake City, Park City, Jackson Hole, Jenny Lake, West Yellowstone, Western Montana, then south to Lake Tahoe, with our last stop in Placerville to celebrate our granddaughter’s 15th birthday. Then home. My DH has never been to Yellowstone and it’s a bucket list item for him. As long as I’m able to tether my iPad here and there, and am able to use the blogging software that worked last time, I’ll post some pictures. The plants are watered, bills are paid and we have a friend staying at the house to enjoy the view – and water the plants some more, since this is usually the hottest month of our summer.
Archives
Recent Posts
Currently Reading
Tasting Spoons
Posted in Veggies/sides, on September 4th, 2012.
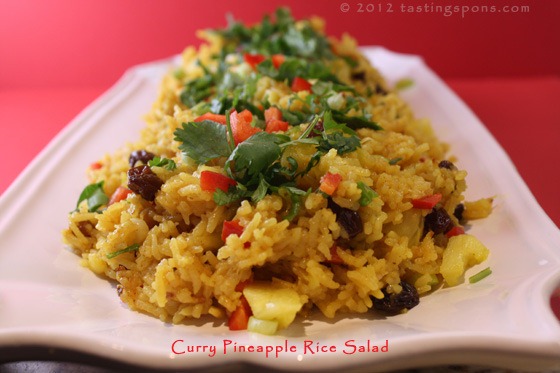
A rice side dish that’s just bursting with all kinds of Asian flavors from fresh ginger, coconut milk, lime juice, a little sprinkle of curry powder, some hot chili sauce, a tiny bit of soy sauce and toasted sesame oil. All that combined with fresh pineapple, dark raisins, toasted almonds, red bell pepper, onions and cilantro.
We’d been invited to a dinner at the home of some new friends. Friends who enjoy cooking and regularly imbibe in good wine. A great combination. The hostess said she was going to grill some beef and salmon (both with an Asian bent), and would make a crab first course. Their other guests were going to bring an appetizer. So, I filled in the rest with this salad above, the honey lavender ice cream I made the other day, and some thin ginger cookies which will come up in a day or two.
Since we didn’t know these people very well, I had to wrack my brain trying to figure out what to make. I wanted my side dish to blend well with the kind-of Asian grilled meat and fish. So I turned to my favorite (1993 old) Hugh Carpenter cookbook, Pacific Flavors: Thai and Chinese Cooking for an American Kitchen. You may have noticed that I don’t have a lot of Asian recipes on my blog – I do have some, but I almost never prepare a full-on Chinese or Thai dinner. Way too much mincing and chopping for me! Plus, we have several really good close-by restaurants if we want them. My DH rarely wants to go to a Chinese restaurant because as a diabetic, it’s very hard to estimate carbs. I often help him estimate carbs on a plate – was that 1/2 cup rice, or 3/8 cup, or 1/2 cup plus 2 tablespoons, how big are those won ton wrappers? how much sugar is in that sauce? – all those things can cause him a lot of grief trying to figure out how much insulin to take – not taking enough means his blood sugar goes way too high – too much can give him an insulin reaction – meaning not enough food in the body for the insulin to work on to convert to energy/sugar which puts his body into distress. So he avoids rice-based cuisines, pretty much. If I crave Asian food, I do it when my DH goes to San Diego to work and play on our sailboat. (I don’t go because I get seasick, unfortunately.)
But this rice dish sounded so good to go with the meat. I will tell you that making this dish is not a quick 20-minute deal. More like an hour, or close to it. There IS a lot of mincing and chopping and measuring. Part of it, though, is while the rice is cooking. Not altogether bad. If you were preparing this as part of a big meal it might be overwhelming – do it for something special. Because it IS special.
What “makes” the dish is the combination of liquids (broth, coconut milk, soy sauce, lime juice) and seasonings (curry, chili garlic sauce and lime zest). Then you toss in all the other stuff – pineapple, of course, toasted almonds, raisins, red bell pepper, and I added cilantro. I saved some of those additions to sprinkle on top (I had forgotten the almonds when I took the photo – I added them later – you didn’t miss them, did you?). Everybody raved about it. I’d definitely make this again – but the morning of, perhaps, or even the day before (adding the almonds and cilantro at the last minute). I made two changes to the original recipe: (1) I added some sesame oil for flavor; and (2) I added cilantro.
What I liked: the overall combo of flavors – I just love it when I taste of something and it just bowls me over with flavors in my mouth. Such it is with this dish.
What I didn’t like: well, if I had to complain about anything, it would be that it took a lot of time to make. It could, however, be a main course if you added in some chicken, maybe. Or some left over pork roast cubes, perhaps. But actually, I think this dish is worth the effort. You’ll be rewarded with some great tastes.
MasterCook 5+ import file – right click to save file, run MC, then File|Import
Curried Pineapple Rice
Recipe By: Adapted slightly from Pacific Flavors by Hugh Carpenter and Teri Sandison
Serving Size: 6
NOTES: To toast the almonds, place on a small baking sheet in a 325° oven for about 5 minutes. Watch carefully.
1 1/2 cups basmati rice — not instant or converted
1 tablespoon fresh ginger — finely grated
3 tablespoons unsalted butter
1/2 cup raisins
SAUCE:
2 1/4 cups low-sodium chicken broth
1 tablespoon sesame oil — toasted type
1/4 cup light coconut milk
2 tablespoons low sodium soy sauce
2 tablespoons lime juice
1 tablespoon curry powder — use mild unless you like it HOT
1/2 teaspoon chili garlic sauce
1/2 teaspoon salt — taste to see if it needs it
1/2 teaspoon lime zest
GARNISHES (important):
1 cup fresh pineapple — diced (more if desired)
1/3 cup slivered almonds — toasted
1/3 cup red bell pepper — minced
1/2 cup green onions — minced
1/2 cup cilantro — minced
1. Rinse the rice well in several changes of water until the water runs clear.
2. In a large saute pan, melt butter. Add ginger and allow it to sizzle for about a minute (don’t brown). Add rice and stir until all the rice is coated with butter. Add raisins.
3. In a 3-cup measure, combine all the liquid ingredients and spices. Stir well, then add to rice. Bring to a simmer, cover and cook just until the rice is tender (don’t overcook).
4. While the rice is cooking, prepare all the garnish ingredients. Reserve a tablespoon or two of the onions, bell peppers, cilantro and almonds to garnish the top.
5. When rice is almost done, stir in the green onions, red bell pepper, almonds, cilantro and pineapple. Replace lid and allow to sit for 5 minutes (to heat through the pineapple). You can serve it immediately, or allow it to cool and serve as a room temp salad. Top with all the reserved garnishes.
6. For a fancy presentation, serve the rice in a pineapple boat.
Per Serving: 359 Calories; 15g Fat (35.1% calories from fat); 12g Protein; 51g Carbohydrate; 2g Dietary Fiber; 16mg Cholesterol; 438mg Sodium.
Posted in Grilling, Pork, Veggies/sides, on September 3rd, 2012.
Throwing this dinner together was very last minute. But fresh produce from our corner farm stand just made it fabulous. And the grilled double pork chop? Oh my goodness! Read on . . .
The day I fixed this dinner – a Saturday – I wasn’t even planning to cook dinner. We were heading to San Diego, to spend the afternoon on our boat and with friends and would eat dinner at our yacht club. But traffic got in the way. It took over an hour for us to drive 20 miles. The freeway was just jammed. Where in the world were all these people going? There was no accident, yet my trusty iPhone traffic info said it would be stop and go for another 35 miles at least. We were in my DH’s convertible. Top up, of course, but still it was over 100° and I was sitting on the passenger side, in full sun, with the A/C barely keeping me cool. In bumper-to-bumper traffic very few car A/C’s can keep cool. We eventually got off the freeway and turned toward home. We stopped at our corner farm stand and bought another big box of the less-than-perfect tomatoes ($10 for 10 pounds), 2 ears of corn, some squash and a bunch of asparagus. Walking into our house (heavenly A/C) I stopped at the garage freezer and poked through the contents until I found one last 2-rib pork chop.
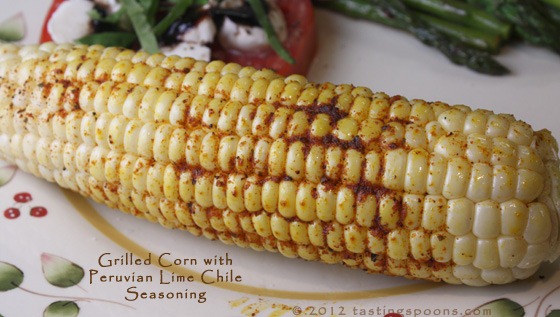
The chunk of meat was plunged into a big bowl of cold water and defrosted in a couple of hours, with some weights on top of it. I sliced a big honkin’ tomato and made a caprese with it. Easy. I sprinkled the corn with a new seasoning mix I have – from Savory Spice Shop. If you have one in your neighborhood, try this mixture – called Peruvian Chile Lime Seasoning. I sprinkled it all over the corn which I’d sprayed with Trader Joe’s canned olive oil spray. Wrapped in foil, it cooked in about 10 minutes or less.
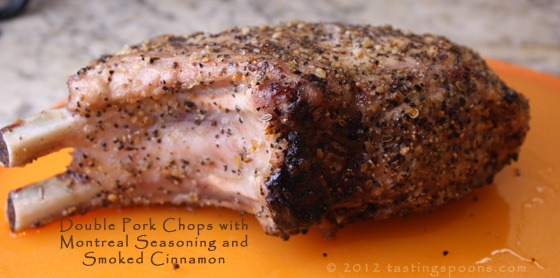
The pork I sprinkled liberally with Montreal Seasoning and spread with some grapeseed oil, then I sprinkled on a brand new ingredient – smoked cinnamon. Oh my goodness was that ever delish. So easy, and so very wonderful!
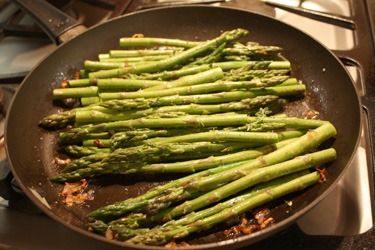
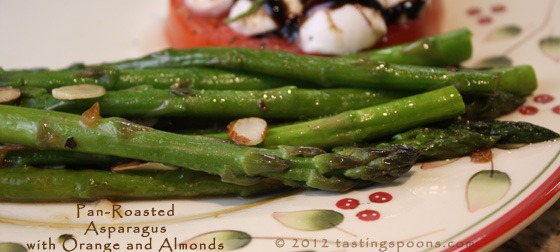
Then I quick-like researched asparagus and found this recipe which was quick and easy too. I had shallots. I had an orange and sherry vinegar. And I had sliced almonds too. It came together in a flash. It was thin asparagus, so it took no more than about 4-5 minutes to cook from beginning to end.
What I liked: I don’t usually do this – 3 recipes in one post – but all of these were so easy I decided I should just post them all together. The pork and the corn were so simple they hardly even require a recipe! Fabulous meal.
printer-friendly PDF for the asparagus
MasterCook 5+ import file (asparagus) – right click to save file, run MC, then File|Import
Corn on the Cob with Peruvian
Chile Lime Seasoning
Serves: 2
2 large corn on the cob, cleaned
1 teaspoon Peruvian Chile Lime seasoning
Trader Joe’s extra virgin olive oil spray
1. Spray the corn with olive oil spray, then liberally sprinkle the corn with the seasoning mix.
2. Seal with foil and grill over medium heat for about 10 minutes, turning several times.
. . .
Double Pork Chops with Montreal
Seasoning and Smoked Cinnamon
Servings: 2
1 double pork chop, a small roast with extended bones intact (about 1 pound)
About 1 tablespoon Montreal Seasoning mix
1/2 teaspoon smoked cinnamon
1 tablespoon grapeseed oil
1. Allow pork to sit at room temp for about 30 minutes.
2. Blot the meat with paper towels, then sprinkle on the Montreal Seasoning. Use ample, then sprinkle on the smoked cinnamon. Press into the meat, then drizzle all sides with grapeseed oil.
3. Grill over medium-high heat until both sides have color (grill marks) then move to indirect heat and continue cooking until the meat reaches about 138°. Remove from grill, set aside and cover loosely with foil for about 5 minutes. Slice the pork into two pieces and serve.
. . .
Pan Roasted Asparagus with Orange and Almonds
Recipe By: Inspired by a Cook’s Illustrated recipe.
Serving Size: 4
1 tablespoon olive oil
1 tablespoon unsalted butter
1 tablespoon minced shallot
1 pound asparagus spears — ends trimmed
2 teaspoons chopped fresh thyme leaves
1 tablespoon sherry vinegar
1 1/2 tablespoons slivered almonds
2 tablespoons fresh orange juice
Kosher salt and ground black pepper
1. Heat olive oil and butter in a large skillet over medium heat until shimmering; add shallots and stir for 1-2 minutes until shallots are golden (don’t burn them).
2. Add the asparagus (left whole) and gently fold them over one another in the pan until all the spears are coated in the oil mixture. Cook for about 5 minutes over medium-low heat, covering them for about half the time.
3. Add orange juice, almonds and thyme; add sherry vinegar, and salt and pepper to taste. Heat through and serve with additional almonds sprinkled over the top.
Per Serving: 95 Calories; 8g Fat (72.5% calories from fat); 2g Protein; 5g Carbohydrate; 1g Dietary Fiber; 8mg Cholesterol; 2mg Sodium.
Posted in Vegetarian, on September 2nd, 2012.
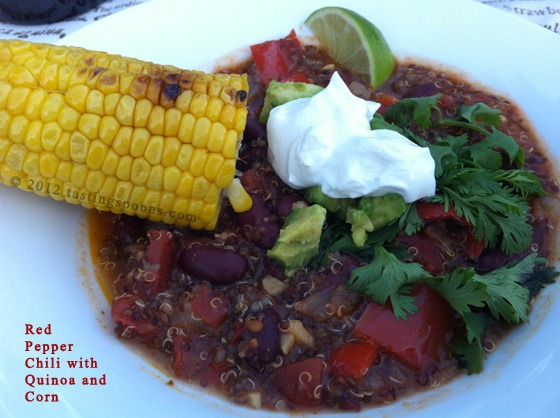
Are you eating more vegetarian meals? We are, although I haven’t made it a priority, just when I think about it I do it. If you are, you’ll want to try this extra-tasty red pepper chili that is just bursting out of the bowl with flavor.
I mentioned a couple of days ago that we’d attended a dinner recently to celebrate Cheryl Sternman Rule’s new cookbook Ripe: A Fresh, Colorful Approach to Fruits and Vegetables. Today I’ll share the recipe for the main dish served that night of the outdoor dinner.
You know how it is, when someone slides a plate of food in front of you, and you glance over that plate to see what’s on it and think about what it’s going to taste like. The salivary glands kick into high gear about then, especially if there are any special aromas wafting toward you. Such was the case – I remember sweeping my cupped hand toward me to get a sniff of the flavors, as we waited for everyone to be served. I always notice what quinoa does when it’s been cooked – those mini white rings, little tiny horseshoes, come loose from the grain and float free. It just happens when you cook quinoa – you can see them distinctly in the photo up top.
From the moment I put my spoon into it, I got the complex flavors – even though it’s vegetarian, don’t think for a minute it isn’t loaded with different tastes – from the red peppers, the beans, the onions and the mixture of spices (garlic, chili powder, cumin, oregano and pepper). Cheryl and the hostess Kim prepared this with a half an ear of roasted corn on the edge of the bowl. That part isn’t in the original recipe, but I’ve added it in, since that’s the way it was served to us. Cheryl says in the headnote to the recipe that this is her go-to winter stew that she developed in 2007 for Eating Well magazine. And it’s a winner on the time line also – you can probably make this in about an hour. The veggies require minimal preparation; open a couple of cans; cook a bit, then add the quinoa. Prepare the garnishes (easy) and once the quinoa is cooked through, serve it! (It thickens as it sits, so you may want to let it just sit for 15 minutes before actually serving it up.) Cheryl says she often spoons this on top of a bed of mashed potatoes. That reminds me a lot of my Cabbage Patch Stew here on my blog – one of MY very favorite recipes. A hearty ground beef, kidney bean and cabbage stew served over mashed potatoes.
What I liked: the mellow red pepper flavor, the little crunch of the quinoa and the mixture of spices in it. It was wonderful!
What I didn’t like: nothing whatsoever!
MasterCook 5+ import file – right click to save file, run MC, then File|Import
Recipe reprinted with permission from RIPE © 2012 by Cheryl Sternman Rule, Running Press, a member of the Perseus Book Group. Cookbook photography © 2012 by Paulette Phlipot.
Red Pepper Chili
Recipe By: Recipe reprinted with permission from RIPE © 2012 by Cheryl Sternman Rule, Running Press, a member of the Perseus Book Group.
Serving Size: 6
NOTES: Cheryl says this chili is her go-to favorite winter stew. She developed it for Eating Well magazine in 2007. Sometimes she serves it on top of mashed potatoes.
2 tablespoons extra-virgin olive oil
1 large red onion — diced (about 13/4 cups or 280g)
2 large red bell peppers — cut into 1-inch (2.5-cm) chunks
5 garlic cloves — minced (about 1 pound or 450 grams)
2 teaspoons chili powder
5 1/2 teaspoons ground cumin
1 teaspoon dried oregano
Kosher salt and freshly ground black pepper
30 ounces canned kidney beans — drained and rinsed
28 ounces diced tomatoes — canned, undrained
1 chipotle chile canned in adobo — to taste, minced (or more if desired)
2 cups vegetable stock
2 teaspoons brown sugar — (light or dark)
3/4 cup red quinoa — rinsed well in a strainer under cool running water
GARNISHES:
Lime wedges, diced avocado, cilantro leaves and sour cream
3 ears corn on the cob — halved
1. Heat the oil in a Dutch oven over medium-high heat. Add the onion, bell peppers, garlic, chili powder, cumin, oregano, and 1/2 teaspoon each salt and pepper.
2. Cook, stirring occasionally, until tender, about 5 minutes. Add the beans, tomatoes with juice, chipotle peppers, stock, and brown sugar. Bring to a boil, reduce heat, and simmer, covered, for 25 minutes.
3. Stir in the quinoa, cover, and cook over low heat for 15 minutes longer. Remove from the heat. Let stand, covered, for 20 minutes, to thicken. Serve with limes, avocado, cilantro, and sour cream.
4. Tip: The chili will thicken further as it cools.
5. CORN (not in the original recipe): if using, cut each cob in half, grill briefly and serve along side the soup bowl.
Per Serving: 405 Calories; 9g Fat (20.0% calories from fat); 16g Protein; 69g Carbohydrate; 16g Dietary Fiber; 1mg Cholesterol; 1075mg Sodium.
Posted in Desserts, on August 31st, 2012.
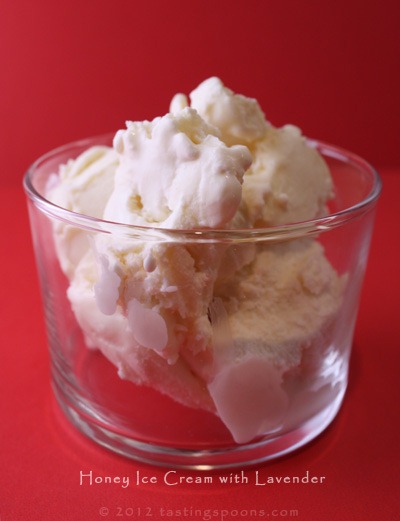
Honey ice cream? It just sounded so sweet. Dulcet. Mellow. I’ve read dozens of recipes for honey ice cream over the last few years, and I’d copied a few for my to-try file. But when I read this one, that didn’t require a custard (egg yolks and milk, simmered until thickened), I thought I should try it first. There are just a few ingredients in it. And truly, it was easy to make.
Part way through I decided to add some lavender to it. It just sounded good.
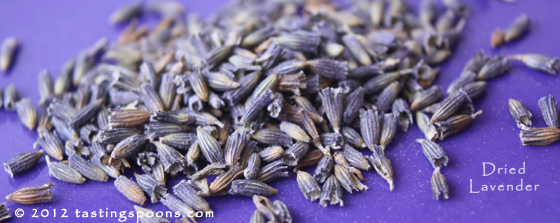
So, I slightly altered the recipe to add that in and to let the lavender infuse a little bit. Not taking time to go look up how other cooks have added lavender to ice cream, I just added it to the just-simmered milk and honey and let it sit, kind of like steeping tea. Once it had cooled to room temperature I filtered out the lavender. I didn’t want to leave the lavender in the ice cream – some folks might be a bit averse to finding little flower particles in it. Once that chilled, it was added to the heavy cream and it was ready to be churned.
The recipe below makes a quart. We ate all but a smidgen when I took it to some new friends, at a dinner for 6 people. There was just enough for one moderate scoop per person. And oh, was it ever good. Oh my yes! I’m glad there isn’t any more of it as I’d be too tempted to dip a spoon in it now and then. It’s special. The ice cream, after all, is almost all cream – there’s just a bit of milk in the mixture. Then the honey . . . I used sage blossom, but what fun it would be to vary the types of honey. You definitely taste the honey, but there is JUST enough honey to make a light sweetness to the ice cream. Just a perfect amount. The lavender was very, very subtle. If you like lavender, add more. If your lavender is old, it may not have any scent left in it, anyway. Taste it to see. Lavender, in and of itself, is a subtle flavor, so letting it get old would make it null and void, I would think. Some upscale markets do carry dried lavender these days. Do seek it out. Or harvest some from your garden! Let the ice cream sit out for about 10-15 minutes before you try to scoop it.
What I liked: every little tiny thing about it. Altogether delicious. I’d make it without the lavender too – the ice cream itself was very smooth.
What I didn’t like: nothing at all.
printer-friendly PDF
MasterCook 5+ import file – right click to save file, run MC, then File|Import
Honey Lavender Ice Cream
Recipe By: Adapted from crumblycookie.net
Serving Size: 6
Yield: 1 quart
NOTES: The lavender is subtle – don’t expect it to leap at you. You want the honey to shine through, which it does.
1/2 cup whole milk — (I used low-fat)
6 tablespoons honey
1/2 teaspoon dried lavender
1/8 teaspoon salt
2 cups heavy cream
1. In a small saucepan over medium heat, heat the milk until it begins to steam and bubbles form around the edge of the pot. Remove it from the heat.
2. Add the honey and salt into the milk until dissolved – whisk the mixture until it’s smooth. Add dried lavender and allow mixture to sit for about 30 minutes to allow the lavender to steep in the milk. Strain out the lavender.
3. Add the cream. Cover and refrigerate to thoroughly chill, at least 2 hours or up to overnight.
4. Churn until it’s at least as thick as soft serve ice cream. Transfer to a chilled container; freeze at least 2 hours before serving. Allow the container to sit out at room temp for 10+ minutes before you try to scoop it.
Per Serving: 350 Calories; 30g Fat (74.6% calories from fat); 2g Protein; 21g Carbohydrate; trace Dietary Fiber; 112mg Cholesterol; 85mg Sodium.
Posted in Uncategorized, on August 30th, 2012.
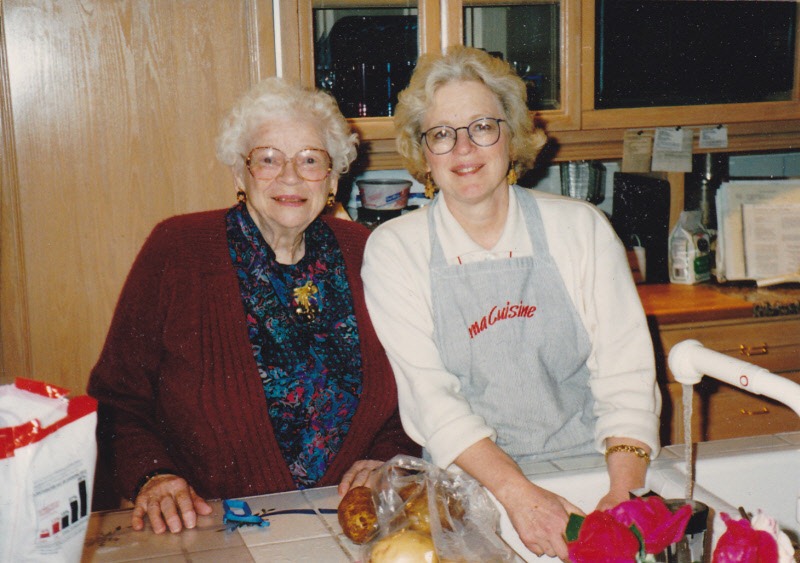
My mom and me.
The other day I was sorting photos. I sat and stared at this one. I think my daughter Dana gave it to me recently. It’s of my beloved mother and me (a much younger me). Tears flooded my eyes. I miss her so very much. She’s been gone for 13 years and there is hardly a day that goes by that I don’t think about her. This picture was taken sometime between 1990 (when we remodeled the kitchen there in our last house) and 1997 (when she died suddenly – her heart just stopped). I think it was taken in about 1996 or so. My mom was in her late 80’s then. I don’t have very many photos of my mom and me together, just the two of us. I wish I had more. A cookbook is on a stand there behind me – and a couple of individual recipes are pinned to the thin horizontal strip of cork board I had designed into the area just above the appliance garage – this was my major food prep area, so it was probably a holiday dinner or a family gathering of some kind. It looks like I was washing and peeling Idaho potatoes. Such a trivial thing to now hold so much emotion for me. I love you, mom. I hope you and dad are resting in heaven and enjoying the life of Riley, free of earthly worries and surrounded in God’s love.
Posted in Soups, on August 29th, 2012.
It probably isn’t the season for hot soup – I know – but then, why did Williams-Sonoma feature it in their most recent “From the Farm” brochure? I mean, it’s August? Hot soup? Do they live on the same time warp as clothing stores do – it’s in the 90’s today – I went shopping and all I could find were fall clothes. What’s wrong with this picture? I’ve never understood it. Well, I DO understand – stores and manufacturers have to gear up ahead of the season. It’s just crazy.
The fact of the matter is, my best friend just had an ugly medical procedure done a few weeks ago, and that day she wanted soup. Okay, soup it is! She saw the recipe and thought it sounded good. (It was.) It’s just that the soup is hot and the weather is hot. Ah well. Featuring a recipe about ripe tomatoes and fresh corn makes me think Williams-Sonoma knew what they were doing. The recipe came from a new cookbook called: This is a Cookbook: Recipes For Real Life by the Sussman brothers.
The soup took a bit more prep than I’d first thought it would – none of it difficult – just a bit time consuming! The corn had to be oven roasted. The tomatoes were oven roasted also. Both took more oven time than the recipe indicated – don’t know why. Ideally the corn will have that brown toasted look about it (or you could buy Trader Joe’s frozen roasted corn – that would be a lot simpler!). The tomatoes never did get any blackening at all. After 45 minutes I gave up and took them out of the oven. The bell peppers were scorched over a gas flame (you could also do it under the broiler). You will sauté onions briefly, then everything else (except a bit of the corn which you’ll use for garnish) is added in and simmered for awhile. The recipe indicated 10 minutes. I felt it needed more time than that, so I did more like 30. The cream is added, and you’re done! My friend wasn’t going to eat it for a few hours, so I just snapped a photo with a bit of corn added – took a taste too. You’ll want to add the avocado, cilantro, for sure. And the olive oil drizzle. Maybe the paprika – that last isn’t needed, for sure. Might look nice, though.
What I liked: the great veggie flavors (bell peppers, onions, corn) and the zip from chipotle chili powder. If you’re sensitive to spicy heat, reduce the amount of chipotle chili powder. The soup has some nice veggie texture – it’s not a smooth soup like Campbell’s Tomato soup. It’s not exactly chunky, but it does have little veggie bits in it.
What I didn’t like: When I made it, according to the recipe, you didn’t cook the onions before adding to the soup. Even after simmering, I could taste that raw-onion flavor. So I altered the recipe to include cooking the onion first (so I actually haven’t tried cooking it that way, but I’m suggesting you do it). The major flavor in the soup, to me, was the bell peppers. Not the tomato and certainly not the corn! Not that that’s a problem – just a comment. With a title of “roasted corn” I expected the corn to be the predominant flavor. Not for me. The soup also takes more time to make than you might think. Just so you know.
printer-friendly PDF
MasterCook 5+ import file – right click to save file, run MC, then File|Import
Roasted Corn Soup with Tomatoes
Recipe By: Adapted from This is a Cookbook, by Max Sussman and Eli Sussman (Olive Press, 2012).(From Williams-Sonoma)
Serving Size: 4
2 large ripe tomatoes — ripe, but firm
3 cups fresh corn kernels — from about 6 ears
2 whole red bell peppers
1 whole yellow onion — chopped
1 whole red onion — chopped
1 tablespoon olive oil
3 whole garlic cloves — minced
2 1/2 cups low-sodium chicken broth — plus more as needed
1 teaspoon chipotle chili powder
2 tablespoons salt
1 cup heavy cream
GARNISHES:
Some of the roasted corn
Sliced avocado
Extra-virgin olive oil for drizzling
Paprika
1. Preheat an oven to 375°F.
2. Put the tomatoes in a lightly greased glass baking dish. Roast until the skins darken and the tomatoes are caramelized, about 30+ minutes. Remove from the oven and let cool. Keep the oven on.
3. Spread the corn in a single layer on a baking sheet. You’ll need 2 large sheet pans so the corn isn’t crowded. Roast until the edges begin to turn golden brown, 15+ minutes. Don’t dry out the corn – you want it toasty brown, but not dried out. Meanwhile, when the tomatoes are cool enough to handle, peel off the skins and discard. Set the flesh, with the juices, aside in the baking dish. Remove the corn from the oven and let cool.
4. Place 1 bell pepper on each of 2 gas burners. Turn the burners on high and sear the peppers directly over the flame, using tongs to turn as needed, until the skins are blackened all over, 10 to 15 minutes total. (Or place the peppers under the broiler and broil, turning as needed, until charred and blistered on all sides, about 15 minutes.) Transfer the peppers to a brown paper bag and close tightly. Let stand for 15 minutes, then remove the peppers from the bag. Remove and discard the skins, core and seeds.
5. In a soup pot, saute onions in olive oil for 10+ minutes, until onion is softened. Then add the tomatoes, bell peppers, garlic and corn, (don’t forget to reserve a handful of the roasted corn for garnish). Add just enough broth to cover the vegetables and bring to a boil over high heat. Reduce the heat to medium-high and cook until the vegetables are very tender, about 10 minutes (or longer, if desired). Stir in the chili powder and salt.
6. Using an immersion blender, blend the soup until smooth. While blending, slowly drizzle in the cream. Ladle the soup into individual bowls. Garnish each portion with a couple of avocado slices, a few drops of olive oil, a scattering of the reserved roasted corn and a sprinkle of paprika. Serve hot.
Per Serving: 422 Calories; 28g Fat (53.4% calories from fat); 14g Protein; 42g Carbohydrate; 6g Dietary Fiber; 82mg Cholesterol; 3264mg Sodium.
Posted in Beverages, on August 27th, 2012.
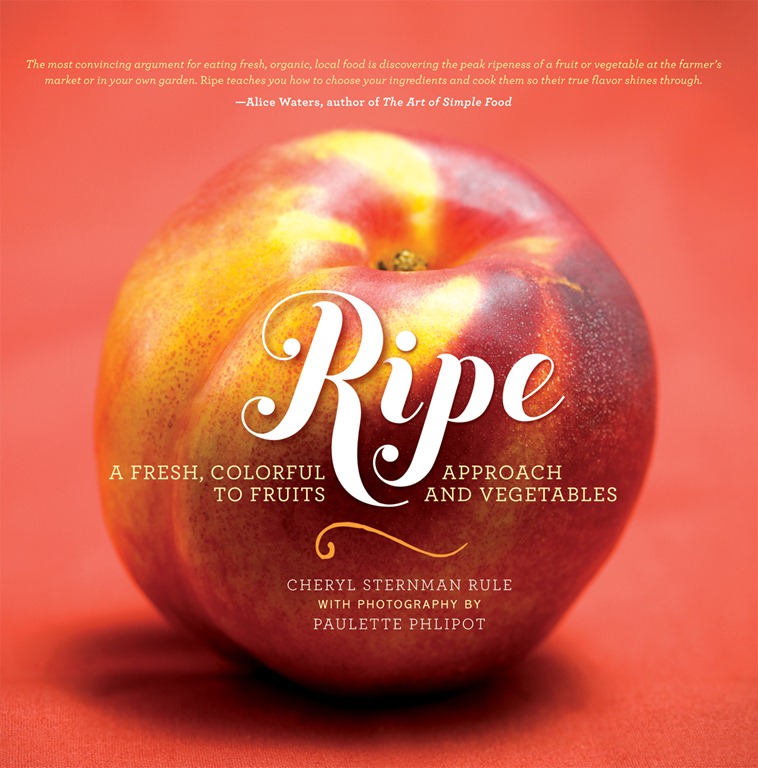
Some weeks ago we attended a very special dinner. Reading Cheryl Sternman Rule’s blog, 5 second rule, I saw that Cheryl was going to visit our neck of the woods here in Southern California and would be cooking a dinner for up to 20 lucky people with help from a charming couple, Kim and Barry, who opened their home to host the dinner. Cheryl’s blog is a favorite of mine, and I’ve featured a couple of her recipes here in the past. She’s a professional food writer and developer; she’s also a wife and mother of two sons. And, she’s just published a cookbook (with an amazing photographer, Pauline Phlipot – and no, that’s not a typo – her name is spelled that way) called Ripe: A Fresh, Colorful Approach to Fruits and Vegetables.
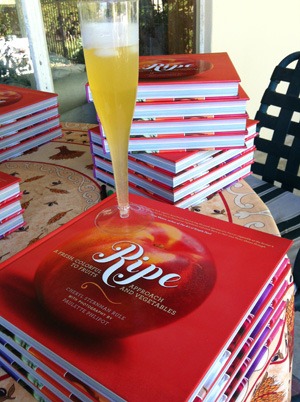
When I clicked on the link to enquire about the dinner, I discovered that the hostess lived very near us. Wow, that made it even more enticing. Quick-like, I signed up (and paid for the dinner, obviously) so my DH and I could go. Included in the price was a cookbook for each person! Yea! I will use the 2nd one as a gift, and I had it signed by Cheryl. When we arrived at Kim and Brian’s house, Cheryl and Kim were busy at work in the kitchen putting the finishing touches on a wonderful multi-course meal. Eighteen more people arrived and appetizers were served (a Radish and Olive Crostini) along with this very nice, refreshing lemonade enhanced with agave nectar. And Kim added in some vodka.
![]()
Isn’t that cookbook cover just stunning? The book is so chock-block full of gorgeous photographs, it’s almost worthy of being a coffee table book, if you get my drift. Cheryl made a fabulous match with the photographer in creating this book. Cheryl did give a short talk to all of the dinner guests about how the book came about and shared some of the story about how any writer works with a publisher. That was interesting to me since I’d never heard much about the actual publishing part. I’ve heard and read that today, with the gigantic flush of cookbooks out there, and new ones every single day of the year, you have to have some kind of a hook, a niche, to be a successful cookbook author. Cheryl cleverly decided to write her book based on color. Yes, you read that right. Color. The book is divided into chapters for Red, Orange, Yellow, Green, Purple & Blue, and White. Just imagine what fruits and veggies you’d find in each of those chapters. The theme, of course, is to cook or prepare foods at their prime, when they’re RIPE, and with some fairly simple additions or preparation, the fruit and veggies will do all the work. All the recipes are contained on one page, so that makes most of them relatively easy.
I’ll be sharing three of the recipes here on my blog (the publisher won’t permit more than that), so I had to choose – oh, that was hard because everything we had was delicious. Today I’m giving you the beverage. Another day you’ll read about the vegetarian main course, a delicious red pepper chili with grilled corn, and lastly the oh-so delicious dessert, a blueberry nutmeg cake. Other bloggers and/or newspapers have featured all of the other menu items from the dinner we went to – click the links if you’re interested in any of these: Cucumber Halloumi Salad with Licorice Notes (it was the cheese that made that one special), Carrot Soup with Garam Masala Cream (I love garam masala, so it was a given that I’d like that one too), and a salad called Red Leaf Lettuce with Grapes and Table Flowers (this one wasn’t my favorite, but perhaps my salad didn’t have enough dressing on it – I liked the nice touch of the edible flowers, though).
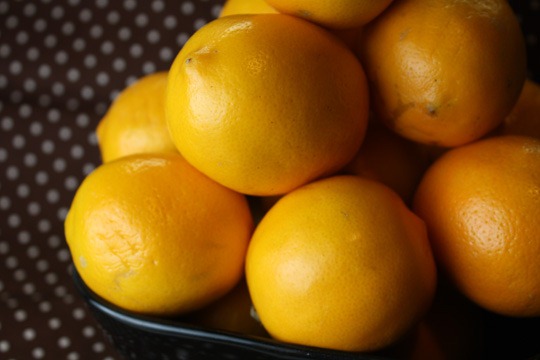
Now, back to this refreshing beverage . . . if you happen to have Meyer lemons, you’ll enjoy using the juice for this. If you have regular lemons . . . no worries . . . just add a bit more agave since regular lemons are a bit more sour.
In the cookbook, on the page for lemons, Cheryl wrote a short blurb about lemons, about her dwarf Meyer lemon tree that thrives in her front yard. She swears that if she ever moves, the tree is going with her. Hmmm. Good luck with that! But just below (as she does with every fruit and veggie in the book) she gives a few simple ideas/uses. For lemons she suggests a risotto (butter, shallots, Arborio rice, white wine, stock, lemon zest, juice and pecorino); another suggestion is avgolemono (a Greek lemony soup) of stock, rice, egg yolks, lemon juice and parsley; and lastly lemon curd (egg yolks, sugar, lemon juice zest and butter). Then on the facing page is the recipe for the lemonade. And a photo of the food.
Cookbook cover photo: © 2012 by Paulette Phlipot; Cheryl’s photo: www.eastwest.com. All other photos are my own. Recipes reprinted with permission from RIPE © 2012 by Cheryl Sternman Rule, Running Press, a member of the Perseus Book Group.
What I liked: well, I’m not much of a drinker, but I loved the vodka-enhanced lemonade. Loved the sweet-sour taste (more sweet than sour). Just so very refreshing. Great for a summer evening.
What I didn’t like: nothing whatsoever!
printer-friendly PDF
MasterCook 5+ import file – right click to save file, run MC, then File|Import
Agave Meyer Lemonade
Recipe By: Recipes reprinted with permission from RIPE © 2012 by Cheryl Sternman Rule, Running Press, a member of the Perseus Book Group.
Serving Size: 6
Yield: 1 1/4 quarts
NOTES: Cheryl Sternman Rule says: I can think of no better way to honor the bright, uplifting flavor of sunny lemons than with this fresh, agave-sweetened lemonade. If you can’t find Meyer lemons, swap the more acidic (and more common) Eureka variety. In either case, adjust the agave to taste.
1 1/4 cups Meyer lemon juice
1/2 cup agave nectar — (170-340g) or to taste (1/2 to 2/3)
4 cups cold water — (0.95l) preferably refrigerated
Ice
[Add vodka, if you’d like – our hostess prepared it that way]
1. Squeeze enough lemons (6 to 7) into a 2-cup (500-ml) glass measure to yield 11/4 cups (300 ml) of juice. Strain into a large pitcher.
2. Whisk in the agave nectar, beginning with 1/2 cup (118 ml) and adding more to taste. Pour in the water. Whisk to combine. [Add vodka if you’d like to zip it up a little bit.]
3. Chill, covered, until ready to serve. Distribute the lemonade among ice-filled glasses. Slice the remaining lemon (you may even have one left over), and float 1 slice in each glass. Serve immediately.
Per Serving: 13 Calories; 0g Fat (0.0% calories from fat); trace Protein; 5g Carbohydrate; trace Dietary Fiber; 0mg Cholesterol; 5mg Sodium.
Posted in Desserts, on August 25th, 2012.
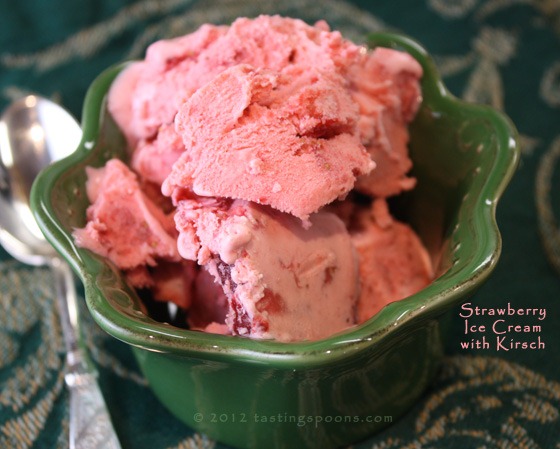
Can you ever have too many recipes for strawberry ice cream? Hopefully not, since I think I have 3 on my blog already! This one is fairly straight forward – except for the addition of kirsch, which surely must add some taste, but I couldn’t pick it out – it just enhanced the strawberries, I think.
First off, I must tell you that the lovely ruby ice cream color in the photo up above has not been enhanced. I do own PhotoShop, and I use it all the time on my photos (cropping, lightening the whole picture, especially if I didn’t have sufficient light on the object to begin with, then inserting the text).
An aside here – do you know why I always type text on my photos? Because people steal my photos and put them on their own blogs or websites, claiming them as their own. I got really ticked off at one guy a couple of years ago who just lifted about 20 of my blog posts and recipes and plopped them all into his website. It wasn’t just the recipes, it was the entire posts. The only thing he did was add advertising within the text I’d written, and particularly in the recipes. So if it said “yellow lentils,” or “chili powder” or “ground cinnamon” he inserted a link on the words so you could go buy it somewhere. I’d suppose he was going to get revenue from manufacturers by providing buy-links. He actually told me he thought I’d be flattered that he was reproducing my stories and recipes on his website. His mistake was including a trackback link to my website (if he hadn’t, I might not have ever known). I set him straight about that in one big hurry! So generally I insert text and my copyright buried somewhere on it. Hopefully that prevents others from using them. It doesn’t prevent anyone from copying and pasting my stories someplace else. I don’t care about a lot of my photos, but the ones with text usually contain the copyright. It’s the courteous thing to do to ASK first if you can lift an entire story or a photo (and provide attribution).
Well, there, I’ve gotten that off my chest! Sorry for the sidetrack . . .
Now, this ice cream I adapted a little bit after reading the recipe over at Cheryl Sternman Rule’s blog called 5 Second Rule. She got it from a cookbook, The Homemade Pantry: 101 Foods You Can Stop Buying and Start Making. It sounds like a very intriguing book – I’d like to glance at it, in a bookstore, though, before I buy it. Among other things, Cheryl mentioned some ideas for children’s snacks. Anyway, if you go onto amazon, you can click on the book photo to view some of the book’s pages – including her recipes for ricotta cheese, cream cheese, buttermilk, quick oatmeal, granola and several pages of her cooking explanations and stories. The author, Alana Chernila, is a young mother, and she must be a stay-at-home mom since she obviously spends a copious amount of time in her kitchen, and on her kitchen sofa (one of her favorite pieces of furniture, where she often piles up stacks of cookbooks). In my next life I’m going to have a comfortable sofa right next to my cookbook bookcase. I have a sofa near mine now, but it’s part of our family room furniture and it backs up to the bookcase. Not convenient. So, next time it might be something out of the pages of Country Living. Red and white plaid, I think. With a table big enough to hold a tray for a pot of tea. Can you picture it?
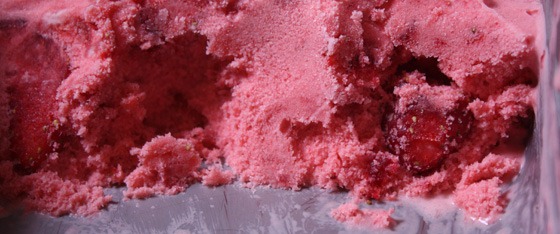
The ice cream – well, it was delicious. It takes 2 baskets of berries to make it – and a cup of heavy cream and just 1/2 cup of half and half or fat-free half and half, which is what I used. I’m sure it must have been the Kirsch that made it different because it’s much like other strawberry ice creams I’ve made. It is a custard-type. Do mash up the strawberries sufficiently (I elaborated the directions about that because mashing them up “a bit” which is what was in the original directions, and that is definitely not enough – we had big frozen chunks of strawberry in the finished product). See the photo above – see the one whole honkin’ strawberry there on the right! My freezer keeps things at 0°, so a berry is frozen solid! The ice cream has to sit out at room temp for about 10 minutes before it can be scooped very well, too. If you have Kirsch in your liquor cabinet, you might want to give this recipe a try.
What I liked: the very-berry strawberry flavor, and the bright ruby-red color. The taste is delightful – very much strawberry. The grandkids thought it was great too. I found out our youngest grandson’s favorite ice cream is strawberry, so he was very happy! He just turned 5.
What I didn’t like: really, nothing.
printer-friendly PDF
MasterCook 5+ import file – right click to save file, run MC, then File|Import
Strawberry Ice Cream with Kirsch
Recipe By: Adapted from 5 second rule blog, and she excerpted it from The Homemade Pantry by Alana Chernila
Serving Size: 8
3 large egg yolks
3/4 cup fat free half-and-half — or use the real stuff
1/4 cup Splenda Granular — (or use real sugar)
3/4 cup heavy cream
1/4 cup granulated sugar
2 pints strawberries — washed, dried, and hulled
1 teaspoon vanilla extract
1/8 teaspoon salt
2 teaspoons kirsch liqueur
1. In a small bowl, whisk the egg yolks.
2. Place the half-and-half in a medium heavy-bottomed pot. Heat it over medium heat without letting it boil, and stir occasionally until the sugar is dissolved, 5 to 8 minutes. In the meantime, set a fine-meshed sieve over a large heatproof bowl.
3. When the half-and-half is hot, add the Splenda (or sugar) and stir to dissolve completely. Then whisk a little of it into the egg yolks to warm them. Then whisk all of the warm egg yolks into the hot cream. Stir constantly with a wooden spoon or heatproof spatula as you heat the mixture over medium heat—keep scraping the bottom and stirring until the mixture thickens and you get a good coating on the spoon. Again, do not let it boil. Remove from the heat and pour through the strainer over the bowl. Add the heavy cream to the mixture and stir to combine. Cover and chill in the refrigerator for at least 30 minutes.
4. Put the strawberries in a large bowl and mash them unil all of it is a mush (any large pieces will likely freeze as-is in the ice cream) with a potato masher. Then add the sugar. Let the strawberries macerate in their own juices, stirring occasionally until the sugar has melted, 10 to 15 minutes. Add the berries to the cream mixture. Then add the vanilla, salt, and kirsch, if using. Chill, covered, in the refrigerator for at least 30 minutes, but up to 2 days.
5. Freeze according to your ice cream maker’s instructions.
Per Serving: 162 Calories; 10g Fat (58.7% calories from fat); 2g Protein; 15g Carbohydrate; 2g Dietary Fiber; 110mg Cholesterol; 68mg Sodium.
Posted in Salad Dressings, Salads, on August 23rd, 2012.
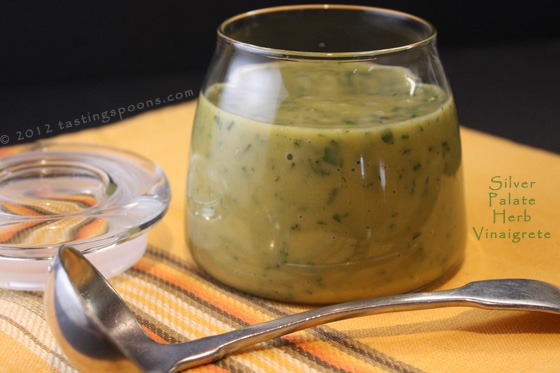
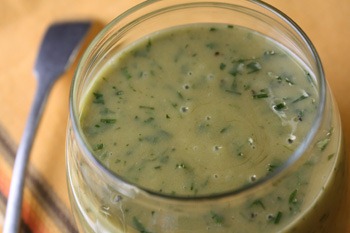
Nothing but a standard, but very tasty vinaigrette dressing. One that’s made without garlic, but with fresh chives, parsley and tarragon (this time) in it. Easy and keeps for a couple of weeks.
Actually, I’ve posted this recipe before, but it was buried inside a rice salad construct. It was last year, actually, but I’ve been making this dressing for at least 30 years. Back when I first bought the Silver Palate Cookbook 25th Anniversary Edition’. That cookbook has been a favorite of mine all these years. In fact, my old paperback copy finally bit the dust (the spine just gave out, came unglued) so I bought a new hardback copy, their 25th anniversary edition. It doesn’t have any spots and stains on the pages like my old one did. I almost feel bereft to have had to throw out the old book.
The page that contained this recipe had numerous mustard smears and the Rice and Vegetable Salad that I always made it with had some oil spatters on its pages. Well used.
The dressing is called “Our Favorite Vinaigrette” because the ladies of the Silver Palate (Julee Rosso and Sheila Lukins) used it for just about everything. I mean EVERYTHING!
My preference is to serve this vinaigrette with veggies (as in the rice salad linked above). It’s also delicious on sliced tomatoes too. This time I made it to serve on a green salad – it’s just an old-faithful recipe that never lets me down. Dijon mustard helps to emulsify it and give it ample taste. I always use Maille, the French Dijon mustard – it is a standard on my refrigerator shelf. I like it far better than Poupon. But, use your choice in any case. This particular time I used an inexpensive red wine vinegar (mostly because I didn’t think its nuances would shine through), and I used Costco’s Kirkland EVOO. The fresh herbs give it plenty of flavor – you can vary what you put in it – and you can vary how MUCH you put in it. The recipe calls for Italian parsley and chives. As I was snipping herbs to make this, I noticed the tarragon sprigs were leggy, so I grabbed some of them as well. I mixed the dressing in a big Pyrex measuring cup and used my immersion blender rather than the stand-blender. Made for easier clean-up.
Ideally, this is best within a few hours of making it, but it will keep just fine for many days. I know I’ve kept it up to 2 weeks. The flavor likely isn’t at its peak any longer, but it will still garnish a nice salad. I was making a huge salad for 20+ at our grandson’s birthday (they were expecting 20 adults and about 20 children). I filled up my gigantic salad bowl that I only use for these kinds of occasions. We didn’t need all the dressing (I doubled the recipe below), so I’ll have plenty to last me for several weeks. I used more herbs this time because I was making a very neutral salad (head lettuce, some nice European greens, corn, radishes and yellow tomatoes) and I wanted the dressing to give the salad some oomph. When you dress the salad, taste it to make sure it’s got enough – definitely don’t use too much – but yet that’s an axiom for any salad, eh?
What I like: just that this is a sturdy and hearty dressing – one that will go with lots of different things.
What I didn’t like: nothing at all!
printer-friendly PDF
MasterCook 5+ import file – right click to save file, run MC, then File|Import
Silver Palate’s “Our Favorite Vinaigrette”
Recipe By: Silver Palate Cookbook
Serving Size: 8
1 tablespoon Dijon-style mustard
4 tablespoons red wine vinegar
1 teaspoon granulated sugar
1/2 teaspoon salt
1/2 teaspoon freshly ground black pepper
Minced parsley and/or snipped fresh chives to taste [I added tarragon too]
1/2 cup olive oil
1. Measure mustard into a bowl. Whisk in vinegar, sugar, salt, pepper and herbs to taste.
2. Continue to whisk mixture while slowly dribbling in olive oil until mixture thickens. [You can also use an immersion blender.] Adjust seasoning to taste. Cover until ready to use (vinaigrette is best if made just before it is to be used.) If necessary, whisk again before serving.
Per Serving: 124 Calories; 14g Fat (96.0% calories from fat); trace Protein; 1g Carbohydrate; trace Dietary Fiber; 0mg Cholesterol; 157mg Sodium.


Leave a Comment!