Get new posts by email:

Archives

Currently Reading

Here are the tastingspoons players. I’m in the middle (Carolyn). Daughter Sara on the right, and daughter-in-law Karen on the left. I started the blog in 2007, as a way to share recipes with my family. I’m still doing 99% of the blogging and holding out hope that these two lovely and excellent cooks will participate. They both lead very busy lives, so we’ll see.

– – – – – – – – – – – – – – – – – – – – – –

BOOK READING (from Carolyn):

Music of Bees, Eileen Garvin. Absolutely charming book about a woman in midlife, lonely, who raises bees, also makes unlikely friends. Heart-warming and very interesting about beekeeping.

A Postcard from Paris, Alex Brown. Really cute story. Dual time line, 1940s and present day about renovating an old apartment in Paris, things discovered.

Time of the Child, Niall Williams. Oh such a good book. Very small village in Ireland, 1960s. A baby is left on the doorstep. The town all whispers and helps. I listened to an interview of the author, which made me like him and his books even more.

Sipsworth, Simon Van Booy. If you like animals you’ll swoon. An old woman who really wants to die finds a tiny mouse in her house and befriends it and finds a reason to live. Utterly charming book.

The Forger’s Spell, Edward Dolnick. True story. For seven years a no-account painter named Han van Meegeren managed to pass off his paintings as those of Johannes Vermeer.

If You Lived Here, You’d be Home by Now, Christopher Ingraham. Could hardly put it down – about a journalist who takes on a challenge to move to small town in Minnesota and write about it. He expects to hate it and the people and place, but he doesn’t. Absolutely wonderful true story.

The River We Remember, William Kent Kreuger. 1950s, Minnesota. A murder and the aftermath. Could hardly put it down. Kreuger has such a vivid imagination and writing style.

How the Lights Gets In, Joyce Maynard. An older woman returns to New Hampshire to help care for her brain-injured son. Siblings and family, lots of angst and resentments.

The Filling Station, Vanessa Miller. Every American should read this book. A novelized retelling of the Tulsa massacre in 1921. Absolutely riveting.

The Story She Left Behind, Patti Callahan Henry. Love this author. Based on a true story. A famous author simply vanishes, leaving her husband and daughter behind. She had invented a mystical language no one could translate. Present day, someone thinks he’s solved the riddle, contacts the family. Really interesting read.

The Girl from Berlin, Ronald Balson. Love anything about Tuscany. An elderly woman is being evicted from a villa there, with odd deed provenance. Two young folks go there to help unravel the mystery. Loved it.

The Island of the Colorblind, Oliver Sacks, M.D. Nonfiction. The dr is intrigued by a remote Pacific island where most of the inhabitants are colorblind. He also unravels a mystery on Guam of people born with a strange neurological problem. Medical mysteries unveiled. Very interesting.

The Bookbinder, Pip Williams. Post 1914 London. Two sisters work at a bookbindery. They’re told to not read the books. One does and one doesn’t. One has visions beyond her narrow world; the other does not. Eventually the one gets into Oxford. Lovely story.

The Paris Express, Emma Donoghue. 1895 on a train to Paris, a disaster happens. You’ll delve into the lives of many people who survived and died in the crash.

A Race to the Bottom of Crazy, Richard Grant. This is about Arizona. Author, wife and child move back to Arizona where they once lived. Part memoir, research, and reporting in a quest to understand what makes Arizona such a confounding and irresistible place.

The Scarlet Thread, Francine Rivers. A woman’s life turned upside down when she discovers the handcrafted quilt and journal of her ancestor Mary Kathryn McMurray, a young woman who was uprooted from her home only to endure harsh frontier conditions on the Oregon Trail.

A Place to Hide, Ronald Balson. 1939 Amsterdam, an ambassador has the ability to save the lives of many Jewish children. Heartwarming.

Homeseeking, Karissa Chen. Two young Chinese teens are deeply in love, but in China. Then their families are separated. Jump to current day and the two meet again in Los Angeles.

North River, Pete Hammill. He always writes such a good story. A doctor works diligently healing people from all walks of life. His wife and daughter left him years before. One day his 3-yr old grandson arrives on his doorstep.

A Very Typical Family, Sierra Godfrey. A very messed-up family. Three adult children are given a home in Santa Cruz, Calif, but only if the siblings meet up and live in the house together. A very untypical scenario but makes for lots of messes.

Three Days in June, Anne Tyler. The usual Anne Tyler grit. Family angst. This wasn’t one of my favorites, but it was entertaining and very short.

Saved, Benjamin Hall. Author is a veteran war reporter. Ukraine, 2022, he nearly loses his life to a Russian strike. Riveting story – he survives, barely.

Grey Wolf, Louise Penny. Another Inspector Gamache mystery in Quebec. She is such an incredible mystery writer.

All the Colors of the Dark, Chris Whitaker. A missing person mystery, a serial killer thriller, a love story, a unique twist on each. Could hardly put it down.

Orbital, Samantha Harvey. Winner of 2024 Booker Prize. I don’t usually like those, but I heard the author interviewed and she hooked me. This is not a normal book with a beginning, a story and an end. It’s several chapters of the day in the life of various astronauts at the ISS (Int’l Space Station). All fictional. She’s been praised by several real astronauts for “getting it” about space station everyday life.

The Blue Hour, Paula Hawkins. An island off Scotland. Inaccessible except when the tide is out. Weird goings on. An artist. A present day mystery too.

Iron Lake, William Kent Krueger. A judge is murdered and a boy is missing. Riveting mystery.

Tell the Wolves I’m Home, Carol Ricks Brunt. 1980s. A 14-yr old girl loses her beloved uncle. Yet a new friendship arises, someone she never knew about.

Four Treasures of the Sky, Jenny Zhang. 1880s, a young girl is kidnapped in China and brought to the United States. She survives with many hurdles in the path.

The Boy Who Fell out of the Sky, Ken Dornstein. Memoir, 1988. The author’s brother died in the PanAm flight that went down in Lockerbie, Scotland. A decade later he tries to solve “the riddle of his older brother’s life.”

Worse Care Scenario, T.J. Newman. Oh my. Interesting analysis of what could/might happen if a jet crashed into a nuclear plant. Un-put-downable.

Song of the Lark, Willa Cather. Complicated weave of a story about a young woman in about 1900, who has a gifted voice (singing) and about her journey to success, not without its ups and downs.

Crow Talk, Eileen Garvin. Charming story which takes place at a remote lake in Washington State, about a few people who inhabit it, the friendships made, but also revolving around the rescue of a baby crow.

The Story Collector, Evie Woods. Sweet story about some dark secrets from an area in Ireland, a bit magical, faerie life, but solving a mystery too.

A Sea of Unspoken Things, Adrienne Young. A woman investigates her twin brother’s mysterious death. She goes to a small town in California to figure it out, to figure HIM out.

The King’s Messenger, Susanna Kearsley. 1600s England, King James. About one of his trusted “messengers,” and his relationship with a young woman also of “the court.” Lots of intrigue.

In the Shadow of the Greenbrier, Emily Matchar. Interesting mystery in/around the area of the famous resort in White Sulphur Springs, West Virginia.

Isola, Allegra Goodman. Hard to describe, survival story on an island in the 1600s.

Save the Date, Allison Raskin. Rom-com, witty, LOL funny. Clever.

The Sirens, Emilia Hart. Numerous time-lines, Australia. Mysteries abound, nightmares, abandoned baby, weird allergies.

Red Clay, Charles Fancher. LOVED this book. Mostly post-Civil War story about the lives of slaves in Alabama during Reconstruction.

Stars in an Italian Sky, Jill Santopolo. Dual time line, 1946 and recent time. Love stories and a mystery.

Battle Mountain, C.J. Box. Another one of Box’s riveting mysteries. Love his descriptions of the land.

Something Beautiful Happened, Yvette Corporon. A memoir of sorts in Greece, tiny island of Erikousa, where the locals hid Jews during WWII. All elusive stories told by the author’s grandmother.

The Jackal’s Mistress, Chris Bohjalian. 1860s Virginia, about a woman who saves the life of a Union soldier. Really good story.

Song of the Magpie, Louise Mayberry. Really interesting story about Australia back in the days when it was mostly a penal colony. Gritty strength of a woman trying to thrive with her farm.

The Boomerang, Robert Bailey. A thriller that will have you gripping the book. About a lot of secrets surrounding the president (fictional novel, remember) and his chief of staff and about cancer. A cure. Such a good story.

Care and Feeding, Laurie Woolever. Really interesting memoir of a woman driven to succeed in the restaurant business. She worked for Mario Batali and then Anthony Bourdain. Gritty stories.

Everything is Tuberculosis, John Green. Maybe not a book for everyone. A real deep dive into the deadly tuberculosis infection, its history. I heard the author interviewed and found the book very interesting.

The Book Lovers Library, Madeline Martin. Fascinating read about Boots’ drug stores’ lending library. And the people who worked in them.

The Arrivals, Meg Mitchell Moore. LOL funny, about a middle-aged couple whose children (and their various family members) return to the family home and the chaos that ensues.

My Life as a Silent Movie, Jesse Lee Kercheval. About grief. A big move to Paris, finding herself a new life with a new set of real blood family.

Escape, Carolyn Jessop. Another memoir about a woman really in bondage in Utah, Mormon plural marriage.


Tasting Spoons

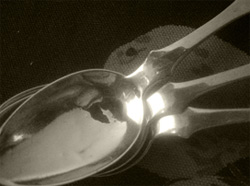
My blog's namesake - small, old and some very dented engraved silver plated tea spoons that belonged to my mother-in-law, and I use them to taste my food as I'm cooking.

Scroll down to the bottom to view my Blogroll

Posted in Desserts, on August 11th, 2012.

yellow_cake_choc_frosting

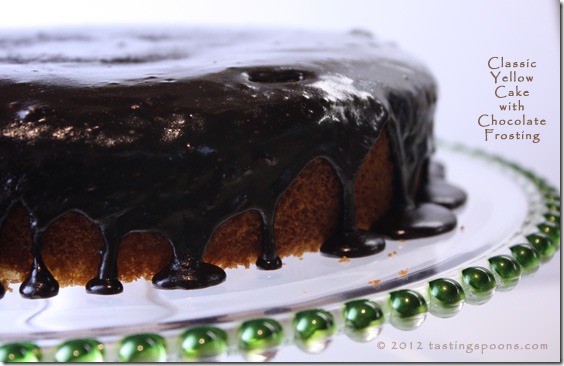
When I read the write-up about this cake on Baking Banter (the blog from King Arthur Flour’s test kitchen) they talked about how very tender this cake is – like from a boxed mix, but it’s NOT – I knew I’d be trying it soon. And yes-yes-yes it’s every bit as good as it should be!

Over the years I’ve been baking I’ve often wondered why I couldn’t make a yellow cake (or any kind of cake, for that matter) as tender as a box mix. I mean, gee whiz, it can’t be those yucky additives in a boxed mix that make it tender? Right? I’ve tried. Many times I’ve tried. So when the gals at Baking Banter (the blog written by the staff in King Arthur Flour’s test kitchen) talked about it on their blog, about how they devised a cake that IS just as tender as a boxed mix, and certainly more tasty than a boxed mix, well, my cooking antennae went up. Then I forgot about it, so when we had a big family celebration (5 birthdays within 2 weeks) recently I decided to make this cake. We were going to have 10 people. This cake makes 10 slices. Great. That way I wouldn’t eat the leftovers.

So what makes this cake tender? Well, it’s likely a combination of things: yogurt in the cake, and probably the method of combining and mixing the batter (I think they mentioned that in the write-up). The cake has ordinary ingredients (other than yogurt in the cake which is a bit different). It’s easy to make, really.
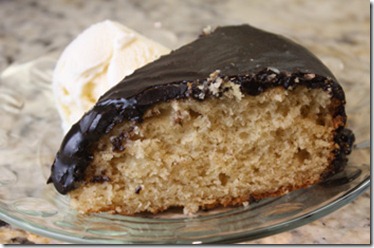
yellow_cake_frosting_sliceThe cake bakes in a one of those taller-sided 9-inch cake pans. Not an ordinary cake pan or you’ll have cake batter spilling over the edges. Someone mentioned you could use a springform pan for this but you might wrap the outside with foil. The batter is relatively thick, though, so I don’t think that would be necessary. It bakes for 30-35 minutes – DO make sure the very center is cooked through – I thought mine was at 30 minutes – the cake tester came out clean – but didn’t find out it wasn’t until it cooled, when the center sunk a little bit, that it wasn’t quite done. It didn’t matter. . . there was enough frosting that it filled in the hole. Nobody knew! But, in the photo above you can see the pointed end sinks just a little bit – that’s why. It did need the full 35 minutes.

Then you make the frosting. Gosh, this frosting is SO easy and SO good. I’ll be making that again on other cakes – not that I make them all that often – but I really, really liked this one, so perhaps I will. Everybody at the table raved about the cake and the icing. You melt and briefly boil butter, yogurt and cocoa together, then add it to powdered sugar and a little tiny bit of espresso powder (optional). It makes a perfect pouring type frosting. Obviously soft and pourable enough that it puddled around the cake. Once poured, don’t smear or try to spread or you’ll end up with a mess. Part of its beauty is the sleek top, untouched until it firmed up. The experts at King Arthur also have a chocolate version (although it’s actually a totally different batter). If you love Boston Cream Pie, they recommend using this cake, slicing in half horizontally and filling it with a custard or cream filling. Everything else would be the same. Maybe next time I’ll try that.

What I liked: everything, absolutely every little thing about it. The gals at Baking Banter did it again with a real winner. This will go onto my favorites list if that tells you anything.

What I didn’t like: nothing at all. Fabulous cake in every dimension.

printer-friendly PDF

MasterCook 5+ import file – right click to save file, run MC, then File|Import

Classic Yellow Cake with Fudge Frosting

Recipe By: From Baker’s Banter blog (King Arthur Flour)
Serving Size: 10
NOTES: All the soft characteristics of a boxed yellow cake, but it’s not boxed.

CAKE:
1 cup granulated sugar
1/2 cup unsalted butter — at room temperature
2 large eggs
1 tablespoon vanilla extract
1/8 teaspoon almond extract — (1/8 to 1/4)
3/4 teaspoon salt
2 teaspoons baking powder
3/4 teaspoon baking soda
1 2/3 cups All-Purpose Flour — (they used King Arthur flour, obviously)
1 cup yogurt — plain, low-fat is OK, but please don’t use nonfat
FROSTING:
5 tablespoons butter
3 tablespoons unsweetened cocoa — natural or Dutch-process
1/4 cup plain yogurt — low-fat is fine
1 teaspoon vanilla extract
1/4 teaspoon espresso powder — optional but good
2 1/2 cups confectioners sugar — sifted

1. Preheat the oven to 350°F. Lightly grease a 9″ round cake pan that’s at least 2″ deep; for extra protection against sticking, line the pan with parchment, and grease the parchment.
2. To make the cake: Beat together the sugar and butter until thoroughly combined.
3. Add the eggs one at a time, beating well and scraping the bowl after each. After you’ve added the second egg, beat at high speed for 2 minutes; the batter will lighten in color and become fluffy.
4. Add the vanilla, almond extract, salt, baking powder, and baking soda, stirring to combine.
5. Starting and ending with the flour, alternately add the flour and yogurt to the mixture: 1/3 of the flour, half the yogurt, 1/3 of the flour, the remaining yogurt, and the remaining flour. Beat gently to combine after each addition. Scrape the bottom and sides of the bowl, and beat briefly.
6. Spoon the batter into the pan. Bake the cake for 30 to 35 minutes, until it’s golden brown on top, the edges are beginning to pull away from the sides of the pan, and a toothpick inserted into the center comes out clean, or with a few moist crumbs clinging to it.
7. After 10 minutes, turn the cake out of the pan onto a rack to cool completely before frosting.
8. To make the frosting: Sift the confectioners’ sugar into a mixing bowl.
9. Melt the butter in a small saucepan. Stir in the cocoa and yogurt.
10. Bring the mixture to a boil, then remove from the heat. Stir in the vanilla and espresso powder. Add to the confectioners’ sugar in the bowl, beating until smooth.
11. Quickly pour over the cooled cake, while the frosting is still warm.
Per Serving: 447 Calories; 17g Fat (34.6% calories from fat); 5g Protein; 69g Carbohydrate; 1g Dietary Fiber; 87mg Cholesterol; 441mg Sodium.

Posted in Books, on August 9th, 2012.

marcus_samuelsson

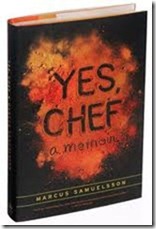
A few months ago I read something online about the book Yes, Chef: A Memoir. It’s written by Marcus Samuelsson, a man with an unusual background, but with a passion for food in general and specifically combining herbs and spices from cross-cultures. His route to chef success took many interesting twists and turns, although he might not say so. He says all he was doing was “chasing flavors.” It wasn’t until I got to the afterword that I learned the book was actually written (obviously from lengthy interviews) by Veronica Chambers. She’s a brilliant writer, no question. All through the reading of it I was amazed at Samuelsson’s command of the English language, only to find out it wasn’t really his voice at all. That isn’t said as a criticism at all – his story is so fascinating and she just tells it so vividly.

Well, here’s more about the story. But I don’t want to give away everything about it – if you enjoy reading chef memoirs you’ll want to read this one. Marcus was born in Ethiopia. Somewhere around age 2 he, his 4-year old sister and his mother all contracted TB. His mother knew their only hope was to walk 75 miles to Addis Ababa for treatment. They did get there – the children survived; their mother did not. It took a year or more of recovering his health before the orphanage found homes for the two – in, of all places, Sweden.  Nothing was known about the children’s father. There were thousands of people with TB; thousands died. Marcus and his sister were the lucky ones.

yes_chef_bookThe next chapter of his life, then, began in Goteborg where he grew up in a very loving Swedish family, eating Swedish delicacies, mostly from his Swedish grandmother’s kitchen. His mother (his Swedish mother) didn’t cook much. Marcus credits a great deal of his interest and later passion about food to his Swedish grandmother, Helga. He was a typical boy, and passionate about soccer; he even thought maybe he could make a career of the game. He didn’t experience any real discrimination (from the color of his skin) until he was nearly an adult. He was trained in a Swedish culinary school, and was fortunate to then work in Switzerland, in France, on a cruise ship for a few stints (grueling), and finally in New York.

He describes his arrival in New York as feeling at “home.” People everywhere had his skin color. People didn’t stare at him at all. He fit in for the first time in his life. To say that Marcus Samuelsson is driven is almost an understatement. The man hardly knows how to rest, I think. Or maybe that’s just the impression I got – being a chef is a 24/7 hour job. He made his name famous once he became head chef at Aquavit, the classic Swedish restaurant in NYC. He was given a chance and prevailed at every rung of the ladder. The restaurant got plenty of press and stars after he took over the kitchen there. Eventually, as with many chefs, he struck out on his own and currently runs his own restaurant in Harlem, call the Red Rooster, on Lennox Avenue.  I don’t know if I’m ever going to visit New York City again, but I’ll tell you, I’m goin’ there if I do. They serve soul food, comfort food.

I was enchanted with this story, right up until the very last sentence. I didn’t want it to end. There isn’t a single recipe in the book; it’s all life story and a fascinating one at that. Marcus eventually marcus_and_mayafinds his father in Ethiopia, and countless relatives he never knew he had. His Swedish mother accompanied him on his first trip to Addis Ababa. His cooking reflects the herbs and spices from the traveling he’s done in his life (all working as a kitchen underling) and he includes them into his cooking style. I was intrigued to read about berbere, every Ethiopian woman’s favorite hot pepper seasoning comprised of about 15 spices. When he first tasted it he felt it was part of his DNA – he knew it. He’s married (toward the end of the book he tells of meeting an Ethiopian model and he was smitten the moment he saw her; they’re pictured at left). And he’s living his dream of running a restaurant kitchen totally his way! Read the book, okay?

Posted in Desserts, on August 7th, 2012.

rainier_cherries_560

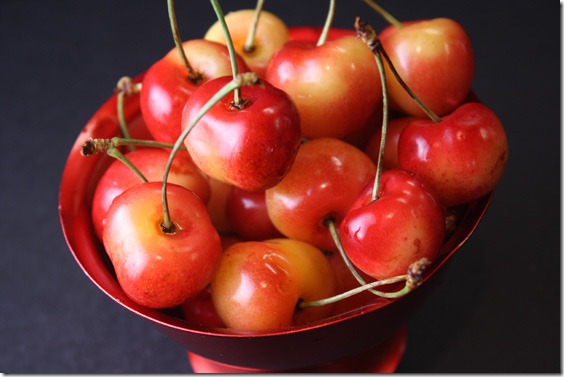
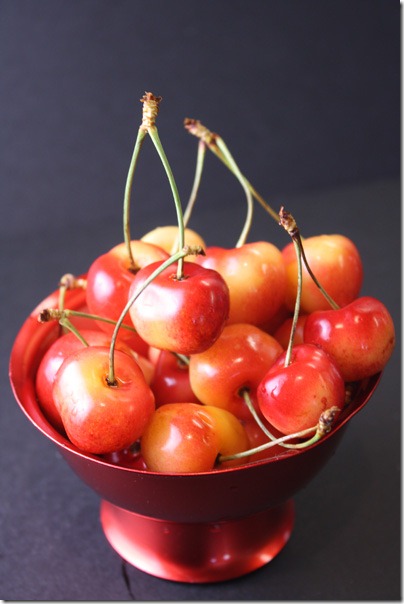
You know it’s summer when cherries come into season. And right now, at Costco, they have the light fleshed Rainier (like Queen Anne) cherries in nice clear, clamshell boxes. Red, ripe, juicy and delicious.

It was a couple of years ago that I was reading one of my favorite food essay books, How to Pick a Peach by Russ Parsons (Los Angeles Times), that I decided to try one of his recipes (I’ve tried many) for a Bing Cherry Compote. I’ve made it numerous times since then, usually 2-3 times each summer, while cherries are in season. And I hope that I’ll have left at least one small 2-cup freezer container of them during the winter when cherries are nothing but a ghost in my mind. I love the stuff over vanilla ice cream.

rainier_cherries_bowlI’d heard that the Costco Rainier cherries were really tasty so I had my DH buy me 2 of the boxes (each box was probably about 4 cups). Did you know that: Rainiers are sweet cherries with a thin skin and thick creamy-yellow flesh? And that these cherries are very sensitive to temperature, wind, and rain. They’re a cross between a Bing and a Vans cherry, and about 1/3 of a Rainier cherry orchard’s crop is eaten by birds. No wonder they’re so precious. According to wikipedia, some Rainier cherries sell for $1.00 apiece (yes, a piece) in Japan. They’re so treasured! Wow.

Gee whiz, that photo is so pretty – sorry to make you look at two of them in one post, but I just decided it was too pretty to not!

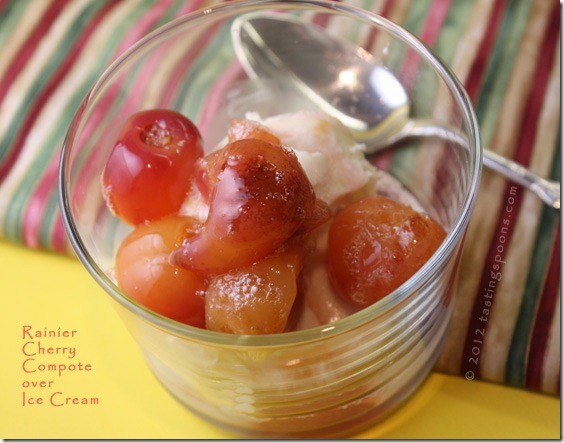
The cherries sat in the refrigerator for a few days, and then I knew I needed to do something with them. But what? Well, first I pitted them with my olive pitter. That did take about half an hour. I decided to wing it – I used the flavorings from the Bing cherry compote that I love so much, and adapted it to the lighter colored and light flesh cherries. What I didn’t want was a dark-red syrup; it needed to be clear or nearly clear. So, I used a sweet white wine (an after dinner wine, actually) instead of red wine, and white balsamic vinegar instead of regular dark balsamic, and the same spices: cinnamon bark, allspice berries and whole cloves. I also added in a big pinch of lemon zest. And some sugar. That was it. I used the same method from before. It’s very easy to make – once you pit the cherries. And some folks don’t mind the pits – if you really want to make it easy just rinse them and cook them with the pits.

rainier_cherries_ice_creamOnce they simmer (covered) for 10 minutes or so, the cherries begin to break down. You don’t want them to turn to mush – you want each cherry to still have its integrity – but you want to cook that wine flavor into them just enough. You also want the cherry flavor to leap through the syrup, which it does. The syrup is winey-briney (by brine I don’t mean salty) and it’s so good I could almost drink it as a liqueur! Altogether lovely.

What I liked: everything about it. I mean, it’s sweet cherries – I adore them, and they’re just so delicious over ice cream. The syrup is sublime.

What I didn’t like: nothing whatsoever. It’s a winner.
printer-friendly PDF

MasterCook 5+ import file – right click to save file, run MC, then File|Import

Rainier Cherry Compote

Recipe By: My own concoction, but adapted from a
Russ Parsons recipe, How to Pick a Peach

Serving Size: 10

2 pounds cherries — Rainier type
1 1/3 cups sweet white wine — a sweet Riesling, or Sauternes, or late harvest something
1 1/2 tablespoons white Balsamic vinegar
2 tablespoons sugar — or Splenda
1 stick cinnamon — about 1 1/2 inches long
2 whole allspice berries
2 whole cloves
1 teaspoon lemon zest

1. Pit the cherries and use only perfect ones for the compote. Place them in a very wide skillet, so there is only one layer of cherries (use 2 pans if needed). Add the white wine, Balsamic vinegar, sugar, cinnamon, allspice, cloves and lemon zest.
2. Bring to a boil, stirring to dissolve the sugar, reduce heat, cover and simmer over very low heat for about 10 minutes until the cherries still hold their shape, but are medium-soft to the touch. Allow to cool to room temp, remove the spices (discard them) and place in a sealing container. Allow to chill for a day or so before using, if possible – to let the cherries soak with the winey syrup. These freeze well – make sure all the cherries are submerged in syrup as best you can. Serve over vanilla ice cream.
Per Serving: 82 Calories; 1g Fat (9.9% calories from fat); 1g Protein; 15g Carbohydrate; 3g Dietary Fiber; 0mg Cholesterol; 7mg Sodium.

Posted in Desserts, Healthy, on August 5th, 2012.

buttermilk_peach_ice_cream

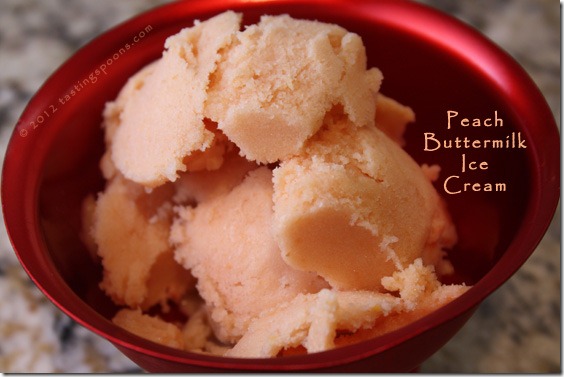
The title is a little bit of a misnomer – it really should be something like Buttermilk Peach Sorbet, or Buttermilk Peach Ice or maybe Peach Sherbet. Not a name with “cream” in the title since there isn’t any cream in it. But we lump all kinds of these frozen confections under “ice cream”  whether they’re made with cream or milk or whatever.

If peaches are still in season around your home, do make an effort to go get some gorgeously ripe peaches, peel them and briefly cook them in a little water, then freeze packets of it. You can then make summery ice cream any month of the year. I just hate to take up valuable freezer space with frozen peaches. My freezer is something of a problem – it’s FULL. And I mean FULL. I could probably get a few frozen chicken breasts in there, and maybe a few very flat things. But that’s about it. I am trying, really I am – to defrost and eat things out of the freezer but then I find some new thing that has to go in there. If I had a full-on stand-alone freezer in the garage it would probably be full too. I need a 12-step program for me and my freezer problem. Want to start one?

Anyway, back to this dessert. The recipe came from Rick Rodgers. I’ve had it for several years, I think, but hadn’t gotten around to making it. But with peaches on the kitchen counter, well, this is what I did with them. I DO want you to read the nutritional info about this recipe – it’s really super low calorie and has a TRACE of fat in a serving. Is that great, or what?

If you’re expecting this to taste rich and creamy like HäagenDazs, it won’t be. It’s more like ice milk. I think you need to be “of a certain age” to remember ice milk. My mother used to buy it all the time (this would have been the 1950’s) when I was growing up, but I don’t think I’ve seen it in years. I read online that it went “out” in the 1960’s when low-fat milk was produced. My dad had a passion for ice cream in any way, shape or form. In his 80’s he had to start eating sugar-free, but he still loved it. We all kidded him because after eating a small bowl (my mother would never serve a big bowl of it) he’d systematically scrape his spoon up the sides, from the bottom center and up, all the way around, until he’d made a full circle. My dad was an engineer, so we’re not talkin’ a few scrapes, I mean maybe 20-30 per bowl. To get every single, solitary, last drop. If there’s a gene for ice cream, I’ve at least inherited some of his passion for the stuff. I try not to indulge, but I do. This recipe makes it a heck of a lot better for me/us.

Wanting to make this particular one more eating-friendly for my diabetic hubby, I made it with half Splenda. I DID use the 1/2 cup of brown sugar, though, in the mixture, because brown sugar has a unique caramel-like taste and I’d never thought about using brown sugar with peaches. It’s a match made in heaven, I’m telling you!

It’s a simple recipe to make – don’t forget to add the almond extract – that’s also a little bit different, and I loved the taste of it. It’s not overpowering but just adds another layer of flavor. The recipe indicates you can make this without an ice cream machine. I did use mine, and when it first came out it was soft in texture, but once frozen for a few hours it was almost rock hard. So my only suggestion about this recipe is: let it sit out for about 20+ minutes before trying to scoop it. That’s what I had to do to get the photo up top. If you’re willing to eat a more icy type “ice cream,” and want the low in fat and calorie type, this may be a new favorite for you. Given the choice of this and full fat, well, of course the full-fat has better flavor, but if you want to cut back, give this one a try.

What I liked: the brown sugar and almond extract add great layers of flavor in this. Just don’t expect it to be soft, scoop-able like ice cream – it’s more icy or sherbet-like. We loved it. Next time I am going to add 2 T. of Peach Pucker Schnapps to the mixture (any alcohol added to home made ice cream helps with the scooping ability), not only for the softness aspect of it, but also to add even more flavor (although it doesn’t really need it – it’s full of peachy flavor as it is).

What I didn’t like: having to let it defrost for 20+ minutes is a bit of a nuisance, that’s all. Otherwise, nothing.

printer-friendly PDF
MasterCook 5+ import file – right click to save file, run MC, then File|Import

Peach-Buttermilk Ice Cream

Recipe By: Adapted slightly from Rick Rodgers’ website
Serving Size: 10
NOTES: Can be done without an ice cream machine – freeze a 9 x 13-inch metal baking pan. An ice cream maker gives the best results, but you can make it in the freezer if you wish. (The texture will be somewhat gritty, but it will taste fine.) The Schnapps in the recipe isn’t really needed – but next time I make this I’ll put it in because it may help with the scooping – once this freezes solid it’s rock hard.

2 pounds peaches — ripe (4-6 depending on size)
1/2 cup granulated sugar — (I used Splenda)
1/2 cup packed light brown sugar
1 tablespoon fresh lemon juice
1 teaspoon vanilla extract
1/4 teaspoon almond extract
2 cups buttermilk
2 tablespoons Peach Pucker Schnapps — (this is my suggestion – not in the original)

1. Bring a large pot of water to a boil over high heat. Add the peaches and cook just until the skins loosen, about 1 minute. (If the skins are stubborn, the peaches aren’t as ripe as you thought, so remove them and pare off the skin with a sharp knife.) Using a slotted spoon, transfer to a large bowl of iced water and let stand until cool enough to handle. Discard the skin and pits and coarsely chop the peaches. Transfer to a food processor.
2. Add the sugar, brown sugar, lemon juice, vanilla, the almond extract and purée. (If using Peach Pucker Schnapps, add that into the bowl too.) Transfer to a large bowl. Stir in the buttermilk.
3. Transfer to the container of an ice machine and process according to the manufacturer’s directions. Pack the ice cream into an airtight container, cover and freeze for at least 2 hours to allow the ice cream to ripen and harden before serving. Leave out at room temp for about 20+ minutes to get it soft enough to scoop, as it freezes rock hard.
Per Serving: 131 Calories; trace Fat (3.2% calories from fat); 2g Protein; 31g Carbohydrate; 1g Dietary Fiber; 2mg Cholesterol; 56mg Sodium.

Posted in Chicken, Soups, on August 3rd, 2012.

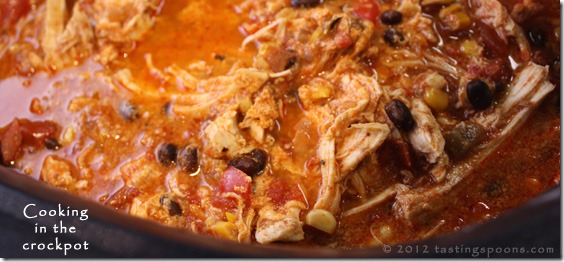
chicken_enchilada_soup

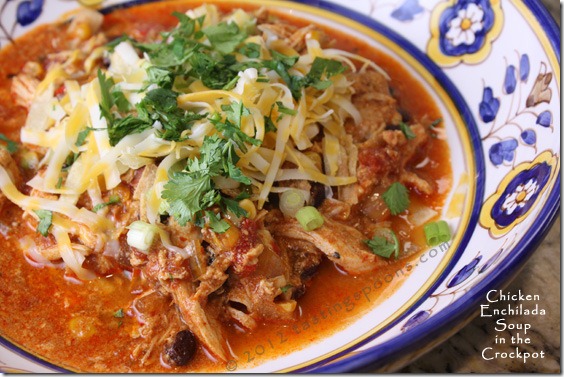
You’ll find very few crockpot recipes here on my blog. Not because I don’t like them – but just because I’m home all the time and usually prefer to make soups on the cooktop. I suppose this one wouldn’t have to be made in a crockpot – but gosh, it’s SO easy this way! If you’re employed full time or have a really busy schedule, this soup/stew will rock your world not only with ease but with flavor! If you love Mexican food, well, this is a shoe-in, then.

As I was cropping and adding text to my photos for this blog post, my fingers were almost itchy to get to writing about it because this soup is so fantastic! Oh my yes. Before I start writing I always work with the photos first, then I prepare the MasterCook recipe that gets exported to a pdf and as a text file (that goes into the box below). Once that’s all done (usually takes me 10-15 minutes or less) then I start writing. My mouth is watering looking at the photo above.

Back when crockpots first came out (wow, that was 1971), the recipes generally under-whelmed me. They lacked sufficient layers of flavor, I suppose. Yes they were easy. Yes, they helped with meal-making when I was a full-time working mom, and yes, the cleanup was easy too. But my first crockpot was ceramic, and back then you either had to brown meat in another pan (taking more time, and giving you another dirty pot) or you had to use raw meat, which is generally what I did. Now I know better – so much of the flavor in meat comes from that caramelization when it’s browned in a pan. So when I bought the Cuisinart Multi-Cooker, 7-Quart, all that changed because it has a heavy insert (coated in a nonstick surface) that can go right on the stove (to brown the meat first) and then you lift up the whole thing and put it into the crockpot. I don’t use it all that often, but I love it when I do. And I now have several crockpot cookbooks that are truly new-age – at least current age, with more steps to preparing it, but things come out tasting a whole lot better.

So back to this recipe. My friend Linda T was telling me about a crockpot enchilada soup she makes, that she got from her daughter Kristin. On the printed page Linda mailed me it said the recipe came Krissy, over at Dainty Chef, a blog. I followed Dainty Chef’s recipe nearly all the way through, only veering off with my combo of garnishes (I love cilantro). It’s one heck of a great recipe. In a nutshell, you first make a thin milk sauce mixture (I used 2%)  that gets mixed with some canned enchilada sauce. Now, I have to tell you, here’s where I veered off – it just happens that when we had family visiting recently, they went to one of their old family favorite restaurants, called Los Jarritos (on N. Garey in Pomona, no website, but you can read about it on Yelp). Our son-in-law, Todd, just loves this place too. This particular trip he had his mother Ann in tow (who just happens to be a great Mexican cook) and she usually buys a quart of their enchilada sauce whenever she’s there and takes it home. She did buy it and came to stay with us her last night, and put it in my freezer. You can guess what happened? She forgot it. So, my plan was to leave it there and the next time one of the family visits they could take it home (500 miles away). But then I got to this recipe . . . and I don’t have any canned enchilada sauce . . . and the lightbulb went off in my head . . . oh, I can use Los Jarritos’ sauce that’s in the freezer!

So there’s this saucy stuff (the thin milky sauce mixed with the enchilada sauce). First, though, you put into the crockpot a can of drained and rinsed black beans, some corn, Rotel tomatoes, some onion and bell pepper. Here I need to tell you something else – Rotel tomatoes are spicy hot. If you find them too hot, I’d suggest you use regular canned (diced) tomatoes and the juice, and add in canned green chiles and a bit of jalapeno for heat. For most adult tastes I think one can of Rotel would be fine. The restaurant enchilada sauce I used happened to have a lot of heat in it, so we had some really smokin’ hot soup.

enchilada_soup_crockpotThen you put the raw chicken breasts on top, cover with the enchilada sauce mixture and crockpot it on low for 6-8 hours (or on high for 3-4). About half an hour before it’s done, remove the chicken breasts and let them cool just a bit so you can handle it. Then shred it up into small bite-sized pieces and put it back into the crockpot and stir it all up to allow the chicken to re-heat. Meanwhile, prepare the garnishes. Scoop a heaping cup (or 2 for hearty eaters) of the soup mixture into a bowl and top with the garnishes of your choice.

What I liked: well, the flavor is paramount. It was fantastic. I loved all the layers of flavors – from the complex enchilada sauce to the textures in the beans, corn, tortilla chips and then the cool, refreshing cilantro and green onions. Altogether fantastic. It was easy enough – you do have to make the sauce, which does take 10 minutes or so. Open a few cans, but really that’s it until you’re ready to serve and need to fix the garnishes. Overall, very easy. I’ll make this for a big family dinner for sure. Maybe soon. A green salad on the side would be all that’s needed.

What I didn’t like: absolutely nothing at all! Will make this again. And again. It’s probably going onto my Carolyn’s Favs list.

printer-friendly PDF
MasterCook 5+ import file – right click to save file, run MC, then File|Import

Crockpot Chicken Enchilada Soup

Recipe By : Adapted slightly from Dainty Chef blog
Serving Size: 6-7
NOTES: Rotel tomatoes are very hot – if you want to tone it down, used canned tomatoes and add canned green chiles or jalapeno peppers to suit your heat tolerance. If you have a source (a Mexican restaurant) that makes their own enchilada sauce, it might be worth finding it. A good, thick sauce makes a big difference.

3 tablespoons butter
3 tablespoons flour
1/2 cup chicken broth
2 cups 2% low-fat milk — DIVIDED USE
10 ounces enchilada sauce
15 ounces black beans — rinsed and drained
14 1/2 ounces Rotel diced tomatoes and jalapenos — see note at top
10 ounces frozen corn
1/2 cup yellow onion — chopped
1/2 cup bell pepper — diced, your choice of color
2 whole boneless skinless chicken breast halves
1 cup Monterey jack cheese — shredded
1 cup baked tortilla chips, crushed
1/2 cup green onions — diced
1/2 cup avocado — sliced (optional)
1/2 cup cilantro — chopped
Sour cream for garnish, if desired

1. Melt butter in a saucepan over medium-low heat. Stir in flour; keep stirring until smooth and bubbly. Remove from heat and add the chicken broth and ½ cup milk, a little at a time, stirring to keep smooth. Return to heat. Bring sauce to a gentle boil; cook, stirring constantly, until it thickens. In a large bowl, whisk together the enchilada sauce and chicken broth mixture . Gradually whisk in remaining milk until smooth. Set aside.
2. In a crockpot, combine drained beans, tomatoes, corn, onion, and bell pepper. Place the chicken breasts on top of the mixture. Pour sauce mixture over ingredients in cooker. Cover; cook on low heat for 6-8 hours or on high for 3 to 4 hours.
3. When you are ready to serve, remove chicken and cut or shred into bite-sized pieces. Add chicken back into the soup, mix together. Top with cheese and serve. Use your choice of toppings: avocado, chopped green onions, sour cream, cilantro and crushed tortilla chips.
Per Serving: 524 Calories; 19g Fat (32.0% calories from fat); 31g Protein; 61g Carbohydrate; 12g Dietary Fiber; 66mg Cholesterol; 541mg Sodium.
Posted in Veggies/sides, on August 1st, 2012.

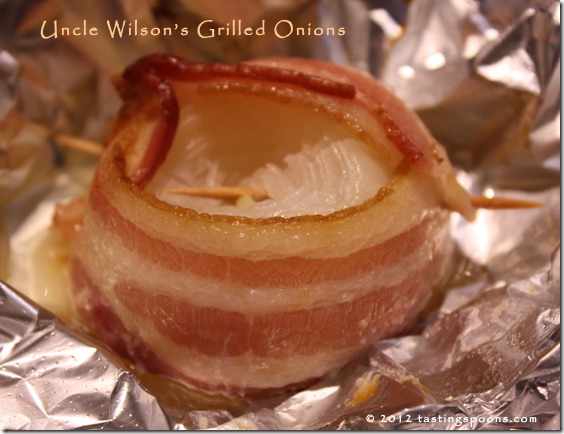
uncle_wilson_grilled_onions

What’s there not to like about a sweet onion, bacon and butter? Nothing that I can think of other than the fat in the bacon and butter. A lot of the fat melted off into the bottom, so what you’re left with after baking an hour is a succulent onion with some delicious snippets of bacon to eat alongside it.

Again this year our friends Joan and Tom shared some of their Noonday onions from East Texas. Tom’s parents send a shipment to all of their kids each summer. This year’s crop was smaller-sized than in some years – about 2 1/2 to 3 inches in diameter I’d guess, but it made for a really nice onion portion.

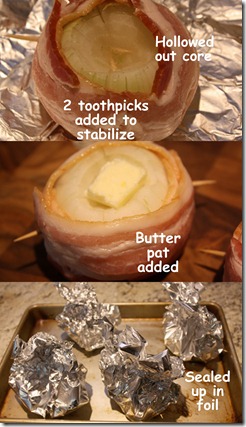
grilled_onions_collageJust recently I started watching Trisha Yearwood on the Food Network. I just read on Trisha’s website that her cooking series has been “picked up” for a season, so there will be more than the initial 6 episodes already aired. Besides being a terrific singer (although I’m not into country music at all), she is a really good cook. She’s married to Garth Brooks and they live in Oklahoma. I’ve printed out half a dozen of her recipes so far. This is the first one I’ve actually prepared, though. She had her Uncle  Wilson visit the show one episode and he made one of the family favs, these onions that make an appearance at every family gathering. And they’re easy to make. Truly they are. The recipe is from Trisha’s 2008 cookbook, Georgia Cooking in an Oklahoma Kitchen: Recipes from My Family to Yours.

The most tedious part was peeling the onions. Since this recipe calls for sweet onions, I didn’t want to lose any more of them than absolutely necessary, so I didn’t peel off another layer like I would normally just to get it done in a hurry. Then you hollow out a cone-shaped core, about 1-inch down – easy to do with a short, pointed paring knife. The onions get wrapped in a couple of slices of bacon, secured with toothpicks, then a pat of butter is put into the little hole. They’re wrapped in foil, leaving an opening for the steam to escape, then they’re grilled for an hour. Or baked at 350° for an hour. Be sure to remove the toothpicks, then either serve them whole, or cut them in quarters (if they’re large) and serve with the bacon. I think if they’re really large, they’d need to oven bake for more than an hour – at least 15 minutes longer. But test them with the tip of a sharp knife to make sure they’re done. Sweet onions contain more water than traditional onions, so they should cook in less time.

In the recipe Trisha suggests cutting the onions in quarters to serve them – depending on how big they are, cutting in half might be fine, or in my case I served a whole onion per person. There were lots of juices in the bottom of the foil packet – some of it water from the onion itself, some bacon fat, and probably some of the butter, although I’d hoped it would stay housed in the onion layers. No matter, as the onions were delicious. Juicy, moist, and so very good with a little bite of bacon with each mouthful. I forgot to salt and pepper them, but it made no difference whatsoever. We didn’t miss the sodium or the pepper. Next time I might add some dried thyme into the hole, since that’s my favorite go-to herb. They also re-heat well in the microwave (take off the foil, obviously).

What I liked: how easy they were to make. The juiciness of the onion, and the smoky taste the bacon added. Altogether good. Yes, I’d make it again.

What I didn’t like: nothing. I’ll be sad when I can’t find sweet onions to make this with, though!

printer-friendly PDF
MasterCook 5+ import file – right click to save file, run MC, then File|Import

Uncle Wilson’s Grilled Onions

Recipe By: From Trisha Yearwood on Food Network
Source: Recipe adapted from Georgia Cooking from an Oklahoma Kitchen
Serving Size: 12
NOTES: If onions are smaller, use less bacon (about 1 1/2 slices per onion) and secure with 3 toothpicks if needed.

6 large sweet onions — such as Vidalia, Walla Walla, or Texas Noonday
12 strips bacon
2 tablespoons butter
Salt and pepper

1. Peel and wash the onions. With the point of a small, sharp knife, cut a 1-inch core from the top of each onion and make shallow slits in a circle around the top. Wrap 2 slices of bacon horizontally around each onion, and secure them with toothpicks. Push toothpicks deep into onion. Put 1 teaspoon of butter in each core. Season with salt and pepper.
2. Place each onion on a square of aluminum foil and bring the edges together at the top, leaving a small opening for steam to escape. Put the foil-wrapped onions on the grill and cook for 1 hour, or until the onions are tender when pierced with the tip of a knife. You can also bake in the oven at 350 degrees F for 1 hour to 1 hour 15 minutes. Cool the onions for a few minutes then unwrap, REMOVE TOOTHPICKS and cut into quarters to serve.
Per Serving: 74 Calories; 5g Fat (61.0% calories from fat); 3g Protein; 5g Carbohydrate; 1g Dietary Fiber; 11mg Cholesterol; 122mg Sodium.

Posted in Desserts, on July 30th, 2012.

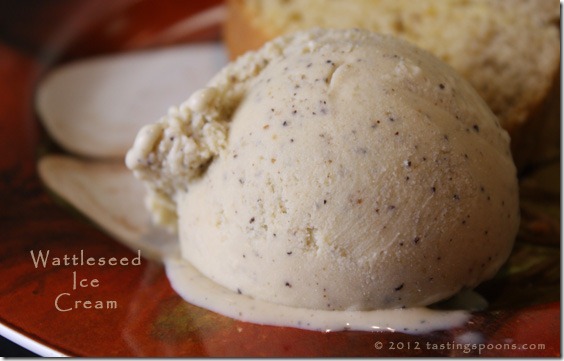
wattleseed_ice_cream

Ever heard of wattleseed, or wattle seed (one or two words, you’ll see it both ways)? It’s the seed from a specific type of Australian acacia shrub. It’s not a variety grown anywhere but Australia, otherwise I’m certain we’d have  wattle seed on our spice shelves.

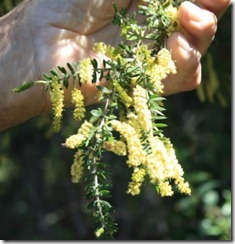
wattleseedflowersMy daughter-in-law brought me a very small package of  several Australian herbs and spices some years ago after a trip, and I’d planned on using all of them, but we had a bug infestation in my pantry, and they loved the wattleseed and everything else in the other packages too.

So it wasn’t until we visited Australia a couple of years ago and I sought out some wattleseed (not on every grocery store shelf, I discovered) that I now have some to try. I’d intended to make something with it right away, but I stored it in a jar and promptly forgot about it. The picture at left was taken near Hobart, Tasmania, and shows my DH’s hand holding the acacia flowers out in the sunlight. The seed pods from this shrub were and still are harvested by the Aboriginal people in Australia. They use it in a variety of cooking methods – in a drink – in stews. Eventually non-Aboriginal people discovered the interesting flavor profile it has, and began using it in other (mostly dessert) dishes.

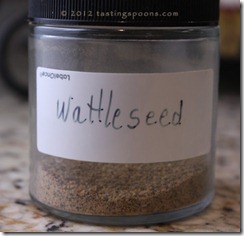
ground_wattleseedWhen we were in Australia we ate some wattleseed gelato. Oh my goodness, was it ever good. Tasting it, it conjures up hazelnut and vanilla  on my taste buds. It has tiny dark and light flecks in it which look something like the tiny seeds in a vanilla bean. It’s the kind of mottled color of ground coriander (see picture at right), but bears no flavor resemblance. Some people taste chocolate and coffee in it too. I’ve not found any source for ground wattleseed here in the U.S. (although I read somewhere that any U.S. grown wattleseed is poor quality and not worth buying – I haven’t found it in any case). Here’s a link if you’re wanting to buy this from Vic Chericoff, the man who really put wattleseed on the world culinary map in the 1980’s. Maybe one of our friends will visit Australia sometime soon and I’ll be able to ask them to buy it for me – although as I mentioned, we had trouble finding it. My DH was so patient with me – we walked all over a farmer’s market in Melbourne trying to locate some – finally did at a butcher shop, of all places. They said they used it for a particular kind of seasoned roast.

Anyway, after all that info about wattleseed, let’s get to the recipe, okay? The only recipe I had was wattleseed ice cream which I researched a couple of years ago after we returned from Australia. Going online I also found a recipe for a cake, which I made, and will post here in a few days – it was kind of like a pound cake using wattleseed and citrus. There aren’t lots of recipes for the spice, surprisingly. There is a short list here, and here. You may not remember a post I did from our trip to Australia about the ANZAC biscuits – I wrote up a recipe provided by our Aussie guide’s sister who brought a plate full of them to our tour bus when we stopped near where she lives in New Zealand (they’re cookies developed during WWII to ship to soldiers at the front because they’re sturdy and because they couldn’t get eggs and butter during the wartime shortages, yet they’re still very popular today). Anyway, I did find several wattleseed ANZAC biscuit recipes.

Some years ago Emeril made wattleseed ice cream on one of his Food Network shows, and it’s his basic recipe I used, although I did make a couple of changes. Vic Chericoff mentions Emeril’s recipe on his website and makes suggestions like not adding vanilla, as he feels it’s redundant since wattleseed has vanilla undertones all by itself. He also doesn’t think you should strain the custard mixture of all the wattleseed segments because they add a lot of color and interest to the ice cream. I used a really fine-mesh strainer and most of the seeds still went through it, which was fine. Usually you strain the ice cream base because you want to remove any possible egg “stuff.”

When you use wattleseed, you want to extract as much flavor as possible, hence adding the ground wattleseed to the cream you scald helps accomplish that. Other than wattleseed, the base mixture is very similar to every other egg-based ice cream base you’ve made. In my case I poured the base into a plastic bowl, nestled it into a bigger bowl filled completely with ice, then I added another bowl on top filled with ice – all this to chill it faster. And chill it below 38°. Chilling the base as fast as possible doesn’t allow for as many ice crystals to form (makes for smoother ice cream).

So, after making the ice cream base – and chilling it quickly, I made it in the ice cream machine. Since it was so cold, it only took about 40 minutes. I scooped it out into a quart-sized plastic container and froze it. When I served it about 3 hours later it was still slightly soft and smooth in the middle – made for easier scooping.

Serving it to our friends Cherrie and Bud, who have never been to Australia, and had never heard of wattleseed, they were blown away. I mean blown away by the taste. Dave and I relived our Australia visit too.

What I liked: well, there’s no question I like this stuff or I wouldn’t have run all over in markets throughout Australia trying to find wattleseed! Good. Tasty. Ah yes. I have just enough to make one more wattleseed something and it will be ice cream. Wattleseed has such a unique flavor spectrum. It’s worth seeking out somehow. Any of your friends going to Australia? Get them to buy you some! Buy me some too, okay?

What I didn’t like: well goodness – nothing at all. Loved it! As long as you can find wattleseed!

printer-friendly PDF
MasterCook 5+ import file – right click to save file, run MC, then File|Import

Wattleseed Ice Cream

Recipe By: adapted from Emeril Legasse (food network)
Serving Size: 12
NOTES: Don’t serve this with anything too powerful in flavor as you want to taste the wattleseed. If you don’t have wattleseed, don’t even make this ice cream – it’s just a vanilla type plain ice cream base but it’s a neutral flavor so the wattleseed nuances will shine through.

2 cups half and half
1 cup heavy cream
1 cup fat free half-and-half — [I used Trader Joe’s]
2 tablespoons ground wattleseed
1 teaspoon vanilla extract
1 teaspoon wattleseed extract — [optional – I don’t have this ingredient]
1 cup sugar
1 pinch salt
5 large egg yolks

1. In a nonreactive saucepan, combine the half-and-half, cream and fat free half and half, powdered wattleseed, vanilla, wattleseed extract (if using), sugar, and salt, over medium heat. Bring the cream to the boiling point to scald it. Remove from the heat.
2. Beat the egg yolks in a large bowl. Add the cream mixture, about 1/4 cup at a time, to the beaten eggs, whisking in between each addition, until all is used. Pour the mixture into a saucepan, and cook, stirring, over medium heat, for 2 to 3 minutes, or until the mixture becomes thick enough to coat the back of a spoon. Strain the mixture through a fine mesh sieve (optional).
3. Chill the custard mixture in a bowl with ample ice to bring it down in temp (below 38° which is the temp for standard refrigeration) if possible. Pour the custard into the ice cream machine and follow the manufacturer’s instructions for churning time. Scoop into a plastic container and freeze solid, about 3-4 hours.
Per Serving: 225 Calories; 14g Fat (57.0% calories from fat); 3g Protein; 21g Carbohydrate; 0g Dietary Fiber; 131mg Cholesterol; 58mg Sodium.

Posted in Salad Dressings, on July 28th, 2012.

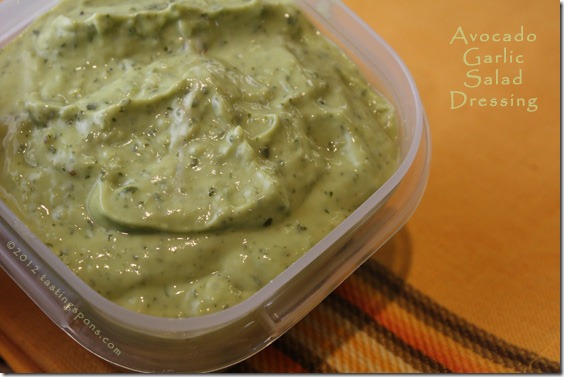
avocado salad dressing

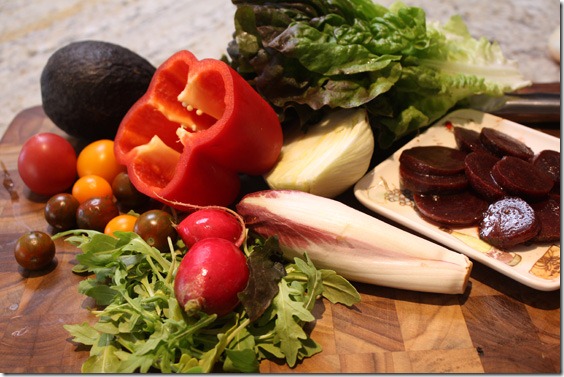
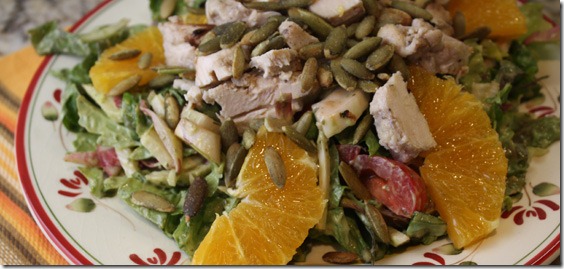
One of the things I crave for dinner, especially in warm weather, is a big, honkin’ green salad with oodles of fresh veggies chopped up in it. I like fresh fennel, carrot, celery, sugar snap peas, tomatoes (in this case I had super heirloom cherry tomatoes), avocado, radishes, arugula, Belgian endive, some red leaf lettuce and usually some Romaine too. If I have left over baguette I might make some garlic croutons (in this case I didn’t). I’ll add some Feta cheese perhaps. Maybe hearts of palm or pickled beets; even a few kidney beans. If I had them languishing in the refrigerator I’d add hard boiled eggs, left over chicken, or maybe tuna. green_salad

Under most circumstances I have a jar of one of my home made salad dressings in the refrigerator. Today, no. I’d used them all up. But I did have some of the Little Girlie’s Green Sauce remaining, so I perused a Southwestern cookbook I got as a gift recently and sure enough, there was an avocado dressing in it. It contained all the ingredients in the Green Sauce and then some. So I adapted it and came up with a scrumptious avocado dressing that tasted just great on the big salad to which I added a lot of the ingredients I mentioned above. My DH gets weary of chewing a big salad. Not me. I enjoy all the crunch and know that it’s so good for me too. I go several days sometimes without making a salad as we have lots of veggies (2 sometimes) instead. But this time of year we have so much beautiful garden bounty at the farmer’s markets, and perfect for a salad.

green_salad_avo_dressingThis dressing tastes something like the avocado dressing they used to serve at one of our local Mexican restaurants. With pepitas sprinkled on top, it made a delicious meal. I never knew how they made it – I’d say I nailed it without even trying to do so. To my mind, the mayonnaise is what makes the difference – it’s not just an oil/vinegar or oil/lime juice vinaigrette, but has a creamy consistency. I used to think it had sour cream in it. I think not! It was mayo. The cookbook I consulted didn’t have mayo in it, so that’s one of my additions. Just don’t make a lot of the dressing as it probably won’t keep indefinitely – avocado tends to go “off” after a day or two. And cilantro isn’t a keeper in liquid either, although it managed really well in the Green Sauce, I noticed. It kept fine for about 6 days. If you have left over of this dressing, serve it like guacamole with chips.

What I liked: well, the avocado garlic flavor was rich and tasty in the salad. Use your own judgment about how much to use. My salad took about 3 T. per serving, I think – I didn’t measure. In any case, with the avocado as the main ingredient, it’s not bad for you anyway. So scoop more as needed until it tastes right.

What I didn’t like: nada.

printer-friendly PDF
MasterCook 5+ import file – right click to save file, run MC, then File|Import

Avocado Garlic Dressing

Recipe By: Adapted from The New Southwest Cookbook by Carolyn Niethammer
Serving Size: 6
NOTES: If avocado is small, use 1 1/2.

1 large avocado — peeled, coarsely chopped (ripe)
1 cup cilantro — packed
2 tablespoons white vinegar
2 tablespoons water
2 cloves garlic — chopped
1/2 jalapeno pepper — minced (you don’t want any chunks)
1 whole green onion — coarsely chopped
3 tablespoons mayonnaise
1 pinch dried thyme
1 pinch dried oregano

1. To a blender add avocado, cilantro, jalapeno, vinegar, water, garlic and green onion. Blend well, until the mixture is smooth. Add more water in small amounts if it’s too thick – it should be thick but barely pourable.
2. Add mayonnaise, thyme, oregano, blend a few seconds, then taste for seasonings. Add salt and pepper if desired. Makes about a cup; use about 3 T dressing per entree sized salad serving. Will keep just a few of days. Use left overs as guacamole if desired.
Per Serving: 120 Calories; 11g Fat (76.5% calories from fat); 2g Protein; 6g Carbohydrate; 1g Dietary Fiber; 2mg Cholesterol; 53mg Sodium.

Posted in Cookies, on July 26th, 2012.

lemon_poppyseed_cookies

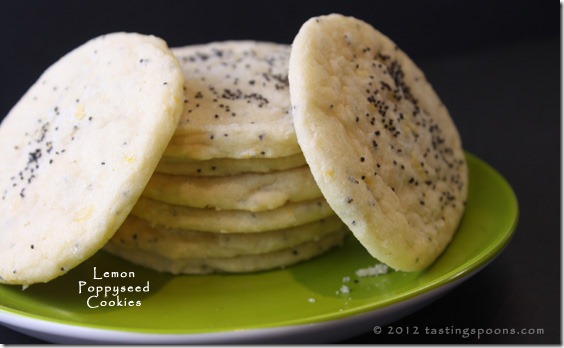
Think lemon zest. Think sugar cookie. Think almost like lemon curd in a cookie, but it doesn’t have any lemon curd in it. Just lemon juice and lemon zest. Oh, yes, yum. If you look very closely at the photo you can barely discern the lemon zest in the cookie itself.

My friend Peggy made these cookies at a book group meeting a couple of months ago. Normally I pass on by eating sugar cookies. Although good, if I’m going to have cookie calories, I want them to be in something much more flavorful than a sugar cookie, maybe even gingerbread, chocolate or chocolate chip. But some one of the other book group guests standing next to me put the cookie in her mouth and raved about the lemony flavor. I couldn’t exactly think how you could get lemon concentration in a cookie, but it works.

Peggy gave me the recipe, then I found it yesterday at Martha Stewart’s website. Maybe I even have it in my M.S. cookies cookbook. If you read the comments there, you might wonder, as some did, if there is something wrong with the recipe because the batter is very loose and soft. So it requires chilling before you can manipulate the dough. The batter is mixed at a medium speed for awhile, giving it an almost ribbony quality like a cake batter. But no, it’s cookie dough. So, no, I don’t believe there is a mistake in the original M.S. recipe. It makes a very, very  tender cookie. Tender = fragile. The recipe below makes just 30 cookies, supposedly. I think I got 26, so I should have made them slightly smaller to get 30 of them.

The batter has a tiny bit of reduced-down lemon juice in it, plus a bunch of grated lemon zest – that’s how you get the extra lemony flavor in a cookie. Do take the time to chill the batter before trying to roll the cookies in the lemon-zested sugar mixture and baking. I suggest overnight, but I think I was able to make the cookies after about 4 hours of chilling. You roll them in the lemon zest/sugar mixture, then flatten them with the bottom of a flat glass. Bake for 10-11 minutes. Cool on the pan for a bit – remember, they’re fragile – and remove carefully to a rack to cool completely. Then I packaged them into a ziploc baggie, 3 across, 3 down and 3 deep and froze them. They’re actually very tasty frozen, too.

Our daughter-in-law, Karen, dropped by the next day and was preparing a quick dessert to take to a party they were going to near where we live and she left the left overs of the lemon curd tarts she assembled. So, when she saw the cookies she suggested we use the lemon curd and blueberry jam sweetened ricotta cheese on some of the cookies with a fresh raspberry on top. There was dessert for a family gathering we had that night.

What I liked: the lemony-ness of the cookie. I just love lemon, so it was a no-brainer that I’d like this cookie. Yes, I’d make it again, maybe even to make the dessert I mentioned above. To me it tastes like there is lemon curd in the cookie. There isn’t, but if you like lemon curd, you’ll just love this cookie.

What I didn’t like: if I had to say something, I’d just say they’re almost too fragile. Not impossibly fragile, but they are tender. But that’s part of what makes them good. Don’t mash the cookies too thinly, that’s all.

printer-friendly PDF
MasterCook 5+ import file – right click to save file, run MC, then File|Import

Lemon Poppy-Seed Cookies

Recipe By: Martha Stewart, but I got it from my friend Peggy M.
Serving Size: 26-30
NOTES: Batter is very soft and loose – chill for several hours to make it handle-able.

1/4 cup fresh lemon juice
3 1/2 teaspoons grated lemon zest — 1-3 lemons, depending on size
8 ounces unsalted butter — (2 sticks)
2 cups all-purpose flour
1 teaspoon baking powder
1/2 teaspoon salt
1 1/2 cups sugar
1 large egg
2 teaspoons pure vanilla extract
1 tablespoon poppy seeds — plus more for sprinkling

1. Preheat oven to 375°. Bring lemon juice to a simmer in a small saucepan over medium heat; cook until reduced by half. Add 1 stick butter; stir until melted. Set aside to cool – at least 15 minutes.
2. Whisk together flour, baking powder, and salt. Cream remaining stick butter and 1 cup sugar on medium speed in the bowl of an electric mixer fitted with the paddle attachment. Mix in egg and lemon butter. Mix until pale, about 3 minutes. Mix in vanilla and 2 teaspoons zest. Mix in flour mixture and poppy seeds. Cover batter and refrigerate for 6 hours or overnight, preferably.
3. Stir together remaining 1/2 cup sugar and 1 1/2 teaspoons zest. Roll spoonfuls of dough into 1 1/2-inch balls; roll them in sugar mixture. Place 2 inches apart on baking sheets. Press each with the flat end of a glass dipped in sugar mixture until 1/4 inch thick. Sprinkle with seeds.
4. Bake until just browned around bottom edges, 10 to 11 minutes. Transfer to wire racks; let cool completely. Store in an airtight container up to 1 week.
Per Serving: 129 Calories; 7g Fat (44.9% calories from fat); 1g Protein; 17g Carbohydrate; trace Dietary Fiber; 24mg Cholesterol; 55mg Sodium.

Posted in easy, Veggies/sides, on July 24th, 2012.

north_african_corn_onthe_cob

Most of you won’t know that just a few months after I started writing this blog back in 2007, as my husband and I were bringing our sailboat into the dock at our yacht club in San Diego after an afternoon putt around the harbor, I jumped off our boat onto the dock while the boat was going forward – my job was to quick-like wrap a line around one of the cleats on the dock to STOP the boat from plowing into the dock itself because you have to motor into the space under some power – I know, too much information –  (I’d done dozens of times before) – and as I jumped I was off-balanced somehow, my right foot went over sideways and just like that I fractured a bone in my foot, the one on the outside edge. Having never broken a bone before, let alone one in my foot, I tried to carry on, thinking it was just a sprain, which I HAD done before jumping off our boat at a different dock 10 years earlier and had to wear a boot for several weeks. This day, though, within 10 minutes I was in moderate agony. Later that day, my DH actually had to pull me, sitting in one of the rolling dock carts, up to our car because I couldn’t put any weight on the foot at all. If you don’t think that looked funny – my husband with 2 artificial legs pulling me sunk into a dock cart (they’re square-ish and quite deep). My foot swelled up like crazy, of course, despite icing it immediately. But no, it was a fracture and I was laid up for near-on 3 months. Most of which I spent in a wheelchair since I couldn’t put an ounce of weight on my foot. Needless to say, I don’t jump off our boat anymore – I sit on the rail and hop off carefully. Very carefully. That day, though, my DH was able to reverse the engine to stop the boat, without me cleating the line, thank goodness! He’s been a sailor for 60 years, so he surely knows how to handle a boat!

So what does this have to do with the spice rub, you’re wondering? Well, I carried on writing my blog, but didn’t have photos because my DH (who was without a doubt a very DEAR Hubby during that endless 3 months) cooked all the meals – even he would tell you we didn’t eat very well since he truly doesn’t know how to cook. So I shared recipes on my blog (without pictures) that were favorites of mine, and I had every intention, immediately upon recovering, of making every dish and photographing them so I could include photos in each and every post. I did do that with many, but not all. And this was one that’s lived all these years with a generic photo of fresh corn in the husks as its only visual.

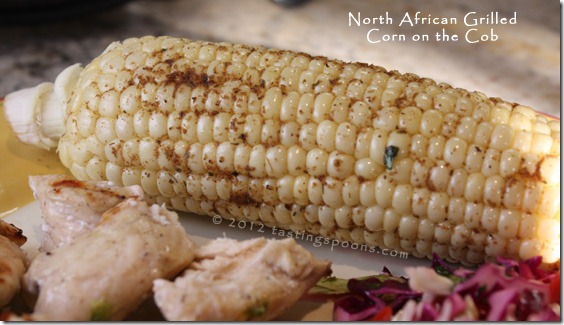
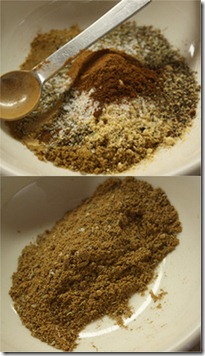
spice_jarsspice_rub_collageTherefore, I’m rectifying that right now. We bought fresh corn at the corner farm stand – that wonderful white corn that I adore – and I whipped up the spice rub – and took a bunch of pictures.

So, back in 2007 I wrote up this recipe. But since it’s such a sensational one, I decided you should revisit it too, just like I did today. I made up a batch of the spices and it should last us through the summer – assuming I make this just 3-4 times. But besides that, ground spices once combined don’t hold their pungency for more than a few months. The only thing that makes this North African is the combo of spices. Probably Moroccan, I’d guess. Whether they grill corn on the cob in Morocco I don’t know – do they even have corn in Morocco?

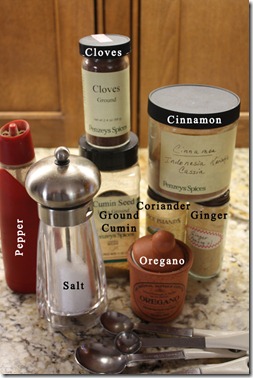
3_cobsThere really aren’t all that many things in this mixture – I gathered them up on the kitchen counter and combined them in a bowl, then stirred them up. Into a firm-sealing jar they went and it’ll sit on my kitchen counter (so I don’t forget to use it). You can see  up above what’s in the mixture – ground cloves, ground cinnamon, ground cumin, ground coriander, ground ginger, oregano, salt and pepper. That’s it. The recipe came from Cooking Light, in 2000.

If you prepare this according to the original recipe you have to do a “process” with the corn husks (opening them without tearing off the husks, removing the silk, adding the oil and spices, then re-wrapping the husks to cover the corn). I’ve stopped doing that part ‘cuz it’s just too time-consuming and tedious. Now I just wrap one or two husked ears in foil and they go onto the grill to cook/steam, rather than actually grill. Besides, with the original, it was just the outside of the corn husks that got “grilled,” so I can’t imagine it makes any difference to the taste. So I’ve re-written the recipe using foil and using olive oil spray (no butter). If you want the original, click on the link 2 paragraphs up. I sprinkle on the spice rub – the oil spray gives the spices something to stick to, a good thing. You could rub the raw corn with butter, but I can’t say that you really need to – it’s SO tasty with the olive oil spray. The corn itself provides plenty of flavor. I used to nearly roll the corn in the spice rub, but now I just sprinkle it on – sometimes more heavily than others – I didn’t use a whole lot this time.

What I like: well, I’m just plum-crazy about the spices. I love-love lots of flavors exploding in my mouth, and to find one that has almost zero fat in it and straight-forward cooking (i.e. simple), I’m a happy camper. It’s not often I have one of those I’m willing to broadcast here on the blog.

What I didn’t like: well, absolutely nothing at all. This recipe is a favorite.

printer-friendly PDF
MasterCook 5+ import file – right click to save file, run MC, then File|Import

Foil-Wrapped North African Grilled Corn on the Cob

Recipe By: Adapted from Cooking Light, July 2000
Serving Size: 9-15, depending on how thick you use the spices
NOTES: This corn is absolutely sensational. When corn is in season, fresh from the garden, this could be a meal (well, not really). I always serve this with jerk chicken, and adding a salad, it makes a complete meal. I do combine the dry rub mixture in advance – in a larger quantity – and put into small plastic bags (labeled) so I don’t have to mix up the mixture every time I prepare this. It is really worth the effort and although the corn is spicy, it isn’t “hot,” as there’s nothing in the mixture to give any chili type heat.

4 1/2 teaspoons ground cumin
4 1/2 teaspoons ground coriander
2 1/4 teaspoons dried oregano
1 1/8 teaspoons ground ginger
1 1/8 teaspoons salt
1/2 teaspoon ground cinnamon
1/2 teaspoon black pepper
2 1/4 dashes ground cloves
9 each corn on cob, whole
Olive oil spray

1. Combine dry ingredients and set aside. Husk corn and remove silk with paper towel. Spray the corn with olive oil spray (so the seasoning will stick to it).
2. Sprinkle with the spice combination, using about 1/2 teaspoon per cob. Wrap 1 or 2 cobs in foil and wrap securely.
3. Place on the grill and cook until done, turning at least once. Estimate: 15 minutes – maybe 20 at the most.
Per Serving: 86 Calories; 2g Fat (13.4% calories from fat); 3g Protein; 19g Carbohydrate; 3g Dietary Fiber; 0mg Cholesterol; 282mg Sodium.

Related Posts Plugin for WordPress, Blogger...