


Get new posts by email:

Archives

Currently Reading

Here are the tastingspoons players. I’m in the middle (Carolyn). Daughter Sara on the right, and daughter-in-law Karen on the left. I started the blog in 2007, as a way to share recipes with my family. I’m still doing 99% of the blogging and holding out hope that these two lovely and excellent cooks will participate. They both lead very busy lives, so we’ll see.

– – – – – – – – – – – – – – – – – – – – – –

BOOK READING (from Carolyn):

Music of Bees, Eileen Garvin. Absolutely charming book about a woman in midlife, lonely, who raises bees, also makes unlikely friends. Heart-warming and very interesting about beekeeping.

A Postcard from Paris, Alex Brown. Really cute story. Dual time line, 1940s and present day about renovating an old apartment in Paris, things discovered.

Time of the Child, Niall Williams. Oh such a good book. Very small village in Ireland, 1960s. A baby is left on the doorstep. The town all whispers and helps. I listened to an interview of the author, which made me like him and his books even more.

Sipsworth, Simon Van Booy. If you like animals you’ll swoon. An old woman who really wants to die finds a tiny mouse in her house and befriends it and finds a reason to live. Utterly charming book.

The Forger’s Spell, Edward Dolnick. True story. For seven years a no-account painter named Han van Meegeren managed to pass off his paintings as those of Johannes Vermeer.

If You Lived Here, You’d be Home by Now, Christopher Ingraham. Could hardly put it down – about a journalist who takes on a challenge to move to small town in Minnesota and write about it. He expects to hate it and the people and place, but he doesn’t. Absolutely wonderful true story.

The River We Remember, William Kent Kreuger. 1950s, Minnesota. A murder and the aftermath. Could hardly put it down. Kreuger has such a vivid imagination and writing style.

How the Lights Gets In, Joyce Maynard. An older woman returns to New Hampshire to help care for her brain-injured son. Siblings and family, lots of angst and resentments.

The Filling Station, Vanessa Miller. Every American should read this book. A novelized retelling of the Tulsa massacre in 1921. Absolutely riveting.

The Story She Left Behind, Patti Callahan Henry. Love this author. Based on a true story. A famous author simply vanishes, leaving her husband and daughter behind. She had invented a mystical language no one could translate. Present day, someone thinks he’s solved the riddle, contacts the family. Really interesting read.

The Girl from Berlin, Ronald Balson. Love anything about Tuscany. An elderly woman is being evicted from a villa there, with odd deed provenance. Two young folks go there to help unravel the mystery. Loved it.

The Island of the Colorblind, Oliver Sacks, M.D. Nonfiction. The dr is intrigued by a remote Pacific island where most of the inhabitants are colorblind. He also unravels a mystery on Guam of people born with a strange neurological problem. Medical mysteries unveiled. Very interesting.

The Bookbinder, Pip Williams. Post 1914 London. Two sisters work at a bookbindery. They’re told to not read the books. One does and one doesn’t. One has visions beyond her narrow world; the other does not. Eventually the one gets into Oxford. Lovely story.

The Paris Express, Emma Donoghue. 1895 on a train to Paris, a disaster happens. You’ll delve into the lives of many people who survived and died in the crash.

A Race to the Bottom of Crazy, Richard Grant. This is about Arizona. Author, wife and child move back to Arizona where they once lived. Part memoir, research, and reporting in a quest to understand what makes Arizona such a confounding and irresistible place.

The Scarlet Thread, Francine Rivers. A woman’s life turned upside down when she discovers the handcrafted quilt and journal of her ancestor Mary Kathryn McMurray, a young woman who was uprooted from her home only to endure harsh frontier conditions on the Oregon Trail.

A Place to Hide, Ronald Balson. 1939 Amsterdam, an ambassador has the ability to save the lives of many Jewish children. Heartwarming.

Homeseeking, Karissa Chen. Two young Chinese teens are deeply in love, but in China. Then their families are separated. Jump to current day and the two meet again in Los Angeles.

North River, Pete Hammill. He always writes such a good story. A doctor works diligently healing people from all walks of life. His wife and daughter left him years before. One day his 3-yr old grandson arrives on his doorstep.

A Very Typical Family, Sierra Godfrey. A very messed-up family. Three adult children are given a home in Santa Cruz, Calif, but only if the siblings meet up and live in the house together. A very untypical scenario but makes for lots of messes.

Three Days in June, Anne Tyler. The usual Anne Tyler grit. Family angst. This wasn’t one of my favorites, but it was entertaining and very short.

Saved, Benjamin Hall. Author is a veteran war reporter. Ukraine, 2022, he nearly loses his life to a Russian strike. Riveting story – he survives, barely.

Grey Wolf, Louise Penny. Another Inspector Gamache mystery in Quebec. She is such an incredible mystery writer.

All the Colors of the Dark, Chris Whitaker. A missing person mystery, a serial killer thriller, a love story, a unique twist on each. Could hardly put it down.

Orbital, Samantha Harvey. Winner of 2024 Booker Prize. I don’t usually like those, but I heard the author interviewed and she hooked me. This is not a normal book with a beginning, a story and an end. It’s several chapters of the day in the life of various astronauts at the ISS (Int’l Space Station). All fictional. She’s been praised by several real astronauts for “getting it” about space station everyday life.

The Blue Hour, Paula Hawkins. An island off Scotland. Inaccessible except when the tide is out. Weird goings on. An artist. A present day mystery too.

Iron Lake, William Kent Krueger. A judge is murdered and a boy is missing. Riveting mystery.

Tell the Wolves I’m Home, Carol Ricks Brunt. 1980s. A 14-yr old girl loses her beloved uncle. Yet a new friendship arises, someone she never knew about.

Four Treasures of the Sky, Jenny Zhang. 1880s, a young girl is kidnapped in China and brought to the United States. She survives with many hurdles in the path.

The Boy Who Fell out of the Sky, Ken Dornstein. Memoir, 1988. The author’s brother died in the PanAm flight that went down in Lockerbie, Scotland. A decade later he tries to solve “the riddle of his older brother’s life.”

Worse Care Scenario, T.J. Newman. Oh my. Interesting analysis of what could/might happen if a jet crashed into a nuclear plant. Un-put-downable.

Song of the Lark, Willa Cather. Complicated weave of a story about a young woman in about 1900, who has a gifted voice (singing) and about her journey to success, not without its ups and downs.

Crow Talk, Eileen Garvin. Charming story which takes place at a remote lake in Washington State, about a few people who inhabit it, the friendships made, but also revolving around the rescue of a baby crow.

The Story Collector, Evie Woods. Sweet story about some dark secrets from an area in Ireland, a bit magical, faerie life, but solving a mystery too.

A Sea of Unspoken Things, Adrienne Young. A woman investigates her twin brother’s mysterious death. She goes to a small town in California to figure it out, to figure HIM out.

The King’s Messenger, Susanna Kearsley. 1600s England, King James. About one of his trusted “messengers,” and his relationship with a young woman also of “the court.” Lots of intrigue.

In the Shadow of the Greenbrier, Emily Matchar. Interesting mystery in/around the area of the famous resort in White Sulphur Springs, West Virginia.

Isola, Allegra Goodman. Hard to describe, survival story on an island in the 1600s.

Save the Date, Allison Raskin. Rom-com, witty, LOL funny. Clever.

The Sirens, Emilia Hart. Numerous time-lines, Australia. Mysteries abound, nightmares, abandoned baby, weird allergies.

Red Clay, Charles Fancher. LOVED this book. Mostly post-Civil War story about the lives of slaves in Alabama during Reconstruction.

Stars in an Italian Sky, Jill Santopolo. Dual time line, 1946 and recent time. Love stories and a mystery.

Battle Mountain, C.J. Box. Another one of Box’s riveting mysteries. Love his descriptions of the land.

Something Beautiful Happened, Yvette Corporon. A memoir of sorts in Greece, tiny island of Erikousa, where the locals hid Jews during WWII. All elusive stories told by the author’s grandmother.

The Jackal’s Mistress, Chris Bohjalian. 1860s Virginia, about a woman who saves the life of a Union soldier. Really good story.

Song of the Magpie, Louise Mayberry. Really interesting story about Australia back in the days when it was mostly a penal colony. Gritty strength of a woman trying to thrive with her farm.

The Boomerang, Robert Bailey. A thriller that will have you gripping the book. About a lot of secrets surrounding the president (fictional novel, remember) and his chief of staff and about cancer. A cure. Such a good story.

Care and Feeding, Laurie Woolever. Really interesting memoir of a woman driven to succeed in the restaurant business. She worked for Mario Batali and then Anthony Bourdain. Gritty stories.

Everything is Tuberculosis, John Green. Maybe not a book for everyone. A real deep dive into the deadly tuberculosis infection, its history. I heard the author interviewed and found the book very interesting.

The Book Lovers Library, Madeline Martin. Fascinating read about Boots’ drug stores’ lending library. And the people who worked in them.

The Arrivals, Meg Mitchell Moore. LOL funny, about a middle-aged couple whose children (and their various family members) return to the family home and the chaos that ensues.

My Life as a Silent Movie, Jesse Lee Kercheval. About grief. A big move to Paris, finding herself a new life with a new set of real blood family.

Escape, Carolyn Jessop. Another memoir about a woman really in bondage in Utah, Mormon plural marriage.


Tasting Spoons

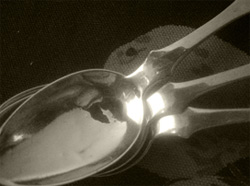
My blog's namesake - small, old and some very dented engraved silver plated tea spoons that belonged to my mother-in-law, and I use them to taste my food as I'm cooking.

Scroll down to the bottom to view my Blogroll

Posted in Uncategorized, on November 23rd, 2013.

Kosher turkey

This post is mostly a repeat from a few years ago. I’ve updated it with some new additions. But just in case you need some ideas for planning Thanksgiving, here are my suggestions.

If you want to see all the recipes on my website, check out the Recipe Index page. It’s huge – maybe too huge. But if you’d like ideas that I think make for a delicious but traditional Thanksgiving dinner, then look no further. Certainly, I return year after year to some favorite recipes, but most likely I introduce something new to the menu equation each year. As I write this I haven’t decided on my menu for Thanksgiving 2009 – yet. We’ll have 6 adults and 3 grandchildren for Thanksgiving dinner itself.

So here’s my roundup of recipes that are sure to please, have been taste-tested and some can even be made ahead:

Appetizers: It’s my opinion that too many appetizers will spoil your appetite for this feast-of-a-meal. Generally I’ll put out some raw vegetables and a dip, or nothing at all. Maybe some nuts. But that’s IT. Besides, if you’re anything like me, I’m buzzing around the kitchen with way too many things to do to take time for appetizers (either preparing, serving or eating). We definitely don’t serve a fancy drink, either. Wine or champagne and soft drinks will be around for anyone who wants them, but that’s it. Maybe some sparkling apple juice for the kids and non-drinkers. But, if you insist on something to serve ahead, here are recipes that would work. The first crostini happen to be a real favorite but they take a bit of fussy work to make them at the last minute – assign the job to one of your guests if possible. And the herb dip (which you’d never know is made with tofu) is relatively light, so serve with fresh veggies to dip or crackers. The onion brushetta – oh my, delish and not all that heavy. And the last crostini is very different, but not particularly light.
Crostini with Apples & Blue Cheese & Honey
Hot & Spicy Tofu Herb Dip – because it’s not heavy or filling
Mahogany Sweet Onion Bruschetta
Gorgonzola, Grape & Pine Nut Crostini

The Turkey, the Main Event: Having tried every single solitary type and brand of turkey out there over the years, I’m now totally devoted to Kosher turkeys. They’re brined, you know, already. So you don’t have to do it. Kosher brining is just a salt and water brine, no added herbs or anything, but it’s fine for me. It’s not too salty, either. Sometimes Kosher turkeys are hard to find, but they ARE carried at Trader Joe’s and at Whole Foods. I missed out at Trader Joe’s one year, so ended up buying two Kosher birds at Whole Foods. They were outrageously expensive (certainly more than at Trader Joe’s) but they were off-the-charts delicious. Even my husband, who isn’t crazy about turkey but eats it, said it was very, very good. So, get thy self to a market where you can get one of these birds. Know, however, that you may not be able to make the gravy from the drippings – generally the broth is too salty. You can try, though. You also don’t want to stuff a brined bird – too much of the salty brine leaches into the dressing.

The Gravy: Because I use a Kosher bird that is heavily salted, usually I have to make the gravy separately. My friend Stacey sent me a recipe last year for a Turkey Gravy Without the Turkey. It was a great find, as you can make the gravy the day before! How about them apples! Everything I can do ahead is a good thing in my book.
Turkey Gravy without the Turkey

The Stuffing (Dressing): Over the years I must have made dozens of different dressings. I’m not overly committed to any one flavor (like cornbread, or oyster, etc.) but prefer a very moist, flavorful dressing. That’s all I ask. Last year I made an Italian sausage dressing that was one of the best I’ve ever done, so will likely make that one again. I’ve also made a Rachel Ray recipe called Stuffin’ Muffins one year – and they were also very good.
Italian Sausage Dressing
Rachel Ray’s Stuffin’ Muffins (link to Food Network’s recipe)

The Potatoes: Well, mashed potatoes are a necessity for me. And I was thrilled one year to read a recipe for making them several hours ahead, piling them into my big crockpot where they held very well for the ensuing hours. You do have to doctor-up the recipe a little to make them particularly moist, but otherwise they’re so simple and I like the fact that all the work can be done ahead. If you don’t want mashed, but prefer another type, there are a couple of other scalloped-type suggestions listed below the mashed.
Crockpot Mashed Potatoes
Goat Cheese Potato Gratin
Monterey Scalloped Potatoes with Jack Cheese
Mashed Potatoes with Bacon, Cheddar & Chives (also has a make-ahead version with added cream cheese)

The Sweet Potatoes: You won’t find a single one of those icky sweet potato casseroles here. I can’t stand them. They’re simply too darned sweet. But I do have a couple of sweet potato dishes that would be quite nice. Generally I fix either mashed potatoes OR sweet potatoes, not both.
Sweet Potato Bake (a pdf of a sweet potato & white potato recipe I’ve never posted as a story – good recipe, though)
Yam Slices with Garlic & Rosemary
Yams, Carrots & Ginger

The Vegetables: Over the years I’ve served just about every kind of vegetable. Some to acclaim, and some not. I happen to love Brussels sprouts (steamed, halved and tossed with salt, pepper and butter), but since Thanksgiving is often a family and multi-generational affair, my DH and I have learned to eat our Brussels at another meal. I like peas, but they’re not very exciting, and besides since this is an overly-rich carbohydrate meal, I don’t serve them anymore. Same goes for corn. I used to serve a baked corn casserole nearly every year, but no longer. So what do I serve? The garlic green beans fit well, although some might not like the garlic with this meal. It’s fine with me. Here are some suggestions:
Broccoli Casserole
Garlic Green Beans – may be too garlicky for the subtle turkey
Baked Fennel
Green Beans, Shallots, Balsamic
Ina Garten’s Zucchini Gratin
Baked Onions
Cauliflower, Bacon & Mushrooms
Creamy Brussels Sprouts
Green Beans & Hazelnut Butter
French Green Beans with Pears & Parmesan

Bread: I don’t serve bread at Thanksgiving any longer. I mean, really, with dressing, potatoes and pumpkin pie, you hardly need any more carbs. But if you insist, here are a few recipes that will work:
Herbed Biscuit Ring – made with the canned biscuits – very easy
Scallion Goat Cheese Chive Muffins

The Salads: Since I grew up with Jell-o salads as a staple at the holiday table, I actually like them, as long as they’re not too sweet. Also, I like them because they’re easy and can be made ahead. You can also make them not-so-sweet if you add vegetables instead of fruit and/or whipped cream. I’ve never blogged about them because you, my loyal readers, might cancel your subscription! One of my favorites is a peach flavored gelatin with a waldorf set of ingredients (diced apples, celery and walnuts). Or, in recent years we also make a green salad. We have family members who still love a green salad anytime, anywhere. They’d almost rather eat green salad than the rest of the meal. So, with that one I would add some of my peppered pecans, or walnuts, pomegranate seeds or dried cranberries. Those additions make it more festive and holiday-ish.
Green Salad with Peppered Pecans and add some dried cranberries too
Cranberry (Jell-o) Waldorf Salad – I’ve never blogged about this one, but you can get the PDF recipe by clicking the recipe title
Apple, Dried Cherry & Walnut Green Salad – very rich, but would be perfect for a holiday dinner
Celery, Date, Walnut & Pecorino Salad – green type, but perfect for this meal

The Cranberry Thing: Some of our family members still like the canned stuff. (They have to bring it if they want it at my table.) No canned stuff for me. So I always, I mean always, make my favorite cranberry relish that has ginger, apples and oranges ground up in it. Make it a week or so in advance then you don’t have to worry about it except to put it out in a serving bowl.
Cranberry Relish – made in the food processor and oh-so easy

Dessert: Well, what can I tell you but we always have traditional pumpkin pie. As far as I’m concerned that’s all that’s needed, but generally somebody else brings the pies at our family get-togethers, and they bring both pumpkin and apple. With real whipped cream, thank you. And the pumpkin usually is Libby’s recipe, and Libby’s pumpkin. That’s it. End of story. But, if you don’t really want pumpkin, here’s a really special dessert that will put your carb count into overdrive.
Cinnamon Raisin Apple Bread Pudding

Leftovers: Well, other than reheating the different components of Thanksgiving dinner, I generally make soup.

THE STOCK: I remove most of the turkey meat from the carcass after the big feast. The bones go into a large, deep soup pot (you may have to break them up some), cover with water and add an onion, some celery, a bay leaf, maybe a garlic clove or two (no salt), put a lid on it and put it in the oven overnight at about 225F. In the morning you’ll have a wonderful turkey stock from which to make soups. Strain everything through a colander and cool and chill. The only down side for me is that on Friday morning the whole house smells like turkey, and sometimes that’s not so appealing at 7:00 in the morning. But, that doesn’t ever keep me from doing it because making that stock is just so easy.

Go from there . . . Here are my leftover favorites:
White Chicken Turkey Chili
Chicken Turkey Posole
Turkey (free form) Tortilla Soup
(Another) Chicken Turkey Chili
Southwestern Turkey Chili
White Turkey Chili (what I did with the leftovers last year – maybe my best turkey chili)
Roasted Sweet Potato & Black Bean Salad (if you have plain sweet potatoes left over)

SANDWICH BREAD: And then, last but not least, I’m telling you about a bread – a bread that you should use for turkey sandwiches. I’ve been making this bread for years and years and years. It’s not difficult (easier if you have a stand mixer), although it IS a yeast bread, not a tea bread. It’s a pumpkin flavored bread, with some raisins and chopped walnuts in it, but it’s more a savory bread and goes just great with leftover turkey sandwiches, especially spread with just a little bit of cranberry relish, crisp lettuce and nice slices of turkey.
Pumpkin Raisin Yeast Bread for Sandwiches

Posted in Cookbooks, on November 23rd, 2013.

2008_03_27_KathleenFlinn.jpg

Having read at more than one website or blog about this book, I decided I did need to read it. The food magazines mostly have given the book high ratings. It’s the memoir of a 30-something woman who hits a crossroads in her life (left her good-paying corporate job) to pursue  her childhood dream of going to Le Cordon Bleu in Paris. Encouraged by her new boyfriend (now her husband), she packs a minimum of belongings, hops on a plane and starts in the professional course in Paris.

She, this American woman, spoke no French, yet she joined a group of international people with the same aspirations, most of them wanting to be a chef. She aspired to be a food writer or journalist of some kind. The course is the same – learning all those basics of sauces, meats, entrails, pastry, yeast, etc. There’s a bit of catty behavior amongst the adult women (students) which was a little difficult to imagine, yet the school is certainly competitive, so I suppose some people could stoop so low as to take all or most of the necessary ingredients so someone else wouldn’t have any (and thereby score poorly). That seemed to be a repeated event in the book – the sous chefs who prep the food for the students sometimes didn’t have enough of one thing or another (the early birds caught the worm on each occasion, and Kathleen was never the early bird). Sometimes the items were essential. No complaining allowed, though. No histrionics in class, for sure. She had to endure some harsh words many a time.

The book chronicles her couple of years there, interspersed with updates about her romance (he actually lived in Paris with her part of the time), the foibles of the different apartments she/they lived in and the lack of certain things she needs to cook. It’s also about her classmates (who change with each session) and the competitive nature of the school. If the teaching chefs at LCB treated most people the way they treated her, I’d doubt many people would last but a few weeks. She does learn French, discovers that success means mastering some of the recipes in her apartment kitchen, often laboring into the wee hours.

Each chapter ends with a recipe – perhaps modified slightly from the official ones at the school. They’re recipes you’ll find in most French cookbooks. I can’t say that I found any recipe I wanted to rush to the kitchen to prepare. But Le Cordon Bleu teaches almost more about technique than the recipes.

What I came away with was one sure thing: I’d have never survived that culinary school. I’d have been reduced to tears (something that just wasn’t done) on day one or two. Kathleen nearly quit once, but was encouraged to keep going. Part of her problem was the language – in the second and subsequent sessions the classes were taught only in French. She did take French lessons, and eventually she more-or-less mastered it – at least culinary French for sure.

Whether she really was disliked at first by the French teaching chefs, it’s hard to know, but they were very hard on her. It seemed like the chefs didn’t like Americans; English speaking students had to work harder to prove his or her mettle. Kathleen persevered, however, and it seemed that some of the chefs came around. For her final exam she decided to prepare a very grand plate – was advised by the chef not to, that it couldn’t be done in the limited time – she practiced it ad nauseum at home to perfect it and complete it in the time allowed. The chefs were mightily impressed. Perhaps that exam meal was her piece de resistance. At graduation she was offered a plum stage but opted not to do it. In the interim her husband was in a bad accident here in the U.S. and felt he needed her more than a non-paying stageI in a Swiss restaurant. Besides, she never aspired to be a chef.

The book, The Sharper Your Knife, the Less You Cry: Love, Laughter, and Tears in Paris at the World’s Most Famous Cooking School is interesting. Not the kind of book you can’t put down, however. Every student took copious notes (obviously she did that part well) so she had ample material to write a book. There were some funny incidents that gave pause. I particularly enjoyed one thing: the French teaching chefs, in trying to pronounce her name, called her “Meez Fleen.” Every time she wrote that in the book I chuckled.
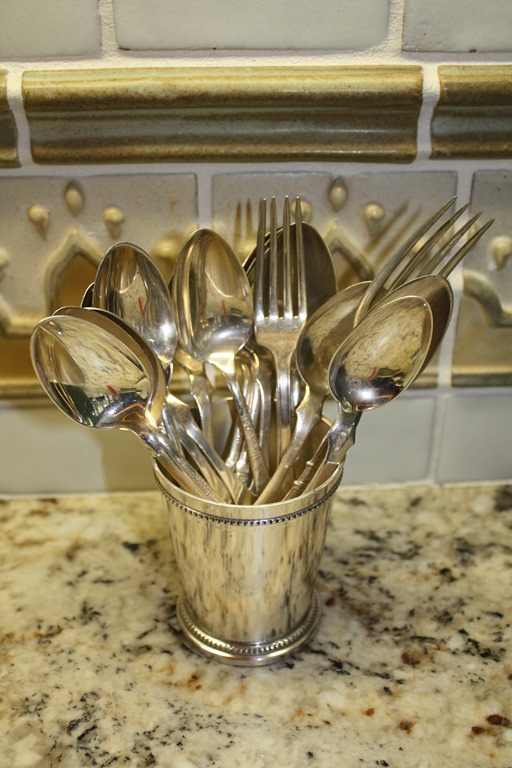
tasting spoonsHer favorite teaching chef said to her as she left school for the last time, “Remember, Meez Fleen, taste, taste, taste.” A good mantra for every cook. It’s something I try to do with everything I make (well, you can’t do it with baked goods). Hence my little silver Mint Julep cup of tasting spoons that sits beside my kitchen stove. (And, the muse for my blog’s name, obviously!

If you’re new to my blog, those spoons (and a few forks) pictured at left are very old silver plated ones that belonged to Dave’s mother. Some are engraved, some with initials we don’t even recognize as part of the family tree. Some need replating, and we do have to polish them periodically. But, rather than let them sit in the silverware box in a drawer, rarely seeing the light of day, I pulled them out some years ago. They’re a variety of styles, all thinly shaped and small, which makes them just perfect for tasting as I cook. I like to think that Dave’s mother smiles every time I reach for one, which is often. I hope the chef at Le Cordon Bleu would also smile in approval.

Posted in Chicken, on November 22nd, 2013.

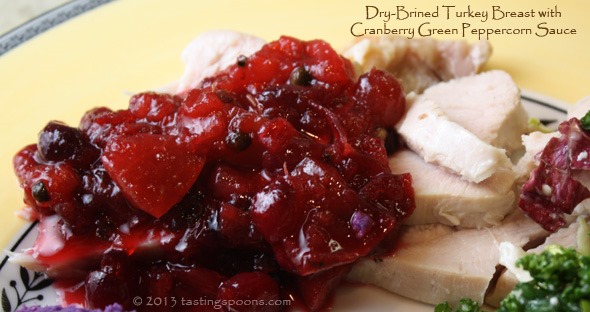
dry_brined_turkey_breast_sauce

A simple, tasty way to roast a turkey breast, then serve with a green peppercorn sauce mixed with whole berry cranberry sauce that’s just bursting with flavor. You do have to plan ahead at least 2 1/2 days, though.

I don’t know about you, but I just never think to roast a turkey breast. In fact, I don’t even look at them at the grocery store. I know the breast meat is considered a healthy meat, but I’ve always thought that roasting a breast would/could only end up being dry and tasteless. I’m wrong. Absolutely wrong. You’ll be amazed. I think my difficulty is in remembering the rolled turkey breasts they used to sell (oh, maybe they still do). The kind that almost looks like hot lunch meat? Those are (were) downright awful. Didn’t we make them in the crockpot? Well, this recipe is NOT about that kind of turkey breast!

The biggest problem – if you can call it that – will be FINDING a bone-in turkey breast. Boneless ones, yes. Bone in, not so easy! They just don’t seem to be readily available. Some Sprouts stores have them sometimes (I found mine there), particularly this time of year. Here in California we have a chicken and turkey producer called Zacky Farms, and they do sell them, but you’ve got to seek them out as they don’t seem to be at every store that carries the product.

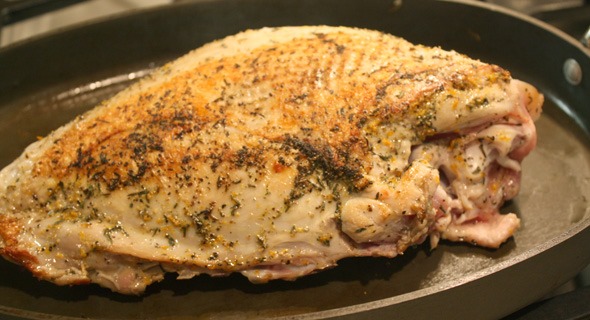
turkey_breast_bone-In_dry_brinedThe dry brine (pictured at left – it sat in the refrigerator in a plastic bag for 2 days): it means it’s a salt mixture that serves the same purpose as a wet salt water brine, but it doesn’t take up so much room in your refrigerator and is ever-so much easier to handle. At the cooking class Phillis Carey taught about this, she said she has stopped making the wet salt brine because she simply has no place in her refrigerator to keep a brined turkey, and she’s quite happy with this dry brine method.

The turkey breast needs to sit in the refrigerator for 48 hours – that’s why you have to plan ahead on this one. The dry brine is a mixture of salt, orange zest, pepper and dried thyme. See? Easy. Just pop it into a Ziploc bag and set it in the refrigerator. Every 12 hours, though, you need to open it up, massage the salt mixture all over the meat again and turn it over. Then, the day you’re serving this, 8 hours ahead you will do one more step. The salt should be invisible by this point (it’s soaked into the meat). The turkey skin will be moist, but not wet. At this point you place the turkey breast on a plate and set it (uncovered) in the refrigerator. Let it sit there for at least 6 hours. Now you roast it after browning the skin side in a bit of oil. The breast goes onto a parchment-lined baking sheet (skin side up) for about 40-45 minutes.

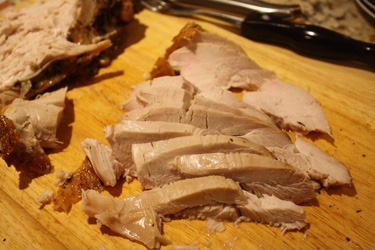
roasted_turkey_breast_slicedDo use an instant read thermometer for this – haven’t we all eaten turkey at Thanksgiving when the breast meat is so dry you can hardly choke it down? When you roast a whole bird you have to cook it until the thigh meat is done and usually the breast meat is far past it’s peak temperature. I noticed in one of the cooking magazines they were touting cutting the turkey into pieces and roasting the sections separately (so you could remove the breast meat when it’s done). Makes such good sense, but then you never see the pretty bird on the plate. In the article they had placed the parts (in their proper position) on a big platter, but they were all flat, on a bed of greens.

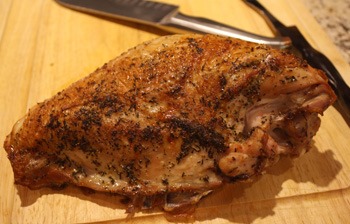
bone_in_turkey_breastHere, you’ll be able to get the turkey breast exactly the way you want it. Remove the turkey when the internal temp has reached 160° F. Ideally you want the breast meat to be 165° F (that’s the safe eating temperature), and it should be fine if it goes up to 170°. Hopefully no higher than that. You’ll set the turkey on a carving board and tent it with foil and in that time the temperature will rise to at least 165° or 170° in just a few minutes.

Now let’s talk about the sauce. You might need to make a trip to the grocery store, and perhaps a higher end one to get the green peppercorns. They’re definitely not at any old market. And my advice is to buy the more expensive by weight. At the cooking class Phillis recommended a brand carried at the cookware store where the class was held. Within seconds 3 women had popped up out of their seats and grabbed the entire stock of them. So I had to buy a different brand at an upscale market. Having not tasted these side by side, I don’t know exactly how they differ. The store owner is going to order more, so eventually I’ll get that brand (I don’t even know the name, other than it said poivre vert in large green letters on the side of the 3-inch high can. I’ve looked online and didn’t see an image of the can.

You’ll want some whole berry cranberry sauce (something I never buy unless I have to!), or you can make your own if you have the time and inclination. I think this would be lovely made with homemade cranberry sauce with port wine. See this recipe if you’re interested. The turkey is cut off the bone for easier carving. It was still super-hot and had reached exactly 165° on the instant read. I had heated plates to serve it on.

What’s GOOD: the low calories and maximum flavor; how easy it was to make, although you do have to let it marinate for 48 hours; planning ahead IS necessary; overall delicious flavor. The turkey meat was SO tender and juicy. I was amazed. Loved the sauce too. The turkey breast (half) I had served 4 people for dinner, and there’s enough left over for one more meal for 2. Unless you’re feeding young men or boys!

What’s NOT: only the 48-hour+ plan-ahead part. Otherwise, it’s a great recipe.

printer-friendly CutePDF

MasterCook 5+ file and MasterCook 14 file

* Exported from MasterCook *

Dry-Brined Turkey Breast with Cranberry Green Peppercorn Sauce

Recipe By: Phillis Carey cooking class, Nov. 2013
Serving Size: 8 (I think more)

TURKEY BREAST:
4 pounds turkey breasts, meat/skin, R-T-C — (not boneless)
1 tablespoon coarse salt
1 tablespoon orange zest — grated
1 teaspoon 5-peppercorn blend — coarsely ground
1 teaspoon dried thyme
1 tablespoon grapeseed oil — or vegetable oil (for browning the breast)
SAUCE:
3 tablespoons unsalted butter
3 tablespoons all-purpose flour
2 cups low-sodium chicken broth
1/2 cup Madeira
1 tablespoon green peppercorns — in brine, drained and crushed
1 cup cranberry sauce — (yes, the canned stuff is fine, whole berry style)
Salt to taste (may not need any)

1. 48 hours before cooking time wash and pat dry the turkey breasts. Combine the salt, orange zest, pepper and thyme in a spice grinder and grind until fine. Sprinkle all over the turkey and place in a resealable bag. Refrigerate for 48 hours, turning and rubbing the salt mixture into the turkey every 12 hours or so.
2. Remove turkey from bag. There should be no salt visible on the surface and the skin should be moist but not wet. Place turkey breasts, skin side up, on a plate and refrigerate uncovered for at least 6 hours.
3. Preheat oven to 400° F. Heat oil in a large saute pan over medium high heat. Add turkey breasts, skin side down and brown 4-6 minutes. Transfer turkey, skin side up, to a parchment lined baking sheet; reserve the pan (and its drippings and brown bits).
4. Roast turkey for 40-45 minutes, or until a meat thermometer registers an internal temp of 160° F (or 165° if you prefer it) in the center of the breast. Remove from oven and cover loosely with foil. Let stand for 20 minutes. In that waiting time, the internal temp will rise to 165° or 170°.
5. SAUCE: Meanwhile, melt butter in the reserved skillet and whisk in the flour. Add chicken broth and Madeira and stir until flour is absorbed. Add green peppercorns (place them in a small plastic bag and pound them with a mallet or flat sided meat pounder until all peppercorns are broken) and cranberry sauce and simmer until thickened. Season to taste with salt and set aside while the turkey breasts are roasting.
6. To serve, cut the turkey breast off the bone (makes it so much easier to slice) and slice across the grain into 1/2 inch slices. Arrange on a heated serving platter and spoon some of the sauce over the turkey. Serve the remaining sauce on the side.
Per Serving: 383 Calories; 13g Fat (32.0% calories from fat); 45g Protein; 19g Carbohydrate; 1g Dietary Fiber; 89mg Cholesterol; 1471mg Sodium.

Posted in Desserts, on November 21st, 2013.

rum_pound_cake

Do you remember when I mentioned, after being on our recent trip to the Pacific Northwest, eating a fantastic piece of cake when we visited The Willows Inn, on Lummi Island. Tender slices of this cake (I thought it was a pound cake) were sitting next to the urns of coffee in the lobby, and as we checked out, our last morning there, having not had any breakfast yet, I took a slice. And thought I’d died and gone to heaven.

After we got back home, I emailed my friend Jerianne about our trip – and about the cake (because she loves to bake too) she just took the bull by the horns – she has a lot more gutsiness than I do – and picked up the phone, called the Inn and asked for the recipe. And they SENT IT to her! Oh my gosh. This was a couple of months ago now, and at the time I had just made a pound cake (in my feeble attempt to make some kind of a tender one from an online recipe) I thought I’d wait awhile before making this.

WELL! First thing is the chef called this a rum cake. Remember, I thought it was a pound cake. But having made it, I really think it has the texture of a chiffon cake, but those are made with oil, not butter. Since my head just tries to understand the chemistry, I dug out several of my baking cookbooks, and found the answers  (mostly) in the Sur la Table cookbook, The Art & Soul of Baking by Cindy Mushet. This type of cake is called an egg-separated sponge cake. However, this one differs from the standard because it has quite a bit of butter in the egg  yolk batter. Most sponge cakes have little to no fat in them and their rising relies on the air incorporated in the egg yolks and whites. They derive their fat from the egg yolks themselves. But if it were truly a sponge cake it would have NO added fat. So that’s why it’s a kind of a combination of a standard butter cake and the egg-separated sponge cake.

Good, we have that settled now! (Maybe I should have been a chemist?) In the process of getting ready to make this I did rearrange the writing of the recipe, and clarified some of the instructions a bit, and added in my suggestions here and there too. The recipe was sent with ingredient weights rather than volume, and I’ve left it that way (and added in suggestions on approximate volume). I do think this is one of those kinds of recipes that will help if you use your scale. As elaborate as this is – well maybe elaborate isn’t the right word – it’s time consuming for sure – you don’t want to mess up on the weights and measures!

The batter has 3 parts – (1) the dry part (cake flour, and sifted at that!); (2) the egg yolk part; and (3) the meringue (egg white) part. Once all of those parts are prepared, it’s combined into a billowy, frothy batter and baked.

The recipe, in one area mentioned loaf pans. In another sentence it mentioned a tube pan, so I’m surmising that you could use either. I included instructions for both, although I only made it in a tube pan. Based on my recollection of the slice I ate at the Inn, I think theirs was made in loaf pans. The recipe indicated 45 minutes in the oven. Well, when I checked at 45 minutes in, the batter was still very jiggly and wet. My heart sank – I thought I’d most likely messed it up somehow, and even went back to the recipe to make sure I’d not forgotten something. No, it looked okay. I set the timer for another 15 minutes. I tested it with an instant read thermometer, my Thermapen, and it was only about 180°F. Another 10 minutes and it got to about 195°F. Each time, of course, the oven loses heat, so I have no idea exactly how many minutes it would take in one straight bake – but certainly a lot more than 45 minutes. Perhaps in loaf pans? I don’t know. Eventually it reached 200°F and I removed it from the oven.

What I learned was that the cake is very fragile – and in making a tender kind of cake – it would be very easy to break or crack it. I was fortunate that mine stayed together. Unintentionally, I did leave a bit of the cake on the tube-pan bottom, but not enough to make any difference. The cake must be left to cool to room temp, then you remove it from the pan(s). The recipe was specific – the cake needs to sit for a day (overnight) before slicing. The cake, right out of the pan, is very VERY moist and with the meringue batter as part of it, the outside edges were a bit sticky, so if you tried to slice it at that point, I think it would tear or rip. That must be why it needs to rest overnight – by enclosing it in foil the outside edges all softened.

I used a knife and an offset spatula to make sure the cake was separated from the pan. The physical act of removing it from the pan – well that was a bit of a juggling act – I used my outstretched and splayed fingers and my forearm to gently tip the cake out, then righted it very quickly and let it sit. Meanwhile I had a huge piece of foil ready, and some additional rum. Some is spread on the bottom of the foil (otherwise it would stick, I suppose), then you place the cake on top, then brush the top and edges with more rum (maybe about 2-3 T.). It’s all sealed up in the foil and left to sit.

Next day I just couldn’t wait until our dinner to see if the cake tasted like I remember. We were having guests and this was dessert. What if it was a completely bust? I might have to fix some other kind of dessert on short notice. I needn’t have worried – the cake was absolutely just as I remembered. (Later note: I made this a couple of weeks ago and put part of it in the freezer. I was trying to find something else, pulled out a little package of these, defrosted it. Oh my. So delicious!) This leads directly into my ranking system . . .

What’s GOOD: there is absolutely nothing about this cake that isn’t good (fabulous is more like it), IMHO. It has texture (oh so very tender) and moisture (it almost drips with it) and sugar and mellowness. Everything about this cake makes it a winner. I served it with whipped cream and some fresh plums that I’d simmered in port wine. If you want to get the full impact of the cake, serve it plain, or maybe with just a little bit of whipped cream. A definite five-star winner in my book.

What’s NOT: the only thing I can say is that it does take a bit of time to make – there are numerous steps and you’ll dirty up a lot of dishes in the process. But it’s worth the effort and the elbow grease (you can ask my DH about that – he did have to wash everything). If you’ve never made a sponge cake before, it might seem a bit intimidating. Just make sure you have the butter and eggs at room temp and follow the directions. Don’t over mix anything.

printer-friendly CutePDF

MasterCook 5+ file and MasterCook 14 file

* Exported from MasterCook *

Rum Cake (aka Egg-Separated Rum Sponge Cake with Butter)

Recipe By: The Willows Inn, Lummi Island, Washington
Serving Size: 24

300 grams cake flour — (approx 2 3/4 cups)
1/4 teaspoon baking powder
EGG YOLK MIXTURE:
300 grams unsalted butter — (about 1 1/3 cups = 2 cubes + 5 1/2 T) room temperature
285 grams superfine sugar — (for the yolk mixture) (about 1 3/8 cups)
9 large egg yolks — at room temperature
3 tablespoons milk
1 1/2 tablespoons fresh lemon juice
3 tablespoons rum
EGG WHITE MIXTURE (MERINGUE):
6 large egg whites — at room temperature
285 grams superfine sugar — (for egg whites) (about 1 3/8 cups)
Extra rum for brushing the cake (about 2-3 T.)

Notes: the recipe indicated using either 2 loaf pans or 1 tube pan. If using loaf pans, check the baking time – might be less time – or perhaps the 45 minutes. The rum is barely distinguishable in this cake – i.e. there is no flashy rum flavor.
1. Preheat oven to 325°F. Butter and flour tube pan. If using two loaf pans, butter and flour and (I suggest you) add a parchment sling. Sift dry ingredients; set aside.
2. EGG YOLK MIXTURE: With a mixer, cream butter and sugar together using the paddle blade. Add sugar, a little at a time. (If you don’t have a mixer with paddle attachment, whisk by hand the butter and sugar in a mixing bowl until light and fluffy.)
3. Add egg yolks, one at a time, beating after each addition.
4. Add milk, rum and lemon juice into the egg yolk mixture.
5. EGG WHITE/MERINGUE MIXTURE: Whip egg whites until foamy using an electric mixer. Add sugar a little at a time, while continuing to whip at medium speed until the mixture is stiff and satiny. Don’t over mix.
6. Add 1/3 of the meringue into egg yolk mixture, alternately with flour, starting with the meringue and ending with the meringue – add in this order: meringue – flour – meringue – flour – meringue. Mixture will seem stiff during the flour addition, but will soften and smooth out when you add the next amount of meringue. At the end, just mix until you can’t see any streaks of meringue or egg yolk mixture.
7. Pour into the prepared tube pan and bake for approximately 45-60 minutes or until a toothpick inserted in the center of the cake comes out clean. (When I baked it in a tube pan it took 1 hour 15 minutes.) Or, use an instant thermometer and bake until it reaches 200°F. Set cake in its pan(s) on a rack to cool completely. The cake is VERY fragile at this point. Only after it has rested overnight does it settle down and will allow slicing. The cake is very moist and wet – and because of the meringue in it, it has a sticky consistency on the edges, so if you try to slice it, the cake will tear. That’s why you must let it cool and rest.
8. Run a knife around the inside edge of the pan (and for the tube pan use an offset spatula to separate the cake from the center tube flat bottom). Gently turn the pan over onto your oustretched hand and forearm and set right side up on the rack. Prepare a large piece of aluminum foil large enough to seat up the cake. Using a pastry brush, brush the surface of the sheet with rum. Place the cake on top of the sheet, on top of the rum. Brush the cake with additional rum. Wrap the cake with the foil sheet. Serve next day. Use a serrated knife to cut slices and do it very gently.
Per Serving: 259 Calories; 12g Fat (42.7% calories from fat); 3g Protein; 34g Carbohydrate; trace Dietary Fiber; 107mg Cholesterol; 24mg Sodium.

Posted in Veggies/sides, on November 19th, 2013.

german_style_mashed_potatoes

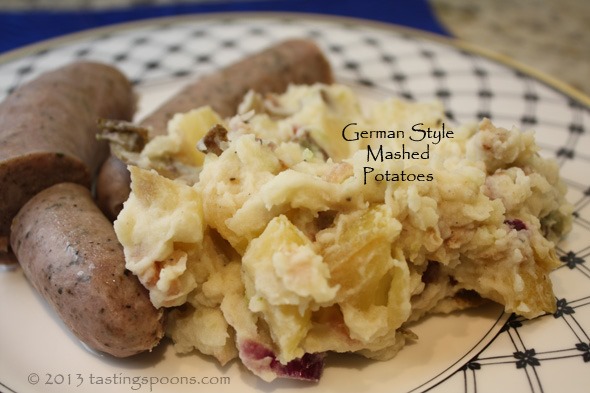
Oh my goodness . . . where  have you been all my life . . . German style mashed potatoes? You’re going to become a regular – at those special times when we have mashed potatoes, that is. These were really easy enough to make and we could hardly stop eating them.

We were having some sausages (Nuremburger and Bratwurst) for dinner, the delicious ones I buy at a German deli, Tip Top Meats, in Carlsbad (north of San Diego). I had one Russet potato I’d bought several weeks ago – it was almost over the hill. That’s how often I use potatoes. Anyway, I let my mind run wild as to what to do with it. I searched for some kind of more healthy fried potato. They’re not one of my favorite things, though. When we go out to breakfast I never eat fried potatoes or hashed browns, or even country fried potatoes. They’re just not my thing. So I looked further and I noticed a German style mashed potato recipe (at A Taste of Home). Sure enough, I had all the ingredients.

The potato was cut up into chunks (I chose to leave the skin on) and simmered them for 10-12 minutes until the potato was cooked through. I drained them, returned them to the same pot and set them aside. Meanwhile, I defrosted one slice of thick-sliced bacon from the freezer, chopped it up into little chunks and set it to rendering on the stove. Then I added  half a chopped up red onion (any onion will do – I just happened to have a half of a red onion in the refrigerator). The bacon had virtually no fat in it, so I had to add a tetch of oil to keep the mixture from burning. Then I added a chopped up (cored, unpeeled) apple. I had a honey crisp apple, but you could probably  use any type – this one didn’t disintegrate at all – I liked that part, so you’d want to use a crisp type or a Granny Smith. If you used a Pippin, you might want to add sugar. I let it sauté for about 10 minutes over low heat. Then I added about 1-2 teaspoons of white vinegar, salt and pepper. The recipe indicated adding sugar, but I tasted it and didn’t think it was needed.

The recipe had you roughly mash the potatoes, so I used my hand-masher some – not thoroughly, as I like to still taste some little chunks – then I scraped in the apple, bacon and onion and stirred it up. The Russet was quite dry by then so I did need to add some milk to smooth it out. I added a little salt and pepper and it was done. Oh my. Yes. I’m glad I left the pan in the kitchen (I always serve our plates in the kitchen so we aren’t tempted to have seconds) so I have enough for another dinner.

What’s GOOD: well, having never had potatoes and apples before in any combination, it was a really lovely taste combination. It was a beautiful match with the sausage. I put out a couple of jars of different kinds of mustard and that was our dinner along with some sliced tomatoes and Mozzarella cheese drizzled with white balsamic vinegar and some Tuscan olive oil. And sprinkled with fresh basil we still have growing in the garden. We both ate in near silence – because it all tasted so darned good. Absolutely I’ll be making this again and again. I’d think kids would love this since it has a bit of sweetness from the apples.
What’s NOT: nothing that I can think of – it does take a little extra time to make, but if you ever do sausages on the grill or any kind of sausage as a dinner entrée, you’ll be really happy to have this variation on fried potatoes or straight mashed.

printer-friendly CutePDF
MasterCook 5+ file and MasterCook 14 file

* Exported from MasterCook *

German Style Mashed Potatoes with Apples

Recipe By: Adapted from A Taste of Home
Serving Size: 4

1 pound potatoes — cubed, skin on (you could use any kind of potato – I used a Russet)
1 large apple — cored, finely chopped (I used Honey Crisp)
1 slice bacon, thick-sliced — diced
1/2 medium red onion — chopped
1 1/2 teaspoons cider vinegar — (I used champagne vinegar)
1 tablespoon sugar — (I omitted this as I didn’t think it was needed)
2 tablespoons milk — or more, if needed (my addition, as the Russet potatoes were a bit dry)
salt and pepper to taste
2 teaspoons parsley — chopped (for garnish, if desired)

Notes: The kind of apple used will change the texture – I liked the little chunks in the finished dish, so use a crisp apple or a Granny Smith. If you have a soft apple, just don’t over cook it so it becomes applesauce – that wouldn’t have the same appeal. I used Russet potatoes (not usually a good potato for mashing), but you could use any type. Adding milk probably isn’t a German style at all – it was needed because of using a Russet potato which has a dry, mealy texture.
1. Place potatoes in a large saucepan and cover with water. Bring to a boil. Reduce heat; cover and cook for 10 minutes.
2. Meanwhile, in a medium sized skillet, cook bacon over medium heat for about 5 minutes. If there are more than 2 tsp of fat in the pan pour out the extra. Add onion and continue cooking about 5-7 minutes. Add chopped apples. If skillet is dry, add about a T. of olive oil or water to keep it from burning. Continue cooking (covered) for about 5-10 minutes until apples are just cooked through.
3. Drain potatoes, then return to the pot and mash some. Add the bacon/onion/apple mixture to the potatoes and stir. Add some milk to smooth-out the mixture. Add salt and pepper to taste. Garnish with chopped parsley if desired.
Per Serving: 153 Calories; 2g Fat (11.8% calories from fat); 4g Protein; 31g Carbohydrate; 3g Dietary Fiber; 4mg Cholesterol; 62mg Sodium.

Posted in Veggies/sides, on November 17th, 2013.

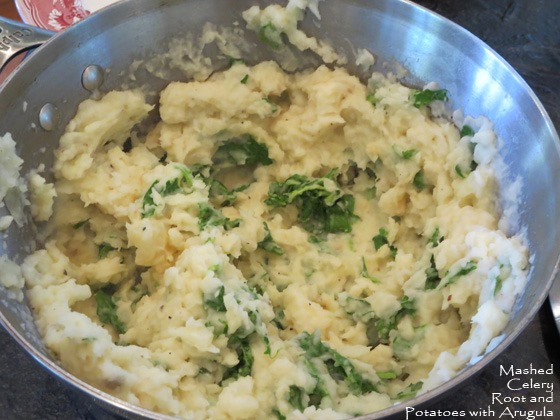
celeryroot_potatoes_mashed

Do you forget about preparing celery root? Surely I do – and I like celeriac. I just never think to buy it. Does it help to know that celery root is actually a very healthy food? Low in calories and certainly a lot lower in carbs than potatoes.

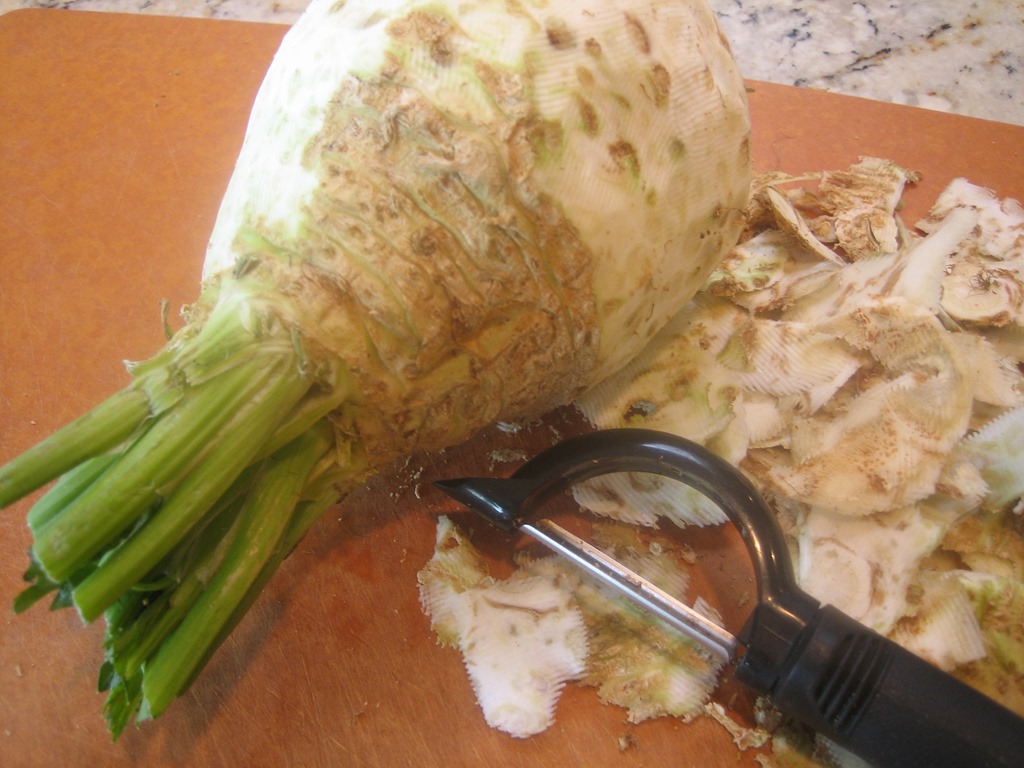
Probably the deterrent is the nuisance of preparing it. Or maybe we look at it as such an ugly veggie, we just don’t bother? Well, fix that, by making this dish the next time you need some creamy carb. Depending on how gnarly it is, you can try using a vegetable peeler. If it’s particularly root-y, I’d recommend using a knife. Do remove all of the little dark brown crevices, though – they don’t look pretty in the finished dish. Plunge the cut cubes into cold water as it turns brown quickly.  celery root 2

Cut everything up and put it into cold water to cover and just let it sit until you’re ready to cook it. That will keep both veggies from turning brown. Allow yourself about 30 minutes total – to bring the pot to a boil, then simmering. Mashing and seasoning takes no time at all.

It doesn’t take long to cook it – usually about 15 minutes. Hence you cut the potatoes into slightly smaller pieces so they’ll all be done at about the same time. Once done, you drain it, mash it by hand (providing you like a rustic mash – I do), then add butter and milk. You can put the celery root in a food processor (not the potato, however – it becomes glue-y). Season it with salt and pepper, then toss in the arugula. Of course, if you’re not an arugula fan, just leave it out. Garnish with Italian parsley. Makes a great bed for a meat dish. Next recipe up will be a chicken breast that goes really well with this.

What’s GOOD: well, the taste is first and foremost. The combo of celery root and potato is really nice. Mellow. Nutty almost. The texture, of course, is just like mashed potatoes, but using the combo is healthier. Fewer carbs for sure. I like the arugula addition. Do remember that celery root is really good for us!
What’s NOT: not much of anything, other than getting over the appearance of the celery root.

printer-friendly CutePDF
MasterCook 5+ file and MasterCook 14 file

* Exported from MasterCook *

Celery Root and Potato Mash with Arugula

Recipe By: Tarla Fallgatter, cooking instructor
Serving Size: 8

2 medium celery roots — (celeriac) about 1 3/4 pounds
1 pound russet potatoes — peeled, cut into 3/4 inch cubes
4 whole garlic cloves — peeled, smashed
1 teaspoon salt
4 ounces unsalted butter
1/2 cup whole milk — or more if needed
Salt and freshly ground black pepper to taste
4 ounces arugula — use baby arugula if available
3 tablespoons Italian parsley — chopped (garnish)

1. Trim and peel the celery roots (may need to use a knife, not a peeler). Cut into about 1-inch chunks. Place them in a large pan with the potatoes and garlic. Add water to cover, add salt. Bring to a boil and simmer until the vegetables are tender (about 15-20 minutes). Drain well then return the mixture to the same pan.
2. Coarsely mash the vegetables, then mash in the butter and enough milk to make a soft consistency. Season with salt and pepper to taste. Stir in arugula, garnish with Italian parsley and serve immediately. If making this ahead, don’t add the arugula until just before serving.
Per Serving: 166 Calories; 12g Fat (64.2% calories from fat); 2g Protein; 13g Carbohydrate; 2g Dietary Fiber; 33mg Cholesterol; 308mg Sodium.

Posted in Veggies/sides, on November 16th, 2013.

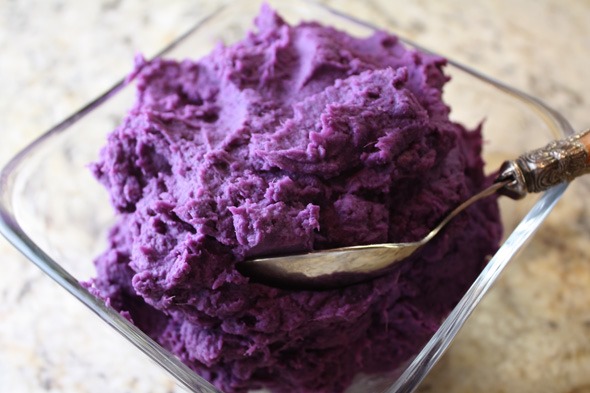
purple_sweet_potatoes_mashed

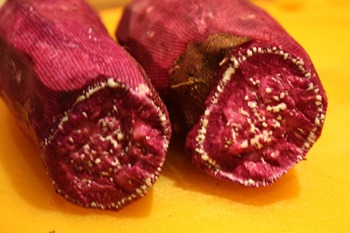
What do you think about them apples sweet potatoes? Ever seen purple sweet potatoes? Me neither! Did you know that purple foods are high in antioxidants? Yup!

The folks at Frieda’s send me new products now and then, and when they asked if I’d like to try this new purple sweet potato, I said sure! A few days later they arrived on my doorstep, and it just happened I was making a roasted turkey breast for dinner. Perfect!

purple_sweet_potatoes_whole

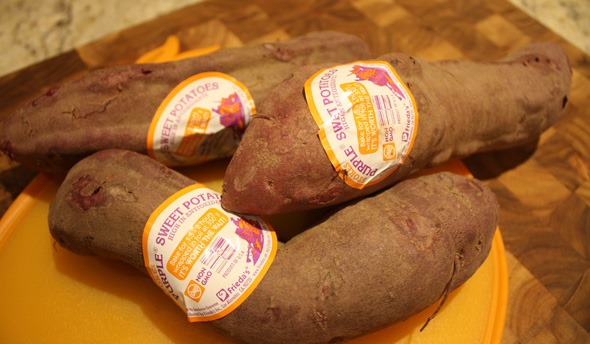
Here’s what the purple sweet potatoes look like whole, unpeeled.

From the outside, they don’t look too different from an ordinary red/orange sweet potato. But gosh, once you cut into it, you sure know it’s different. Below is a photo of the peeled and halved potato.

purple_sweet_potatoes_raw_halved

The little white ring (right) inside, is a fluid that leaks from the potato – perhaps the starch? I don’t know. It made no difference in the cooked potato.

With a turkey breast on the menu, I wanted mashed potatoes, so I merely chopped them up (after peeling) into 1 1 /2 inch pieces, approximately, cooked them in simmering water until they were done, mashed with a hand masher, added some milk, butter, salt, pepper and a pinch of cinnamon. Perfect!

We had guests for dinner, and I must say, everyone was a little apprehensive about them, but once you put them in your mouth you have no idea they’re purple. Certainly made fun conversation at the table. Our daughter Sara was visiting that night and I had her take home the leftovers to her teenagers. Hmmm. They wouldn’t even try it. They thought Grandma was playing a trick, that I’d doctored them up with purple food coloring. She assured them I wasn’t, but they still wouldn’t taste them! We ate all but a few bites, though, and thought they tasted great. The color is a little odd, I must say, but yes, I’d buy them again. They were fun and tasty too.

Here’s what Frieda’s has to say about this potato:

[Stokes’s is a] special new sweet potato variety with purple skin and bold purple flesh that intensifies when cooked. Aside from its unique bold color, The Stokes Purple® differs from other sweet potatoes and yams in its flavor and mouth feel, offering a favorably dryer, denser and richer taste that is not cloyingly sweet. The Stokes Purple® Sweet Potato is grown in California and is non-GMO.

If you’re interested in finding these critters, here’s a link to Frieda’s resource page for them. You might call the store listed to make sure they DO have them. If your family is into doing something fun, this might be the ticket to surprise at your Thanksgiving meal!

Posted in Desserts, on November 15th, 2013.

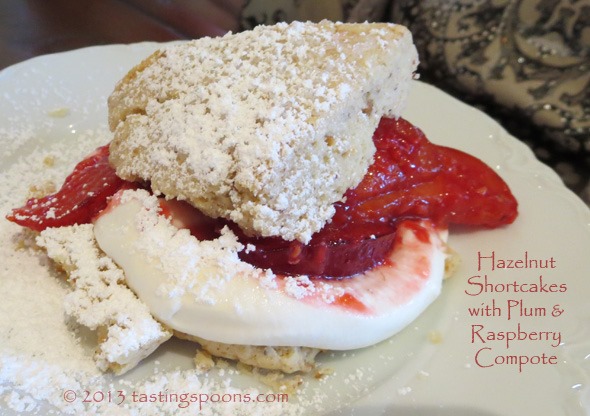
hazelnut_shortcakes

Can I just tell you – please make this. It is really extra-special in the taste department. But then, I love hazelnuts. And then I also love whipped cream (who doesn’t?). And the plum compote with the hazelnuts somehow is one of those magical pairings. Just make it.

Some of my friends – and my friend Cherrie’s friends – laugh at us – why do we need to go to cooking classes, since we both are pretty darned good home cooks? Neither of us has professional training. Neither of us really lacks for ideas. Neither of us lack cookbooks to get even more ideas. Neither of us dreads cooking. So why do we go? Well, sometimes it’s just to get us thinking outside of our own boxes.

We also go to classes because we’re close friends, and we enjoy spending time together, of course, but we always – and I mean always – learn something. You’d really think we would be past the stage where we could still learn, but yet, we do. And of course, the kitchen gadget inventors love to tweak us – about needing a new something to augment our already bulging kitchen utensil drawers.

kitchenThis class was in a private home in an area near us called Nellie Gale Ranch. Seeing this house, in itself would have been a reason to go to the cooking class – I think the home (kitchen pictured above) was THE most beautiful home I’ve ever visited in my life – it was decorated in my style and every step I took, ever hallway I entered, every turn I made I’d find some new pretty thing – a niche, a decorator item, an arch, a room just exquisitely appointed. The hostess, Karen, designed the house herself – I mean everything – the architecture of it, every wall, doorway, bathroom, and she paid attention to minute detail. She also designed all the interior décor and does all of it herself. I was mightily impressed. The granite in the kitchen was honed first, then “leathered.” I’d never seen that before. Note the lights under the toe kick area. Note the windows behind the 2 cupboards on the far wall – so natural light brightens the entire room. There were 3 sinks in the kitchen, 2 of them farmstyle fronts. She has indoor table seating for 32 people (I counted) although 8 of those are in an enclosed solarium back 20 feet or so behind where I was standing taking the above photo. She has 2 laundry rooms, 5 or 6 fireplaces. Oh my, I could go on and on and on.

The class was taught by Tarla Fallgatter, who regularly teaches classes to this group Cherrie and I are in. We get together 4 times a year. And had I looked at this recipe in a magazine or even a cookbook, I might not have given it much thought. Nothing in it would have generated any kind of “wow” thoughts. I do like hazelnuts, though. But oh, was this dessert ever delicious. After eating it I concluded that it must be that hazelnuts and plums have a natural affinity – a food chemistry when they’re paired.

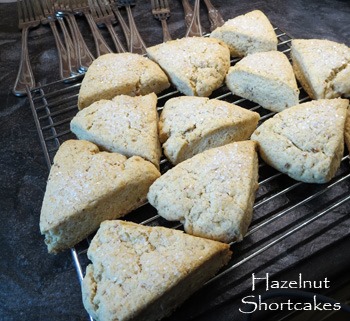
hazelnut_shortcakes_coolingThe shortcakes are easy enough – the only caveat there is to NOT overwork the dough. If you do, the shortcakes will get tough. Tarla pressed the dough to about an inch thickness and made very short wedges. She cut them erratically in order to get a short triangle (see photo), not a long tapered one, as she says more often than not that thin, tapered end will fall off when you pick it up to plate it. To make it easier, cut rounds with a cutter instead. And really, it makes no-never-mind what shape it’s in anyway – cut squares if you want. If you make them thinner they’ll be more crispy. If you make them thicker than an inch, they’ll be more soft. The 1-inch one was absolutely perfect.

Plums happen to be in season right now, and they just were so perfect for this – different too. Don’t we first think strawberries? If the plums you buy are not ripe/soft, you may need to cook them awhile longer – you want them to be tender (not mush, though). Add the raspberries at the last minute – otherwise they’ll completely fall apart. You’ll not even know they’re in the fruit mixture.

When I looked at the nutrition/calorie count of this, I gasped. It must be the volume of whipped cream. Perhaps you could make do with 1 cup of heavy cream – that would cut down some. But the shortcakes do need an ample amount of whipped cream – it’s more than just decoration here.

What’s GOOD: there isn’t anything about this that ISN’T good in my opinion. The hazelnuts are different in a shortcake and you definitely can taste them. Toasting them enhances their flavor so much. The plums were piquant and sweet at the same time; mixed with the whipped cream the flavor mixture in my mouth just . . . well, it was sinfully good.
What’s NOT: absolutely nothing, except the calories!

printer-friendly CutePDF
MasterCook 5+ file and MasterCook 14 file

* Exported from MasterCook *

Hazelnut Shortcakes with Plum & Raspberry Compote

Recipe By: Tarla Fallgatter, cooking instructor
Serving Size: 6

SHORTCAKES:
3/4 cup hazelnuts — toasted and skinned
1/3 cup sugar
2 cups all-purpose flour
1/2 teaspoon salt
1 tablespoon baking powder
1 cup heavy cream
4 ounces unsalted butter — cold, cut into pieces
PLUM COMPOTE:
7 whole plums — ripe, sliced 1/2 inch thick
3/4 cup sugar
2 teaspoons lemon juice
3 tablespoons unsalted butter
1/2 cup fresh raspberries
TOPPING:
1 tablespoon heavy cream
2 teaspoons sugar
WHIPPED CREAM:
1 1/2 cups heavy cream
1 tablespoon sugar
1/4 cup creme fraiche
1/2 teaspoon vanilla

1. SHORTCAKES: Preheat oven to 350°F. Coarsely grind hazelnuts and sugar in a food processor and add with flour, salt and baking powder. Pulse in the butter and slowly pour in the cream until the dough comes together. Pulse ONLY until it holds together – stop before the dough wraps itself around the blade.
2. Roll or pat the dough 1-inch thick. Thicker will produce softer shortcakes; thinner will be more crisp. Cut into 2 1/2 inch circles, or roll into a circle and cut wedges. Circles will hold together better; because the shortcakes are so tender, the ones cut into wedges may fall apart at the tapered end. Place shortcakes on a baking sheet, brush the tops with the TOPPING mixture then sprinkle with sugar. Bake them until golden brown – about 35 minutes.
3. COMPOTE: Combine plums, sugar and lemon juice in a saute pan and cook over medium heat until the sugar is dissolved. Stir in the butter and cook until the sauce thickens (and the plums are cooked through). Stir in the raspberries. Allow mixture to cool to room temp.
4. WHIPPED CREAM: Whip the cream with the sugar and vanilla until it reaches soft peaks. Add creme fraiche and continue to whip until the cream is thick enough (however you prefer it).
4. Split the shortcakes in half horizontally and place the bottom of each shortcake on a plate. Cover the shortcake with some whipped cream and then spoon some of the plum compote on top. Add the shortcake top half and serve.
Per Serving: 893 Calories; 59g Fat (57.6% calories from fat); 9g Protein; 88g Carbohydrate; 4g Dietary Fiber; 151mg Cholesterol; 454mg Sodium.

Posted in Cookies, on November 13th, 2013.

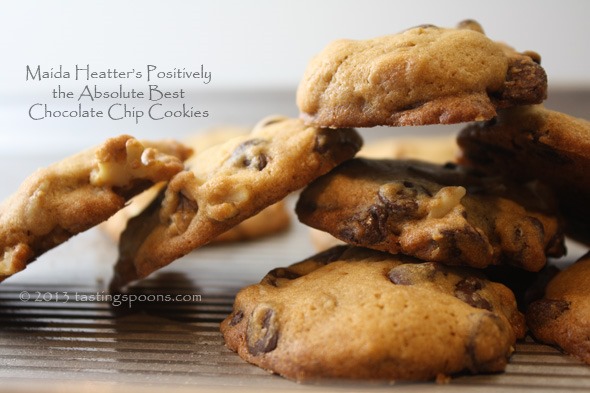
maida_heatters_choc_chip_cookies

Before I tell you about these cookies, let me just say I didn’t name them – Maida Heatter did. And she certainly is the doyenne of all things baking, desserts and chocolate!

Whenever I write up a post about a famous chef or cook (or baker in this case) – like Maida Heatter – I go online to read a bit more about the person’s background. Apparently Craig Claiborne helped her career, early on, after she’d gotten a degree in fashion design. In time she became one of the finest experts in baking, and authored many cookbooks. I own two –  chocolate desserts and one about cookies. Here’s a quote I found online:

Happiness is baking cookies. Happiness is giving them away. And serving them, and eating them, talking about them, reading and writing about them, thinking about them, and sharing them with you.” . . . Maida Heatter

Don’t you just love that? This recipe came from Heatter’s chocolate cookbook – Maida Heatter’s Book of Great Chocolate Desserts. And I decided to make these simply because of the cookie title. Who, unless she was very confident about her skills, would name a cookie “Positively- the-Absolute-Best Chocolate Chip Cookie?” I figured I should pay attention and try these. The recipe takes up 3 full pages in the book – much more than usual – because of all the history involved with chocolate chip cookies.
You know most of it, probably, about Ruth Wakefield, who with her husband bought an old staging station that was a toll house – they remodeled it as an inn and restaurant, and called it Toll House. Apparently there was a popular cookie at the time called a Butter Drop-Do. What a name. A drop-do? I’m LOLing here. How could anyone in her right mind call a cookie a drop-do? (I went online and did a search, just for curiosity – nothing.) Anyway, Wakefield decided to add chocolate bits to it and called them Toll House cookies. A legend was born.

The main ingredients are the same as what you see on the back of the Toll House chocolate chip bag, but there are a few differences: (1) the baking soda is dissolved in hot water and added to the wet batter (which is something Ruth Wakefield did, but later revised the recipe and eliminated that step); (2) 2 cups of chopped walnuts are added (instead of 1 cup); and (3) in the newer edition, apparently, Heatter changed the vanilla portion to 2 tsp rather than 1. There are also a few differences in the way it’s mixed – you whip up the butter alone (without sugar) until it’s light and fluffy, then you add the eggs and vanilla and whip that a bit. Then you add the sugars. Meanwhile you mix the baking soda and water, and add half the flour, the soda, then the balance of flour. You mix it just until incorporated, then you stir in the chips and nuts.

Heatter also uses a slightly different technique for the baking – she recommends refrigerating the dough first (which is what Wakefield used to do) – and found that the cookies held their shape better. She would create little mounds of dough and would roll them in damp hands, then once on the baking sheet she’d flatten them slightly. I didn’t refrigerate the dough – but I did use my cookie scoop to create the mound and slightly pressed the flat of my fingers on top to flatten each one slightly. That made a more evenly baked (browned) cookie. The first batch I made (and I didn’t take that extra step) had fairly extra-brown edges. Not a problem, really, other than appearance.

So, if you bothered to read all of the above – Heatter uses the basic recipe, but makes a few changes. She adds more nuts and the texture of these cookies is slightly different. Some years ago I began adding a tablespoon or 2 of extra flour to the old Toll House recipe because my cookies were always too thin. I sure didn’t have that trouble here – so perhaps it was the soda dissolving that made a difference. I don’t know. But these cookies sat right up and stayed there through the baking.

What’s GOOD: easy, good texture, reliable flavor. This is a softer cookie (I actually prefer a crisp cookie if I have a choice). Even eaten from a frozen state, they have a soft texture. Only another brand of chocolate chip could make much of a taste difference (I now buy Kirkland brand – I think they’re almost as good as Nestle’s). I don’t know that I’d go so far as to say these are the absolute best CC cookies out there – to me it almost always comes down to a texture thing – if they’re soft, I’m not much of a fan. But if that floats your boat, try this version – you might find them superior.
What’s NOT: nothing that I can think of.

printer-friendly CutePDF
MasterCook 5+ file and MasterCook 14 file

* Exported from MasterCook *

Maida Heatter’s Positively-the-Absolute-Best Chocolate Chip Cookies

Recipe By: From Maida Heatter’s Book of Great Chocolate Desserts
Serving Size: 55

8 ounces unsalted butter
1 teaspoon salt
2 teaspoons vanilla extract — (I always err on the up side – original calls for 1 tsp)
3/4 cup sugar
3/4 cup light brown sugar — firmly packed
2 large eggs
2 1/4 cup all-purpose flour — unsifted
1 teaspoon baking soda
1 teaspoon hot water
2 cups walnuts — cut or broken into medium-size pieces
2 cups semisweet chocolate chips

1. Preheat the oven to 375°F. Cut aluminum foil to fit cookie sheets.
2. Cream the butter in a mixer. Add the salt, vanilla and both sugars and beat well. Add the eggs and beat well. Lower the speed of the mixer and add about half of the flour and beat only until incorporated. In a small cup stir the baking soda with the hot water until it is dissolved. Mix it into the dough. Add the remaining flour and beat only to mix. Remove the bowl from the mixer and stir in the chocolate and the nuts.
3. There are various methods for forming the dough. You can simply drop the batter from a teaspoon or you can chill the dough overnight (Ruth Wakefield did this). Maida prefers forming the dough into balls with your wet hands. She says they will have a more even color and taste better. Whichever method you choose, place the dough 2 inches apart on the foil and slightly flatten the top with a spoon or your fingertips.
4. Bake for about 12-14 minutes until the cookies have browned all over. If using only one cookie sheet, use the upper rack. If using two sheets, reverse them from top to bottom and front to back half-way through the baking time.
5. Let the cookies cool for a few seconds before transferring them to a cooling rack. Store in an airtight container.
Per Serving: 126 Calories; 8g Fat (54.2% calories from fat); 2g Protein; 13g Carbohydrate; 1g Dietary Fiber; 17mg Cholesterol; 66mg Sodium.

Posted in Soups, on November 11th, 2013.

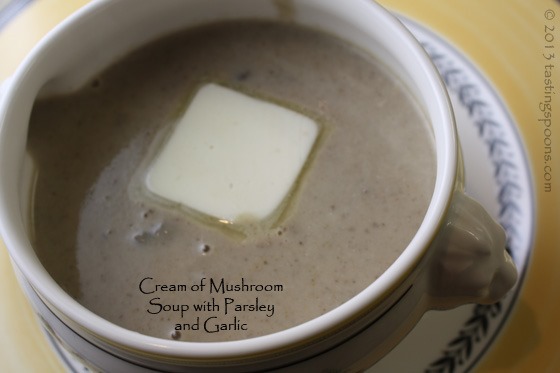
cream_mushroom_soup_parsley_garlic

When I was young – and even into my 20’s if any home cook gave much thought to mushroom soup – what came to mind was Campbell’s Cream of Mushroom. In the 1960’s the canned stuff was all over the place in casseroles, the 60’s being the era of the casserole! I never made a home made version because the canned stuff was just THERE, and it was inexpensive. I fixed the soup – as a soup – now and then too, as well as many a can of Campbell’s tomato soup, made with milk. My mother and dad were crazy about Campbell’s tomato soup. Saturday lunch was often a bowl of it with a toasted cheese sandwich.

Well, here it is 50 years later, and I almost never buy Campbell’s soups any time. (In all honesty, though, I do occasionally buy it because it’s called for in one or more casseroles that I still make – but I usually buy the healthy version; still Campbell’s, though.) Their soups are so full of sodium and probably unhealthy fats. A couple of times in years past I’ve made a home made mushroom soup, but wasn’t particularly crazy about it, so it wasn’t repeated.

Then, you’ll remember a week or so ago I mentioned making a soup from scratch – it was a salmon soup, and I couldn’t find the cookbook. I’d gone to Eat Your Books and a recipe in my own cookbook collection intrigued me. I winged it that time because I couldn’t locate the book anywhere in my house! A week or so later I found it, along with 3-4 other cookbooks on an odd shelf (I’ll blame my cleaning lady – I think she was trying to help and she put the small stack on a shelf in my upstairs office – not a shelf that holds cookbooks, which is why I couldn’t find it). Anyway, it was a cookbook I’d never cooked from. I sat down and read through it and found several recipes I wanted to try.

FYI: The New Covent Garden Soup Company is a small London firm that grew over the course of 20+ years because they produce a superior product. They use the best quality ingredients, and they found a way to market (through grocery stores in England, I think – any of my British readers, correct me if I’m wrong) their fresh soups. They’re packaged in those waxed cardboard containers (like buttermilk and some milk here), and they have a definite shelf life. They’ve published 3 cookbooks over the years, and as I mentioned before, I bought the one I have, the last time we were visiting London – it was laying on a counter in the book dept. at Harrod’s. The book – The New Covent Garden Soup Company’s Book of Soups (incidentally, my copy has a different cover – so am not certain it’s the identical book or just a newer edition, but this one is produced by the soup company) has lots of good, hearty soups, and they include the stories about each one – how they acquired it – from whom, and often with very entertaining and humorous asides. Several recipes intrigued me to try, but the story about this one was the reason I decided to once-again, try making home made cream of mushroom soup.

The headnotes to this recipe in the book say: A simple but classic mushroom soup that is loved by everyone. This is one of the first recipes ever created by Caroline Jeremy, now our Marketing Director, in the kitchen of her flat when she was working as a freelance recipe developer for the soup company back at the very beginning in 1987. The recipe was actually poached by Caroline from an old boyfriend who was obsessed with cooking. They eventually split up because he would not let her near the stove.

Since I think I’m pretty accomplished at making soups, I have no quibble with changing a recipe to suit me, and in this case I did also. Here’s what I changed: (1) I used mushroom stock rather than “vegetable stock”; (2) I added some dried mushrooms soaked in water for extra flavor; (3) I used more mushrooms than the recipe called for (24 ounces rather than 18); (4) I added just a little jot of cream and a little pat of butter at the end; and (5) I didn’t sauté the 2nd mushroom batch in butter – I just threw them into the simmering soup – and that’s why I added the butter on top. Also, I was supposed to add Italian parsley – both IN the soup and as a garnish – but I didn’t have any. That’s why I added the thinnest little sliver of butter on top. I’ve left the parsley in the recipe, though – next time I’ll hopefully have some!

We loved it. It ended up in the frig for a couple of days before I served it – while we ate up left overs. So the other night I took some left over ribeye steak, cut it into tiny slivers, toasted a slice of good country bread, toasted it, layered on the meat, some sliced tomatoes and a bunch of shredded cheddar cheese, broiled it, and served that as an open-faced sandwich along with the mushroom soup. My DH said “wow, this is good.” After dinner he asked “is there more?” I said yes. The recipe is a keeper, I think. I wouldn’t change a thing from my revised recipe – except to add the parsley.

What’s GOOD: the mushroom flavor is definitely “there.” This is not a plain old ordinary creamy  soup with some mushrooms thrown in. It has a perfect cream-consistency (it is thickened with flour, and more than you might think). I liked having something to chew (the mushrooms added in later) – there isn’t anything else to chew since the rest of the soup is pureed. Definitely a keeper.

What’s NOT: really nothing at all. It does take awhile to prep all the mushrooms – my DH bought one of those big boxes of them at Costco (that’s why I used 24 ounces, not the 18 called for). If you want to make this exactly as I have, you’ll have to seek out the mushroom base (I found it at a specialty cookware and food store called Surfas – Custom Culinary Mushroom Base – a 1 lb. jar. It is available online from Surfas. I’m glad to have this available in my frig because I think mushrooms add a great umami flavor to soups, whether it’s a mushroom-centric soup or something else.

printer-friendly CutePDF

MasterCook 5+ file and MasterCook 14 file

* Exported from MasterCook *

Cream of Mushroom Soup with Parsley & Garlic

Recipe By: Adapted from the New Covent Garden Soup Company Book of Soups, 1998
Serving Size: 6

1 tablespoon unsalted butter
1 large yellow onion — chopped
2 cloves garlic — minced
2/3 cup all-purpose flour
5 cups broth — (I used mushroom base concentrate) or use beef or vegetable
12 ounces button mushrooms — chopped
1 ounce dried mushrooms — (mixed variety) soaked in hot water for 5 minutes [my addition]
3 ounces hot water — (to soak mushrooms, discard after soaking)
3 tablespoons Italian parsley — chopped
12 ounces button mushrooms — (yes, another amount) neatly sliced or chopped
2 cups half and half
3 tablespoons heavy cream — [my addition]
2 tablespoons unsalted butter — added in at the last
Italian parsley for garnish

Notes: If you have shiitake, oyster, or brown mushrooms, do use them since they have more flavor. Otherwise, button mushrooms worked just fine. The mushroom base I used is Custom Culinary Mushroom Base Gold Label available from Surfas online.
1. In a large pot melt butter over medium heat and add onions and garlic. Saute over low heat until onions are cooked, but not browned at all.
2. Add the flour and stir to coat all the onions. Add the stock slowly at first, stirring constantly so you don’t get lumps, then add all of it, stir until it’s a smooth saucy consistency. Add the parsley and fresh mushrooms. Lastly add the dried mushrooms that have been soaked in water and drained (discard the water). Simmer over low heat for 10-15 minutes until the mushrooms are fully cooked.
3. Pour this mixture into a blender and carefully (in 2 batches if necessary) puree until it’s very smooth. Return mixture to the soup pot, add the nicely sliced mushrooms and simmer over low heat for 4-5 minutes until the mushrooms are cooked through. Add the half and half and heat through (do not boil), then stir in butter or place a thin sliver on the soup when serving. Taste for seasonings (white pepper?). Ladle into soup bowls and garnish with Italian parsley. If you used a soup base concentrate it may have sufficient salt and you may need no additional.
Per Serving: 284 Calories; 18g Fat (55.8% calories from fat); 7g Protein; 26g Carbohydrate; 3g Dietary Fiber; 55mg Cholesterol; 44mg Sodium.

Related Posts Plugin for WordPress, Blogger...