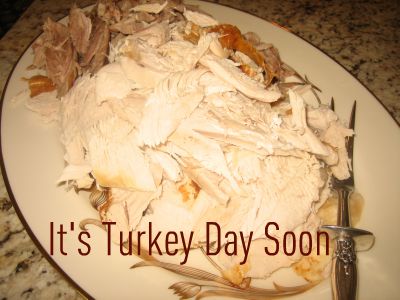
Get new posts by email:

Archives

Currently Reading

Here are the tastingspoons players. I’m in the middle (Carolyn). Daughter Sara on the right, and daughter-in-law Karen on the left. I started the blog in 2007, as a way to share recipes with my family. I’m still doing 99% of the blogging and holding out hope that these two lovely and excellent cooks will participate. They both lead very busy lives, so we’ll see.

– – – – – – – – – – – – – – – – – – – – – –

BOOK READING (from Carolyn):

Music of Bees, Eileen Garvin. Absolutely charming book about a woman in midlife, lonely, who raises bees, also makes unlikely friends. Heart-warming and very interesting about beekeeping.

A Postcard from Paris, Alex Brown. Really cute story. Dual time line, 1940s and present day about renovating an old apartment in Paris, things discovered.

Time of the Child, Niall Williams. Oh such a good book. Very small village in Ireland, 1960s. A baby is left on the doorstep. The town all whispers and helps. I listened to an interview of the author, which made me like him and his books even more.

Sipsworth, Simon Van Booy. If you like animals you’ll swoon. An old woman who really wants to die finds a tiny mouse in her house and befriends it and finds a reason to live. Utterly charming book.

The Forger’s Spell, Edward Dolnick. True story. For seven years a no-account painter named Han van Meegeren managed to pass off his paintings as those of Johannes Vermeer.

If You Lived Here, You’d be Home by Now, Christopher Ingraham. Could hardly put it down – about a journalist who takes on a challenge to move to small town in Minnesota and write about it. He expects to hate it and the people and place, but he doesn’t. Absolutely wonderful true story.

The River We Remember, William Kent Kreuger. 1950s, Minnesota. A murder and the aftermath. Could hardly put it down. Kreuger has such a vivid imagination and writing style.

How the Lights Gets In, Joyce Maynard. An older woman returns to New Hampshire to help care for her brain-injured son. Siblings and family, lots of angst and resentments.

The Filling Station, Vanessa Miller. Every American should read this book. A novelized retelling of the Tulsa massacre in 1921. Absolutely riveting.

The Story She Left Behind, Patti Callahan Henry. Love this author. Based on a true story. A famous author simply vanishes, leaving her husband and daughter behind. She had invented a mystical language no one could translate. Present day, someone thinks he’s solved the riddle, contacts the family. Really interesting read.

The Girl from Berlin, Ronald Balson. Love anything about Tuscany. An elderly woman is being evicted from a villa there, with odd deed provenance. Two young folks go there to help unravel the mystery. Loved it.

The Island of the Colorblind, Oliver Sacks, M.D. Nonfiction. The dr is intrigued by a remote Pacific island where most of the inhabitants are colorblind. He also unravels a mystery on Guam of people born with a strange neurological problem. Medical mysteries unveiled. Very interesting.

The Bookbinder, Pip Williams. Post 1914 London. Two sisters work at a bookbindery. They’re told to not read the books. One does and one doesn’t. One has visions beyond her narrow world; the other does not. Eventually the one gets into Oxford. Lovely story.

The Paris Express, Emma Donoghue. 1895 on a train to Paris, a disaster happens. You’ll delve into the lives of many people who survived and died in the crash.

A Race to the Bottom of Crazy, Richard Grant. This is about Arizona. Author, wife and child move back to Arizona where they once lived. Part memoir, research, and reporting in a quest to understand what makes Arizona such a confounding and irresistible place.

The Scarlet Thread, Francine Rivers. A woman’s life turned upside down when she discovers the handcrafted quilt and journal of her ancestor Mary Kathryn McMurray, a young woman who was uprooted from her home only to endure harsh frontier conditions on the Oregon Trail.

A Place to Hide, Ronald Balson. 1939 Amsterdam, an ambassador has the ability to save the lives of many Jewish children. Heartwarming.

Homeseeking, Karissa Chen. Two young Chinese teens are deeply in love, but in China. Then their families are separated. Jump to current day and the two meet again in Los Angeles.

North River, Pete Hammill. He always writes such a good story. A doctor works diligently healing people from all walks of life. His wife and daughter left him years before. One day his 3-yr old grandson arrives on his doorstep.

A Very Typical Family, Sierra Godfrey. A very messed-up family. Three adult children are given a home in Santa Cruz, Calif, but only if the siblings meet up and live in the house together. A very untypical scenario but makes for lots of messes.

Three Days in June, Anne Tyler. The usual Anne Tyler grit. Family angst. This wasn’t one of my favorites, but it was entertaining and very short.

Saved, Benjamin Hall. Author is a veteran war reporter. Ukraine, 2022, he nearly loses his life to a Russian strike. Riveting story – he survives, barely.

Grey Wolf, Louise Penny. Another Inspector Gamache mystery in Quebec. She is such an incredible mystery writer.

All the Colors of the Dark, Chris Whitaker. A missing person mystery, a serial killer thriller, a love story, a unique twist on each. Could hardly put it down.

Orbital, Samantha Harvey. Winner of 2024 Booker Prize. I don’t usually like those, but I heard the author interviewed and she hooked me. This is not a normal book with a beginning, a story and an end. It’s several chapters of the day in the life of various astronauts at the ISS (Int’l Space Station). All fictional. She’s been praised by several real astronauts for “getting it” about space station everyday life.

The Blue Hour, Paula Hawkins. An island off Scotland. Inaccessible except when the tide is out. Weird goings on. An artist. A present day mystery too.

Iron Lake, William Kent Krueger. A judge is murdered and a boy is missing. Riveting mystery.

Tell the Wolves I’m Home, Carol Ricks Brunt. 1980s. A 14-yr old girl loses her beloved uncle. Yet a new friendship arises, someone she never knew about.

Four Treasures of the Sky, Jenny Zhang. 1880s, a young girl is kidnapped in China and brought to the United States. She survives with many hurdles in the path.

The Boy Who Fell out of the Sky, Ken Dornstein. Memoir, 1988. The author’s brother died in the PanAm flight that went down in Lockerbie, Scotland. A decade later he tries to solve “the riddle of his older brother’s life.”

Worse Care Scenario, T.J. Newman. Oh my. Interesting analysis of what could/might happen if a jet crashed into a nuclear plant. Un-put-downable.

Song of the Lark, Willa Cather. Complicated weave of a story about a young woman in about 1900, who has a gifted voice (singing) and about her journey to success, not without its ups and downs.

Crow Talk, Eileen Garvin. Charming story which takes place at a remote lake in Washington State, about a few people who inhabit it, the friendships made, but also revolving around the rescue of a baby crow.

The Story Collector, Evie Woods. Sweet story about some dark secrets from an area in Ireland, a bit magical, faerie life, but solving a mystery too.

A Sea of Unspoken Things, Adrienne Young. A woman investigates her twin brother’s mysterious death. She goes to a small town in California to figure it out, to figure HIM out.

The King’s Messenger, Susanna Kearsley. 1600s England, King James. About one of his trusted “messengers,” and his relationship with a young woman also of “the court.” Lots of intrigue.

In the Shadow of the Greenbrier, Emily Matchar. Interesting mystery in/around the area of the famous resort in White Sulphur Springs, West Virginia.

Isola, Allegra Goodman. Hard to describe, survival story on an island in the 1600s.

Save the Date, Allison Raskin. Rom-com, witty, LOL funny. Clever.

The Sirens, Emilia Hart. Numerous time-lines, Australia. Mysteries abound, nightmares, abandoned baby, weird allergies.

Red Clay, Charles Fancher. LOVED this book. Mostly post-Civil War story about the lives of slaves in Alabama during Reconstruction.

Stars in an Italian Sky, Jill Santopolo. Dual time line, 1946 and recent time. Love stories and a mystery.

Battle Mountain, C.J. Box. Another one of Box’s riveting mysteries. Love his descriptions of the land.

Something Beautiful Happened, Yvette Corporon. A memoir of sorts in Greece, tiny island of Erikousa, where the locals hid Jews during WWII. All elusive stories told by the author’s grandmother.

The Jackal’s Mistress, Chris Bohjalian. 1860s Virginia, about a woman who saves the life of a Union soldier. Really good story.

Song of the Magpie, Louise Mayberry. Really interesting story about Australia back in the days when it was mostly a penal colony. Gritty strength of a woman trying to thrive with her farm.

The Boomerang, Robert Bailey. A thriller that will have you gripping the book. About a lot of secrets surrounding the president (fictional novel, remember) and his chief of staff and about cancer. A cure. Such a good story.

Care and Feeding, Laurie Woolever. Really interesting memoir of a woman driven to succeed in the restaurant business. She worked for Mario Batali and then Anthony Bourdain. Gritty stories.

Everything is Tuberculosis, John Green. Maybe not a book for everyone. A real deep dive into the deadly tuberculosis infection, its history. I heard the author interviewed and found the book very interesting.

The Book Lovers Library, Madeline Martin. Fascinating read about Boots’ drug stores’ lending library. And the people who worked in them.

The Arrivals, Meg Mitchell Moore. LOL funny, about a middle-aged couple whose children (and their various family members) return to the family home and the chaos that ensues.

My Life as a Silent Movie, Jesse Lee Kercheval. About grief. A big move to Paris, finding herself a new life with a new set of real blood family.

Escape, Carolyn Jessop. Another memoir about a woman really in bondage in Utah, Mormon plural marriage.


Tasting Spoons

My blog's namesake - small, old and some very dented engraved silver plated tea spoons that belonged to my mother-in-law, and I use them to taste my food as I'm cooking.

Scroll down to the bottom to view my Blogroll

Posted in Uncategorized, on October 30th, 2013.

pumpkin_flowers

I’m a sucker for anything pumpkin. Have always loved it in its many guises. Since some of you haven’t been reading my blog for all that long, I thought I’d do a review of most of the pumpkin recipes you’ll find here on my blog – not in any order of preference. I left out a couple that weren’t particularly memorable – these are all memorable to me.

blueberrypumpkinmuffin_thumb

Blueberry Pumpkin Muffins – oh gosh, are these good. I think I found this recipe in a magazine lo these many years ago.


ginger_pumpkin_bars_thumb


Ginger Pumpkin Bars – kind of like pumpkin pie – all the traditional flavorings, but it’s made in bar form with crumbled cookies as the base. Very sweet. 

harvest_pumpkin_scones_thumb

Harvest Pumpkin Scones – if you like pumpkin, you’ll love pumpkin in scones. These are made in round form (big) and you cut them into wedges.

pumpkin_bread_pudding_orange_ginger_sauce_thumb

Pumpkin Bread Pudding with Orange Ginger Sauce – the bread pudding is delicious all on its own, but the sauce. Oh gosh. The sauce is so delish and if you make enough the sauce can be a pudding dessert a few nights later.

pumpkin_cream_cheese_ball_thumb

Pumpkin Cream Cheese Ball – easy to make, and so perfect for this Fall season of the year. Also good to use up some left over canned pumpkin.

pumpkin_spice_gingerbread_trifle_thumb

Pumpkin Spice Gingerbread Trifle – oh gosh, so good. So beautiful. I served this some years ago for a Thanksgiving dinner. Best served IN a trifle bowl, but still delicious even if you don’t have one.


pumpkin_raisin_scones_thumb


Pumpkin and Golden Raisin Scones – can you tell I like scones? Yet I never make them just for us – only when we have guests. You can freeze them (if they last that long) but eat up within a week or so.

pumpkinbreadpudding2

Pumpkin Bread Pudding – all the deliciousness you would expect from a bread pudding, but made with pumpkin and all the great spicy flavors.

pumpkin-custard-420

Pumpkin Praline Custard – LOVE this stuff – it’s very low calorie, but if you’re a pumpkin fan and don’t want the calories from pie or trifle, try this. Easy – easy to make too.

pumpkinstreuselcoffeecakewhole_thumb

Pumpkin Streusel Coffeecake – you might not think pumpkin goes well with coffeecake, but oh yes, it does. Perfect for the holidays.

raisedpumpkinbreadsliced_thumb

Pumpkin Raisin Bread  – this is a yeast bread – not sweet particularly. Makes the most wonderful turkey sandwiches with a little cranberry relish with it. My mouth is watering. I’ve been making this bread for about 30 years.

thai-pumpkin-coco-soup

Thai Pumpkin and Shrimp Soup – I had this at a restaurant and promptly went home and created it myself from several recipes I found online. Fabulous soup.

traditional-pumpkin-pie

Traditional Pumpkin Pie with Caramelized Pumpkin – mostly I buy Costco’s pumpkin pie (because they’re so darned good) but in years past I made my own. This was a really good one.

And what will I be making this year? The Thai soup for sure. The yeast pumpkin bread. The easy Pumpkin Praline custard (cuz it’s so easy and low calorie) and the Pumpkin Bread Pudding with the Orange Ginger Sauce.

Posted in Vegetarian, on October 29th, 2013.

eggplant_parmesan

To say that my husband was in food ecstasy when I made this is almost an understatement. He swooned. Hmm – do men swoon? Well, for sure he purred! Eggplant Parmesan is one of his all-time favorite meals. And I haven’t made it in years because the usual method uses SO much oil to fry the eggplant. Not any more, with this recipe. It’s a keeper.

When we dine out at an Italian restaurant, my DH almost always orders Eggplant Parmesan. He adores it, and no matter how big the portion, he eats it all. A few times over the 30+ years of our marriage I’ve made it at home, and just cringed at all the oil the eggplant soaks up during the browning/frying process. And how heavy it tasted when you eat it – from all that oil. Eggplant is like a sponge!

Then I read this recipe over at Food52. It struck a chord for me. The raw eggplant first gets lightly floured and baked – then you use the slightly dried planks to layer the casserole. You also simmer down (reduce) a tomato type sauce until it’s thick. And of course there’s Parmigiano-Reggiano cheese AND some fresh Mozzie.

I will give you a heads-up here – it takes a bit of time to make this. A lot more than I’d anticipated, at least. I should have used 2 of my big baking sheets to roast the eggplant – but still, you’ll have to make at least 2 batches of eggplant to roast/dry out in the oven.

roasted_eggplant_planksAfter baking the eggplant slices, this (at left) is what I got. Maybe the two on the left toward the top you can see how “crisp” they are, sticking out sideways as they are. That’s why I call them PLANKS. There is still some moisture in them, but not much. They’re not dry like toast or chips. But a good bit of the water in the eggplant has been baked out of them, so they totally hold their shape. They need to bake at least 30 minutes (15 minutes per side), and you want them to get just a bit golden brown.

Meanwhile, I made the sauce – it’s nothing but good canned tomatoes (use San Marzano brand if you can), some shallot and a bit of herbs (I added the herbs – they weren’t in the original recipe). You need to simmer the tomatoes over a relatively low heat – once it gets thick it’s going to sputter out and all over, so I used a mesh cover. It won’t reduce if you leave a lid on the pan as the point is to evaporate the extra water in the tomatoes.

eggplant_parmesan_layeringNow you can see the casserole as I began to layer it. I’d made the sauce while the eggplant was baking. I pulled out a big wide casserole dish and put a bit of sauce in the bottom so the eggplant wouldn’t stick. I layered in some eggplant first (the Food52 contributor says press the pieces in like a jigsaw puzzle), then some little globs of sauce that I spread around some, some Parmesan, then a new layer. In one of the middle layers you’ll use the mozzarella. I used more Parmigiano-Reggiano than the recipe called for – and I like an ample amount on the top.

Outside of Italy, until the other day, I’d never had [water] buffalo-milk Mozzarella. My guess is that most restaurants don’t use it. I’d never cooked with it for sure. Why? I don’t know – just cuz I’ve thought that the cow’s milk mozzie was good enough. Well, I’m here to tell you, there is a HUGE difference between cow’s milk mozzie and buffalo-milk mozzie. buffalo_mil_mozzarellaTrue mozzie is made with the milk from water buffalo, but then, you all knew that already, right? And it has a wholly different taste. Whereas cow’s milk mozzie is bland, this stuff is positively umami in every way. I bought an 8-ounce little tub of it at Trader Joe’s, and it was a couple dollars more than the cow’s milk version. It was one big ball, which I sliced as thinly as I could. I took a taste. Oh my! It was full-flavored, broad, deep. Wonderful. It’s a bit sour – kind of like the difference between cow cheese and goat cheese. But the umami – it’s there – like you get in balsamic vinegar, anchovies, chiles, mushrooms.

Buffalo-Milk Mozzarella

Just trust me on this one – buy the real thing if you make this – you’ll be amazed at the depth of flavor.

The umami flavor aspect is kind of like the difference between cottage cheese and goat cheese. Or white bread and wheat grain. Or instant oatmeal and steel cut.

So, when you make this, do go to the extra trouble to find and buy buffalo-milk mozzarella. Truly it makes a difference. And I suggest you taste it. I may never use cow’s milk mozzie again. It’s that good.

If I make this again – oh yes, I WILL be doing that – I’ll be sure to have at least 6 layers of eggplant. eggplant_parmesan_casseroleI managed to have just 4 (because one of the eggplants we bought was spoiled – couldn’t tell from looking at the skin), so I made do with 2 pounds of eggplant (6 small servings). It was a little bit on the thin side (see picture at top). Not that it made any difference in the taste.  There at left you can see the casserole just before I stuck it in the oven. Not all that exciting looking, but wait until you taste it!

What’s GOOD: Oh my goodness, where do I start. Taste, texture, even the eggplant itself. The umami is all over the place. Worth the trouble. Make extra – you’ll be SO glad to have left overs!
What’s NOT: As I mentioned, it takes some time to make. Allow over an hour to prep the eggplant (unless you have 2 ovens – I do, but I used only one, so it took longer, of course), and at least another 30 minutes to do the rest of the prep. Baking will take about 30-40 minutes, plus some resting time (or you’ll burn your mouth big-time). So, that’s over 2 hours. Not a dish you can make after work unless you have other helping hands.

printer-friendly CutePDF
MasterCook 5+ file and MasterCook 14 file

* Exported from MasterCook *

Eggplant Parmesan with Buffalo-Milk Mozzarella

Recipe By: Adapted slightly from Food52, from Nancy Jo, a contributor
Serving Size: 6

3 pounds eggplant — (Choose the large globe variety. Make sure they are firm and smooth. Also choose male eggplants. They have fewer seeds and have a rounder, smoother bottom)
1 cup flour — (about)
salt
3 tablespoons olive oil — approximately (drizzled on eggplant)
1 1/2 cups Parmigiano-Reggiano cheese — grated
1/2 pound buffalo-milk mozzarella — sliced
TOMATO SAUCE:
56 ounces canned tomatoes — (28 ounce cans) San Marzano brand preferred – add another can if you want extra sauce left over. Use whole, peeled tomatoes. [I used Muir Glen diced]
3 cloves garlic — thinly sliced
1 teaspoon dried oregano

Notes: You will need the full 3 pounds of eggplant to make this – don’t skimp. Ideally, you want enough eggplant for about 6 layers. You’ll be surprised at how thin the eggplant becomes once it bakes. Part of the secret to this recipe is cooking down the tomato sauce – it’s almost like a paste, but not quite – that way the casserole doesn’t ooze juice through the baking process. You’ll have a lot of concentrated tomato (umami) flavor by doing it this way. If you can’t buy buffalo-milk mozzarella, use regular cow’s milk type, but it just won’t taste as good!
1. Peel the eggplant and slice long ways into 1/4 inch slices.
2. Lightly sprinkle each layer with salt and place into a colander, overlapping and salting as you go. Each slice should be salted. After you fill the colander, place a plate on top and weight it with a heavy pan or a tea kettle filled with water. Let the eggplant sweat for 30 minutes or more. If you’re concerned about using salt, just stack the slices without salt, but weight it down. You’ll still get the eggplant to drain some. Dry it off before proceeding.
3. While the eggplant sweats, make the sauce.
4. SAUCE: Coat the bottom of a sauce pan with olive oil and heat over medium high heat. Add the sliced garlic and let it cook until is sizzles (do not brown the garlic). Add the canned whole tomatoes and their juice. Stir and chop coarsely using a potato masher or two knives chopping crossways. Lower the heat and simmer until reduced by almost half. [I used Muir Glen diced tomatoes.] Add dried oregano and taste for salt and pepper [I didn’t think it needed any].
5. Remove the eggplant from the colander and thoroughly swipe and pat dry each slice with paper towels.
6. Heat the oven to 450°F. Cover the bottom of a baking sheet or two with olive oil. [I used a piece of parchment paper and drizzled the oil on one side of each eggplant slice.]
7. Dredge the eggplant slices in flour, shaking off any excess. Place on the baking sheets and drizzle each slice with olive oil. Bake until brown on one side (about 15 minutes or so) and turn over and brown the other side. Repeat until you have cooked all the eggplant. The eggplant will be moderately dry – not burned – not exactly browned – but like a plank.
8. Using a 7×11 baking dish (ceramic or earthenware, or stainless is okay too), spread a thin layer of sauce on the bottom and layer the eggplant until it completely covers the bottom (it’s like a puzzle!).
9. Sprinkle generously with the grated Parmigiano-Reggiano. Add another layer of sauce and then the eggplant. Continue to build the layers until you are about two layers from the top, then add a single layer of sliced mozzarella. Finish with a couple more layers of eggplant, sauce, and parmesan. Finish the top with parmesan – a bit more than you’ve sprinkled on any of the layers.
10. Bake in the upper third of a 400°F oven. Check after about 20 minutes. You may find that it throws off more liquid as it bakes. If so, press down on the eggplant and draw off any excess liquid. Cook for another 15 minutes or so or until the casserole is bubbling well all around the edges and a little bit in the middle. Let stand for 10 minutes before serving.
– – – – – – – – – – – – – – – – – – –
Per Serving: 328 Calories; 14g Fat (35.9% calories from fat); 15g Protein; 40g Carbohydrate; 8g Dietary Fiber; 16mg Cholesterol; 771mg Sodium.

Posted in Desserts, on October 27th, 2013.

clementine_almond_syrup_bundt_cake

Yes, I know . . . the photo says Clementine and I titled it Tangerine. You could use either, depending on the citrus season. It could even be orange for that matter. Sounds more elegant to say it’s clementine, though, doesn’t it? Whatever citrus you DO use, it’s a really nice cake from Israel.

And isn’t that honeycomb Bundt cake shape just the cutest thing? My friend Dianne made this for our Israeli dinner we had a couple of weeks ago, and a friend of hers, who is Jewish, loaned her the pan. These 2 gals work at Sur la Table, and Dianne loves to bake. Dianne thought the pan was available at the store, but it isn’t on their website. In the event you want one of these, here’s the Amazon link for the Nordicware Jubilee Bundt Pan.

The recipe, is another one from Jerusalem: A Cookbook by Ottolenghi & Tamimi. In deciding on the menu, this dessert, of the many in the cookbook, sounded the most interesting to me. Since I know Dianne loves to bake and some of the other recipes were really complex (even more than I’d want to do), I chose this one.

clementine_almond_syrup_bundt_sliceThe only thing unusual about the cake is the use of almond meal. I spent some time looking at lots of other bloggers who have posted this recipe already, and some did it the way the recipe indicated – grinding up almonds to get finely minced almonds. Dianne used almond meal (you can buy it at some markets – Trader Joe’s carries it at a more reasonable price). I think (and I can’t guarantee it, but it’s my humble opinion) that people who ground up nuts ended up with a heavier cake. I suspect this is because whatever machine type you use to grind the nuts (blender, food processor, coffee grinder) could vary – if you stopped it 3 seconds before the next person did it, you’d end up with different textures in the finished cake. I think the Trader Joe’s almond meal is a lighter – and less dense meal.

Now some stores have a completely white almond meal (no skins used) and perhaps that would be the best, but it shouldn’t make any difference, really. Almond meal is done in some process that gets it to a dry meal – not a wet and moist mixture, which would make a difference in the end texture. So, just keep all that in mind. The way to counteract all this is to use weight rather than volume. The recipe calls for 280 grams of ground almonds. So if you used whole almonds, it might be less than 2 1/2 cups. And that would make a difference for sure. And the flour – 100 grams are called for.

Anyway, the cake is a cake – eggs, butter, flour, salt and the ground almonds. The original was baked in a 9 1/2 inch springform pan. Do not use an 8-inch or a 10-inch. Use a 9 or a 9 1/2 incher. Several bloggers said that the size variation made a big difference. Dianne used the Bundt cake pan. Whatever you do, measure the internal temp of the cake – and remove it when it reaches 200°F. The recipe says when  a toothpick inserted in the center comes out clean. As we learn more about the chemistry of cakes, it’s pretty reliable to do the internal temp method.

As soon as the cake is removed from the oven, you’ll need the syrup to be ready. Pour it all over. If you want, use a wooden pick or toothpick to help get the syrup to ooze further down into the cake. That info wasn’t in the original recipe, but I’ve included it below because we noticed the syrup stayed mostly at the surface and you want it disbursed as much as possible. Allow the cake to cool (if using the Bundt, remove the cake after about 20 minutes) and frost when it’s reached room temp.

What’s GOOD: The texture – it’s a heavier cake – don’t expect lightness here. But it’s far from being a brick, either! Enjoyed the flavor. Also liked that it wasn’t too sweet. The chocolate just melts in your mouth. All good.
What’s NOT: really nothing other than making or finding almond meal.

printer-friendly CutePDF
MasterCook 5+ file and MasterCook 14 file

* Exported from MasterCook *

Clementine & Almond Syrup Cake with Chocolate Icing

Recipe By: Jerusalem: A Cookbook, by Ottolenghi & Tamimi
Serving Size: 10

3/4 cup unsalted butter — + 2 T.
1 1/2 cups sugar — scant
4 clementines — zest and juice (separate) or tangerines, or oranges
1 lemon — zest and juice (separate)
2 1/2 cups ground almonds — or almond meal [280 grams)
5 large eggs
3/4 cup all-purpose flour — + 1 T. sifted (100 grams)
1 pinch salt
Long strips of orange zest for garnish (optional)
OPTIONAL: sweetened whipped cream
SYRUP:
3/8 cup granulated sugar
Juice from the 4 clementines (you want exactly 1/2 cup total juice, this and the lemon juice)
Juice from 1 lemon
FROSTING:
6 tablespoons butter — diced
5 ounces dark chocolate — broken up
2 1/2 teaspoons honey
1 1/2 teaspoon Cognac

Note: if using ground almonds, grind them to a fine powder, but if you keep going you’ll end up with almond butter.
1. Preheat the oven to 350°F. Lightly grease a 9-1/2 inch springform pan with butter and line the sides and bottom with parchment paper. (Can also be made in a Bundt pan – may need different baking time – check internal temp.)
2. Place the butter, 1-1/2 cups of the sugar, and both zests in a stand mixer fitted with the beater attachment and beat on low speed to combine everything well. Do not work the mixture too much or incorporate too much air. Add half the ground almonds and continue mixing until combined.
3. With the machine running, gradually add the eggs, stopping to scrape the bottom and sides of the bowl a couple of times as you go. Add the remaining ground almonds, the flour, and the salt and beat until completely smooth.
4. Pour the cake batter into the pan and level it with an offset spatula.
5. Bake the cake for 50 to 55 minutes. (Cakes like this should reach 200° internal temp.) Check to see if it is ready by inserting a skewer into the center. It should come out a little bit moist.
6. When the cake is almost done, make the syrup. Combine the sugar and the citrus juices in a small saucepan and bring to a boil (the juices should total about 1/2 cup; remove some juice if needed). When the syrup boils, remove it from the heat.
7. As soon as the cake comes out of the oven, brush it with the boiling syrup, making sure all the syrup soaks in. (You can use a wooden pick so the syrup seeps further down into the cake.) Leave the cake to cool down completely in the pan before you remove it. You can then serve it as it is, garnished with orange zest strips, or store it for up to 3 days in an airtight container.
8. If you wish to ice the cake, we recommend doing it on the day you want to serve it so the icing is fresh and shiny. Put the butter, chocolate, and honey in a heatproof bowl and place over a saucepan of simmering water (make sure the bowl does not touch the water). Stir until everything is melted, then immediately remove from the heat and fold in the Cognac. Pour the icing over the cooled cake, allowing it to dribble naturally down the sides without covering the cake completely. Let the icing set and then garnish the cake with the orange zest strips. Serve with sweetened whipped cream, if desired. (My opinion? It needs the whipped cream to temper the texture.)
Per Serving: 683 Calories; 44g Fat (55.2% calories from fat); 14g Protein; 66g Carbohydrate; 4g Dietary Fiber; 162mg Cholesterol; 127mg Sodium.

Posted in Breads, on October 25th, 2013.

european_peasant_bread

Why don’t I bake bread more often? This recipe was so darned easy and the bread was so darned GOOD. You just have to plan ahead, that’s all. It takes no time at all to mix up the batter and it lives in the refrigerator until you’re ready to bake. Allow about 2 hours on the day you decide to bake it.

Remember when the no-knead sensation hit a few years ago? It was a revelation to me. And I baked No Knead Bread using the Sullivan Street Bakery method. I even bought a cute little enameled pot just to make it in a small 2-person shape and size. And then I just got out of the habit. In the interim I bought the book Artisan Bread in Five Minutes a Day: The Discovery That Revolutionizes Home Baking by Jeff Hertzberg. He made the process so easy and gives all manner of variations on the theme. His method is slightly different than the Sullivan Street method, but they’re similar. Hertzberg gives you options, though, for whole wheat, rye, and other flour types.

Hertzberg’s method involves mixing up the dough (a batter, because it’s really wet and sticky) and refrigerating it. He says it will last for 2 weeks in the refrigerator. I made a half of a recipe (half of the one shown below) and it made 2 loaves. I mixed it in my Kitchen Aid, just because it was easy. You want to cover it, but not seal it airtight as the batter needs a little bit of air. Several days later, the day I made the Spicy Moroccan Lamb Soup with Lentils and Chickpeas, I pulled out the bowl and set to work.

You sprinkle the top of the batter with a little flour. This helps. And surprisingly, once you coax the batter out of the bowl, it’s easy to work with. I took off my rings (DO do that!) and go in there with the dough and a bit of flour. I cut the batch in half (remember, I made half) and gently tried to sculpt the round boule by pulling the dough down the sides with my thumbs and pulling the dough together underneath and pinching it. Not hard to do, and it takes but a minute or so to do it. What you DON’T do is knead it – at all. Next you place the round balls on top of a pizza peel (or something that has no raised edge). You do this to let the bread rest a bit (the next step) and you want it to be on a bunch of cornmeal so that when you open the oven door awhile later the dough will hopefully slide right off. Mine didn’t, exactly. It stuck some, so that’s why I say use ample cornmeal.

european_peasant_bread_raw_doughSo you let the boules rest on the cornmeal and on the pizza peel for about 40 minutes. After 20 minutes you preheat the oven (450°) with 2 things in it: (1) a low edged baking pan (a broiler pan? a sheet pan is what I used) on the lowest shelf; and (2) a pizza stone on the middle shelf (where you’ll slide the bread onto). You’ll not notice much difference in the size of the dough during this resting period. I was concerned, but didn’t do anything different. Just before baking you slash the top of the dough with a serrated knife – this helps it to expand properly when it begins to rise during baking. Don’t cut too far towards the side – you want the rising to happen on the top, not the sides. I slit it a bit too far the first time. Now I know better.

Carefully move the dough onto the pizza stone then pour a cup of hot tap water into the pan below the bread. Because the pan and oven are HOT, it makes a huge billow of steam. Shut the oven european_peasant_bread_cutquickly so the steam stays in the oven. That’s what helps it get the wonderful chewy and crunchy crust. Since home ovens don’t have steam injection, this is a marvelous substitute! It works like a charm.

The bread is baked for about 35 minutes and it’s done. Remove the pizza stone – or at least remove the bread and place on a cooling rack. They’re hot, so be careful. Allow to cool at least 30-40 minutes before slicing.

What’s GOOD: everything about the no-knead method. Texture of the bread was really good – not exactly hole-y, or as much as I’d have liked. Maybe my yeast was old – it had been in the refrigerator for about a year. I’ll buy new the next time. But the bread was wonderful and I liked the whole wheat and rye additions – neither predominated. Definitely I’d make this again.
What’s NOT: it’s pretty straight forward, really, though it does take planning ahead. At least a day.

printer-friendly CutePDF
MasterCook 5+ file and MasterCook 14 file

* Exported from MasterCook *

European Peasant Bread (No-Knead)

Recipe: From Artisan Bread in 5 Minutes a Day
Serving Size: 32

3 cups lukewarm water
1 1/2 tablespoons yeast — 2 packets (not rapid rise)
1 tablespoon Kosher salt — (original recipe calls for 1 1/2)
1/2 cup rye flour
1/2 cup whole wheat flour
5 1/2 cups all purpose flour
cornmeal for pizza peel

1. MIXING: Mix yeast and salt with the water in a 5 quart (20 cup) container (best if it has a lid but is not airtight). Mix in remaining dry ingredients without kneading, using a wooden spoon or mixer. Cover (not airtight) and allow to rest at room temperature until dough rises and collapses (or flattens on the top) approximately 2 hours. The dough can be used immediately after the initial rise, though it is easier to handle when cold. Refrigerate in a lidded (not airtight) container and use over the next 14 days. [This recipe makes 4 loaves, small boule sized, enough for 4 people to accompany a meal.]
2. BAKING DAY: On baking day, dust the surface of the refrigerated dough with flour and cut off a 1 pound (grapefruit-size) piece. Dust with more flour and quickly shape it into a ball by stretching the surface of the dough around the bottom on all four sides, rotating the ball a quarter-turn as you go.
3. RESTING PERIOD: Allow to rest and rise for 40 minutes on a pizza peel or cutting board that is WELL covered in cornmeal. Note: it is hard to tell much difference in size during this resting period.
4. BEFORE BAKING: 20 minutes before baking, preheat the oven to 450°F, with a baking (pizza) stone placed on the middle rack. Place and empty (metal) pan or broiler tray on any other shelf that won’t interfere with the rising bread.
5. BAKING: Sprinkle the loaf liberally with flour and slash a cross, scallop or tic-tac-toe pattern into the top, using a serrated bread knife. Leave flour in place for baking, tap some of it off before slicing. Using a thin spatula or your hands, slide the loaf directly onto the hot stone. Pour 1 cup of hot tap water into the broiler tray (it will steam up immediately) and quickly close the oven door. Bake for about 35 minutes, or until the top crust is deeply browned and firm. Allow to cool before slicing.
Yield: 4 loaves
– – – – – – – – – – – – – – – – – – –
Per Serving: 92 Calories; trace Fat (3.0% calories from fat); 3g Protein; 19g Carbohydrate; 1g Dietary Fiber; 0mg Cholesterol; 178mg Sodium.

Posted in Lamb, Soups, on October 23rd, 2013.

moroccan_lamb_chickpea_lentil_soup

After roasting, grilling or braising a leg of lamb, I never seem to know what to do with the leftovers. One night we had the lamb shawarma in a sandwich (flatbread) as we’d prepared it for the dinner for 8 we did. But I still had about a pound of meat remaining. What to do. Aha! Soup.

Going to Eat Your Books, I quickly found a recipe in my copy of James Peterson’s soup book, Splendid Soups: Recipes and Master Techniques for Making the World’s Best Soups. Peterson, indeed, makes some splendid soups in this book. None of them 2-3 ingredients, however. But I like that. I used his recipe as my inspiration. A few ingredients I didn’t have, so I just punted. I changed a bit the way it was made because I believe that the vegetables you put into the beginning of a soup give out and off all the flavor and texture they have to the broth. And rather than starting with fresh meat (like shanks or stew meat) I wanted to use the leg of lamb bones (that did have a bit of meat attached, but I’d cut off most of the meat – it was added in at the end of the soup making, since it was all cooked). And I prefer soups with more than just beans or lentils – I want more veggies.

So I threw out all those soft and mushy veggies used to flavor the broth and added new ones (onions, carrots and celery). It called for fresh ginger in the beginning too. And some saffron, cinnamon and turmeric. I added curry powder also. I’d saved the broth and drippings from the roasting pan when I made the lamb shawarma, so that went into the pot as well. The shawarma seasonings were somewhat similar to this soup, so I thought they added just a bit more oomph to the flavor.

What I had were tiny yellow lentils, so they went in after the broth was created, but after I’d strained out everything from the broth itself (the bones, ginger chunks, onions, celery, etc.) so it was just flavorful broth at that point. I added beef broth (using my Penzey’s soup base. Then after the lentils were done I added a CAN of chickpeas (drained and rinsed) and new vegetables. I also added a can of chopped tomatoes including the juices. That simmered for a short time, then I added the lamb, all cut up into cubes and some parsley. Full-fat (Greek) yogurt was added. My pot was simmering a bit too vigorously if you examine the photo carefully – so it separated some. It didn’t look very pretty, so I added 1/4 cup of heavy cream to it. Hardly made much of a difference in the consistency, actually. It probably needed more, but that’s all I was willing to add. And it was done. All I did was garnish it and serve in wide bowls along with some home made no-knead wheat/rye bread I’d made, nicely slathered with unsalted butter. Yum.

What’s GOOD: first, it was a good way to use up all that leftover leg of lamb meat. I was happy to have a good use for it. AND, I’m glad I now have a great recipe I can return to in the future! I don’t much like just pieces of leftover lamb heated up as a dinner entrée. The soup freezes well too. I now have 2 ziploc bags (2 servings each) in the freezer for some night when I don’t feel like cooking!
What’s NOT: only the time you have to commit to the long, slow cooking – at least a couple of hours, but it happily simmered away while I did other things in between times.

printer-friendly CutePDF
MasterCook 5+ file and MasterCook 14 file

* Exported from MasterCook *

Spicy Moroccan Soup of Lamb, Lentils and Chickpeas

Recipe By: Inspired by a recipe in Splendid Soups by James Peterson
Serving Size: 6

About 2 pounds leg of lamb bones (left over from cooking a leg of lamb)
3 tablespoons butter — or more if needed
1 medium onion — finely chopped
1 whole celery rib — finely chopped
1 teaspoon ground turmeric
A 1-inch knob of fresh ginger, sliced in about 5-7 pieces
1 teaspoon ground cinnamon
1 pinch saffron threads
1 teaspoon curry powder
5 cups low-sodium chicken broth — or beef broth, or lamb broth
14 ounces garbanzo beans, canned — drained, rinsed
3/4 cup dried lentils
3 cups canned tomatoes — chopped
3 cups leg of lamb — (left over lamb meat cut from the leg)
VEGETABLES (added toward the end)
1 large onion — chopped
4 ribs celery — chopped
2 whole carrots — chopped
2 tablespoons chopped parsley
1/2 cup cilantro — packed, finely chopped
1 cup Greek yogurt, full-fat
1/4 cup heavy cream — (optional)
Salt to taste Pepper to taste

Note: this soup can be made in a slow cooker; it just will take longer. Add the lentils about an hour before the soup is done along with the new vegetables.
1. In a 6-quart pot, lightly brown the lamb bones in butter. Remove lamb from pot. If the butter has burned, pour it out and replace it with fresh butter. Add the onions, carrots and celery. Stir over medium heat for about 5 minutes and then add turmeric, ginger, cinnamon, curry powder and saffron. Stir for 5 minutes more.
2. Add broth. Cover the pot and simmer gently for an hour. Remove the lamb bones and strain mixture to remove all vegetables, debris and foam. Wash the pot and pour the strained mixture back into the soup pot. Add the new vegetables (onions, celery and carrots), lentils and tomatoes and simmer for about 20 minutes, or until the lentils and vegetables are just cooked through.
3. Add the canned garbanzo beans and the left over lamb meat. Bring to a boil and simmer for 5 minutes. Stir parsley, cilantro and yogurt into soup. Season soup with salt and pepper to taste. Ladle into soup bowls, sprinkle with more cilantro.
– – – – – – – – – – – – – – – – – – –
Per Serving: 600 Calories; 33g Fat (45.8% calories from fat); 41g Protein; 46g Carbohydrate; 14g Dietary Fiber; 100mg Cholesterol; 583mg Sodium.

Posted in Chicken, on October 21st, 2013.

chix_flambe_tarragon_wine_sauce

Is it an oxymoron to eat a (healthy) boneless, skinless chicken breast and then drizzle a decadent sauce (with some heavy whipping cream) all over it? It’s a dilemma I do think about now and then, and yet boneless skinless chicken breasts can be so boring and dry if they’re not cooked just right and/or served with something on the side that gives it flavor and moisture. And no, this probably isn’t a true oxymoron (it means combining 2 words that are contradictory) but in culinary terms, yes I think it is.

You’ll go through the usual steps here, buying boneless skinless chicken breasts, carefully trimming off any exterior fat, pounding them to an even thickness so they’ll cook evenly. After cooking them and adding some brandy, that gets flamed, then you make a decadent sauce. It contains some fresh tomatoes as you can see above. It has shallots in there too, some fresh tarragon, white wine, chicken broth and THEN, 1/2 cup heavy cream. Thicken it up some by simmering it until it reduces just a bit. You’ll want to have some kind of carb on the side to soak up the fantastic juicy sauce that will ooze all over the plate. I’d recommend rice.

If you have everything all ready before you start, it takes just a very few minutes to make this from beginning to end. It will make a lovely company meal. Yet it’s not so difficult you couldn’t make it easily enough for a family dinner.

What’s GOOD: it relatively easy to make. You’ll like the fresh tomato with it – gives it some nice texture and taste.You’ll definitely notice the tarragon and the hint of brandy too. A lovely presentation also.
What’s NOT: nothing really, except that all the work has to be done just before serving.

printer-friendly CutePDF
MasterCook 5+ file and MasterCook 14 file

* Exported from MasterCook *

Chicken Breasts Flambé in Tarragon Tomato Wine Sauce

Recipe By: Phillis Carey, cooking instructor and author
Serving Size: 4

CHICKEN:
4 boneless skinless chicken breast halves
Salt and pepper to taste
1/2 cup flour
1 tablespoon olive oil
2 tablespoons unsalted butter — divided use
1/3 cup brandy
SAUCE:
1 tablespoon unsalted butter
1 tablespoon shallots — minced
1 1/2 cups plum tomatoes — seeded and diced
2 tablespoons tarragon — fresh, minced (or use thyme, if preferred)
1/2 cup dry white wine — or vermouth
1/2 cup low sodium chicken broth
1/2 cup heavy cream
2 tablespoons Italian parsley — chopped
More salt and freshly ground black pepper to taste

1. Trim chicken breasts and lightly pound between two sheets of plastic wrap to an even 1/2 inch thickness. Season chicken with salt, pepper to taste. Place flour on a plate and coat chicken well, shaking off excess.
2. Melt butter with olive oil in a large skillet over medium high heat. Add chicken to skillet and cook 2 minutes per side to brown lightly. Shut off heat under skillet. Making sure there is plenty of room above and around the pan (and do not have your overhead exhaust fan running) add brandy to the skillet and ignite. Shake the pan until the flames go out. Remove chicken to a plate and set aside.
3. SAUCE: Add butter to same skillet along with shallots and toss for 30 seconds over medium-high heat. Add tomatoes and tarragon and cook for 2 minutes. Add the wine, chicken broth and cream. Bring to a boil, stirring to scrape up any browned bits from the bottom of the pan. Reduce heat to medium low and simmer sauce, uncovered, for 5-6 minutes or until slightly thickened.
4. Return chicken to the pan, along with any accumulated juices, turning to coat with sauce. Simmer chicken, uncovered, for 5-7 minutes or until chicken is cooked through, turning over once. Taste sauce for seasonings. Serve alongside some rice and drizzle sauce over chicken. Garnish with chopped parsley.
– – – – – – – – – – – – – – – – – – –
Per Serving: 491 Calories; 25g Fat (52.8% calories from fat); 32g Protein; 18g Carbohydrate; 1g Dietary Fiber; 132mg Cholesterol; 165mg Sodium.

Posted in Lamb, on October 19th, 2013.

leg_of_lamb_schwarma

That’s a huge leg of lamb (8 1/2 pounds to be exact) we made for our Israeli dinner recently. The darkened patches are the spices that were used in the marinade. It’s oven baked. Since it’s not roasted on one of those unique vertical spits, it’s not an authentic Shawarma, but it’s close enough for government work, as they say. I suppose I should call it Shawarma for the home kitchen.

As I just mentioned a few days ago, my DH loves-loves lamb, and would happily eat it about once a week if I’d prepare it. But lamb is a very saturated fat – and I don’t just mean because it’s a red meat – I mean that lamb in and of itself is a very fatty meat, comparing it with beef or pork. It’s hard to realize it unless you read the nutrition info on lamb recipes, or even when you look at those cute little lamb chops in the grocery store, or at the slices of lamb cut from the above leg. Even when I cut up the meat from this meal later (as leftovers) I could hardly SEE any fat in it. But it’s there. Hence I buy leg of lamb very rarely. And not only because of the high fat, but also because I never seem to be very happy using up the leftovers. But oh, this time, I’ve got a winner of a recipe to share – in a day or two – a soup I made with the bones and lamb meat.

The recipe for this came from Jerusalem: A Cookbook. The authors provide lots of details about the origins of the spice mixture ((Lebanese) and about ways to serve the lamb.schwarma_spices

Aren’t the colors beautiful? Seeing this plate reminds me of our trip some years ago to Turkey (in 1997). We visited an underground ancient city in Cappadocia that provided a safe haven for Christians when the Romans were trying to arrest and kill them all. The Christians lived and hid there for months, some for years. There was even a morgue that could be sealed up with a stone (because of the smell, I suppose) because no one could go above ground during that time. Considering this was about 2000 years ago, they had a very sophisticated ventilation system too, so they wouldn’t be found from any little twists of smoke emanating through the rocks hiding the entrance at ground level. In one of the subterranean rooms was a kitchen and a big stone sat right in the middle of this room – the top was flat with a myriad of little 2-4 inch round indentations.  It was their kitchen spice cabinet, so to speak. When the underground caverns were discovered centuries later, there were still remnants of the herbs and spices in the little cups. At left you can see an example of one (from tryanythingonce blog). Those cups would have held all of the spices you see on the plate above. At right is a photo from the underground caverns (from the vagablond.com). The cavern we visited went down something like 8 stories below ground. It was an ever-winding spiral, down, down, down. Only the top 3 “floors” closest to the surface were open to the public and some of the connecting tunnels were very narrow and low. My DH, who is tall, got stuck in one of them as he bent over trying to move forward, and had to be pushed slightly from behind to get through the passage. Scary for him, as he gets claustrophobic. The picture here shows very wide and tall tunnels. Not so in the one we visited!

Anyway, back to this lamb. . . all those spices were toasted and ground up in my spice grinder. If you happen to look at the plate and wonder about the cinnamon – it’s from Penzey’s. They sell it in chunks like that – you can easily use a cinnamon stick – I just happened to have the chunks in my pantry. So the spices were combined with some peanut oil, salt, fresh ginger, garlic, cilantro and lemon juice. I spread it all over the outside of the lamb, puncturing numerous slits in the meat and pushing the mixture into them as well. Into a large plastic bag it went and refrigeratedlamb_shawarma_wet_rub

overnight. Most of the marinade stuck well to the lamb, so once it went into a baking pan (on a rack, my turkey roaster actually) it was easy to go right into the oven. The lamb was roasted at a low temp for about 5 hours (part of the time covered with foil). I allowed a little extra time because the lamb leg was bigger than the recipe indicated. The meat wasn’t falling off the bone, really, as some commenters mentioned on other sites where I found the recipe online, but it was quite tender.

shawarma_condimentsTraditionally this dish is served in either pita bread or some kind of soft foldable flatbread with condiments like chopped tomato, chopped cucumber, onions and definitely some sumac to sprinkle on top. I did the same.

We had fresh sangak bread on hand and I tore it up into hand-sized portions and placed the slices of lamb on the bread. The tray was passed at the table for people to add condiments of their choice. The recipe also mentioned a spread to put on the bread or pita – a mixture of canned tomatoes, harissa, tomato paste, olive oil, salt and pepper. So I spread some of that on each piece of sangak bread as it was served. The harissa added some heat – everyone noticed that. I liked it, actually. The only thing missing in my book was some fresh Greek yogurt to dab on the hand-sandwich. The recipe didn’t indicate it, so I didn’t put it out, but I think it would have been a nice addition.

What’s GOOD: loved the spices in this – warm and cozy. The lamb was not difficult, but was a bit time consuming and I needed to be near the oven periodically over the 5 hours to keep water in the pan below the meat (so it wouldn’t dry out). It made a gorgeous presentation. Meat was well done, obviously. Not dry, though and was still relatively tender. Made a very spectacular centerpiece of a meal.
What’s NOT: it’s a fair amount of work, as I mentioned above. If you have an Alligator 11-1/4-Inch Dicer with Collector, it’s quick work to make the condiments you see above. If you don’t own all the spices already, it could be a bit expensive to buy them all.

printer-friendly CutePDF
MasterCook 5+ file and MasterCook 14 file

* Exported from MasterCook *

Lamb Shawarma

Recipe By: From Jerusalem: A Cookbook, by Ottolenghi & Tamimi
Serving Size: 8

2 teaspoons black peppercorns
5 whole cloves
1/2 teaspoon cardamom pods
1/4 teaspoon fenugreek seeds
1 teaspoon fennel seeds
1 tablespoon cumin seeds
1 whole star anise
1/2 cinnamon stick
1/2 whole nutmeg
1/4 teaspoon ground ginger
1 tablespoon sweet paprika
1 tablespoon sumac
2 1/2 teaspoons Maldon salt — or regular salt
1 ounce fresh ginger — grated
3 cloves garlic — crushed
2/3 cup cilantro — chopped stems and leaves
1/4 cup fresh lemon juice
1/2 cup peanut oil
5 1/2 pounds leg of lamb — bone-in (5.5 to 6.5)
1-2 cups of water added to the roasting pan to keep the lamb moist
CONDIMENTS:
2/3 cup chopped tomatoes
2/3 cup chopped cucumber
1/2 cup sliced onions
1 1/2 tablespoons sumac
Lemon wedges to squeeze over the sandwiches
PASTE FOR THE FLATBREAD:
2/3 cup canned tomatoes — drained, chopped
2 teaspoons harissa
4 teaspoons tomato paste
1 tablespoon olive oil
Salt and pepper to taste
Pita pockets or thin soft flatbread for serving

1. Put the first 8 ingredients in a cast-iron pan and dry-roast on medium-high heat for a minute or two, until the spices begin to pop and release their aromas. Take care not to burn them. Add the nutmeg, ginger, and paprika, toss for a few more seconds, just to heat them, then transfer to a spice grinder. Process the spices to a uniform powder. Transfer to a medium bowl and stir in all the remaining ingredients, apart from the lamb.
2. Use a small sharp knife to score the leg of lamb in a few places, making 2/3-inch-deep slits through the fat and meat to allow the marinade to seep in. Place in a large roasting tin and rub the marinade all over the lamb; use your hands to massage the meat well. Cover the tin with foil and leave aside for at least a couple of hours or, preferably, chill overnight.
3. Preheat the oven to 325°F. Put the lamb in the oven with its fatty side facing up and roast for a total of about 41/2 hours, until the meat is completely tender. After 30 minutes of roasting add about a cup of boiling water to the pan and use this liquid to baste the meat every hour or so. Add more water, as needed, making sure there is always a little in the bottom of the pan. For the last 3 hours, cover the lamb with foil to prevent the spices from burning.
4. Once done, remove the lamb from the oven and let rest for 10 minutes before carving and serving.
– – – – – – – – – – – – – – – – – – –
Per Serving: 756 Calories; 59g Fat (69.9% calories from fat); 46g Protein; 11g Carbohydrate; 4g Dietary Fiber; 170mg Cholesterol; 856mg Sodium.

Posted in Veggies/sides, on October 17th, 2013.

eggplant_stuffed_onion_lemon

The humble eggplant. Made in so many guises. This one’s a side dish, or it could be a vegetarian entrée (it does have Feta cheese in it) if you served just one of those per person. Prepare to be surprised at the flavors in this version.

When I was working on the menu for the Israeli dinner we did awhile back, I had fun going through Ottolenghi and Tamimi’s book, Jerusalem: A Cookbook. There are some gorgeous photographs of food, homes, kitchens, markets, families, street people, city views, floors,  walls, doors and everything in between. And ample explanations about some of the more unusual ingredients not known much to Western cultures. Like sumac, for instance, and date syrup.

Our dinner group is comprised of 4 couples. The hostess chooses the theme or menu, and can leave each cook to her own devices to find an appropriate recipe, or in this case, since I wanted us to cook a full meal from this cookbook, I chose the recipes myself and sent them out. Initially I thought this eggplant might be part of our first food – a mezze. As it turned out we had 2 mezze items already so the eggplant was cut into thirds and everyone had a nice-sized chunk of it with our dinner. Peggy made this dish earlier in the day. We served it at room temp.

The chefs wrote a fairly long introduction prior to this recipe, about the eggplant. I’m going to type it here because I found it so interesting (the emphases below are mine):

Few ingredients have reached the level of veneration achieved by the humble eggplant or have found their way to almost every table in Jerusalem, for breakfast, lunch, and dinner. Everybody loves to be associated with the eggplant – it’s like a little local celebrity. The number of people who claim to have invented baba ghanoush, or at least elevated it to the level of fine food, is extraordinary.

At the markets in the city, the eggplants come in a wide range of shapes and sizes, from the regular kind, elongated and uniform in size, to zebra – streaked on the outside and pure white on the inside, baby eggplants; globe eggplants; and the baladi, a local heirloom variety that is wide, flat and resembles an open fan.

Eggplants, depending on variety, lend themselves to pickling, stuffing, cooking in sauce, frying, baking, roasting, charring, burning, pureeing and even cooking in sugar and spice to make a festive jam (Moroccan) or fruit mostarda (Aleppine), a type of candied fruit conserved in a spicy syrup. They also marry beautifully with the flavors so typical of the city: tahini, pine nuts, date syrup, tomatoes, chickpeas, potatoes, lemon, garlic, lamb, fresh cheese and yogurt, olive oil, sumac, and cinnamon.

Arabs first brought eggplants to Italy and Spain, but it was the Jews who are said to have introduced them to these cuisines when moving and trading among the Arab, Moorish and Christian cultures in the 15th and 16th centuries. Sephardic Jews have always been identified with eggplants, as were Arabs, even when Europeans were quite suspicious of them and were reluctant to use them, believing that “mad apples,” as they were known, induced insanity.            . . . from Jerusalem: A Cookbook

This eggplant dish, really quite simple actually, has you roast the halved eggplant in a hot oven, scoring the open surfaces a little,  until they’re golden brown. Onions are cooked separately until they develop an almost caramel look and flavor, and they’re mixed with some mild green chiles and the spices: cumin and sumac. And lastly, some Feta is added in. This mixture is spread on the roasted eggplant and a topping is made using the fresh pulp and juice of a lemon, some of the green chile and garlic. That’s drizzled over the top and allowed to sit out until serving time. Can be served warm, or at room temperature. The only precaution mentioned in the recipe is that eggplant can dry out when roasted (probably because eggplants are not uniform in size) so they suggest you place a shallow pan of water in the oven to help keep the eggplant hydrated.

What’s GOOD: certainly this dish is different, but except for the sumac, it’s ordinary ingredients to most home cooks. I loved the combination – the soft flavorful eggplant with the browned onions and Feta. It has ample umami flavor. Also good that it can be made a few hours ahead of time – always nice if you’re cooking for guests.

What’s NOT: can’t think of anything. We liked it.

printer-friendly CutePDF

MasterCook 5+ file and MasterCook 14 file

* Exported from MasterCook *

Roasted Eggplant With Fried Onion and Chopped Lemon

Recipe By: From Jerusalem: A Cookbook, by Ottolenghi & Tamimi
Serving Size: 4

1 2/3 pounds eggplant, halved, stems intact if possible
2/3 cup olive oil
Salt and freshly ground black pepper
4 whole yellow onions — thinly sliced (about 1 1/4 pounds)
1 1/2 whole green chiles
1 1/2 teaspoons ground cumin
1 teaspoon sumac
1/3 cup feta cheese — broken into large chunks
1 medium lemon
1 clove garlic — crushed

Note: Will serve more than 4 if serving with a larger meal. Serves 4 as a main course.
1. Preheat oven to 425°F.
2. Halve the eggplants lengthwise with the stems on. Score the cut side of each eggplant with a crisscross pattern. Brush the cut sides with 6 1/2 tablespoons of the oil and sprinkle liberally with salt and pepper.
3. Roast on a baking sheet, cut side up, for about 45 minutes, until the flesh is golden brown. (A tip: Place a shallow pan of water at the bottom of the oven to prevent the eggplants from drying out.)
4. While the eggplants are roasting, add the remaining oil to a large frying pan and place over high heat. Add the onions and 1/2 teaspoon salt, and cook for 8 minutes, stirring often, so that parts of the onion get dark and crisp.
5. Seed and chop the chiles, keeping the whole chile separate from the half. Add the ground cumin, sumac, and the whole chopped chile, and cook for a further 2 minutes before adding the feta. Cook for a final minute, not stirring much, then remove from the heat. Use a small serrated knife to remove the skin and pith of the lemon. Coarsely chop the flesh, discarding the seeds, and place the flesh and any juices in a bowl with the remaining 1/2 chile and the garlic. Transfer the roasted halves to a serving dish, and spoon the lemon sauce over the flesh. Warm up the onions a little, and spoon over. Serve warm or set aside to come to room temperature.
– – – – – – – – – – – – – – – – – – –
Per Serving: 406 Calories; 39g Fat (83.4% calories from fat); 4g Protein; 14g Carbohydrate; 2g Dietary Fiber; 11mg Cholesterol; 145mg Sodium.

Posted in Desserts, easy, on October 15th, 2013.

cinnamon_apple_pudding_cake

You know pudding cake, right? That mysterious chemistry that happens when you combine certain baking ingredients and it makes its own sauce – like magic! I’ve had chocolate pudding cake and lemon pudding cake (here on my blog it’s called a Lemon Sponge Pudding), and count them as favorites of mine, but oh, this one. Wait till you try it.

Since it’s October, my thoughts turn to Fall. I love Fall. Here in Southern California, though, it comes late and doesn’t last long. My physical calendar says yes, October is Fall, but real Fall doesn’t arrive here, usually, until November. As I write this we’ve had a couple of beautiful cooler days, but we’re anticipating Santa Ana winds which usually come with very high heat (winds blow in from the hot deserts). Most people dread them – they blow like hell. They wreak all kinds of minor havoc. Light weight things get tossed around back yards, into pools, get hung up in trees. And leaves and debris blow just everywhere. Weak limbs on trees and even whole trees can fall and block roads and down power lines. Often my internet connection is shaky. Why that should be I don’t know since the cable is underground. But it happens almost every time. And no, none of this is related to a hurricane – there is no water/rain associated with the Santa Ana winds. Here where we live, on a western-facing hill, the winds come roaring up and over the peak of the hill behind us, then create a twist and roll back to our yard and particularly our side patio. Birds hunker down and try to hold on. I don’t know how they manage to eat when we have the winds. Our awnings are pulled in, all our summer umbrellas are stowed, our rolling cart that lives on our patio is tied down. We keep towels on our patio, covering cushions to protect them from sun damage – if we didn’t take those in they’d all be flying up the road, off to neighbors’ yards, or caught in bushes. It’s crazy. We get these winds during the Fall and Spring mostly. And now is the season. We’ve been told we’ll have 3 days of winds – that’s a long one. If we’re lucky they last just one day. Not this time, I hear.

But it’s a good day to stay inside and bake, if you’re so inclined! I am going to bake bread today (one of those overnight no-knead types that I mixed up a couple of days ago). If it’s successful, I’ll post it. It’s a whole wheat rye loaf.

We expected a big crowd for our bible study group last week when I made this. We had 9 people, I think it was, and am so glad I made a double batch of this – that way we did have a bit of left overs. A couple of conscientious people decided not to have any. I couldn’t resist. I made some sweetened whipped cream to put on top, but didn’t take the time to photograph one, so I created a photo-worthy version the next day with some cream poured over.

The recipe comes from fellow blogger (and friend) Marie Rayner, who lives in England. I started reading her blog many years ago, A Year from Oak Cottage. Some years ago when we visited England, we visited Marie and her husband Todd (and their adorable then-puppy Mitzie) and went out to dinner together. Marie’s recipes are posted at her 2nd blog, The English Kitchen. Marie loves pudding cakes and explains on the blog post about this recipe about several of her other pudding cakes. When I made this I didn’t have enough milk, but I did have buttermilk, so I adapted the recipe. That meant I reduced the amount of baking powder and added baking soda – I also added just a tetch more fluid – I had to do that because the initial batter was so thick it couldn’t hardly hold all the flour. Hence I added more buttermilk.

cinn_apple_pudd_cake_collageNow, let’s get to this pudding cake. I am very long-winded this morning . . . this dessert is SO easy to make. You create a cake batter first (it’s just a bit on the stiff side), then you create the sauce part (a lot of brown sugar, water and butter). The batter is spread into a pan, the sauce part is poured over, then you dot the top with fresh chopped apples and walnuts. That’s it. Into the oven to bake for nearly an hour and it’s done.

Here at left you can see the different steps. The top photo shows the fairly stiff batter in the pan. The liquid was poured in after that and when you do that the batter starts to separate some. Blobs of batter float to the top. Don’t be dismayed by the appearance (I should have taken a picture of it at that point). Just persevere. The 2nd photo shows it ready to go in the oven, then below that that finished cake. At first – when I snapped the photo of that step, you could not see or feel the pudding part.

The cake cools for awhile and when I scooped into the pan to serve it, there is all that delicious, brown sugary caramel-like sauce in the bottom. Do spoon some of that sauce over each portion.

What’s GOOD: oh my goodness, everything about it. I just loved this dessert. Do note that a 8×8 pan only contains 2 T. of butter – so it’s very VERY low fat. It’s not low sugar, however. I should have made it with some Splenda, but often the first time I make things I want to make it according to the recipe. Since this is one of those mysterious chemistry things, I was afraid to change it much.

What’s NOT: gosh, nothing. Definitely a keeper.

printer-friendly CutePDF
MasterCook 5+ file and MasterCook 14 file

* Exported from MasterCook *

Cinnamon Apple Pudding Cake

Recipe By: Adapted from The English Kitchen blog
Serving Size: 8

CAKE PART:
2 cups flour
1 cup sugar
1 teaspoon baking powder
1/2 teaspoon baking soda
1/2 teaspoon salt
1 tablespoon cinnamon
1 1/8 cups buttermilk
PUDDING PART:
1 1/2 cups water
1 3/4 cups light brown sugar — packed
2 tablespoons butter
1 large apple — peeled, cored, chopped (or 2 medium sized ones)
1/3 cup walnuts — toasted, chopped (or more)

Note: if you don’t have buttermilk, make it with milk, per the original recipe – 1 cup milk, and 4 tsp baking powder. Do not add soda in this case.
1. Preheat the oven to 350*F or 180°C. Butter the bottom of a deep 8×8 inch square baking dish. Set aside.
2. Whisk the flour, sugar, baking powder, baking soda, salt and cinnamon together in a large bowl. Make a well in the center and pour in the buttermilk,. Whisk together until smooth – it will be a bit on the stiff side and not like a typical cake batter. Pour into the prepared pan and spread out to the edges.
3. Heat the water, brown sugar and butter together until the butter melts, the sugar dissolves and the mixture boils. This can be done in the microwave – use a large glass bowl and watch carefully so it doesn’t boil over. Pour this carefully over top of the batter in the pan. The mixture will look very odd (part of the cake batter will separate and float). Just carry on – it all will turn out fine. Sprinkle the chopped apples and walnuts over top.
4. Bake for 45-50 minutes until risen and set, and a toothpick inserted in the center comes out clean. Serve warm and spooned out into bowls (including some of the pudding/sauce part), with or without cream or ice cream. It’s definitely better with cream, whipped cream or ice cream.
– – – – – – – – – – – – – – – – – – –
Per Serving: 413 Calories; 7g Fat (13.9% calories from fat); 6g Protein; 85g Carbohydrate; 2g Dietary Fiber; 9mg Cholesterol; 353mg Sodium.

Posted in Lamb, on October 13th, 2013.

rack_lamb_ancho_blackb_port_sauce

The cooking class I went to recently was all about SAUCES. We had 4 sauces altogether: two on meats (pork tenderloin and this lamb), one on a chicken breast, another on salmon, plus a chocolate caramel sauce on a dessert. And none of them was ordinary. They all started from some basic sauce, but each had something unique or different about them. That’s why I took the class!

Do you ever eyeball those lovely lamb racks at Costco? Or the frozen ones at Trader Joe’s? They’re pricey, no question, but for a special occasion, I’ll splurge and get one. My DH really loves rack of lamb and I don’t fix it anywhere near often enough for him! Maybe twice a year. I think the ones from TJ’s already have a rub or herbs on them – you won’t want to buy that as this recipe has a light flavoring to put on it as well. But this recipe is all about the sauce.

Ancho chiles are a favorite of mine because they are mild. They impart lots of flavor, but not much heat. Now occasionally you may find one with some heat, but usually not. Anchos are dried poblano chiles, same thing. At left you can see the dried anchos (thanks to photo at Freida’s Produce). At right is a photo of a fresh poblano. We can buy them fresh at almost any grocery store here in California.

The lamb is rubbed with a mixture and allowed to sit out at room temp for about 45 minutes; otherwise, make it several hours ahead and just put it in the refrigerator until 30 minutes or so before you’re ready to bake. The lamb is browned well on as many sides as you can manage (they’re a bit awkward to brown, I admit), then place them on a parchment lined baking sheet and roast for about 15-20 minutes. They also need to rest for 5-8 minutes afterwards to let all the juices re-absorb before you cut them into little ribs and serve.

Meanwhile, you make the sauce. Have everything all ready to go – once you start the lamb browning and baking, you’ll want to be on a time line. Have your meal all ready (except plating) and do serve this with some kind of carb so you can soak up any errant sauce. You’ll want to get every bit of it! Anyway, the ancho chiles need to be soaked (do this ahead), then they’re whizzed up in the food processor with some of the soaking liquid. It makes a puree that gets added to the sauce later on.

The  usual flavor mixture starts with celery, carrots and onion, then peppercorns, port wine, red wine, cranberry juice concentrate (great flavor), the ancho puree, some brown sugar and chicken broth. You boil it until it’s reduced by half, then you season it and add fresh blackberries. At the very last minute you add a couple T. of unsalted butter and season it if needed. Serve with that carb, and garnish with at least one pretty blackberry. This makes a fairly thin sauce – if you want something thicker, remove a bit of the liquid, cool and add some flour. Do this after you’ve reduced the liquid by half.

What’s GOOD: Well, the sauce first and foremost. It has wonderful flavor. If you enjoy lamb, this will be a fabulous meal.
What’s NOT: the sauce does take a bit of time to make – this would be a special occasion kind of meal.

printer-friendly CutePDF
MasterCook 5+ file and MasterCook 14 file

* Exported from MasterCook *

Rack of Lamb with Ancho Chile Blackberry Port Sauce

Recipe By: Phillis Carey cooking class, 9/2013
Serving Size: 8

LAMB:
3 pounds racks of lamb — (two 1 1/2 lb racks)
4 cloves garlic — minced
2 tablespoons cilantro — chopped
1/4 cup grapeseed oil — (or vegetable oil)
ANCHO PUREE:
3 whole ancho chiles — (dried pasilla)
3 cups boiling water
1 teaspoon minced garlic
PORT SAUCE:
4 tablespoons unsalted butter — divided use
2 celery stalks — finely diced
1 medium carrot — finely diced
2 small yellow onions — finely diced
1 tablespoon whole black peppercorns
1 cup Port wine — (use Ruby port)
1 cup red wine
1 cup cranberry juice concentrate
1/2 cup ancho chile puree (recipe included here)
1/4 cup dark brown sugar
4 cups chicken stock
1 cup blackberries — fresh (remove 6-8 of them for garnish)
Salt

1. LAMB PREP: Unwrap lamb and pat dry with paper towels. Combine the garlic, cilantro and oil, mixing to form a paste. Rub all over the lamb and let stand at room temp for 45 minutes, or cover and refrigerate for 3-4 hours.
2. ANCHO SAUCE: Combine the ancho chiles and water in a small bowl and let stand 1 hour. Drain well, reserving the soaking liquid. Remove the seeds and stems and puree in a food processor with the garlic and about 1/2 cup of the liquid, or more if needed.
3. PORT SAUCE: Melt HALF the butter in a medium non-reactive saucepan over medium heat. Cook the celery, carrot, and onions until soft. Add the peppercorns, port, red wine, cranberry juice concentrate, ancho puree, brown sugar, and stock and cook over high heat, stirring occasionally, until reduced by half. Strain into a clean pot, add the blackberries, and cook over medium heat until the blackberries are warmed through. You may crush them with the back of a fork if preferred. Season with salt, to taste. Add the remaining butter in little pieces and allow it to melt without bringing it to a boil. The sauce is on the thin side – if you prefer a thicker sauce, remove a little bit of the sauce after you’ve reduced it by half, allow it to cool and shake it up in a sealed jar with about a T. of flour. Add into the sauce and cook for 3-5 minutes before finishing with the butter.
4. LAMB ROASTING: Preheat oven to 425°F on convection/bake if it’s available. Heat a large skillet over medium-high heat. Season the lamb racks with salt and pepper and brown them on all sides, fatty side first. Transfer lamb to a parchment-lined baking sheet and roast for 15-20 minutes or until the internal temperature reaches 120°F. If you prefer it medium, cook it until it reaches 125°-130°. Remove pan from oven and tent with foil, allowing it to rest for 5-8 minutes before cutting the chops individually and serving onto hot plates with a fresh blackberry for each serving. Do serve with a carb (rice, mashed potatoes, polenta or pasta) to soak up the sauce.
Per Serving: 735 Calories; 55g Fat (72.9% calories from fat); 23g Protein; 23g Carbohydrate; 4g Dietary Fiber; 116mg Cholesterol; 1197mg Sodium.

Related Posts Plugin for WordPress, Blogger...