Get new posts by email:

Archives

Currently Reading

Here are the tastingspoons players. I’m in the middle (Carolyn). Daughter Sara on the right, and daughter-in-law Karen on the left. I started the blog in 2007, as a way to share recipes with my family. I’m still doing 99% of the blogging and holding out hope that these two lovely and excellent cooks will participate. They both lead very busy lives, so we’ll see.

– – – – – – – – – – – – – – – – – – – – – –

BOOK READING (from Carolyn):

Music of Bees, Eileen Garvin. Absolutely charming book about a woman in midlife, lonely, who raises bees, also makes unlikely friends. Heart-warming and very interesting about beekeeping.

A Postcard from Paris, Alex Brown. Really cute story. Dual time line, 1940s and present day about renovating an old apartment in Paris, things discovered.

Time of the Child, Niall Williams. Oh such a good book. Very small village in Ireland, 1960s. A baby is left on the doorstep. The town all whispers and helps. I listened to an interview of the author, which made me like him and his books even more.

Sipsworth, Simon Van Booy. If you like animals you’ll swoon. An old woman who really wants to die finds a tiny mouse in her house and befriends it and finds a reason to live. Utterly charming book.

The Forger’s Spell, Edward Dolnick. True story. For seven years a no-account painter named Han van Meegeren managed to pass off his paintings as those of Johannes Vermeer.

If You Lived Here, You’d be Home by Now, Christopher Ingraham. Could hardly put it down – about a journalist who takes on a challenge to move to small town in Minnesota and write about it. He expects to hate it and the people and place, but he doesn’t. Absolutely wonderful true story.

The River We Remember, William Kent Kreuger. 1950s, Minnesota. A murder and the aftermath. Could hardly put it down. Kreuger has such a vivid imagination and writing style.

How the Lights Gets In, Joyce Maynard. An older woman returns to New Hampshire to help care for her brain-injured son. Siblings and family, lots of angst and resentments.

The Filling Station, Vanessa Miller. Every American should read this book. A novelized retelling of the Tulsa massacre in 1921. Absolutely riveting.

The Story She Left Behind, Patti Callahan Henry. Love this author. Based on a true story. A famous author simply vanishes, leaving her husband and daughter behind. She had invented a mystical language no one could translate. Present day, someone thinks he’s solved the riddle, contacts the family. Really interesting read.

The Girl from Berlin, Ronald Balson. Love anything about Tuscany. An elderly woman is being evicted from a villa there, with odd deed provenance. Two young folks go there to help unravel the mystery. Loved it.

The Island of the Colorblind, Oliver Sacks, M.D. Nonfiction. The dr is intrigued by a remote Pacific island where most of the inhabitants are colorblind. He also unravels a mystery on Guam of people born with a strange neurological problem. Medical mysteries unveiled. Very interesting.

The Bookbinder, Pip Williams. Post 1914 London. Two sisters work at a bookbindery. They’re told to not read the books. One does and one doesn’t. One has visions beyond her narrow world; the other does not. Eventually the one gets into Oxford. Lovely story.

The Paris Express, Emma Donoghue. 1895 on a train to Paris, a disaster happens. You’ll delve into the lives of many people who survived and died in the crash.

A Race to the Bottom of Crazy, Richard Grant. This is about Arizona. Author, wife and child move back to Arizona where they once lived. Part memoir, research, and reporting in a quest to understand what makes Arizona such a confounding and irresistible place.

The Scarlet Thread, Francine Rivers. A woman’s life turned upside down when she discovers the handcrafted quilt and journal of her ancestor Mary Kathryn McMurray, a young woman who was uprooted from her home only to endure harsh frontier conditions on the Oregon Trail.

A Place to Hide, Ronald Balson. 1939 Amsterdam, an ambassador has the ability to save the lives of many Jewish children. Heartwarming.

Homeseeking, Karissa Chen. Two young Chinese teens are deeply in love, but in China. Then their families are separated. Jump to current day and the two meet again in Los Angeles.

North River, Pete Hammill. He always writes such a good story. A doctor works diligently healing people from all walks of life. His wife and daughter left him years before. One day his 3-yr old grandson arrives on his doorstep.

A Very Typical Family, Sierra Godfrey. A very messed-up family. Three adult children are given a home in Santa Cruz, Calif, but only if the siblings meet up and live in the house together. A very untypical scenario but makes for lots of messes.

Three Days in June, Anne Tyler. The usual Anne Tyler grit. Family angst. This wasn’t one of my favorites, but it was entertaining and very short.

Saved, Benjamin Hall. Author is a veteran war reporter. Ukraine, 2022, he nearly loses his life to a Russian strike. Riveting story – he survives, barely.

Grey Wolf, Louise Penny. Another Inspector Gamache mystery in Quebec. She is such an incredible mystery writer.

All the Colors of the Dark, Chris Whitaker. A missing person mystery, a serial killer thriller, a love story, a unique twist on each. Could hardly put it down.

Orbital, Samantha Harvey. Winner of 2024 Booker Prize. I don’t usually like those, but I heard the author interviewed and she hooked me. This is not a normal book with a beginning, a story and an end. It’s several chapters of the day in the life of various astronauts at the ISS (Int’l Space Station). All fictional. She’s been praised by several real astronauts for “getting it” about space station everyday life.

The Blue Hour, Paula Hawkins. An island off Scotland. Inaccessible except when the tide is out. Weird goings on. An artist. A present day mystery too.

Iron Lake, William Kent Krueger. A judge is murdered and a boy is missing. Riveting mystery.

Tell the Wolves I’m Home, Carol Ricks Brunt. 1980s. A 14-yr old girl loses her beloved uncle. Yet a new friendship arises, someone she never knew about.

Four Treasures of the Sky, Jenny Zhang. 1880s, a young girl is kidnapped in China and brought to the United States. She survives with many hurdles in the path.

The Boy Who Fell out of the Sky, Ken Dornstein. Memoir, 1988. The author’s brother died in the PanAm flight that went down in Lockerbie, Scotland. A decade later he tries to solve “the riddle of his older brother’s life.”

Worse Care Scenario, T.J. Newman. Oh my. Interesting analysis of what could/might happen if a jet crashed into a nuclear plant. Un-put-downable.

Song of the Lark, Willa Cather. Complicated weave of a story about a young woman in about 1900, who has a gifted voice (singing) and about her journey to success, not without its ups and downs.

Crow Talk, Eileen Garvin. Charming story which takes place at a remote lake in Washington State, about a few people who inhabit it, the friendships made, but also revolving around the rescue of a baby crow.

The Story Collector, Evie Woods. Sweet story about some dark secrets from an area in Ireland, a bit magical, faerie life, but solving a mystery too.

A Sea of Unspoken Things, Adrienne Young. A woman investigates her twin brother’s mysterious death. She goes to a small town in California to figure it out, to figure HIM out.

The King’s Messenger, Susanna Kearsley. 1600s England, King James. About one of his trusted “messengers,” and his relationship with a young woman also of “the court.” Lots of intrigue.

In the Shadow of the Greenbrier, Emily Matchar. Interesting mystery in/around the area of the famous resort in White Sulphur Springs, West Virginia.

Isola, Allegra Goodman. Hard to describe, survival story on an island in the 1600s.

Save the Date, Allison Raskin. Rom-com, witty, LOL funny. Clever.

The Sirens, Emilia Hart. Numerous time-lines, Australia. Mysteries abound, nightmares, abandoned baby, weird allergies.

Red Clay, Charles Fancher. LOVED this book. Mostly post-Civil War story about the lives of slaves in Alabama during Reconstruction.

Stars in an Italian Sky, Jill Santopolo. Dual time line, 1946 and recent time. Love stories and a mystery.

Battle Mountain, C.J. Box. Another one of Box’s riveting mysteries. Love his descriptions of the land.

Something Beautiful Happened, Yvette Corporon. A memoir of sorts in Greece, tiny island of Erikousa, where the locals hid Jews during WWII. All elusive stories told by the author’s grandmother.

The Jackal’s Mistress, Chris Bohjalian. 1860s Virginia, about a woman who saves the life of a Union soldier. Really good story.

Song of the Magpie, Louise Mayberry. Really interesting story about Australia back in the days when it was mostly a penal colony. Gritty strength of a woman trying to thrive with her farm.

The Boomerang, Robert Bailey. A thriller that will have you gripping the book. About a lot of secrets surrounding the president (fictional novel, remember) and his chief of staff and about cancer. A cure. Such a good story.

Care and Feeding, Laurie Woolever. Really interesting memoir of a woman driven to succeed in the restaurant business. She worked for Mario Batali and then Anthony Bourdain. Gritty stories.

Everything is Tuberculosis, John Green. Maybe not a book for everyone. A real deep dive into the deadly tuberculosis infection, its history. I heard the author interviewed and found the book very interesting.

The Book Lovers Library, Madeline Martin. Fascinating read about Boots’ drug stores’ lending library. And the people who worked in them.

The Arrivals, Meg Mitchell Moore. LOL funny, about a middle-aged couple whose children (and their various family members) return to the family home and the chaos that ensues.

My Life as a Silent Movie, Jesse Lee Kercheval. About grief. A big move to Paris, finding herself a new life with a new set of real blood family.

Escape, Carolyn Jessop. Another memoir about a woman really in bondage in Utah, Mormon plural marriage.


Tasting Spoons

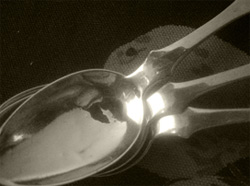
My blog's namesake - small, old and some very dented engraved silver plated tea spoons that belonged to my mother-in-law, and I use them to taste my food as I'm cooking.

Scroll down to the bottom to view my Blogroll

Posted in Beef, on July 14th, 2014.

japanese_burger_onion_curry_sauce

I was in the mood for some kind of fancy burger. I perused my to-try recipe collection, and up popped this recipe, from Food52 for a Japanese style burger (they called it a chopped steak) with an unusual sauce of caramelized onions, tamari, sake, Madras curry powder and ketchup. What a combination, I thought!

If you’ve been reading my blog for awhile, you’ll notice an absence of much of any Japanese influence. I eat sushi once in a blue moon, and only if it’s tuna or a California roll. I spent a couple of months in Japan years ago (1965 to be exact) and I wasn’t particularly enamored with the food. Tempura was good, but even then I knew it was rich and it didn’t appeal to me every day. If there were sushi restaurants in Japan when I was there, I sure never saw them. Probably the thought of eating raw fish made me cringe. Gyoza, however, I love. Fried, of course. I buy the ones at Trader Joe’s now and then and like them. I like my own better – they have more shrimp and pork in them, but oh, gosh, are they a lot of work. The TJ’s ones will do me just fine! I did make sukiyaki at home for some years after my 1965 trip, but even that recipe has disappeared and I haven’t craved it. Today sushi is king.

And, since we know from all the health experts that we shouldn’t OD on salt, I am careful about cooking with or using too much plain salt, or soy sauce, for instance. And with the scare about arsenic in rice, I also limit how much rice I eat.

All that leads up to the fact that this recipe appealed to me recently, tarmari included! As I write this, my best friend Cherrie is in Hawaii in a timeshare they’ve owned for years. She’s with her friend Jackie who also loves Hawaii as much as Cherrie does. Cherrie’s hubby, Bud, is fending for himself at home, so I invited him to come have dinner with me. Right now I have no working outdoor barbecue (an outdoor kitchen is under construction, and I’ll share the photos when it’s done) so it needed to be something cooked on the stovetop or oven. Bud is going to give me some barbecue lessons (you may remember I’ve mentioned here, that I really don’t know how to barbecue – Dave always – always did the barbecuing). I do understand the technique, but I need guidance about the brand of barbecue I have. Bud and Cherrie own the same brand (gas). I don’t know whether I mentioned it a week or so ago, but recently my cousin Gary flew down to visit me (stories on that soon) and his 2nd night here I defrosted a prime steak and I DID barbecue it. It took longer than I’d thought it would, but I think the fire wasn’t quite as hot as Dave would have used. But it worked perfectly, and the steak was done just the way I liked it – seared and charred on the outside – and at a perfect 125-128° temp on the inside, solidly pink with no gray anywhere. I was quite proud of myself. Back-patting here, okay????

A trip to the market ensued because I didn’t have the right combo of ground meats (half ground chuck, half ground sirloin), tamari, sake, and enough onions to make the caramelized ones needed for the burgers and the sauce. One thing I wondered about was what’s the difference between soy sauce and tamari. Well, not much, but tamari is generally less salty (good) and it’s also a thicker sauce than soy sauce (good in this instance since it was in a sauce). I also didn’t have sake on hand.

caramelized_onionsOne thing you need to know about this dinner, if you haven’t made caramelized onions lately, is that it takes a long, LONG time to caramelize onions. And you’d be amazed at how much you start out with (2 1/2 cups) and what you end up with (about 2/3 cup). I forget how long it takes (at least 45 minutes) – good thing I started working on dinner at about 4:00. I took the photo before the onions were fully caramelized. I figured you’d not be able to even see them against that black nonstick pan if I took the photo later, when they were nearly the color of mahogany.

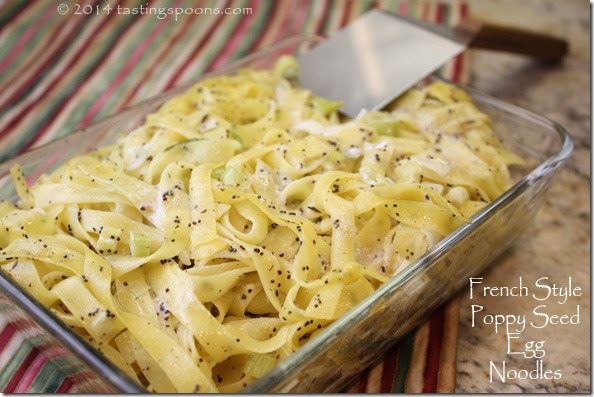
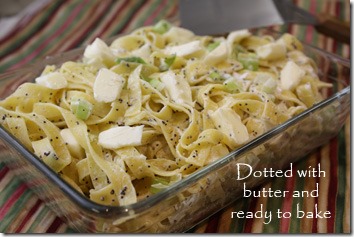
I made Marinated Tomatoes to go with it, and some nice steamed broccoli. (The recipe indicated sliced tomatoes, broccoli and rice are standard sides with this burger.)  Our markets are just now starting to get good tasting tomatoes, so I used Kumato again, because I really like their flavor. And I made an ancient recipe of mine for a French-style poppy seed egg noodle dish which I’ll post in a few days. I didn’t serve rice, as any self-respecting Japanese person would eat with this.

The gist of the recipe is as follows: you cook up a ton of onions (chopped) until they’re caramelized a dark brown but not burned. You mix up the ground meat, eggs, seasonings, some bread crumbs soaked in milk (which gave these burgers perfect texture, IMHO). Most of the caramelized onions are added to the burgers (reserving the remaining for the sauce) and you gently shape them into 6 thick burgers. I pressed an indent in the middle which worked like a charm for a more evenly flat shaped finished burger. I refrigerated the burgers on waxed paper at that point. Meanwhile I set up all the things to go into the sauce – easy. I made the noodle dish and that went into the toaster oven for 25 minutes. I’d already made the tomatoes and they were chilling in the refrigerator. I prepped the broccoli in my cute little Lekue steam case, drizzled lightly with oil. The burgers are sautéed in butter (not much) – seared to get a nice dark crust on one side, turned over to do the same on the other side. I used my instant-read thermometer to test the meat – I wanted it to be 130°, or even a bit under. The burgers were removed to a hot plate in a low oven while I mixed up the sauce. To the pan I’d fixed the burgers in I added the flour and curry powder and let that sizzle just a bit, then added the reserved onions, tamari, ketchup, sake (with sugar dissolved) and finally water. That just cooked slowly for a few minutes. I added a tetch of water (about 2 T) because it got thick quickly. That’s it. Burgers were plated and the sauce spooned over the top. Garnish with parsley if desired.

What’s GOOD: the flavor of the burger was stupendous. It was just tender, just cooked through, just perfect. The sauce was a bit salty tasted on its own (so be careful not to add too much salt to the burgers themselves, but they do need a little bit), but with a bite of the burger it was great. Altogether fabulous dish. It would be worthy of a company meal for sure. Not difficult for a weeknight meal except for the caramelizing of the onions.

What’s NOT: regarding flavor, nothing. Just know you have to stir and cook those darned onions for a long, long time.

printer-friendly CutePDF

Files: MasterCook 5+ and MasterCook 14 (click link to open recipe in MC)

* Exported from MasterCook *

Japanese Burgers with Caramelized Onion Curry Gravy

Recipe By: Food 52, 2013
Serving Size: 6

1 tablespoon olive oil
4 tablespoons unsalted butter — divided into 4 tablespoons
2 1/2 cups yellow onions — small dice
1/4 cup whole milk
1/2 cup bread crumbs — gluten-free or otherwise
1 pound ground chuck
1 pound ground sirloin
1 teaspoon kosher salt
Freshly ground black pepper to taste
2 eggs
2 tablespoons flour — or 3 tablespoons brown rice flour
1 tablespoon Madras curry powder
1 1/2 cup water — (1 1/2 to 2)
2 tablespoons ketchup
2 tablespoons sake
1 teaspoon sugar — dissolved in the sake
2 tablespoons tamari soy sauce — (2 to 3)
Parsley for garnish

1. In a large sauté pan, heat the oil with 1 tablespoon of butter. When the butter has melted, add the onions and caramelize them slowly over medium heat. This takes a LONG time. Be patient and stir often.
2. While the onions are gently sizzling away combine the milk and bread crumbs in a large mixing bowl. All your ground meat will go into this bowl, so make sure it is large. Let the bread crumbs absorb the milk.
3. Add the ground meats to the bowl along with a teaspoon of salt, black pepper to taste, and the eggs. Mix it well, making sure to really work everything together so you get a nice blend.You don’t want any streaks of the bread crumb/milk mixture, or egg white.
4. Once the onions are French onion soup brown, remove them from the pan to a plate. You can re-use the pan – remove any burned bits. Let the onions cool a minute, then add 3/4 of the onions to the steak mix and knead them in. Form six 6-ounce patties. If time permits, place the burgers on a waxed paper lined sheet and refrigerate for 1 hour (makes them easier to handle).
4. Place the pan back onto the heat and turn it to medium high. Add the remaining butter and let it melt and bubble, but not burn. If it begins to burn, turn the heat down. Once the bubbles begin to subside, add the burgers (if your sauté pan isn’t big enough, do this in batches.) Brown them on both sides, cook them to about 130°F (use an instant read thermometer with the probe into the center of each burger) or to your desired temperature and then gently remove them to a warmed plate and keep them in a low oven while you make the pan gravy.
5. If your butter is burned, clean pan and start over. There should be a bit of butter left in the pan (if not, add just a little bit). Add the remaining onions and the flour and let them cook for a minute or two while you are stirring it around. Add the curry powder, stir once or twice to break out the spice flavors, and then add the water, ketchup, sake, and tamari, stirring the entire time until the sauce comes to a boil and thickens. Make sure to use your wooden spoon to scrape up all the goodies from the bottom of the pan. Taste and adjust the seasoning (don’t add salt). If it is too thick, add water a 1/4 cup at a time, stirring between additions. Taste and adjust the seasonings if needed.
6. Place the burgers on individual plates and pour the sauce over the top. If desired, serve with steamed white rice and vegetables (traditionally broccoli, potatoes, and sliced tomatoes).
Per Serving: 581 Calories; 41g Fat (64.6% calories from fat); 33g Protein; 18g Carbohydrate; 2g Dietary Fiber; 202mg Cholesterol; 921mg Sodium.

Posted in Cookies, on July 10th, 2014.

earl_grey_tea_cookies

I don’t recall when it was that I first read about Earl Grey (tea) cookies (oops, I see I misspelled Grey in the photo). But I remember thinking hmmm, that might be very interesting. So, when I ran across a recipe for them at Food52 not so long ago, I decided to try them.

As it turned out, I came down with a cold 2 days before I was supposed to hostess a group of friends at my home for a book review. In this group the hostess obviously IS the hostess; she also selects the book, and she reviews the book too. So if the hostess gets sick, well, there’s trouble in River City! And I was sick. I’m sick as I write this – on day 3 of this cold. One of my friends agreed to have the group at her home. I took these to her – these cookies and the new cream cheese brownie batch I made also (all prepared a week ago before I had any symptoms, even, of a cold). I also took her all my notes so she could try to lead the discussion. It all worked out fine, she said, and everyone really enjoyed both cookies.

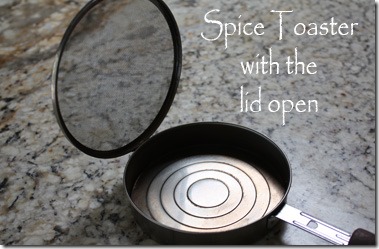
These guys were truly easy to make. But, you do need a coffee (spice) grinder, or in my case I have a coffee grinder that’s used only for grinding up herbs and spices – it’s never used for coffee. So, first off, I selected which Earl Grey tea I was going to use (Republic of Tea) and I put the amount needed into earl_grey_ground_finethe grinder, and let it whirl. Make sure you grind the tea into a complete powder – not just ground up like coffee. You want it to almost disappear in the dough – although with a dark color, of course you can’t do that. In the cookies in the photo, you can see the tea in it, obviously.

There at left you can see the tea ground to a fine powder. It probably could have been chopped even finer. Remember, Earl Grey has bergamot in it – and I don’t know whether they use bergamot flowers or also some of the twigs. If there is any question in your mind about whether it’s ground up fine enough, grind it some more. In a cookie I ate, I did find a little tiny bit of grit – so perhaps I didn’t grind it enough myself.

In the original recipe you were offered the choice of using coconut oil as the fat in it, or butter, so since I couldn’t find my coconut oil, obviously I had to use butter. There’s also 2 ounces of cream cheese in this. Otherwise, it’s a relatively standard shortbread kind of cookie. It was chilled for awhile (I ended up chilling it for a couple of days). But it does need to be warmed slightly in order to roll it out. I didn’t get it rolled out uniformly (see picture) but it didn’t seem to matter to the flavor. The dough was quite sticky, so I had to use flour with every smaller amount I rolled up.

The cookies are baked at 375°F for 10-12 minutes. Mine were done at 11 minutes, but your oven might be different. They are baked on parchment paper and you do have to allow them to rest for 10 minutes or so before removing them from the pan. I was able to fit this batch onto two half sheet pans. They freeze just fine too.

In the original recipe the originator of the recipe likes to make sandwich cookies with chocolate ganache in the middle. That sounded richer than I wanted for a morning event, so I just left them as is, and I was certain the chocolate would overpower the tea. They were delicious as is.

What’s GOOD: the subtlety of the tea – you have to concentrate to even taste it. I think it would be really nice with some Earl Grey tea – I haven’t tried it that way as yet, but I have some in the freezer, so I will on some cool morning. They were easy to make and certainly different!

What’s NOT: nothing at all.

printer-friendly CutePDF

Files: MasterCook 5+ and MasterCook 14 (click on link to open recipe in MC)

* Exported from MasterCook *

Earl Grey Tea Cookies

Recipe By: Food52
Serving Size: 45

2 1/2 tablespoons Earl Grey tea — loose leaf
2 1/2 cups all purpose flour
1/2 cup sugar
1/4 teaspoon salt
2 tablespoons cream cheese
6 ounces coconut oil — or 2 cubes unsalted butter
1 teaspoon vanilla extract
2 teaspoons apple juice
Chocolate Ganache for dipped cookies (optional)

1. Grind the tea in a coffee grinder until it’s VERY fine – like powder almost. Place the ground tea, sugar and salt into a food processor and mix together. Then, after each addition of the following, process for a few seconds to combine: flour, butter, cream cheese, vanilla extract and apple juice (last). Once the dough starts forming together, take the dough out of the processor and form into 2 balls. Refrigerate for 1 hour or more.
2. Preheat oven to 375°. Keep one ball chilled while you’re working with the other one. On a slightly floured surface, roll out one ball to a 1/8 inch thickness.
3. Line baking sheet with parchment paper. Once you’ve rolled out the dough, cut out shapes (circles, squares or other type). Very carefully lift each cookie onto the parchment paper. The cookies will not spread, so you can place them on the cookie sheet quite close together. Chill cookie sheet with the cookies on it for less than a minute. Bake for 10-12 minutes. Let the cookies cool on the sheet before you slide them off and let them finish cooling on a wire rack. Keep re-rolling and cutting the shapes until all your dough is gone, or roll dough into a log and freeze for later.
4. If desired you can use chocolate ganache and make sandwich cookies. Or, dip 1/3 of the cookie into chocolate ganache after the cookies have completely cooled off. In this case, make the cookie 1/4-1/2 inch thick and keep the ganache on the thin side so the cookies don’t break.
Per Serving: 69 Calories; 4g Fat (52.3% calories from fat); 1g Protein; 8g Carbohydrate; trace Dietary Fiber; 1mg Cholesterol; 14mg Sodium.

Posted in Cookies, Desserts, on July 6th, 2014.

cream_cheese_brownies_cooks_illus

Since I’ve made cream cheese brownies by an age-old recipe for a lot of years – and liked them – I thought why should I try something different? But as I read about the development of the recipe, I concluded that there probably was sufficient reason to try them.

With an upcoming group of ladies coming to my house for a book review, I decided to make these a week or so ahead. As I read the article in Cook’s Illustrated, the recipe developer talked about never collagebeing completely satisfied with the old recipe – it produced either a dry-ish brownie with a soggy kind of cream cheese middle, or the cream cheese part was chalky and tasteless, or the brownie part was wet and too dense. Or even worse, she found the brownies overpowered the subtle flavors of the cream cheese layer. So, off she went to figure out how to make these a better way. And indeed she did.

The pictures at left: (1) the foil slings; (2) the brownie bottom layer with the cream cheese batter poured over the top; (3) the cream cheese layer has been spread out, then a reserved amount of the chocolate batter is poured on top and then – (4) it’s swirled just 10-12 times, and (5) baked.

Here’s the more detailed directions. First off, you prepare a foil sling for the 8-inch pan (no, don’t use a 9-inch, please!). Get those foil liners folded just right and they fit perfectly. Pressed into the sides and corners, you spray it with baking spray or grease it with butter if you’d prefer.

Then you make the cream cheese filling – it’s easy – the cream cheese is briefly warmed in the microwave, then mixed with sugar, sour cream and a tablespoon of flour. That gets set aside.

Next is the chocolate – it’s melted in a small bowl in the microwave with butter. Then you mix up the main part of the brownies and add in the chocolate. This 8-inch pan uses just 4 ounces of chocolate. That’s all! A small amount of the batter is set aside, then you spread the cream cheese filling on top and dollop the remaining chocolate batter in 6-8 blobs and using a kitchen knife, you swirl it all, leaving a 1/2 inch edge unswirled. Into the oven it goes for 35-40 minutes and they’re done. The brownies need to cool for an hour in the pan, then once removed from the pan still in the foil slings for another hour. So, NO, you can’t eat these immediately! I let them cool a couple of hours, then cut them into smaller than the directed size. I thought my book group friends might like a smaller sized brownie, so I cut the pan into about 1 1/4-inch squares.

What’s GOOD: indeed, these cream cheese brownies had just the right distinction of brownie (chocolate) and cream cheese (filling). You could definitely taste the cream cheese part, but you could also taste the chocolate, but it wasn’t overpowering at all. I used Valrhona chocolate (just about the best out there). These were just delicious. Definitely worth making again.
What’s NOT: nothing in particular – it does take a few extra dishes to make the 2 different layers, though.

printer-friendly CutePDF
Files: MasterCook 5+ and MasterCook 14 (click on link to open recipe in MC)

* Exported from MasterCook *

Cream Cheese Brownies – a Better Way

Recipe By: Cook’s Illustrated 2014
Serving Size: 16

CREAM CHEESE FILLING:
4 ounces cream cheese — cut into 8 pieces
1/2 cup sour cream — full fat
2 tablespoons sugar
1 tablespoon all-purpose flour

BROWNIE BATTER:
2/3 cup all-purpose flour — 3 1/3 ounces
1/2 teaspoon baking powder
1/2 teaspoon salt
4 ounces unsweetened chocolate — chopped fine
8 tablespoons unsalted butter
1 1/4 cups sugar
2 large eggs
1 teaspoon vanilla extract

Notes: As a dessert, a 2×2 inch serving would be fine – but you can cut these into smaller pieces to serve more people – more like a cookie serving. I did that, and got about 40 pieces or so.
1. FILLING: Microwave the cream cheese until soft, about 20-30 seconds. Add sour cream, sugar and flour and whisk to combine. Set aside.
2. Adjust oven rack to middle position and heat oven to 325°F. Make foil slings for an 8-inch sized square pan by folding 2 long sheets of foil so each is 8 inches wide. Lay sheets of foil in pan, perpendicular to each other, with extra foil hanging over edges of pan. Push foil into corners and up sides of pan, smoothing foil flush to pan. Grease foil, or spray with baking spray.
3. BROWNIE BATTER: Whisk flour, baking powder and salt together in bowl and set aside. Microwave chocolate and butter in bowl at 50% power (so it doesn’t burn), stirring at least twice, until melted, about 1-2 minutes. Watch it carefully.
4. Whisk sugar, eggs and vanilla together in medium bowl. Add melted chocolate mixture (do not clean the small chocolate bowl) and whisk until incorporated. Add flour mixture and fold to combine.
5. Transfer 1/2 cup of batter to the bowl used to melt chocolate. Spread the remaining batter in prepared pan (this is the big bowl of batter). Spread cream cheese filling evenly over batter.
6. Microwave small bowl of reserved batter until warm and pourable (about 10-20 seconds). Using spoon, dollop softened batter over cream cheese filling, about 6-8 dollops. Using knife, swirl batter through cream cheese filling, making marbled pattern – maximum of 10-12 strokes – leaving a 1/2-inch border around edges.
7. Bake until toothpick inserted in center comes out with few moist crumbs attached, 35-40 minutes, rotating pan halfway through baking. Let cool in pan on wire rack for an hour.
8. Using foil overhang, lift brownies out of pan. Return brownies to wire rack and let cool completely, about an hour. Cut into 2-inch squares and serve.
Per Serving: 225 Calories; 14g Fat (54.3% calories from fat); 3g Protein; 24g Carbohydrate; 1g Dietary Fiber; 53mg Cholesterol; 117mg Sodium.

Posted in Uncategorized, on July 4th, 2014.

Today is a holiday. Not usually a day I’d choose to write sad stuff. But it’s what’s on my mind. If you don’t want to know the details about my grieving process, skip this post!

Later today I’ll be with friends, thankfully. I’ve had a few emails, and a few comments this week from some of you, my readers, asking about how I’m doing. With the grief thing. Three days ago I would have said I’m doing really, really well. Today, not so much. There’s simply no predicting. Last week at my grief class I said I was a 5 on the scale of 1-10. I was really proud of myself.  Too proud, probably. Then a bunch of little things happened.

(1) First, I’m still buried in paperwork. We had/have a living trust. And although trusts are designed to protect some of the assets couples own (they do and it will for me), they also carry with them a “burden” of paperwork after the death of the first spouse. My Quicken program just wasn’t cooperating in trying to do the online handshake with my bank. It took me 2 weeks to sort that out with my bank. Way too long. Now I’m starting with the monthly reporting the estate attorney needs, and I must backtrack them, date wise, to when my husband passed away. None of it is difficult. It’s just that every check I write, or arrange to pay online through a new account I was required to open, must be categorized and accounted for. Like many of us, I pay a lot of my bills online and many are automatic. All those have to be changed to this new account. Tedious work. Never the same from one firm or utility to the next. Time consuming. Frustrating. I’m continuing to work on it, but it’s just a whole lot of work and none of it is any fun. I am/was the financial person in our marriage – I paid 99% of the bills, did the tax preparation, etc. My darling husband would have been dumbfounded by all this work. He wouldn’t have known where to begin. He’d have just sent all the bank statements to the attorney and let them charge their $165/hour paralegal and $650/hour attorney fees that would have accompanied that work.

(2) Next, a couple of days ago I had a little phone snit with an insurance company about a very old bill. From 2012. The bill I just received was from our pharmacy – claiming that our insurance hadn’t paid what was owed on this small monitoring equipment Dave used for measuring his blood sugar. All the way back that long ago. Right after Dave died, I paid it just to get it out of my hair ($142), but then got billed again for it. So I started digging. The pharmacy said our secondary insurance company didn’t pay. So I called the insurance company, only to find out that their files don’t go back to 2012. Really? They claim they never received the initial bill from the pharmacy or notice from Medicare. However, to go back that long ago (even though this is a new bill) I’d have to go through some kind of written claim to get the ball rolling to re-bill them. The pharmacy won’t give me my money back. I explained to the kind lady (she really was kind, but couldn’t really help me much) that my husband had recently died and that I’d paid it in error. Well, sorry. No, we can’t give the money back. I hung up and burst into tears. It just was overwhelming. That one thing should not have overwhelmed me, but it did. It became my tipping point, the edge of the precipice. Or the straw that broke the camel’s back. I’m detail oriented. I keep notes and records. But Dave’s not here to ask. He probably knew all about it. And would have had a ready answer. And probably would have told me NOT to pay the bill. But I had, just because right after he died I wasn’t coping very well with anything. After I had a good cry, I just said “oh well,” it’s over and done with, and I’m simply not going to fight the insurance company over $142. I’m going to let it go. But it put my emotions into turmoil. After working frantically the night before on balancing the new checking account and laying awake half the night, I was tired and cranky. I don’t cope well when I haven’t slept well.

(3) In the process of calling this insurance company I had to go find Dave’s secondary health insurance card. I went to the “Dave box” I have and found his wallet that I had put there right after he passed away. And memories came flooding into my consciousness. I’d handled his wallet before – it had been on his bureau for the week he was in the hospital, but after he died I put it in a safe place. I hadn’t touched it during that time. The wallet itself wasn’t myundoing – it was looking at his driver’s license (and the picture on it) and handling the few plastic cards (I’d already cut up the credit cards in there), but also a couple of little notes in his handwriting. A couple of receipts from when he’d been to the grocery store for me a couple of days before his stroke. My mind and senses were filled with memories, and tears came afresh to my eyes. In the back was $32 in cash. I’ve left the bills there. I simple can’t take them out yet. Maybe next year. These are silly things – and some spouses would find my actions peculiar, perhaps. Some widows or widowers will identify mightily with my emotions and actions or lack of. For every grieving spouse, the actions and reactions will be different. And that’s okay. But my tears were very real and quick to spring from my eyes.

(4) Then, lastly, the other night my griefshare class had it’s final gathering – week 13. Each person talked, as we always do, and when it was my turn to share about how I am this week, I said “last week I was a 5, but this week I’m a 3.” Not very good. I explained in brief about the accounting stuff I’m doing and the frustration of it all. And about fighting with an insurance company. But also, I said, I need to  say that I’m blessed to have a lovely home to live in, that’s paid for, and hopefully, enough money to live on for my remaining days, however many there are. I didn’t go into any further detail. I do thank God for those blessings. We watched a 30-minute video about heaven. About what scripture tells us heaven will be like. Among many other things we were told that we won’t be married in heaven. Our loved ones will be there, but it won’t be anything like our earthly life.

Then we adjourned to another room for a potluck dinner, which was very, very nice. Lots of good food brought by all the class attendees and the two leaders. During that, we were asked to share a funny story about our loved one. I talked about Dave’s proclivity to never let a few facts get in the way of a good story. He was famous for that. Next we were asked to share something we gained from our relationship with our loved one (two women in the class had lost a father, the remaining are widows or widowers), but not something material. Like many others around the table, I said that Dave gave me the joy of laughter. I’m a more serious person – he was full of jokes and smiles! The leader read 4-5 poems about losing a loved one. Then, the part that these two paragraphs are leading up to, she lit a taper candle and lit a votive in front of her and said “I light this candle in the memory of my husband, Doug.” Then she passed the candle. When it got to me and I struggled to get the words out, “I light this candle in the memory of my darling husband, Dave,” I burst into tears. Lighting the candle was so very symbolic. It was wrenching. After everyone had lit their votive, the leader prayed, then she asked each of us to – in silence – blow out the candle. That was my undoing. I sobbed. And they handed me the Kleenex box that makes its way around the table sometimes. This was my week to need the tissues.

I’m better today, but far from okay. As I keep telling myself, this is a process, and I can’t expect every day to be better than the last. It’s up and down, cyclical, but generally in an improving direction. Three months isn’t all that long and I need to give myself plenty of opportunity to grieve and cry. As my close friends know, I cry easily and I do. They’ve been kind to let me and not tell me things like “buckle up” or “it’s time to get over this.” Grief lasts as long as it needs to and can’t be rushed or predicted. So today is a better day and I’ll hope to have more of them. Thank you, dear readers, for listening to me. I hope that what I’m experiencing will help some other widow or widower who goes through the same feelings.

Posted in Soups, on July 2nd, 2014.

mexican_fideo_soup

In Mexico, this is a kind of comfort food – maybe like mac and cheese to us, or chicken noodle soup perhaps. It could be made without meat, but usually it’s made with chicken. It’s a great way to use up some leftover chicken that’s already cooked, like a rotisserie chicken. Fideo? Know what that is? It’s a little, tiny pasta noodle – like angel hair. What’s also on top is a Mexican white crumbly cheese, a Mexican kitchen staple – sometimes you’ll see it sprinkled on top of enchiladas.

You may recall that I had a Mexican fideo soup at a Nordstrom Café recently, and vowed I’d research it and find a recipe. There are lots of recipes out there, but I finally settled on this one  from a blog called www.azucarandspice.com that I thought would have more flavor and texture than most of the others. Maribel’s recipe, from her much beloved grandmother Elvira, has lots of little tips and tricks to making it, all of which I included. I did, however, take a few liberties with the recipe – I liked the carrots that were in little cubes in the soup I’d tasted, and although most of the soup was a puree, there were a few pieces of things in the soup I had at Nordstrom’s, so I only blended about  2/3 of the total amount so there was still some texture from onion, celery, leeks and carrots.  I also added a can of enchilada sauce – not traditional – but I thought it added a bit of extra flavor. And lastly, I sprinkled some salty Mexican cheese on top. I used Queso Fresco, but Cotija would be really nice too. Cotija is saltier and a bit drier cheese. They’re both good, however.

What’s fideo? That’s pronounced fih-DAY-oh – and it’s just a tiny little pasta noodle, much like angel hair. Let’s briefly talk about fideo . . . if you have a market with some Mexican staples on the shelves, you might find a cellophane package of pre-cut, short fideo (I did, see photo below). But it’s not necessary to find a Mexican market – just use angel hair pasta and break it up into small 2-inch pieces.

Fideo soup is a fairly easy soup to make – the only different thing you must do, to make it right, toasted_fideoMaribel’s way, is to toast the raw pasta in a little bit of oil. See photo at left. This is the same technique used for making pilaf, when you toast the rice and pasta in oil. That process hardens the pasta a bit, also gives it a nice golden brown color (just be cautious you don’t burn it) and therefore it takes longer to cook. This soup is simmered for nearly an hour after you add the pasta – normally pasta would cook in about 7-8 minutes, but toasted this way, the pasta doesn’t get mushy.

I made a nice, big batch of this, and since it definitely is NOT soup season right now, I packaged it up, except for the single serving I ate that night, and it’s all in plastic ziploc bags in the freezer. It will stay there until the fall when the weather turns cooler. My guess is that every good Mexican cook (maybe even bad cooks) know how to make fideo soup. Not everyone, though, uses all the different steps in this one that make it so good. Thanks to Maribel, you now know how to make it her abuelita’s (grandmother’s) way.

What’s GOOD: it’s just a good, tasty soup – enriched with chicken and the little pieces of pasta. Easy to make – easy to freeze too. Very comfort food. You don’t have to serve anything with it.

What’s NOT: there are a few more steps to this than just pouring in a bunch of raw veggies and adding broth, but it’s worth it.

printer-friendly CutePDF

Files: MasterCook 5+ and MasterCook 14 (click link to open recipe in MC)

* Exported from MasterCook *

Mexican Chicken Fideo Soup

Recipe By: Adapted from azucarandspice.com
Serving Size: 8

1 tablespoon canola oil
2 whole garlic cloves — minced
1 cup yellow onion — chopped
1 cup celery — chopped
1 whole leek — cleaned, finely chopped
56 ounces canned tomatoes — chopped or squished in your hands
1 whole chipotle chile canned in adobo — minced finely
1 teaspoon salt — or more if needed
1/2 cup water
2 tablespoons olive oil
6 ounces fideo pasta — or angel hair, broken into small 2-inch lengths
3 cups chicken broth
3 cups water
1 1/2 cups carrots — chopped in small 1/2″ cubes
10 ounces enchilada sauce — canned (Las Palmas if you can find it)
2 cups cooked chicken — shredded or chopped in small pieces
1/2 cup cotija cheese — or queso fresca (garnish)
1/2 cup cilantro — chopped (garnish)

Notes: If you’d like this soup to have more flavor depth, rehydrate some guajillo or ancho chiles – the dried ones – in water for an hour, then open them, remove stems, seeds and membranes and chop them up – add them all to the blender batch that gets pureed in step #3 below. I didn’t do this when I made it, but next time I will.
1. In a Dutch oven heat the canola oil. Add the garlic and saute for less than a minute (do not let garlic brown or burn). Add the chopped onions, celery and leeks. Continue cooking until the onions turn translucent, about 5 minutes.
2. Pour in the tomatoes, with the juices and chipotle chiles and cook for a few more minutes.
3. Remove from heat and scoop about 2/3 of this mixture into a blender or food processor. Add about 1/2 cup of water. Don’t overload it as it may blow the lid off (from the heat). Puree that mixture and pour it back into the pan.
4. Return pan to the heat, add salt and add some of the chicken broth if needed (if it’s too thick to simmer without burning). Bring to a simmer and allow it to cook while you prepare the noodles.
5. Into a large nonstick skillet pour about 2 T of olive oil. Warm to a medium heat. Add the fideo pasta to the pot and fry until the pasta turns light brown. This will take about 5 minutes depending on the heat level. Keep stirring throughout or the noodles will burn. You want them to be golden brown, no darker.
6. Add the golden brown fideo to the soup and raise the heat to medium.
7. Add the remaining chicken broth and stir well. Let the soup come to a boil and let it bubble for about 5 minutes then turn the heat down to a simmer. Cover the pot.
8. After 15 minutes add 2 cups of water, stir well and cover and continue to simmer.
10. After another 15 minutes add the remaining cup of chicken broth, stir well and cover the pot again up so the soup continues simmering.
11. In 20 more minutes add one more cup of water, cover and let simmer for another 10 minutes. At this point add chicken. Taste the soup and add more salt if needed.
12. Serve hot and garnish with the crumbled cheese and cilantro.
Per Serving: 265 Calories; 12g Fat (39.9% calories from fat); 17g Protein; 24g Carbohydrate; 4g Dietary Fiber; 48mg Cholesterol; 960mg Sodium.

Posted in Uncategorized, on July 1st, 2014.

dole_bananas

My friend Maggie sent me a link to a video the other day. Do I eat bananas regularly? Well, every week or two for sure, but by golly, I never knew how complex they are to grow, harvest, sort, pack and ship the product from Costa Rica here to the U.S. I found the video fascinating. And no, Dole didn’t pay me to post this! The image above I found online.

YouTube video from Dole

Click on the “Skip the Ad” at the beginning to get right to the video. It’s about 5 minutes long.

Posted in Chicken, on June 28th, 2014.

crispy_mustard_chicken_breasts

Need an easy, but gussied-up way to fix chicken – easy enough for a family meal, but also special enough to serve to guests? This is a great recipe to fit all those parameters.

Watching a recent Ina Garten program, she prepared a chicken dinner (anybody who follows her shows knows Jeffrey loves chicken, right?). It was an anniversary dinner that they ate out on their patio (don’t you all want to be invited to her house for dinner?). Ina reminisced about when they were first married and lived in France for awhile, and she learned to make chicken somewhat like this recipe. I took liberties with it. In essence it’s her recipe, but she used skin on, bone-in chicken pieces. I used boneless, skinless chicken breasts. It worked. She baked hers, I pan-sautéed mine for a flash of time and dinner was ready. The Brussels sprouts took more time to cook than the chicken, but only by a few minutes.

What was different about this – was – you whiz up the panko crumbs in the food processor. Now, I have to ask the question . . . when Ina and Jeffrey were first married (that was in 1968 – I looked it up) I don’t really think they had panko crumbs in France. You think? But okay, she’s updated the recipe, and I’m glad she did. (I love Ina, don’t get me wrong, and I didn’t save the episode, so maybe she said she had updated the recipe . . .I don’t remember.) So, anyway, into the food processor go the panko crumbs, garlic, salt, pepper, thyme (I didn’t have fresh), lemon zest and once that’s all finely minced, then you add a little tiny jot of olive oil and butter. This is IN the food processor. With the panko crumbs. What this does is slightly moisten the panko crumbs with fat and allows the crumbs to brown to a nice golden brown (see picture below) all over – not just where you might have poured some oil into the pan. Actually, she baked them. I did add a bit of oil to the pan also, but I used a nonstick pan. chix_breasts_sauteeing

And, because the panko crumbs are much finer (from time in the food processor) they give the chicken a less dense coating. But before the chicken goes in the pan you prepare a mixture of Dijon and dry white wine. It’s a kind of a slurry (not exactly thick, but certainly not like water, either) and the chicken is dipped into that, then put into the panko crumb mixture.

As I mentioned, Ina baked her chicken (but they were bone-in pieces, remember). I could have done that too, but it just seemed simpler to pan fry the breasts. I also pounded the chicken breasts before I started – to an even 1/2 inch thickness, so they’d cook evenly. Another of those wonderful Phillis Carey tips that I use for any chicken breast recipe I make.

Do cut into the breasts to make sure they’re cooked through. If you question it, use an instant read thermometer horizontally into the thickest part of the breast meat and cook the breasts to 155°. Serve immediately. Do try to serve it with a bright green veggie of some kind – the chicken is a bit pale on the plate. I did Brussels sprouts, but broccoli, green beans, asparagus would all work. Or a green salad.

What’s GOOD: how easy it was to make – I’d definitely make this again. It was super-tasty, and because I watched the cooking time, they were cooked perfectly – still juicy and not a bit of dryness to them.
What’s NOT: some folks might not want to fuss with making the mustard slurry or the panko mixture (you do dirty up a few dishes in the making of this) but the result is worth the trouble, I think.

printer-friendly CutePDF
Files: MasterCook 5+ and MasterCook 14 (click on link to open recipe in MC)

* Exported from MasterCook *

Crispy Mustard Chicken Breasts

Recipe By: Adapted significantly from Ina Garten, 2014
Serving Size: 4

4 cloves garlic
1 tablespoon fresh thyme leaves — minced (I used 1 tsp dried, crushed in my palms)
Kosher salt and freshly ground black pepper
1 3/4 cups panko bread crumbs
1 tablespoon lemon zest — from about 2 lemons
2 tablespoons olive oil
2 tablespoons unsalted butter — melted
4 pieces boneless skinless chicken breast halves
1 tablespoon canola oil
MUSTARD SLURRY:
1/3 cup Dijon mustard — such as Grey Poupon
1/3 cup dry white wine

1. Drop the garlic cloves into the food processor while it’s running, then add the thyme, 2 teaspoons salt, and 1 teaspoon pepper. Add the panko, lemon zest, olive oil, and butter and pulse a few times to moisten the bread flakes. Pour the mixture onto a large plate. In a shallow bowl, whisk together the mustard and wine. Pat the chicken dry with paper towels. Sprinkle generously all over with salt and pepper.
2. Remove the chicken tenders (if they’re there and use for another purpose). Placing the chicken breasts, shiny side up, between 2 pieces of plastic wrap, gently pound the breasts to an even 1/2 inch thickness. Do not pound the thin ends.
3. Dip each chicken breast in the mustard mixture to coat well. Heat a large nonstick skillet and once it’s medium-hot, add the canola oil. Dip the breasts into the panko mixture, patting uneven areas to cover completely. Gently place the chicken breasts into the pan and sear until the crumbs are golden brown, about 2 minutes. Reduce heat if the crumbs brown too quickly. Turn over and brown the other side, about another 2 minutes. Reduce heat and continue cooking, turning the breasts back over one more time until they’re just cooked through. Use a thin knife to cut into the center to check. Or use an instant-read thermometer, insert it on the side into the thickest part of the breast – it should be cooked to 155-160°F. Serve hot.
Per Serving (you don’t use all the coating or the slurry, so the nutrition here is probably high): 671 Calories; 20g Fat (28.8% calories from fat); 39g Protein; 72g Carbohydrate; 4g Dietary Fiber; 84mg Cholesterol; 659mg Sodium.

Posted in Salads, Veggies/sides, on June 24th, 2014.

brussels_sprouts_salad_cran

If you’re a convert to the joys of Brussels sprouts (I’ve always been a fan) that are pan sautéed, then you’ll like this recipe a lot. It uses halved Brussels, a whole-grain mustard vinaigrette and some chopped up dried cranberries and almonds for crunch and flavor. Really delish.

With a package of Brussels sprouts in the refrigerator and a dinner to prepare, I hunted through my to-try recipes and came across this one. I adapted it some (didn’t have dried blueberries; opted to pan sauté them rather than cook them in water first; didn’t have Manchego so I subbed Parm). The mustard vinaigrette was first on the list to do – an easy mixture. It was a bit too oily for me, so I added in a little more lemon juice than called for. I also used more garlic. The original recipe comes from a restaurant in Pasadena called La Grande Orange, located adjacent to the main-stop train station there. It’s a great restaurant (have eaten there and enjoyed their signature sangria and salads). Anyway, this is a veggie dish, but can also be dubbed a salad too. I served it hot, but you know Brussels sprouts – they cool quickly, so they were at room temp within a couple of minutes.

In the original recipe the Brussels were simmered in water. I like pan roasted ones, so I added a tablespoon or oil to a huge nonstick frying pan and got them nice and brown-blackened. Meanwhile I made the vinaigrette, chopped up the dried cranberries (very few) and the almonds (raw, only a little bit) and shredded Parm. I did add a bit of water to the Brussels to get them just cooked through, then dumped them out into a serving bowl and drizzled on the tiny bit of dressing and added the garnishes. Done. Easy. Definitely a make again veggie!

What’s GOOD: Well, I love Brussels sprouts almost any way they come. My DH’s good friend Joe was here for dinner and he said he wasn’t much of a fan of Brussels sprouts anytime, but he really, really liked these. He had 3 servings if that tells you anything. I gave myself a very small serving at first, but I dug in for a few more myself. And I’ll be having the last few for tonight’s dinner.

What’s NOT: nothing, unless you don’t like Brussels sprouts!

printer-friendly CutePDF

Files: MasterCook 5+ and MasterCook 14 (click on link to open full recipe in MC)

* Exported from MasterCook *

Hot Brussels Sprout Salad with Mustard Vinaigrette

Recipe By: Adapted from La Grande Orange Café in the historic Santa Fe train depot in Pasadena (via L.A. Times, 4/14)
Serving Size: 4

MUSTARD VINAIGRETTE (makes about 1 cup, and you’ll use only a tiny bit):
2 tablespoons honey
1 1/2 tablespoons champagne wine vinegar — or more if needed
1 tablespoon fresh lemon juice — with pulp (may need more)
1 1/2 teaspoons lemon zest
1 1/2 teaspoons mustard, whole grain — or more if needed
2 teaspoons minced garlic
3/4 cup olive oil — not extra virgin
Sea salt and black pepper to taste
SALAD:
1 pound Brussels sprouts
1 tablespoon canola oil
1 tablespoon dried cranberries — chopped
2 tablespoons almonds — chopped
3 tablespoons mustard vinaigrette (recipe above)
3 tablespoons Parmigiano-Reggiano cheese — grated

Notes: the recipe above includes all the dressing, so the nutrition count is way off. You’ll use just about 3 T. of the dressing or maybe a little more. If you don’t want extra dressing, make half a recipe or less.
1. In a large bowl, whisk together the honey, vinegar, lemon juice and zest, mustard and garlic. Continue whisking while slowly drizzling in the olive oil until the oil is thoroughly incorporated. Season to taste with salt and pepper, and brighten the dressing as desired with a little extra vinegar or lemon juice. Chill well before using. This makes a generous cup of dressing, more than is needed for this recipe, and will keep for 1 week, covered and refrigerated.
2. Peel the outer discolored leaves from the Brussels sprouts and discard. Trim off the base (core) still leaving the shape intact. Cut each one in half lengthwise. You should have 3 cups.
3. Heat a very large nonstick skillet over medium-high heat. Add oil and gently lay the Brussels sprouts cut side down into the pan. After about a minute reduce the heat to medium or even medium low (you don’t want them to burn, just get toasty brown). After 2-3 minutes use a big spoon and stir them – some will turn over and others will not (that’s okay). Add about a T. of tap water, cover with a lid and allow to steam for 2-3 minutes, stirring at least twice in that time. Test one – and continue cooking until your test one isn’t crunchy. Don’t over cook them, however!
4. Pour the hot veggies into a serving bowl, add cranberries, almonds and just enough vinaigrette to lightly moisten, about 3 tablespoons. Garnish with Parmesan shreds and serve immediately. However, they cool quickly, so you could easily cook the veggies ahead and toss and garnish it later, so you’d serve it at room temp. It might require more dressing.
Per Serving (nutrition is way off – this includes the full cup of dressing!): 513 Calories; 48g Fat (80.3% calories from fat); 6g Protein; 20g Carbohydrate; 5g Dietary Fiber; 3mg Cholesterol; 120mg Sodium.

Posted in easy, Pork, on June 24th, 2014.

southern_fried_pork_chops

If you’ve been a reader of my blog for any length of time you know I don’t usually FRY things. Sauté yes, but really fry in oil, no. My bottle of canola oil gets used mostly for salad dressings. But I just decided to do something different. In the background on the plate above there are the dry-pan roasted green beans that I’ve made 10 times in the last 6 months they’re so good. And easy.

I searched around the ‘net for “pork chop recipes”, and southern fried pork chops were the top 8 or so. Really?  So I clicked over to several (one on epicurious, and two others from blogs, but were almost identical. I kind of made my own way once I got the gist of the main recipe. A flour-based breading mixture is made (flour, cornstarch, herbs, salt, pepper) and set aside. Another is made with an egg and some milk or buttermilk. The pork chops are dipped first into the flour, then egg, then back in the flour, and ever-so gently placed into the 1/4 inch of medium-hot oil.

One thing I learned (and don’t know if it’s true) is that when you fry foods like this, it’s best to raise the heat of the oil in a gentle manner – i.e., use low heat and then raise it over the course of 10 minutes or so. If you turn the flame up to high right from the get-go, you’ll end up with oil that’s too hot. Some of that makes sense, but some of it sounds crazy. Heated oil is heated oil. Isn’t it? Any of you chemistry types out there know?

Anyway, the pork chops were dutifully dipped in the proper pans and lowered into the oil, and they were done in no time flat. One of the bloggers mentioned using a heat test before you start cooking – dropping a pinch of the flour mixture into the oil – if it bubbles, then it’s hot enough. And during the cooking you do only want the oil to bubble around the meat and not burn the coating.

The cornstarch in the flour mixture gives the breading/coating a lighter texture. Not exactly like a tempura batter, but not far from it. It was nice. I liked it. I used seasonings in my flour mixture (other than the usual salt, pepper, garlic powder, paprika that was in most of these recipes). I reached for Penzey’s Fox Point Seasoning and added a couple of teaspoons. I don’t really know that I could taste it once it was fried, however. So you could use whatever suits you – like an Italian blend perhaps – or don’t add any at all. In the South I think they’d go for the plain stuff (salt, pepper and garlic powder).

The pork chops bubble around the edges as they’re frying. Be sure the chops aren’t touching – I used a pan that probably could have held more – because several recipes stressed that the chops need lots of space around them. They browned in no time flat, so I turned the heat down just a little bit and turned them over and cooked the 1/2 inch thick chops about 4 minutes per side – my guess. I didn’t time it. It was all by color.

What’s GOOD: how easy it was – only time consuming thing was mixing up the coating mixture. I got everything else finished before I even started the pork chops so I wouldn’t be distracted. They were really good. Not in the “outstanding” category, but it was an easy, quick dinner that was satisfying.
What’s NOT: well, some folks don’t like frying – like deep frying – although these weren’t deep in oil – I used only about 1/4 inch (half way up the chops).

printer-friendly CutePDF
Files: MasterCook 5+ and MasterCook 14 (click link to open in MC)

* Exported from MasterCook *

Southern Fried Pork Chops

Recipe By: Adapted from a website called Taste of Southern
Serving Size: 4

32 ounces pork chops — center cut, bone in (four 1/2 inch chops)
1 cup all purpose flour
2 tablespoons cornstarch
1 large egg
2 tablespoons milk — or buttermilk (or water)
1 tablespoon mixed herbs — I used Penzey’s Fox Point Seasoning
1 teaspoon garlic powder
1/2 teaspoon salt
1/4 teaspoon black pepper
1 teaspoon paprika
Cooking oil for frying the chops (canola or vegetable)

1. BREADING: In a small mixing bowl, add the flour, cornstarch, herbs, garlic powder, salt, black pepper and paprika. Stir all ingredients well. Set aside.
2. EGG: Break one egg into a small low sided dish. Add milk and use a fork to mix it well. Mix well enough that there are no little globs of egg white.
3. MEAT: One at a time, dip a pork chop in the flour and coat both sides. Dip the chop into the egg mixture, coat both sides well. Lift and let any excess drip off. Place the chop back into the flour mixture and coat both sides and edges.
4. FRYING: Place about 1/2 inch of cooking oil in a large skillet over medium heat. Test the oil by sprinkling in a little pinch of the bread mixture – if it sizzles, the pan is hot enough. Lower the chops into the hot cooking oil, one at a time. Do not crowd them (they don’t want to be touching). Cook for 4-6 minutes.
5. Watch the bottoms of the chop and when they start to brown, flip the pork chops over. Let the chops fry for about 4-6 minutes or until done but not over cooked. Test a chop by cutting into the center to make sure it’s not rare. A little bit of pink is fine. Remove the cooked chops from the skillet, place on a paper towel lined plate and let drain. Serve warm.
Per Serving: 507 Calories; 24g Fat (44.0% calories from fat); 40g Protein; 29g Carbohydrate; 1g Dietary Fiber; 165mg Cholesterol; 378mg Sodium.

Posted in Uncategorized, on June 22nd, 2014.

baloon_whisk

Are you ever just on overload with information? I get that way sometimes. And I was feeling information overload yesterday when I decided to catch up on reading blogs. I subscribe by RSS to a lot, including America’s Test Kitchen. Oh, I’m so glad I didn’t just skip this particular one.

One of the cooks/chefs at their kitchens had a thought . . . he observed that all over the test kitchen different chefs, when they used a wire whisk would use different motions with the whisk.

If I’d been working at their kitchens  you would have always seen me using a whisk/lift/circular kind of motion. I do that for everything I whisk just because I thought that probably was the right way. Ha, was I ever wrong. He saw people doing (1) back and forth; (2) stirring (with the whisk always in contact with the bottom of the bowl); and (3) my style, the around lift type whisk motion. So, to figure it out, they set up a test of making a vinaigrette, whipped cream and satiny whipped egg whites.

There’s a video about this – if you’re interested go watch it. It’s not long.

I was right in making just one thing – the egg whites. The round, lift motion of whisking IS the proper one for incorporating air into egg whites. You’ll get a lovely mound of satiny egg whites by doing it that way. Well, good. But then, on the other two – the vinaigrette and the whipped cream – no question, a back and forth motion is THE one to use. They give a scientific explanation for it – if you’re a chemist type you might like to read about it. Anyway, back and forth it will be from now on. Cream whips much faster with a back and forth motion. Vinaigrettes stay stable (emulsified) longer when using and back and forth motion. Okay. Learned. Done. Another nugget I need to store in my brain from now on.

Related Posts Plugin for WordPress, Blogger...