Get new posts by email:

Archives

Currently Reading

Here are the tastingspoons players. I’m in the middle (Carolyn). Daughter Sara on the right, and daughter-in-law Karen on the left. I started the blog in 2007, as a way to share recipes with my family. I’m still doing 99% of the blogging and holding out hope that these two lovely and excellent cooks will participate. They both lead very busy lives, so we’ll see.

– – – – – – – – – – – – – – – – – – – – – –

BOOK READING (from Carolyn):

Music of Bees, Eileen Garvin. Absolutely charming book about a woman in midlife, lonely, who raises bees, also makes unlikely friends. Heart-warming and very interesting about beekeeping.

A Postcard from Paris, Alex Brown. Really cute story. Dual time line, 1940s and present day about renovating an old apartment in Paris, things discovered.

Time of the Child, Niall Williams. Oh such a good book. Very small village in Ireland, 1960s. A baby is left on the doorstep. The town all whispers and helps. I listened to an interview of the author, which made me like him and his books even more.

Sipsworth, Simon Van Booy. If you like animals you’ll swoon. An old woman who really wants to die finds a tiny mouse in her house and befriends it and finds a reason to live. Utterly charming book.

The Forger’s Spell, Edward Dolnick. True story. For seven years a no-account painter named Han van Meegeren managed to pass off his paintings as those of Johannes Vermeer.

If You Lived Here, You’d be Home by Now, Christopher Ingraham. Could hardly put it down – about a journalist who takes on a challenge to move to small town in Minnesota and write about it. He expects to hate it and the people and place, but he doesn’t. Absolutely wonderful true story.

The River We Remember, William Kent Kreuger. 1950s, Minnesota. A murder and the aftermath. Could hardly put it down. Kreuger has such a vivid imagination and writing style.

How the Lights Gets In, Joyce Maynard. An older woman returns to New Hampshire to help care for her brain-injured son. Siblings and family, lots of angst and resentments.

The Filling Station, Vanessa Miller. Every American should read this book. A novelized retelling of the Tulsa massacre in 1921. Absolutely riveting.

The Story She Left Behind, Patti Callahan Henry. Love this author. Based on a true story. A famous author simply vanishes, leaving her husband and daughter behind. She had invented a mystical language no one could translate. Present day, someone thinks he’s solved the riddle, contacts the family. Really interesting read.

The Girl from Berlin, Ronald Balson. Love anything about Tuscany. An elderly woman is being evicted from a villa there, with odd deed provenance. Two young folks go there to help unravel the mystery. Loved it.

The Island of the Colorblind, Oliver Sacks, M.D. Nonfiction. The dr is intrigued by a remote Pacific island where most of the inhabitants are colorblind. He also unravels a mystery on Guam of people born with a strange neurological problem. Medical mysteries unveiled. Very interesting.

The Bookbinder, Pip Williams. Post 1914 London. Two sisters work at a bookbindery. They’re told to not read the books. One does and one doesn’t. One has visions beyond her narrow world; the other does not. Eventually the one gets into Oxford. Lovely story.

The Paris Express, Emma Donoghue. 1895 on a train to Paris, a disaster happens. You’ll delve into the lives of many people who survived and died in the crash.

A Race to the Bottom of Crazy, Richard Grant. This is about Arizona. Author, wife and child move back to Arizona where they once lived. Part memoir, research, and reporting in a quest to understand what makes Arizona such a confounding and irresistible place.

The Scarlet Thread, Francine Rivers. A woman’s life turned upside down when she discovers the handcrafted quilt and journal of her ancestor Mary Kathryn McMurray, a young woman who was uprooted from her home only to endure harsh frontier conditions on the Oregon Trail.

A Place to Hide, Ronald Balson. 1939 Amsterdam, an ambassador has the ability to save the lives of many Jewish children. Heartwarming.

Homeseeking, Karissa Chen. Two young Chinese teens are deeply in love, but in China. Then their families are separated. Jump to current day and the two meet again in Los Angeles.

North River, Pete Hammill. He always writes such a good story. A doctor works diligently healing people from all walks of life. His wife and daughter left him years before. One day his 3-yr old grandson arrives on his doorstep.

A Very Typical Family, Sierra Godfrey. A very messed-up family. Three adult children are given a home in Santa Cruz, Calif, but only if the siblings meet up and live in the house together. A very untypical scenario but makes for lots of messes.

Three Days in June, Anne Tyler. The usual Anne Tyler grit. Family angst. This wasn’t one of my favorites, but it was entertaining and very short.

Saved, Benjamin Hall. Author is a veteran war reporter. Ukraine, 2022, he nearly loses his life to a Russian strike. Riveting story – he survives, barely.

Grey Wolf, Louise Penny. Another Inspector Gamache mystery in Quebec. She is such an incredible mystery writer.

All the Colors of the Dark, Chris Whitaker. A missing person mystery, a serial killer thriller, a love story, a unique twist on each. Could hardly put it down.

Orbital, Samantha Harvey. Winner of 2024 Booker Prize. I don’t usually like those, but I heard the author interviewed and she hooked me. This is not a normal book with a beginning, a story and an end. It’s several chapters of the day in the life of various astronauts at the ISS (Int’l Space Station). All fictional. She’s been praised by several real astronauts for “getting it” about space station everyday life.

The Blue Hour, Paula Hawkins. An island off Scotland. Inaccessible except when the tide is out. Weird goings on. An artist. A present day mystery too.

Iron Lake, William Kent Krueger. A judge is murdered and a boy is missing. Riveting mystery.

Tell the Wolves I’m Home, Carol Ricks Brunt. 1980s. A 14-yr old girl loses her beloved uncle. Yet a new friendship arises, someone she never knew about.

Four Treasures of the Sky, Jenny Zhang. 1880s, a young girl is kidnapped in China and brought to the United States. She survives with many hurdles in the path.

The Boy Who Fell out of the Sky, Ken Dornstein. Memoir, 1988. The author’s brother died in the PanAm flight that went down in Lockerbie, Scotland. A decade later he tries to solve “the riddle of his older brother’s life.”

Worse Care Scenario, T.J. Newman. Oh my. Interesting analysis of what could/might happen if a jet crashed into a nuclear plant. Un-put-downable.

Song of the Lark, Willa Cather. Complicated weave of a story about a young woman in about 1900, who has a gifted voice (singing) and about her journey to success, not without its ups and downs.

Crow Talk, Eileen Garvin. Charming story which takes place at a remote lake in Washington State, about a few people who inhabit it, the friendships made, but also revolving around the rescue of a baby crow.

The Story Collector, Evie Woods. Sweet story about some dark secrets from an area in Ireland, a bit magical, faerie life, but solving a mystery too.

A Sea of Unspoken Things, Adrienne Young. A woman investigates her twin brother’s mysterious death. She goes to a small town in California to figure it out, to figure HIM out.

The King’s Messenger, Susanna Kearsley. 1600s England, King James. About one of his trusted “messengers,” and his relationship with a young woman also of “the court.” Lots of intrigue.

In the Shadow of the Greenbrier, Emily Matchar. Interesting mystery in/around the area of the famous resort in White Sulphur Springs, West Virginia.

Isola, Allegra Goodman. Hard to describe, survival story on an island in the 1600s.

Save the Date, Allison Raskin. Rom-com, witty, LOL funny. Clever.

The Sirens, Emilia Hart. Numerous time-lines, Australia. Mysteries abound, nightmares, abandoned baby, weird allergies.

Red Clay, Charles Fancher. LOVED this book. Mostly post-Civil War story about the lives of slaves in Alabama during Reconstruction.

Stars in an Italian Sky, Jill Santopolo. Dual time line, 1946 and recent time. Love stories and a mystery.

Battle Mountain, C.J. Box. Another one of Box’s riveting mysteries. Love his descriptions of the land.

Something Beautiful Happened, Yvette Corporon. A memoir of sorts in Greece, tiny island of Erikousa, where the locals hid Jews during WWII. All elusive stories told by the author’s grandmother.

The Jackal’s Mistress, Chris Bohjalian. 1860s Virginia, about a woman who saves the life of a Union soldier. Really good story.

Song of the Magpie, Louise Mayberry. Really interesting story about Australia back in the days when it was mostly a penal colony. Gritty strength of a woman trying to thrive with her farm.

The Boomerang, Robert Bailey. A thriller that will have you gripping the book. About a lot of secrets surrounding the president (fictional novel, remember) and his chief of staff and about cancer. A cure. Such a good story.

Care and Feeding, Laurie Woolever. Really interesting memoir of a woman driven to succeed in the restaurant business. She worked for Mario Batali and then Anthony Bourdain. Gritty stories.

Everything is Tuberculosis, John Green. Maybe not a book for everyone. A real deep dive into the deadly tuberculosis infection, its history. I heard the author interviewed and found the book very interesting.

The Book Lovers Library, Madeline Martin. Fascinating read about Boots’ drug stores’ lending library. And the people who worked in them.

The Arrivals, Meg Mitchell Moore. LOL funny, about a middle-aged couple whose children (and their various family members) return to the family home and the chaos that ensues.

My Life as a Silent Movie, Jesse Lee Kercheval. About grief. A big move to Paris, finding herself a new life with a new set of real blood family.

Escape, Carolyn Jessop. Another memoir about a woman really in bondage in Utah, Mormon plural marriage.


Tasting Spoons

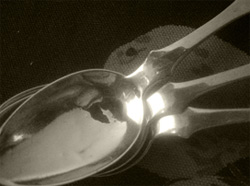
My blog's namesake - small, old and some very dented engraved silver plated tea spoons that belonged to my mother-in-law, and I use them to taste my food as I'm cooking.

Scroll down to the bottom to view my Blogroll

Posted in Uncategorized, on November 6th, 2012.

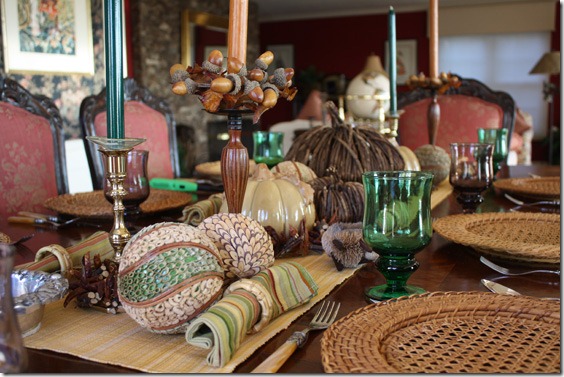
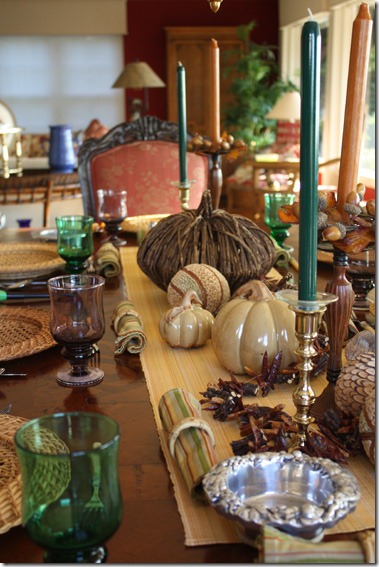
We entertained a few nights ago. I made my easy cassoulet, spinach hummus, a new sweet onion and thyme dip (it will be posted here next week), and one of my favorite sides, baked onions with thyme. Other guests brought a salmon dip (that I loved, and hope to give you a link to Kim’s blog once she posts it) and a delicious sugar-free apple strudel. Another guest helped me by making a cocktail – a clove-scented sidecar. That recipe will be up in another week or so too. I had fun setting the table. Over the years I’ve collected a bunch of Fall and/or pumpkin-oriented stuff that I use on our kitchen island or on the dining room table. Just thought I’d share with you. I don’t know that rattan chargers are “in” any more, but I like them. I’ve had the decorated balls for several years. The ceramic pumpkins I bought a few years ago, along with the rings that go on the candle bases. The big twig pumpkins I bought last year on sale.

fall_dining_table_decor1

fall_dining_table_decor2

Do you suppose anybody noticed that one candle was a little Leaning Tower of Pisa? Hope not! The brownish thing lying on the runner (just above the silver wine holder) that s-curves is a 5-foot long garland, of sorts, of sewn-together cut twigs and red chiles (dark red, so you can hardly see that they’re red, as they’re almost brown). I bought it years and years ago – every time I touch it, almost, a red chile (very dried out, obviously) breaks open and a dozen seeds fall. But I like the texture of it. I store it in a plastic sealing bag the other 11 months of the year!

Posted in Cookies, on November 6th, 2012.

maple_walnut_refrigerator_cookies

If you’re new to my blog (I have a lot more readers these days – maybe because I’m posting some of my food pictures on Pinterest), you don’t know that over the course of my life I’ve collected thousands of recipes. Oh my goodness, have I! It’s almost a sickness, and yet I can’t seem to stop! My mother, back in 1997, when she was within a few months of passing away (and in really good health at that moment) actually handed me a recipe she’d clipped out of a magazine – she said she couldn’t seem to help herself. She didn’t cook at all then (she was 89 and lived in a retirement home), but she thought I might like it. I put it in my purse and it went into the trash later. It didn’t appeal to me at all. I feel guilty about that now! I wish I had that recipe – I’d make it just because it was something she gave me so near to the end of her life. Anyway, on to this recipe.

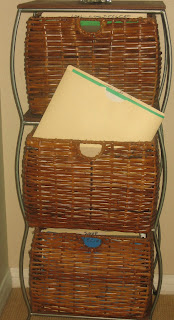
What I have in a hallway in our house (about 15 steps from the kitchen) is a 3-tier storage container (rattan baskets in a stand) that contain the recipes I collected from about 1965-2003. There you can see it at left. In our former house I had a huge – HUGE – set of drawers that housed Pentaflex racks and my recipe files lived there, right in the kitchen. In the house we’re in now, I didn’t have the space for such a thing in the kitchen (prior to the remodeling we did), so I bought this contraption and jamb-packed it with file folders by recipe type. When we did remodel, these just stayed where they are, sitting in a little alcove, out of the way, but there if I need them!
In the ensuing years I’ve really tried to limit the recipes I clip out of magazines and newspapers. I say to myself “Am I really going to make this? Really?” I try to not clip more than 1-3 in any one magazine. Those that make the cut go into 3-ring binders. So yes, I’m still collecting recipes. Occasionally I go to the archives (the baskets) to find something. Some years ago I actually went through the entire thing and got rid of about half of the recipes in there – things I knew I wouldn’t make – like home made phyllo dough, or real croissants, pickling my own sauerkraut, and lots of canning recipes. You know, those kinds of things.

So anyway, I was scouring the files for some old recipe; can’t even remember what it was now, but it was something in the cookie folder. And out flitted a recipe onto the floor. I reached for it. Yes, a cookie recipe. But hmmm, this looked good. Not what I needed that day, but I took it out and put it on my to-make-soon cookbook stand I have right next to this computer. It’s sat there for several weeks, then one day it just said “make me.”

Where this recipe clipping came from, I’m not sure, but when I went searching online for this recipe (only a couple of sources had it, and only one person had written a story about it) someone wrote that it was in the brochure for Jessica’s Biscuit, then a place to order cookbooks (and I did at one time). Nancy Silverton’s book Desserts is called a classic, and it’s popular enough that it’s been reprinted. Anyway, the recipe clip said it’s Nancy Silverton’s recipe – and her comment was that if she ever had to be limited to one slice and bake cookie, this would be it. That’s good enough testimony for me.

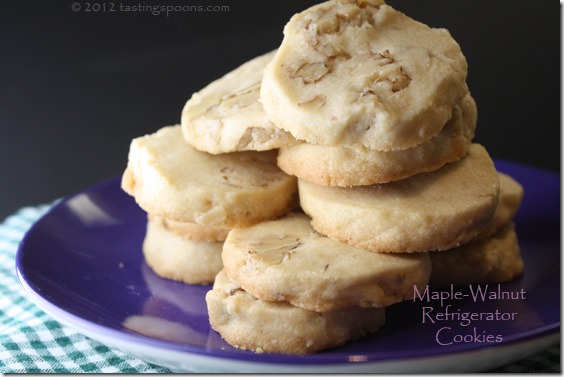
The cookie is easy to mix up. My only difficulty was that I thought I had pecans. I didn’t. So I used walnuts instead. I think pecans would have a bit more flavor, but walnuts were great, don’t get me maple_walnut_cookies_to_bakewrong here! It’s a kind of very tender shortbread cookie and not overly sweet. Love the maple syrup in it, and just one egg yolk. But half a pound of butter. No, not low fat! Ha! The dough is chilled, then formed into cylinders and frozen solid. The next day I baked them, and found that if the rolls sat out for about 10 minutes they were a lot easier to slice. With large walnut pieces in the dough, if my knife hit the nut just so, it broke the slice altogether. But I was able to piece them back together mostly. The recipe said it made 72 – obviously I sliced the cookies a little thicker than 3/8”, so I got about 42 or so. The cookies don’t spread at all (there’s no leavening in the cookie, remember) so you can pack the cookie sheet well. The only caution in the recipe is that the cookie must be baked completely to be tender. If you under bake them, they’re tough, apparently. I didn’t have that difficulty, but I did have to bake my cookies (possibly thicker ones) for 18 minutes to get them just barely golden brown around the edges. I cooled them – promptly ate two (yum) with a cup of tea – and put the remainder in the freezer.

What I liked: the batter was easy-peasy to mix up and chill. Really easy to roll into cylinders too. And relatively easy to slice and bake. Taste: yum. Tender, buttery, and absolutely perfect with a cup of tea I made this afternoon! And these would be wonderful for Christmas. Make them up ahead and keep on hand to bake when needed. Or they’d work great for a cookie exchange too.
What I didn’t like: absolutely nothing. The frozen dough was a little finicky to slice, but not a deterrent to making them!

printer-friendly PDF
MasterCook 5+ import file – right click to save file, run MC, then File|Import

* Exported from MasterCook *

Maple-Pecan or Maple-Walnut Cookies

Recipe By: Nancy Silverton (baking genius) from her book “Desserts,” 1986.
Serving Size: 72
NOTES: I didn’t get 72 cookies – more like about 40-45, so I must have sliced them thicker than I was supposed to. I also had to bake them for 18 minutes – watch carefully – you don’t want them to over bake. Dough cylinders can be frozen for several weeks. When ready to bake, remove from freezer and allow to sit for 10 minutes or so until you can slice them easily.

2 sticks unsalted butter
1/2 cup granulated sugar
1 large egg yolk
2 tablespoons maple syrup — the real stuff (no imitation)
1/2 teaspoon vanilla extract
1 3/4 cups all-purpose flour
1 1/4 cups pecan halves — or walnuts

1. To make dough: Using paddle attachment of electric mixer, beat butter on medium speed for 3 to 5 minutes or until it whitens and holds soft peaks. Add sugar. Beat until well blended. Whisk together egg yolk, maple syrup and vanilla. Beat into butter mixture, scraping down sides of bowl when necessary. Add flour on low speed and mix only until combined. Beat in pecan halves until combined. Wrap dough in plastic wrap. Chill for 30 minutes or until firm.
2. To form dough into logs: Divide dough into 4 sections. Working with one section at a time (and keeping others in refrigerator), roll on floured surface into 1-1/2-inch diameter log. Place on cookie sheet. Freeze for 30 minutes or until firm enough to slice. Repeat with remaining dough.
3. To bake cookies: Preheat oven to 325°. Adjust rack to middle position. Using very sharp knife, slice logs into 3/8-inch-thick rounds. Place 1 inch apart on Silpat or parchment paper lined baking sheet. Bake for 12 to 15 minutes or until firm and lightly browned. (Note: Cookies must be cooked through to be tender.)
Per Serving: 54 Calories; 4g Fat (63.9% calories from fat); 1g Protein; 4g Carbohydrate; trace Dietary Fiber; 10mg Cholesterol; 1mg Sodium.

Posted in Healthy, Pasta, Veggies/sides, on November 4th, 2012.

no_calorie_noodles_arugula_spinach

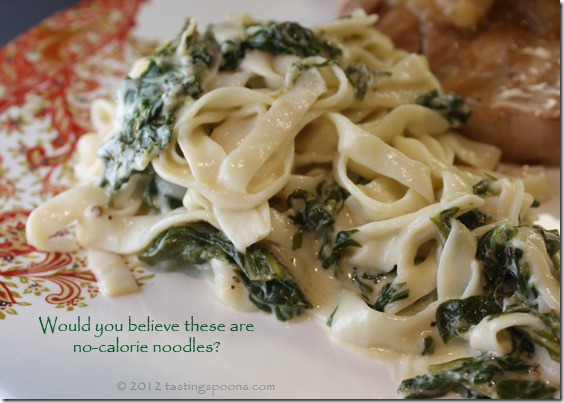
No, I’m not joshing you. And no, these aren’t made of cardboard, either. Cardboard would have carbs perhaps? From tree bark and fiber? Nope, these are made from tofu and some kind of
Asian yam. I’m sure I have some readers who, after just
seeing that word tofu – will not even read further. I might have been one of those some years ago. I don’t eat tofu, as tofu, but if it’s in other things, well, yes I do. These noodles have almost zero calories, nearly zero carbs, zero fat in a single serving.

It’s not news on this blog that we are a family of two try to limit carbs, what with my Type 1 diabetic husband. And certainly I can cut down on them myself. But I’ll tell you true – I miss pasta. Once in awhile – a big splurge for us – I make a huge batch of spaghetti sauce from one of my numerous recipes (my favorite one this year is Ina Garten’s Weeknight Bolognese Sauce). I freeze some of it for other dinner splurges months hence. Well, we’re now going to be able to have all we want because of these fantastic new products.

I’d heard about them several months ago when I got an email from one of the daily deal emails I subscribe to, offering me “Miracle Noodles” for some unbelievably low cost. I knew nothing whatsoever about them. I talked to a friend of mine, a recent Type 2 diabetic, who is struggling with her revised diet, to ask if she’d like to share the box with me. It was 29 packages or some odd number. She said no. Knowing so little, I opted not to buy it, either. Then I visited a local Asian market, thinking that surely they would have them – indeed they did, although it wasn’t the “Miracle” noodle, but Tofu Shirataki (the fettucine and angel hair varieties shown here), and it took the store manager’s involvement to find them in the store. Aha! In the refrigerated area – not really near anything in particular – and they were lying flat, so you couldn’t see the package front very well. FYI: a 4-ounce serving (half of the above package) contains 20 calories, .5 grams of fat, 15 mg of sodium and 3 g of carbs. And 1 g of fiber. As I’m writing this, I haven’t had the Miracle Noodle yet – I’ll probably write up another post after that with more info.
Each package holds about 8 ounces including the fluid – and about 4 ounces of net wet noodles – enough for 2 side servings. And just maybe enough for a small serving of a pasta main dish. These packages need to be refrigerated and they’ll keep for about 6 months. They don’t ever spoil, really, but eventually, the noodle may dissolve into its primary form of glucomannen (that’s the tofu and yam product).

I threw together a side dish to serve them the first time. I had no recipe, but wanted to make it a little special for the first time we’d eat them since I wasn’t certain my DH would eat them – he did and he liked them. He loves pasta too, and encourages me to NOT make it very often since it wreaks havoc with his blood sugar. The thing you need to remember is that these noodles, like most tofu products, don’t have much taste straight out of the package, so you must add flavorful ingredients to them, so they’ll soak up the flavor. Don’t just heat them with a little oil or butter and expect them to have great flavor. They won’t.

The other thing about these noodles is that they’re packed in a rather unappetizing fluid (that you drain off). It smells something like Asian fish sauce. In case you haven’t ever taken a sniff of Asian fish sauce, well, it’s not pleasant – kind of like rotten fish, actually. Tastes great, but doesn’t smell all that nice. So, there is a process of getting the noodles ready to eat. First, drain them, then rinse well under running water. According to the package instructions, I put them on a plate and microwaved them for 60 seconds. You can also “cook” them in a nonstick pan until they make a kind of squeaky sound in the pan, but microwaving is almost easier. I rinsed them again, drained again, then they went into the skillet. They’re already cooked, you see, so they don’t really need further cooking – just heating – but they need to absorb flavor. So I stirred them around, added the dairy stuff, some herbs and cayenne, and let them sit in the pan just barely simmering. I had to add a little water as the creamy ingredients boiled away, tasted it for salt and pepper, added the grated cheese and served it piping hot.

What I liked: the fact that they’re very similar – not identical – to a wheat noodle, but have so few calories and carbs. That’s the logical answer, of course. Why would we bother to eat these unless they were giving us some kind of nutritional boon. Or if I needed to restrict gluten. Obviously these are GF also.
What I didn’t like: if you forced me to say something negative (I’m trying to be at least neutral or unbiased), the texture of these noodles aren’t the same as a wheat pasta fettuccine noodle. It doesn’t have the same kind of “chew” as a wheat noodle – more like a rice noodle to me. But if you know going into it that you’re wanting a vehicle for the SAUCE – it’s the sauce we love, right? – then these noodles absolutely work. All in all, this is a great alternative to a much higher calorie wheat noodle.

printer-friendly PDF
MasterCook 5+ import file – right click to save file, run MC, then File|Import

* Exported from MasterCook *

Shirataki Fettucine with Arugula and Spinach

Recipe By: My own concoction.
Serving Size: 2

2 teaspoons unsalted butter
1 cup arugula — fresh, chopped
1 cup baby spinach — fresh, chopped
8 ounces tofu shirataki — fettucine style (read notes regarding preparation)
1 tablespoon light sour cream
1 tablespoon heavy cream
2 tablespoons goat cheese — crumbled
1/2 teaspoon dried oregano
1/2 teaspoon dried thyme
1 pinch cayenne
1/2 cup Parmigiano-Reggiano cheese — grated
Salt and freshly ground black pepper to taste
water, as needed to keep the mixture fluid

1. TOFU SHIRATAKI PREPARATION: Remove noodles from package and drain. Run under water for 30-40 seconds, lifting and separating. Place noodles on a plate and microwave for about one minute (this parboils them). Remove from microwave and wash under running water again. Drain.
2. Meanwhile, in a large skillet (large enough to hold all of the mixture) melt the butter. Add arugula and spinach and stir over medium heat until greens are cooked. Add tofu shirataki noodles and stir to combine.
3. Add the sour cream, cream, goat cheese, herbs and cayenne. Stir to combine and continue heating over low heat. Add shredded Parm, salt and pepper to taste and add water to the pan if it’s thicker than you want. Serve immediately. Makes enough for a side dish, not a main dish.
Per Serving: 193 Calories; 16g Fat (66.2% calories from fat); 13g Protein; 6g Carbohydrate; 3g Dietary Fiber; 44mg Cholesterol; 432mg Sodium.

Posted in Appetizers, on November 2nd, 2012.

goat_cheese_pear_marmalade_cracker

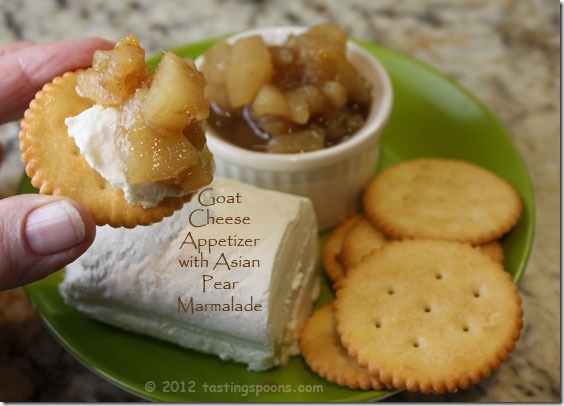
You may have read before – brown food is hard to photograph. So I put this on a bright green plate, then added the white goat cheese as contrast. How’d I do?  This is a fabulous make-ahead appetizer. It’s worth the effort to make it – do try it. And by the way, those are not Ritz crackers – they’re Trader Joe’s version of them. They’re quite good!

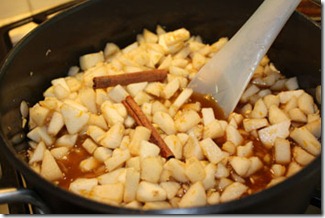
I almost forgot to post this recipe – it was from a cooking class a couple of months ago. I was doing some background admin stuff on my blog  and ran across it – then realized I hadn’t written a story about it or shared the recipe. Every few months I have to transfer all the images from the posts to a CD for long-term safekeeping. So, I go through each image folder (I put all the photos into folders by recipe title, then they go onto a vaguely chronological ordered CD) and delete the extra photos that I chose not to use – wrong angle, bad light, parsley isn’t perky, shadows wrong, too far away – pear_marmalade_cookingyou know, those kinds of things. I had a photo of this from the class, but it was terrible. All brown everywhere. So I needed to make it in order to take a better picture! First I had to buy all the ingredients (didn’t have the pears or five spice powder). Then I had to wait 3 days for the Bartlett pears to ripen. Finally, then, got it made! I didn’t need an appetizer, but I decided to make this now, knowing I’ll be needing some for holiday entertaining. Here at right are the ingredients before I started cooking them. Just chopped,  raw pears, water, orange zest and juice, ginger I whizzed up in the food processor, five spice powder, brown sugar and cinnamon sticks. Oh, and vanilla.

What’s great about this appetizer is that you can make the marmalade several weeks ahead. With all the sugar in the pear mixture, it should keep for awhile. My thought was to make it for sometime over Thanksgiving weekend. I made a double batch, so actually I will freeze half for using in December. The mixture doesn’t have enough sugar that it’s truly a “marmalade” by jam-making standards. So it won’t keep for months on the shelf in the refrigerator. Use this within a week, and freeze what you haven’t eaten. Just don’t invite the same people over more than once! On second thought, I think you’ll like this enough you won’t pear_marmalade_cookedbe concerned to serve this twice, even if it was the same group of friends. Or family.

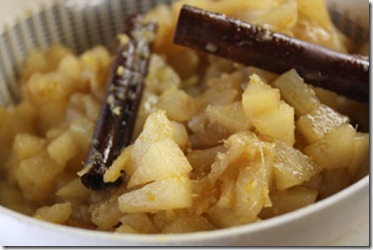
There’s a photo of the finished marmalade – I left the cinnamon sticks in the picture just for more brown-on-brown contrast. The pears have a lovely, warming bite from the fresh ginger in it. The orange zest and juice add some nice sweet notes. Then it’s also got vanilla, cinnamon (stick) and five-spice powder. The five-spice gives it a real interesting depth. It’s kind of elusive – you might not know what it is unless someone told you. Makes it different. Really different. The pear marmalade needs something to cut the richness (although there’s not a bit of butter or fat in it – I mean the intense flavors), so the goat cheese is the perfect choice.  With a bit of the left overs, I paired it with grilled pork chops. It was lover-ly.

What I liked: the sweet, the bite from the ginger. Loved the Chinese five-spice powder in it. It’s a sweet appetizer – just know that. With some goat cheese to spread on a cracker and the marmalade piled on top? Yummy. This would also make a delightful hostess gift if you’re into making these kinds of things to give to friends. If you wanted to make it complete, give the hostess a log of goat cheese and a tube of crackers.
What I didn’t like: absolutely nothing. It’s a keeper.

printer-friendly PDF
MasterCook 5+ import file – right click to save file, run MC, then File|Import

* Exported from MasterCook *

Goat Cheese with Asian Pear Marmalade

Recipe By: Tarla Fallgatter, caterer and cooking instructor
Serving Size: 8
Notes: I used a mixture of half Asian pears and half Bartlett (something Tarla said was an option).

MARMALADE:
1 2-inch piece ginger, peeled and grated
1/2 cup water grated zest of one orange
2 tablespoons fresh orange juice
1/2 cup brown sugar — packed
1 teaspoon Chinese five-spice powder
1/2 teaspoon vanilla
1 whole cinnamon stick
4 whole Asian pears — peeled, cored, chopped into 1/2″ pieces
ASSEMBLY:
11 ounces goat cheese — log type
1 tablespoon Italian parsley — garnish
plain crackers

1. In a medium saucepan, combine all the marmalade ingredients together. Bring to a boil, reduce heat, cover and simmer for 3 minutes. Uncover and continue cooking, stirring occasionally, for 15 minutes, or until soft and mushy.
2. Remove and discard the cinnamon stick. Let cool to room temperature. Place the log of goat cheese on a platter and spoon some of the marmalade on top. Garnish with Italian parsley and surround with crackers. If you’d like a more sticky hold-together mixture, remove all the pears and drain through a colander, reserving all the fluid. Return the fluid to the pan and reduce it until it’s almost syrupy. Also, I removed about a third of the pears and mashed them, then put them back in. That way there will be some mushy pulp and some pieces.
Per Serving: 243 Calories; 14g Fat (51.1% calories from fat); 12g Protein; 18g Carbohydrate; 3g Dietary Fiber; 41mg Cholesterol; 140mg Sodium.

Posted in Beef, Soups, on October 31st, 2012.

no_heat_beef_chili

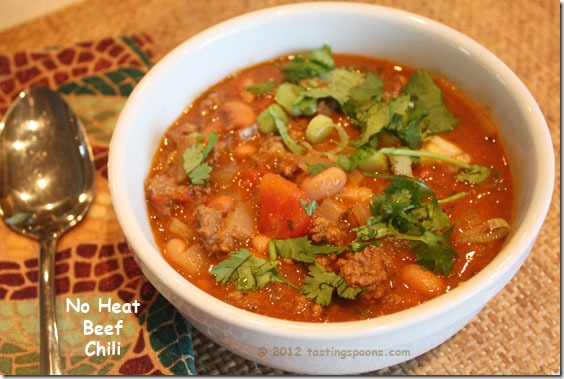
If you’re the kind of person who really avoids chiles, in any way, shape or form, this heat-less beef and pinto bean soup/chili may be just up your alley. But even for people who like spicy foods (me), this mixture is full of flavor. It has one different ingredient in it too – something I’ve never used before. Intrigued? Read on.

When I read this recipe over at Kalyn’s Kitchen, it just looked and sounded so good. Maybe it was merely because it’s late summer here in Southern California and I haven’t had chili for many, many months. In fact, Kalyn doesn’t even call this chili, but pinto bean and beef soup. In her photo, it looked like chili and my brain and taste buds looked at it and said chili! Maybe the last time I made something similar it was turkey chili last Thanksgiving.

We were still in summer doldrums when I read the recipe, but I went about gathering all the ingredients. I’d intended to try Kalyn’s pressure-cooker method of cooking beans. But we ended up going to our Palm Desert house, and I don’t have a pressure cooker there (I’d intended to take along the one I have, but forgot). So, I made it the old fashioned way by soaking the beans for about 6 hours and slowly simmering them until they were “just right.” And then making the chili and simmering it on the stove for 45 minutes.

The soup/chili mixture is standard – onions, garlic, ground beef, beans and (typical chili) seasonings. What’s different about this one is: (1) there is no heat in it – no chiles of any kind, not even black pepper, so this mixture is not hot – at all; and (2) it uses dried cilantro. I’ve never owned dried cilantro. Why should I, when we can buy fresh cilantro year ‘round at our local markets? But Kalyn mentions in the recipe that using the dried cilantro is highly recommended. I trusted Kalyn’s judgment here, so I went out and bought dried cilantro. Imagine my surprise when, after simmering the chili (with the dried cilantro in it) for the requisite 45 minutes, I tasted it. Wow. Citrus. Lemon or lime juice to be exact – yet there was no citrus in the chili up to that point. It’s the cilantro that gives it that citrusy taste – probably from the cilantro stems. To me, there was no typical cilantro taste – what I know of as cilantro taste from the fresh herbs – just the citrus. I need to remember this for use in other dishes. At the very end you add in freshly squeezed lime juice, then for garnish some freshly chopped green onions and chopped cilantro. No cheese needed at all. Thank you, Kalyn.

What I liked: the fresh taste of it all – this is not a complex-flavored chili (which is probably why Kalyn called it a soup!) but a quick-cooking type (and you can use canned beans if you don’t want to take the time to cook the beans). And that’s a big compliment. Usually I like as much complex flavors as I can get in a soup mixture, but in this one I really liked the simple-ness of it. The chicken broth adds lots of flavor too (usually I would use beef or pork broth, but this one particularly calls for chicken broth). All in all, this one’s a winner.
What I didn’t like: not a thing, really. Just know this is a “lighter” version of traditional chili – not lighter in calories so much as lighter in flavor and complexity. It’s a delicious soup/chili – don’t misunderstand what I’m saying. I liked it a lot, no matter what it’s called!

printer-friendly PDF
MasterCook 5+ import file – right click to save file, run MC, then File|Import

No Heat Chili (or Beef and Bean Soup)

Recipe By: Kalyn’s Kitchen blog, 10/2012
Serving Size: 6

1 cup dried pinto beans — unsoaked (or can use 2 cans pinto beans, rinsed and drained)
2 tablespoons olive oil — divided use
1 pound ground beef — (Kalyn uses ground beef with less than 10% fat)
1 teaspoon Spike seasoning
1 whole onion — chopped
1 tablespoon minced garlic
2 teaspoons dried oregano — Mexican, not Greek
1 tablespoon ground cumin
1 tablespoon dried cilantro — (not required, but recommended)
3 cups chicken broth
1 cup water — or liquid from the beans
2 tablespoons tomato paste
14 1/2 ounces canned tomatoes — diced
1/2 cup sliced green onions
1/2 cup fresh cilantro — or more to taste (highly recommended)
2 tablespoons fresh squeezed lime juice

1. Soak pinto beans overnight covered in cold water. Drain. Add fresh water, covering beans by at least an inch, bring to a boil and simmer for 45 minutes, or until tender. Drain, but reserve liquid.
2. Heat 2 tsp. olive oil in large heavy frying pan (large enough to hold all of the chili/soup mixture, add ground beef and season with Spike seasoning, then saute until beef is well-browned, breaking apart as it cooks. When it’s well browned, remove beef and set aside.
3. Heat 2 tsp. more olive oil in same frying pan, then add onion and saute about 5 minutes, or until onion is starting to brown. Add minced garlic and saute 2 minutes more, then add Mexican oregano, cumin, and dried cilantro. Saute about 2 minutes more.
4. Add beans, ground beef, chicken stock and a cup of bean liquid or water. Bring to a simmer, then add tomato paste and canned tomatoes.
5. Bring to a boil, reduce heat, cover and simmer for 45 minutes, stirring once or twice. Add lime juice and continue cooking for another minute. Taste for seasonings (salt), spoon portions into soup bowls and add sliced green onion and chopped fresh cilantro. Add additional chopped cilantro to add at the table if desired.
Per Serving: 439 Calories; 26g Fat (53.0% calories from fat); 23g Protein; 29g Carbohydrate; 10g Dietary Fiber; 64mg Cholesterol; 587mg Sodium.

Posted in Desserts, on October 29th, 2012.

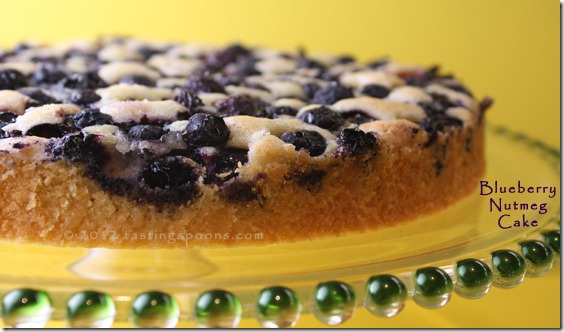
blueberry_nutmeg_cake_on_plate

I’m remiss in not posting this recipe a couple of months ago. I got permission to post it here on my blog, but then we went away on vacation and I forgot to post this last recipe. Not a good thing since this cake is such a winner.

For whatever reason, I don’t think much about making desserts with blueberries. Usually I’m not so fond of them in cooked form – I prefer them raw on my morning Greek yogurt. But then I was blueberry_nutmeg_cake_cutserved this cake and I fell in love with blueberry cake. Ah, but it has to have the nutmeg in it. It would be nowhere near as interesting without the freshly grated nutmeg!

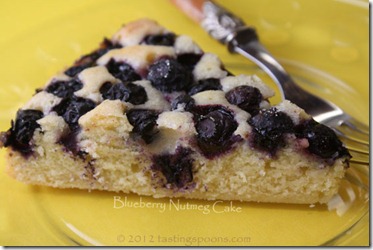
You may recall that some months ago (last May, actually) we attended a dinner in the backyard of some (now) friends who live a mile or so away from us. We met Cheryl Sternman Rule, a professional food writer and developer from the Bay Area (who writes her own blog, 5 Second Rule) and we and 20+ other people had a delicious 5-course meal from Cheryl’s new cookbook called Ripe: A Fresh, Colorful Approach to Fruits and Vegetables. This was the finale of the dinner and I was all over it. So soft and tender a cake and the subtle flavors. If you like blueberries – and nutmeg – you’ll like it too. Easy to make for sure. The blueberries kind of sink down into the batter during the baking process – it’s not frosting or an icing there – but it makes for a really pretty appearance, I think.

blueberry_nutmeg_cake_sliceRecipe reprinted with permission from RIPE © 2012 by Cheryl Sternman Rule, Running Press, a member of the Perseus Book Group. Cookbook photography © 2012 by Paulette Phlipot.

What I liked: the almost sponge-cake texture – soft and luscious. Easy to make too. The blueberries stand out for sure – and oh, the nutmeg. Of course I love nutmeg, so naturally I’d like this.
What I didn’t like: nothing whatsoever. A definite make again cake.

printer-friendly PDF
MasterCook 5+ import file – right click to save file, run MC, then File|Import

* Exported from MasterCook *

Blueberry Nutmeg Cake

Recipe By: Recipe reprinted with permission from RIPE © 2012 by Cheryl Sternman Rule, Running Press, a member of the Perseus Book Group.
Serving Size: 8
NOTES: Cheryl says: This cake’s appeal lies not only in its ease of preparation, but in its simple, glorious presentation. I tip my hat to Marian Burros for creating the original plum torte that inspired my twist. This cake tastes especially amazing when baked one day ahead.
Tip: While the cake may appear dry when freshly baked, it takes on a fantastic dampness after an overnight rest, and continues to improve with age. (The blueberries become almost jammy as the cake matures.) After 24 hours, I store any leftovers, tightly wrapped, in the fridge.

2 cups blueberries
3/4 teaspoon lemon juice
3/4 cup granulated sugar — plus 2 1/2 tablespoons, divided use
1 cup all-purpose flour
1 teaspoon baking powder
3/4 teaspoon ground nutmeg — divided
1/4 teaspoon kosher salt
1/4 pound unsalted butter — at room temperature
2 large eggs

1. Preheat the oven to 350°F (175°C). Grease a 9-inch (23-cm) springform pan and line the bottom with parchment.
2. In a medium bowl, toss the blueberries with the lemon juice and 1 tablespoon of the sugar. In a separate bowl, sift the flour, baking powder, 1/2 teaspoon of the nutmeg, and the salt.
3. Using an electric mixer, cream the butter and 3/4 cup (187g) of the sugar on medium-high speed until light and fluffy, about 3 minutes. Add the eggs, 1 at a time, beating well after each addition. Scrape down the sides of the bowl. With the mixer on low, beat in the sifted ingredients. Do not overbeat. Scrape into the prepared pan and smooth the top.
4. Scatter the berries and any juices over the batter. Stir the remaining 11/2 tablespoons of sugar and the remaining 1/4 teaspoon of nutmeg together and sprinkle over the berries.
5. Bake in the center of the oven for 50 to 60 minutes, or until a skewer comes out clean and the cake just begins to pull away from the sides.
6. Cool in the pan for 30 minutes. Spring the cake free then finish cooling completely. Slide a wide, thin spatula under the cake to transfer it to a large plate. Wrap tightly with plastic, and let mellow at room temperature for several hours, or overnight, before eating.

Per Serving: 272 Calories; 13g Fat (42.6% calories from fat); 4g Protein; 36g Carbohydrate; 1g Dietary Fiber; 84mg Cholesterol; 141mg Sodium.

Posted in Veggies/sides, on October 27th, 2012.

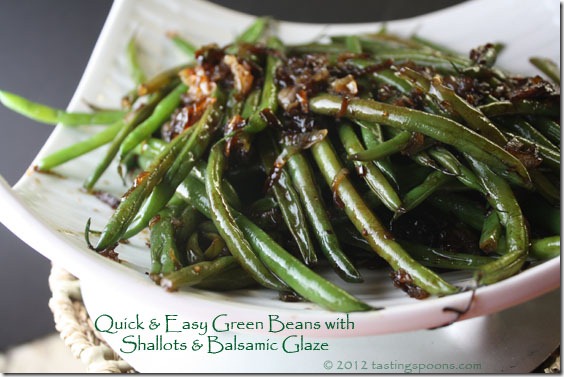
green_beans_shallots_balsamic_glaze

Most often I buy the 2-lb. packages of haricot verts (those little thin ones) from Costco. I cook them all and store in a ziploc bag. Then I do something different with them as I parcel them out over 2-3 meals, my favorite being the Garlic Green Beans. This was a really quick throw-together one.

Back about 5 years ago I went to a cooking class and had a magnificent version of this – a more complicated preparation for sure, and it was delicious. It’s here on my blog – Green Beans with Roasted Shallots and Balsamic Glaze. This time, though, I wanted something much simpler – no time for roasting shallots or making a glaze. I had shallots, so I just sautéed them in some olive oil and a bit of butter until they were golden. I did this part ahead a couple of hours. The green beans were already cooked (barely). I wanted them under cooked when I first simmer them, knowing I’m going to cook them some more in the frying pan.

Just before serving, then, I poured the green beans into the pan with the shallots and gently tossed them around so they were all covered in the oil and shallots. Once I was sure they were completely heated through, I drizzled on about 2 teaspoons of Trader Joe’s Balsamic Glaze and I carefully stirred that around the beans and poured them out on a serving bowl/plate . Just before serving I sprinkled on some flake salt and freshly ground black pepper. Done. Easy. Tasty.

What I liked: mostly that they came together quickly. I almost always have shallots in my kitchen for just this kind of occasion. And the balsamic glaze lives in my refrigerator door.
What I didn’t like: maybe not the most complex of flavors, but hey, this was an “easy” dish. It’s hard to get complex flavors when it’s just cooking in a sauté pan!

printer-friendly PDF
MasterCook 5+ import file – right click to save file, run MC, then File|Import

Quick & Easy Green Beans with Shallots & Balsamic Glaze

Recipe By: My own concoction
Serving Size: 4

3/4 pound green beans — haricot verts type, stem end trimmed
2 medium shallots — halved and sliced
1 tablespoon olive oil
2 teaspoons unsalted butter
1/2 tablespoon balsamic glaze
Salt and freshly ground black pepper to taste

1. Heat a large pot of water to a furious boil, add the green beans and continue to simmer for 3-5 minutes until beans are just barely done (under done is better than over done). Taste a green bean to make sure they’re cooked to your liking.
2. Prepare a large bowl with cold water and add several cups of ice. Drain green beans, then pour them into the iced water and stir around. Leave them sit for 2-4 minutes, then gently scoop them out and onto dry cloth towels. Roll the towels up gently and allow to sit for 10-15 minutes. Set beans aside at room temp for up to an hour; otherwise, place them in a plastic zip type bag and refrigerate.
3. In a saute pan large enough to hold all the beans, melt the butter and olive oil until they’re lightly bubbling. Add sliced shallots and cook these until they’re soft but not browned. (This may be set aside at this point, for up to 2 hours ahead of time.)
4. Add green beans to the heated shallot mixture and stir and toss until beans are hot. Taste to make sure. Drizzle the balsamic glaze over the beans and stir gently until the beans are coated. Sprinkle with salt and pepper to taste. Serve immediately.
Per Serving: 78 Calories; 5g Fat (57.9% calories from fat); 2g Protein; 7g Carbohydrate; 3g Dietary Fiber; 5mg Cholesterol; 6mg Sodium.

Posted in Desserts, on October 25th, 2012.

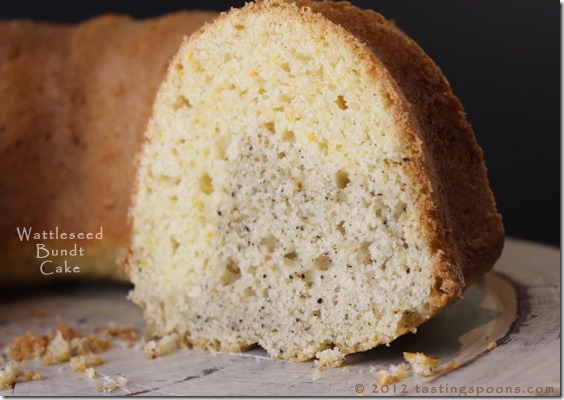
wattleseed_bundt_cake

If you’re most of my readers, you probably don’t have wattleseed in your spice pantry. If that’s the case, and you don’t really want to buy any (from Australia) then you may want to breeze on by this recipe. If you’re intrigued, you may want to look at my previous post about wattleseed, incorporated in the recipe for wattleseed ice cream – my favorite (to date) wattleseed recipe.

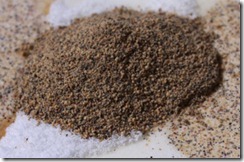
Have you ever made something – in this case baked something – and it was good, but not the “best,” so you gave it away, or even tipped it into the trash? Sometimes it’s just that whatever it was didn’t ground_wattleseedappeal to you the next day – I’ve had that happen often enough. Like left overs! When I made this cake, I also made the wattleseed ice cream along with it. The ice cream was the star of the show. No question! I was bereft when the quart of wattleseed ice cream was gone. In the meantime I’ve restocked my wattleseed supply. That, in itself is another story – an acquaintance at a local herb and spice store had an employee who was visiting Australia – one thing led to another and I ordered wattleseed from Vic Chericoff, had it shipped to where this employee was staying and she brought it home in her suitcase! I gave her a Starbucks card as a thank you. Yippee. I now have enough wattleseed to make another 3-4 batches of ice cream. There’s a lesson here – if anyone you know is going to Australia make arrangements to have them bring you some! I bought it when I was in Australia 2 years ago, but I only bought a little bit. Definitely not enough!

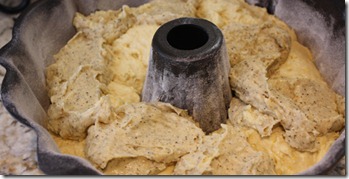
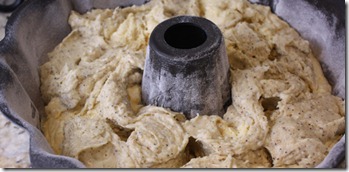
wattleseed_cake_batterThe cake recipe. Well, I found it on a website that also (it just happens) sells wattleseed and some other indigenous Australian products. And a wattleseed cookbook. And has a group of wattleseed recipes too. The cake looked interesting – I like Bundt cakes. I had an orange and a lemon, so I put it together and baked it up in a flash. The batter is divided in half – half gets wattleseed – the other half gets orange/lemon flavorings. You swirl itwattleseed_cake_swirled around in the pan a bit and that’s what you get. The above photo shows the top before I’d swirled it. The one at right shows it after I’d used a knife to swirl the batter.

So, to get back to this cake story . . . after making the cake I was hoping the wattleseed would be just permeate the flavor. It didn’t. What I tasted was the orange and lemon in it. Hmmm. Not what I had in mind. We had it that night, and I think my DH and I had a piece the next night. By the following day it didn’t appeal to me at all, so without asking my DH I threw it out. My hubby doesn’t eat much sweets, so I never thought for a minute he would miss it. Oh yessiree, he did! Went hunting for it a day or so later. Therefore, I made a couple of minor flavor changes to this recipe – toning down the orange (I only added lemon because I didn’t have enough with just one orange) and lemon. Use small ones so the zest doesn’t overpower the cake. That’s all. And definitely don’t over bake it – I think I did and it was a bit on the dry side. I prefer moist cakes. My DH I guess likes cakes drier than I do!

What I liked: well, that here’s another way to use wattleseed. I don’t have a big inventory of recipes for it (yet), although if you click on the link up above you’ll find several, mostly desserts. Just remember that wattleseed is subtle. You don’t want to use a lot of it (it’s precious, remember, for a Californian since it ships from Australia!) in any case. I’ll watch the baking time very carefully next time.
What I didn’t like: that the wattleseed flavor wasn’t the predominant flavor. But it was still nice anyway. A kind of a white spice cake. See what you think and let me know!

printer-friendly PDF
MasterCook 5+ import file – right click to save file, run MC, then File|Import

* Exported from MasterCook *

Orange, Lemon & Wattleseed Butter Cake

Recipe By: Adapted slightly from www.footesidefarm.com/orange-wattle-seed-butter-cake/
Serving Size: 12
NOTES: You can use all orange zest and juice if preferred. I didn’t have enough orange, so use a lemon to supplement the juice and rind. I’ve adjusted this recipe slightly to tone down the orange and lemon flavor since I want the wattleseed flavor to shine through instead.

8 3/4 ounces butter — (2 cubes plus a little bit)
2 teaspoons vanilla
1 1/2 cups sugar
4 large eggs
3 cups self-rising flour
1 cup milk
2 tablespoons wattleseed
1 medium orange — rind and juice (you’ll want 1/2 cup juice total)
1 small lemon — rind and juice (juice added to the orange above)

1. Cream butter, vanilla and sugar in a small bowl with an electric mixer until light and fluffy. Beat in eggs one at a time, and beat until combined.
2. Divide mixture in half.
3. To one mix add ground wattleseed, 1 1/2 cups of self-rising flour and 1/2 cup of milk. Mix until combined.
4. To the other add 1 1/2 cups of self-rising flour, rind from one orange and 1/2 cup of orange and lemon juices. Mix until combined.
5. Spoon mixture into Bundt pan – greased and lightly floured – alternating mixtures. Gently stir a knife through the mixture to give a swirled effect.
6. Bake in a 350° (180° C) oven for approx 40 minutes or until a pick inserted in the center comes out clean. Do NOT over bake!
Per Serving: 402 Calories; 20g Fat (43.3% calories from fat); 6g Protein; 51g Carbohydrate; 1g Dietary Fiber; 119mg Cholesterol; 602mg Sodium.

Posted in Salads, on October 23rd, 2012.

avo_lime_salad_pumpkin_seeds

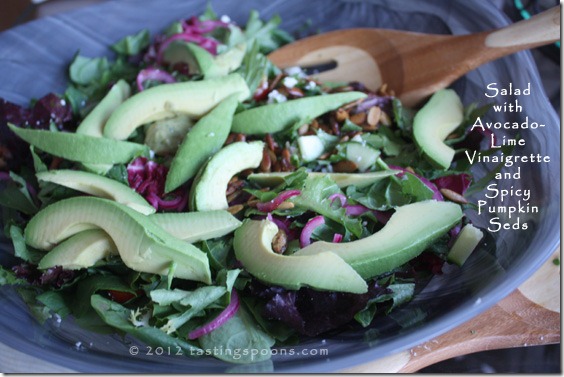
I hadn’t actually tossed this salad when I took the photo, nor had I sprinkled the spicy pepitas over the top, so this photo doesn’t exactly show you the finished product! But don’t let that deter you from making this very tasty salad.

I’m always on the lookout for a new twist on a green salad. I love salads, and particularly enjoy taking some new combination when I’m asked to bring one to someone else’s house. That was the case recently, so I looked through all of my salad recipes to try, and this one stood out. It was a clipping from Bon Appetit in 2009. Next I went online to find the recipe, and hoped to find some comments from others about it. Did they like it? Or not? What would they change, etc. Surprisingly, there was nothing online at all, except the recipe itself. Hmmm. Well, that didn’t deter me from making it anyway. I liked the idea of the avocados, the pepitas (pumpkin seeds) roasted with spices.

The reason I said that I like making this kind of salad to take to someone else’s home is that I probably wouldn’t put in quite this much effort for a salad if I were preparing a company dinner at home. But since all I had to take was salad and bread, it was easy!

First I made the pumpkin seeds. They’re toasted in a large frying pan with a little bit of oil (don’t be tempted to use more oil, it isn’t needed), then when they’re nicely browned you sprinkle a sugar, cayenne and salt mixture over them and allow them to dry. As it was, I couldn’t find unsalted pepitas, so I didn’t add the salt suggested in the recipe.

Meanwhile, you can combine all the other ingredients for the salad part and let them rest in the refrigerator (untossed). The vinaigrette was easy enough to make – it’s olive oil, avocado, cilantro, lime juice vinegar, garlic and a little bit of serrano chile pepper. Also 1/4 cup of the toasted pepitas are added. They provide almost a smoky flavor, although they were merely toasted, not smoked. Just before serving slice up an avocado, dress the salad with the avocado dressing and sprinkle more of the pepitas over the top. Done.

CHANGES I MADE: I used a lot less Feta cheese than the 1 1/2 cups the recipe called for. I also didn’t use the jicama (the one my DH bought was rotten inside, and it was too late for another trip to the grocery store) and I only used one avocado in the salad, not two. I also soaked the red onion in a little water and vinegar for 20 minutes to take out the raw, sharp taste. I didn’t include that tip in the recipe itself since most people don’t care about that.

What I liked: mostly it was the flavor the pumpkin seeds added – but also it was a nice combination with the salad greens, avocado, cucumber and the pepitas. You might want to make more of the pepitas as they make a great snack or for other salads later on.
What I didn’t like: really nothing that I can think of. Next time I might add some Romaine lettuce to the salad (a sturdier lettuce) because the very thick dressing almost overwhelmed the tender greens.

printer-friendly PDF
MasterCook 5+ import file – right click to save file, run MC, then File|Import

Salad with Avocado-Lime
Vinaigrette and Spicy Pumpkin Seeds

Recipe By: Adapted from Bon Appetit, 2009
Serving Size: 8
NOTES: You won’t use all of the salad dressing, so the nutriton info about this salad is not accurate.

VINAIGRETTE:
9 tablespoons olive oil
1/2 cup avocado — diced peeled seeded
1/2 cup chopped fresh cilantro
1/4 cup fresh lime juice
1/4 cup spicy pumpkin seeds (from recipe below)
3 tablespoons white vinegar
1 garlic clove
3/4 teaspoon serrano pepper — minced seeded
SALAD:
1 package baby greens — (5 ounces)
1 whole avocado — halved, seeded, peeled, sliced
1 container cherry tomatoes — (12 ounce) halved
1 medium cucumber — peeled, seeded, diced
1 medium jicama — cut in tiny sticks [optional]
1/2 medium red onion — very thinly sliced
1/2 cup Feta cheese — or cotija, crumbled
SPICY PUMPKIN SEEDS: (1 cup)
1/2 teaspoon cayenne pepper
2 teaspoons olive oil
1 cup pumpkin seeds, roasted — raw, shelled
1 teaspoon sugar
1/2 teaspoon salt

1. VINAIGRETTE: Combine all ingredients in blender and blend until smooth. Season to taste with salt and pepper.
2. SALAD: Place greens in very large bowl. Add avocados, tomatoes, cucumber, jicama, and onion. Toss with enough vinaigrette to coat. Sprinkle with cheese and Spicy Pumpkin Seeds.
3. PUMPKIN SEEDS: Heat oil in large skillet over medium heat. Add pumpkin seeds and stir until evenly toasted (seeds will pop) about 5 minutes. Sprinkle evenly with sugar, salt, and 1/2 teaspoon cayenne. Don’t use too much dressing – it’s thick and may take less than you might think. Toss to coat. Transfer pumpkin seeds to bowl and cool. DO AHEAD Can be made 2 days ahead. Store seeds airtight at room temperature.
Per Serving: 307 Calories; 25g Fat (71.1% calories from fat); 5g Protein; 19g Carbohydrate; 7g Dietary Fiber; 8mg Cholesterol; 249mg Sodium.

Posted in Cookies, on October 21st, 2012.

chocolate_brownie_cookies

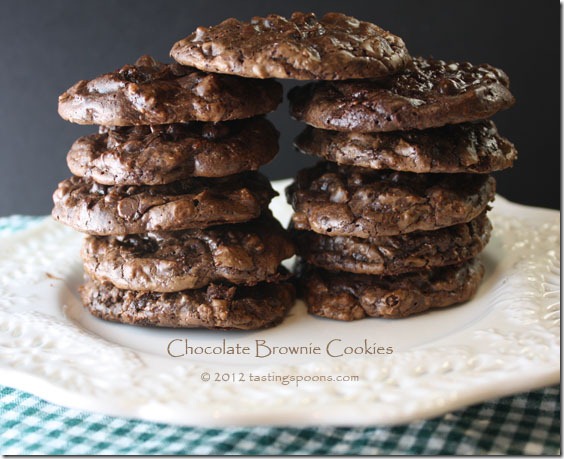
Oh my, oh my. Chocolate decadence. Chocolate heaven. Sugar overload. Chocolate overload. These are slightly crunchy on the very delicate outside and soft and meltingly tender on the inside. I don’t know how that chemistry works, but it does!

Can you tell by looking at these that there’s just a little hint of crispiness to those edges? The whole cookie top is shiny – I think that means there’s lots of wicked butterfat in it and sugar. Yep to both. But when your teeth sink into them, the cookie almost melts before it sort-of sinks and collapses (not crumbles) in your mouth. When I read the recipe in the latest issue of Food & Wine I was smitten with the description of these – brownies in cookie form. I mean the mag is just hot off the press – it’s still October and I’m reading the November issue. You know how that is – all the food mags seem to compete on how early they can publish before the true publish-by date. But anyway, the cookie is from Belinda Leong (obviously she’s the B) of B. Patisserie in San Francisco.

What makes these cookies all craggy-like on top is the folding in of chocolate chips after you’ve smoothed together  the cookie batter. Chocolate chips don’t quite melt into the cookie, but once cooled, they are still intact inside. These taste nothing like a box-mix brownie – it’s not cake like. It’s almost soufflé-like – puffy and soft. They’re not like fudge either – they’re not dense at all, yet there is a ton of chocolate in this recipe (a pound of semisweet that’s melted into the batter and 12 ounces of chips folded in at the end).

The other thing that’s truly unique about these is the method – once you’ve folded in the last of the chips, the batter is spread into a baking dish and FROZEN for an hour or so. Yes, that’s what I said. Then you use a sharp scooping implement (I have cookie scoops from King Arthur Flour that I use all the time – one for cookies and one for muffin size). The scoops of batter are placed on a parchment-lined baking sheet and baked at 400° for 10 minutes. Allow them to cool slightly on the sheet afterwards, then use a small spatula to put them onto a rack to cool completely. I used one sheet of parchment for all the cookies (I made the cookies smaller than the recipe indicated, so I got 48 instead of 36), but I did scrape off the still-warm crumbs that stuck to the parchment. The first batch were pretty hard to scoop out of the dish (because it was frozen), but as the batter sat out at room temp, it was easier and easier.

The only adjustment I made to the recipe was to add a bit less sugar. I’m glad I did, and I think you probably could add even less. I don’t love overly sweet cookies – so use your own judgment. I’ve made a note in the recipe about it.

What I liked: well, the rich, over-the-top chocolate flavor, the texture altogether (crispy outside, melty soft inside). They’re also very delicate, but wickedly chocolate.
What I didn’t like: nothing, really. It’s a very rich cookie – know that before you start!

printer-friendly PDF
MasterCook 5+ import file – right click to save file, run MC, then File|Import

Chocolate Brownie Cookies B. Patisserie

Recipe By: Belinda Leong, B. Patisserie (San Francisco) via Food & Wine, 11/2012
Serving Size: 36-48
NOTES: SUGAR – I removed about 2 T. of sugar from the 1 1/2 cup measure I used, and I think you could reduce it even more. But I’m not so crazy about overly sweet cookies anyway. Use your own judgment.
SIZE: I made the cookies smaller – about a rounded tablespoon per mound – so I got 48 cookies rather than 36.

1 pound semisweet chocolate — chopped
4 tablespoons unsalted butter
4 large eggs — at room temperature
1 1/2 cups sugar — (see Notes)
1 teaspoon pure vanilla extract
1/4 teaspoon salt
1/2 cup all-purpose flour — sifted
1/2 teaspoon baking powder
12 ounces semisweet chocolate chips

1. In a large bowl set over a saucepan of simmering water, melt the chopped chocolate with the butter, stirring a few times, until smooth, about 7 minutes.
2. In another large bowl, using a handheld electric mixer, beat the eggs with the sugar at medium speed until thick and pale, about 5 minutes. Beat in the vanilla and salt. Using a rubber spatula, fold in the melted chocolate, then fold in the flour and baking powder. Stir in the chocolate chips. Scrape the batter into a shallow baking dish, cover and freeze until well chilled and firm, about 1 hour.
3. Preheat the oven to 350° and line 2 baking sheets with parchment paper. Working in batches, scoop 2-tablespoon-size mounds of dough onto the prepared baking sheets, about 2 inches apart. Bake for about 10 minutes, until the cookies are dry around the edges and cracked on top. Let the cookies cool on the baking sheets for 10 minutes, then transfer to a rack to cool completely before serving.
Per Serving: 123 Calories; 6g Fat (42.6% calories from fat); 1g Protein; 18g Carbohydrate; trace Dietary Fiber; 20mg Cholesterol; 24mg Sodium.

Related Posts Plugin for WordPress, Blogger...