Get new posts by email:

Archives

Currently Reading

Here are the tastingspoons players. I’m in the middle (Carolyn). Daughter Sara on the right, and daughter-in-law Karen on the left. I started the blog in 2007, as a way to share recipes with my family. I’m still doing 99% of the blogging and holding out hope that these two lovely and excellent cooks will participate. They both lead very busy lives, so we’ll see.

– – – – – – – – – – – – – – – – – – – – – –

BOOK READING (from Carolyn):

Music of Bees, Eileen Garvin. Absolutely charming book about a woman in midlife, lonely, who raises bees, also makes unlikely friends. Heart-warming and very interesting about beekeeping.

A Postcard from Paris, Alex Brown. Really cute story. Dual time line, 1940s and present day about renovating an old apartment in Paris, things discovered.

Time of the Child, Niall Williams. Oh such a good book. Very small village in Ireland, 1960s. A baby is left on the doorstep. The town all whispers and helps. I listened to an interview of the author, which made me like him and his books even more.

Sipsworth, Simon Van Booy. If you like animals you’ll swoon. An old woman who really wants to die finds a tiny mouse in her house and befriends it and finds a reason to live. Utterly charming book.

The Forger’s Spell, Edward Dolnick. True story. For seven years a no-account painter named Han van Meegeren managed to pass off his paintings as those of Johannes Vermeer.

If You Lived Here, You’d be Home by Now, Christopher Ingraham. Could hardly put it down – about a journalist who takes on a challenge to move to small town in Minnesota and write about it. He expects to hate it and the people and place, but he doesn’t. Absolutely wonderful true story.

The River We Remember, William Kent Kreuger. 1950s, Minnesota. A murder and the aftermath. Could hardly put it down. Kreuger has such a vivid imagination and writing style.

How the Lights Gets In, Joyce Maynard. An older woman returns to New Hampshire to help care for her brain-injured son. Siblings and family, lots of angst and resentments.

The Filling Station, Vanessa Miller. Every American should read this book. A novelized retelling of the Tulsa massacre in 1921. Absolutely riveting.

The Story She Left Behind, Patti Callahan Henry. Love this author. Based on a true story. A famous author simply vanishes, leaving her husband and daughter behind. She had invented a mystical language no one could translate. Present day, someone thinks he’s solved the riddle, contacts the family. Really interesting read.

The Girl from Berlin, Ronald Balson. Love anything about Tuscany. An elderly woman is being evicted from a villa there, with odd deed provenance. Two young folks go there to help unravel the mystery. Loved it.

The Island of the Colorblind, Oliver Sacks, M.D. Nonfiction. The dr is intrigued by a remote Pacific island where most of the inhabitants are colorblind. He also unravels a mystery on Guam of people born with a strange neurological problem. Medical mysteries unveiled. Very interesting.

The Bookbinder, Pip Williams. Post 1914 London. Two sisters work at a bookbindery. They’re told to not read the books. One does and one doesn’t. One has visions beyond her narrow world; the other does not. Eventually the one gets into Oxford. Lovely story.

The Paris Express, Emma Donoghue. 1895 on a train to Paris, a disaster happens. You’ll delve into the lives of many people who survived and died in the crash.

A Race to the Bottom of Crazy, Richard Grant. This is about Arizona. Author, wife and child move back to Arizona where they once lived. Part memoir, research, and reporting in a quest to understand what makes Arizona such a confounding and irresistible place.

The Scarlet Thread, Francine Rivers. A woman’s life turned upside down when she discovers the handcrafted quilt and journal of her ancestor Mary Kathryn McMurray, a young woman who was uprooted from her home only to endure harsh frontier conditions on the Oregon Trail.

A Place to Hide, Ronald Balson. 1939 Amsterdam, an ambassador has the ability to save the lives of many Jewish children. Heartwarming.

Homeseeking, Karissa Chen. Two young Chinese teens are deeply in love, but in China. Then their families are separated. Jump to current day and the two meet again in Los Angeles.

North River, Pete Hammill. He always writes such a good story. A doctor works diligently healing people from all walks of life. His wife and daughter left him years before. One day his 3-yr old grandson arrives on his doorstep.

A Very Typical Family, Sierra Godfrey. A very messed-up family. Three adult children are given a home in Santa Cruz, Calif, but only if the siblings meet up and live in the house together. A very untypical scenario but makes for lots of messes.

Three Days in June, Anne Tyler. The usual Anne Tyler grit. Family angst. This wasn’t one of my favorites, but it was entertaining and very short.

Saved, Benjamin Hall. Author is a veteran war reporter. Ukraine, 2022, he nearly loses his life to a Russian strike. Riveting story – he survives, barely.

Grey Wolf, Louise Penny. Another Inspector Gamache mystery in Quebec. She is such an incredible mystery writer.

All the Colors of the Dark, Chris Whitaker. A missing person mystery, a serial killer thriller, a love story, a unique twist on each. Could hardly put it down.

Orbital, Samantha Harvey. Winner of 2024 Booker Prize. I don’t usually like those, but I heard the author interviewed and she hooked me. This is not a normal book with a beginning, a story and an end. It’s several chapters of the day in the life of various astronauts at the ISS (Int’l Space Station). All fictional. She’s been praised by several real astronauts for “getting it” about space station everyday life.

The Blue Hour, Paula Hawkins. An island off Scotland. Inaccessible except when the tide is out. Weird goings on. An artist. A present day mystery too.

Iron Lake, William Kent Krueger. A judge is murdered and a boy is missing. Riveting mystery.

Tell the Wolves I’m Home, Carol Ricks Brunt. 1980s. A 14-yr old girl loses her beloved uncle. Yet a new friendship arises, someone she never knew about.

Four Treasures of the Sky, Jenny Zhang. 1880s, a young girl is kidnapped in China and brought to the United States. She survives with many hurdles in the path.

The Boy Who Fell out of the Sky, Ken Dornstein. Memoir, 1988. The author’s brother died in the PanAm flight that went down in Lockerbie, Scotland. A decade later he tries to solve “the riddle of his older brother’s life.”

Worse Care Scenario, T.J. Newman. Oh my. Interesting analysis of what could/might happen if a jet crashed into a nuclear plant. Un-put-downable.

Song of the Lark, Willa Cather. Complicated weave of a story about a young woman in about 1900, who has a gifted voice (singing) and about her journey to success, not without its ups and downs.

Crow Talk, Eileen Garvin. Charming story which takes place at a remote lake in Washington State, about a few people who inhabit it, the friendships made, but also revolving around the rescue of a baby crow.

The Story Collector, Evie Woods. Sweet story about some dark secrets from an area in Ireland, a bit magical, faerie life, but solving a mystery too.

A Sea of Unspoken Things, Adrienne Young. A woman investigates her twin brother’s mysterious death. She goes to a small town in California to figure it out, to figure HIM out.

The King’s Messenger, Susanna Kearsley. 1600s England, King James. About one of his trusted “messengers,” and his relationship with a young woman also of “the court.” Lots of intrigue.

In the Shadow of the Greenbrier, Emily Matchar. Interesting mystery in/around the area of the famous resort in White Sulphur Springs, West Virginia.

Isola, Allegra Goodman. Hard to describe, survival story on an island in the 1600s.

Save the Date, Allison Raskin. Rom-com, witty, LOL funny. Clever.

The Sirens, Emilia Hart. Numerous time-lines, Australia. Mysteries abound, nightmares, abandoned baby, weird allergies.

Red Clay, Charles Fancher. LOVED this book. Mostly post-Civil War story about the lives of slaves in Alabama during Reconstruction.

Stars in an Italian Sky, Jill Santopolo. Dual time line, 1946 and recent time. Love stories and a mystery.

Battle Mountain, C.J. Box. Another one of Box’s riveting mysteries. Love his descriptions of the land.

Something Beautiful Happened, Yvette Corporon. A memoir of sorts in Greece, tiny island of Erikousa, where the locals hid Jews during WWII. All elusive stories told by the author’s grandmother.

The Jackal’s Mistress, Chris Bohjalian. 1860s Virginia, about a woman who saves the life of a Union soldier. Really good story.

Song of the Magpie, Louise Mayberry. Really interesting story about Australia back in the days when it was mostly a penal colony. Gritty strength of a woman trying to thrive with her farm.

The Boomerang, Robert Bailey. A thriller that will have you gripping the book. About a lot of secrets surrounding the president (fictional novel, remember) and his chief of staff and about cancer. A cure. Such a good story.

Care and Feeding, Laurie Woolever. Really interesting memoir of a woman driven to succeed in the restaurant business. She worked for Mario Batali and then Anthony Bourdain. Gritty stories.

Everything is Tuberculosis, John Green. Maybe not a book for everyone. A real deep dive into the deadly tuberculosis infection, its history. I heard the author interviewed and found the book very interesting.

The Book Lovers Library, Madeline Martin. Fascinating read about Boots’ drug stores’ lending library. And the people who worked in them.

The Arrivals, Meg Mitchell Moore. LOL funny, about a middle-aged couple whose children (and their various family members) return to the family home and the chaos that ensues.

My Life as a Silent Movie, Jesse Lee Kercheval. About grief. A big move to Paris, finding herself a new life with a new set of real blood family.

Escape, Carolyn Jessop. Another memoir about a woman really in bondage in Utah, Mormon plural marriage.


Tasting Spoons

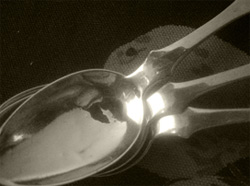
My blog's namesake - small, old and some very dented engraved silver plated tea spoons that belonged to my mother-in-law, and I use them to taste my food as I'm cooking.

Scroll down to the bottom to view my Blogroll

Posted in Breads, Desserts, on March 28th, 2013.

choc_loaf_cake

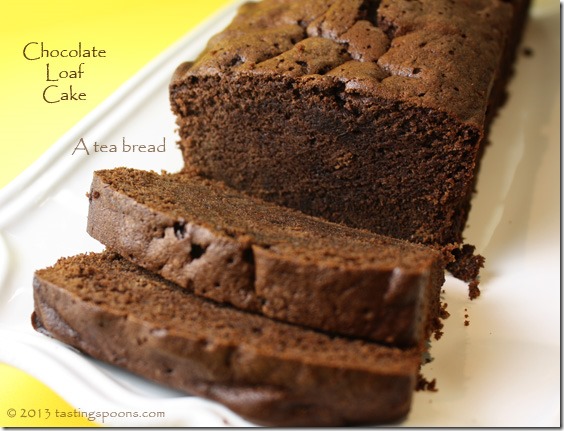
A tea bread. Yes. A cake? Well, perhaps, but it’s not quite as tender as one. A traditional loaf bread texture? No, not at all. More tender than that. It’s in-between. Chocolaty, yes, indeed! Delicious? Absolutely!
choc_loaf_cake_bakedOh my. Oh my. I knew, the moment I licked the beater that this bread or cake in a bread shape, was going to be sensational. The chocolate flavor – well, it’s just there. You know what I mean? If you don’t already read the blog from King Arthur Flour, you should. They have a very astute test kitchen, and of course, all they do is bake things – sweet and savory. Crackers, to doughnuts, to cakes, pies, breads of all kinds, and things like this, a tea bread. PJ Hamel was the test kitchen cook this time. I always love reading her stories – she’s witty. Here’s what she wrote in the preface to this recipe:

I brake for chocolate.

I also break for chocolate.

And bake with chocolate.
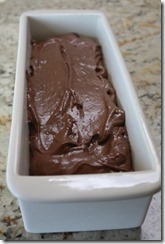
choc_loaf_cake_batter_in_panThe day I baked this had been a doozy. A little – no, a big family crisis does something to the psyche. I was feeling wrenched. At a loss. I prayed about it – have been praying about it for several days. I’m sorry, I can’t share about it; it’s not my place to share. It’s still too raw. No, it’s not about me or my dear hubby. Someone else in the immediate family. Finally, after lulling myself with some TV shows on my Tivo, and having a short glass of sangria, I just decided I should bake something. We were going to friends for dinner, so I didn’t have to cook. I thought maybe I’d get it done in time to take some to them. Also thought baking might get me out of my slump. And it did.

It had me looking back at the King Arthur blog piece because I decided to bake the loaf in the narrow tea loaf ceramic pan I have – that I love – and have only used a few times.

There was a little nugget of information on the blog about why/how we use different kinds of cocoa. This was provided in one of the comments to this recipe; it came from Frank, a pastry chef.

  • It is always best to use the cocoa called for in the recipe rather than
    making a substitution, but if you need to substitute, here is the
    ratio.
  • Dutch Cocoa:
    Substitute 3 Tablespoons natural cocoa plus 1/8 teaspoon baking soda.
  • Natural Cocoa:
    Substitute 3 Tablespoons Dutch cocoa plus 1/8 teaspoon cream of tartar,
    lemon juice, or vinegar.
  • So, when do you use each one? For recipes calling for more baking soda
    than baking powder, you use natural cocoa.
  • If the recipe has more baking powder than soda, you will want a Dutched
    cocoa due to the different alkali content. Using a natural cocoa will
    give your baked goods a heavy, soapy taste.

I’m so glad I read that because had I not, I would have used a different cocoa. As it was, I dug in my lidded bin in my pantry for Penzey’s high fat Dutch-process cocoa, exactly what I needed for this tea bread.
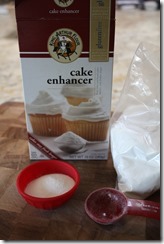
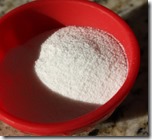
IMG_6673It took no time to mix it up. Butter, sugar, cocoa, a little jot of espresso powder (which brings out, or enhances the chocolate flavor in the loaf), baking powder, vanilla, also some of King Arthur Flour’s Cake Enhancer. Have you heard of it? It’s a type of emulsifier, and is king_arthur_cake_enhancer_bowlused a lot in professional kitchens and bakeries. It helps stabilize batters and breads and makes them or keeps them moist. So there were 2 T. of that in the batter too. Plus flour and milk. I think that was it. Nothing all that unusual, really.
Into the elongated tea loaf pan it went and baked. According to KAF, to switch to the different pan I should reduce the baking time by about 25% from a standard bread pan. It took longer than that to get the tea loaf to just the right internal temp, but it baked in about 60 minutes. I let it cool awhile, then with a little bit of rocking motion it came out of the pan easily enough. I think next time I would put a piece of parchment in the bottom. I’ve added that note to the directions.

What’s GOOD: everything about it. This is really a cake, but it’s sturdy enough (or it has a dense enough texture) that you can slice it into thin slices. But it’s absolutely NOT dense like a banana bread, for instance, or zucchini bread. Not at all. Truly it’s a cake. And delicious. If you’re a chocolate nut, it will tick all your boxes for richness, chocolate flavor, toothsome-ness, if there is such a hyphenation. In a word, this is terrific.
What’s NOT: nothing. Nary a word could I say. Hoorays for the King Arthur Flour test kitchen.

printer-friendly PDF (created using Cute PDF Writer, not Adobe)
MasterCook 5+ import file – right click to save file (and remember where you put it), run MC, then File|Import

* Exported from MasterCook *

Chocolate Loaf Cake

Recipe By: King Arthur Flour, 2013
Serving Size: 20

1/2 cup butter — (8 tablespoons) preferably at room temperature for easiest mixing
1 1/2 cups sugar
3/4 teaspoon salt
2 teaspoons vanilla extract
1/2 teaspoon baking powder
2 teaspoons espresso powder — optional, to enhance chocolate flavor
2/3 cup Dutch-process cocoa powder
2 tablespoons Cake Enhancer — optional; for moistness (King Arthur product)
3 large eggs
1 1/4 cups all-purpose flour
3/4 cup milk

1. Preheat the oven to 350°F. Lightly grease a loaf pan: either 9″ x 5″, or 8 1/2″ x 4 1/2″. The smaller pan will yield a higher-crowned loaf. [My suggestion: put parchment paper in the bottom of the pan – makes it a whole lot easier to get out.]
2. In a medium-sized mixing bowl, beat together the butter, sugar, salt, vanilla, baking powder, espresso powder, cocoa, and Cake Enhancer to make a sandy, somewhat clumpy mixture. Don’t worry; the eggs will smooth things out.
3. Add the eggs one at a time, beating well after each addition. Scrape down the sides and bottom of the bowl midway through this process.
4. Add half the flour to the bowl, beating at low speed to combine.
5. Add all of the milk, beating at low speed to combine.
6. Add the remaining flour, beating gently just until the batter is smooth.
7. Pour the batter into the prepared pan.
8. Bake the cake for 60 to 70 minutes (or more), or until a toothpick inserted into the center comes out clean. The top may look a tiny bit damp; that’s OK. If you have an instant-read thermometer, the center will register about 205°F, while just under the top will register about 195°F. If baking in an elongated tea loaf pan, bake for about 50-60 minutes.
9. Remove the cake from the oven, loosen the edges, wait 10 minutes, and turn it out of the pan onto a rack to cool.
10. Store completely cooled cake well wrapped, at room temperature.
Per Serving: 154 Calories; 6g Fat (35.7% calories from fat); 3g Protein; 23g Carbohydrate; 1g Dietary Fiber; 45mg Cholesterol; 156mg Sodium.

Posted in Essays, on March 26th, 2013.

laurie_colwin_and_books

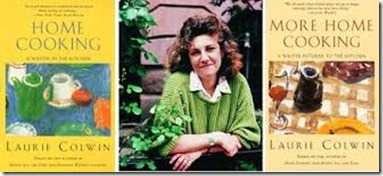
The world lost a wonderful writer when Laurie Colwin died in 1992, very young (48) to a heart attack. I remember opening my issue of Gourmet that month to read the unbelievable news that Colwin had died suddenly. There was no explanation about what happened. I’d been a fan of her writing for many, many years. I adored her essays in the magazine, and had purchased her first food essay collection, Home Cooking: A Writer in the Kitchen (Vintage Contemporaries). I loved the stories – most of them were from her many years of writing for Gourmet. Her writing style was so witty, folksy, down to earth. But loving, and matter-of-fact. She shared simple recipes, but with a charm and verve that made you just want to go right to the kitchen and make her beef stew. Or her gingerbread. Or her creamed spinach with jalapenos.

Recently I moved some of my cookbooks and other books related to cooking from my kitchen/family room area to my upstairs office. Books I don’t refer to with any frequency made the transition along with various cookbooks I can’t bear to part with, but don’t use much. When I came upon the Home Cooking book, I decided to set it aside and it’s been sitting in the book rack in one of our bathrooms for about 2-3 months. Even my DH has picked it up from time to time and enjoyed reading a story. I’ve just finished reading it from cover to cover, with a renewed enthusiasm for making some of her recipes (of which there are few). There are several quotes that I found so humorous, so I decided to share some with you. I don’t think I’m allowed to completely write one of her essays here, but bits and pieces are okay, I think. Perhaps they’ll pique your interest – enough to buy the book yourself.

In the Forward of the book, Colwin wrote a little explanation about her love of food and socializing in the presence of food.

Unless you live alone in a cave or hermitage, cooking and eating are social activities; even hermit monks have one communal meal a month. The sharing of food is the basis of social life, and to many people it is the only kind of social life worth participating in.

No one who cooks cooks alone. Even at her most solitary, a cook in the kitchen is surrounded by generations of cooks past, the advice and menus of cooks present, the wisdom of cookbook writers. In my kitchen I rely on Edna Lewis, Marcella Hazan, Jane Grigson, Elizabeth David, the numerous contributors to The Charleston Receipts, and Margaret Costa (author of an English book entitled The Four Seasons Cookery Book).

One of the delights of life is eating with friends; second to that is talking about eating. And for an unsurpassed double whammy, there is talking about eating while you are eating with friends. People who like to cook like to talk about food. Plain old cooks (as opposed to the geniuses in fancy restaurants) tend to be friendly. After all, without one cook giving another cook a tip or two, human life might have died out a long time ago.

Perhaps Colwin’s most famous essay is the one entitled “Alone in the Kitchen with an Eggplant.” It is, without a doubt, my favorite food essay ever, and I’ve opened this book more than once just to read this chapter. Colwin was young and an aspiring writer back then, and had to economize in order to even live in New York City. She rented an apartment that would likely drive a normal person off the edge, but to Colwin, it had charm in spades. Here’s what she wrote:

For eight years I lived in a one-room apartment a little larger than the Columbia Encyclopedia. It is lucky I never met Wilt Chamberlain because if I had invited him in for coffee he would have been unable to spread his arms in my room which was roughly seven by twenty.

I had enough space for a twin-sized bed, a very small night table, and a desk. This desk, which I use to this day, was meant for a child of, say, eleven. At the foot of my bed was a low table that would have been a coffee table in a normal apartment. In mine it served as a lamp stand, and beneath it was a basket containing my sheets and towels. Next to a small fireplace, which had an excellent draw, was a wicker armchair and an ungainly wicker footstool which often served as a table of sorts.

Instead of a kitchen, this minute apartment featured a metal counter. Underneath was a refrigerator the size of a child’s playhouse. On top was what I called the stove but which was only two electric burners – in short, a hot plate.

Many people found this place charming, at least for five minutes or so. Many thought I must be insane to live in so small a space, but I loved my apartment and found it the coziest place on earth.

My cupboard shelves were so narrow that I had to stand my dinner plates on end. I did the dishes in a plastic pan in the bathtub and set the dish drainer over the toilet . . .

When I was alone I lived on eggplant, the stove top cook’s strongest ally. I fried it and stewed it, and ate it crisp and sludgy, hot and cold. It was cheap and filling and was delicious in all manner of strange combinations. If any was left over I ate it cold the next day with bread. . .

In this tunnel-like dollhouse of an apartment, Colwin often entertained, but only a party of three. Four made impossible logistics. She often served soup – a one pot wonder. Usually she brought in dessert. I’ve tried to envision an apartment 7 feet wide by 20 feet long, which had to have included a bathroom of sorts, thereby leaving very little space left for living. Yet Colwin found it absolutely comforting and homey. She always preferred to eat at home rather than go out – she was a champion of good old-fashioned kinds of home cooking. Nothing fancy was her motto. One of her mantras was about salt – lots of it – and seasoning everything with celery salt too.

Eventually Colwin married – moved into a more normal sized house – and had a daughter. She continued to write. Including numerous novels. Here’s a link to her many published works. None is available on the Kindle.

Posted in Uncategorized, on March 22nd, 2013.

irish_soda_bread

For whatever reason, I haven’t cooked anything in the last few days that has been noteworthy. Or I supposed I should say blog-worthy. Don’t we all have days like that, or strings of days? I made some beef stroganoff and to me it was just blah. And it was a well-tested recipe from America’s Test Kitchen. Or Cook’s Illustrated. Can’t remember which. I took pictures of it, assuming it would be great since usually I rave about their recipes. Not that one. Toss those photos.

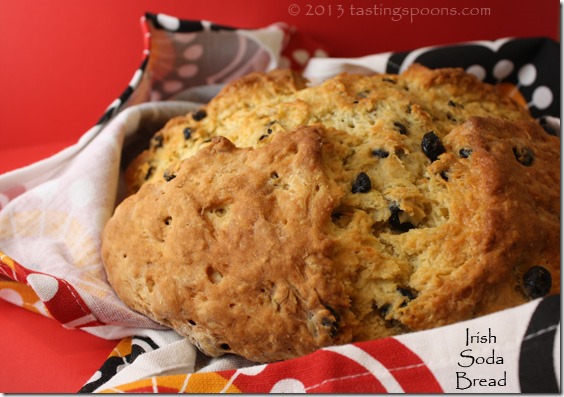
I have been cooking, but sometimes it’s been something from the freezer that I’ve already told you about. We’ve had several meals from my stash of soups. We’ve been out to eat, or been invited to friends, so I’ve not needed to cook anything myself. I fixed Trader Joe’s minted green peas – the last package from my freezer. I’m sad they’ve discontinued that one. I’ve made squash in a couple of ways – my mother’s old tried and true method of finely mincing, steaming it a bit, then adding in a bit of butter at the end. Who hasn’t done that a hundred times? I bought a nice chubby sweet potato a week ago and went to fix it tonight and discovered that it’s mostly spoiled. Today I defrosted some pork chops (boneless) that I’d gotten all prepared to do in the Sous Vide SVK-00001 – SousVide Supreme Water Oven, Brushed Stainless’>sous vide. But by the time I got to it, there wasn’t time to do it that way. So my DH is grilling them outside. We were invited to our son’s home the other night, and I did make some things – the very creamy rice pudding I posted a few weeks ago. And I also made Irish Soda Bread with Orange Zest that has been a favorite of mine. It’s Ina Garten’s recipe. I love that soda bread (pictured at top). My DH just said to me, as I pointed to the photo here on my computer screen, and he said “wow, that was unbelievably good; you can make that any time you’re willing to.” I’ve made nearly all of my usual rotations of salad dressings, relying on the Garlic VIP Salad Dressing most of the time. That recipe was the 16th blog post I did, back in 2007. I also heavily rely on my Creamy Garlic Blue Cheese Dressing too.

We’ve been buying meat for a couple of years now, from a guy who comes to our house, and he sold us a box of his duck legs. Oh gosh, are they good! But they’re not blog-worthy because they’re already cooked and they enclose a package of orange sauce to serve with it. It’s all “done” already – all I have to do is heat it through in the oven. How easy is that?

indian_ridge_golf_course1Maybe I haven’t mentioned it, but we’ve sold our vacation home in the California desert. We sold it because we just don’t use it enough. We love it – and we use it, yes, but not enough. That picture is taken near the country club a week or so ago. Dave and I got into our cute little black, shiny golf cart and just took a long, long jaunt around the complex, looking at all the ponds, the ducks, the herons frozen in place looking for fish alongside some of the ponds. We watched some of the golfers swing. And miss the green. Spring flowers are blooming to beat the band these days. In the photo above, the golf course is off on the right. We had lunch in our favorite café there (that overlooks the Olympic pool, outdoors) and ordered our very favorite item – an Oriental chicken salad. They use a Sysco prepared dressing on that salad. I’ll miss having that. We’re resigning our membership, so we won’t be able to use the clubhouse. On our last visit, we went to our favorite restaurants out there, Pacifica, on El Paseo, and enjoyed our fish-centric meal so much. Likely our very last lunch at the country club will be that salad. We hope some of our friends will invite us out there on occasion and take us there so we can have that salad!

It only took us 5 years to sell the house, and we took a bath on it. Some areas in California have not had much of a downturn (the Bay Area mostly), but other areas, yes indeed! It’s still in escrow as I’m writing this, but will close in a couple of weeks. We’ve made numerous trips out there packing, sorting and getting rid of clothes that have lived there for years and aren’t being worn. The houses there mostly sell furnished, so it’s just our personal stuff we must pack – and all the art, including many paintings I did myself, and nick-nacks. The kitchen – well, let me just tell you – the new owners are getting a treasure trove of gadgets and things. Most herbs and spices I’m leaving behind – they’ve been sealed up in jars, but during 13 desert summers they’ve been up to 88° for months at a time (houses are supposed to be left air conditioned – even if you’re not there – because if you don’t, the glue in cabinets will dry up and you might arrive one time and find most of your cabinets and everything in them – in a heap on the floor – so the houses are kept at 88° all through the hot months). So I’m not thinking any of those herbs or spices are worth keeping. Maybe the new owners won’t notice. I will tell them, in my lengthy letter I’m writing to them on our last day. I did bring back home all of my good Cutco knives (I ordered a second set for that house when we bought the house in 2000). And my old Nespresso machine which I’ll now put in my office upstairs.

We had a couple of sets of dishes out there, so have brought those back too, but we’re leaving plenty for the new owners. Including a set of white (very plain and ordinary) dishes for 12 that came with the house when we bought it. They’re gathering dust in the garage. They’ll be surprised when they open that cupboard. Maybe they’ll like them. We didn’t. The cupboards in the kitchen are full of varying dishes, pots and pans (including some Caphalon), bake ware, Pyrex, an ancient slow cooker, even a bread machine. Everything they could possibly need except fresh food. The freezer has a bunch of stuff in it, so we will be bringing all that back on our next trip. Whenever I cooked there, I’d just stash a 2nd dinner portion in the freezer. I’m even leaving them some cookbooks. Not ones that I particularly care about, or they’d be coming back home with me too.

curried_deviled_eggsLast night I made a big batch of deviled eggs for a luncheon. Or, as my Bible Study leader said, nobody wants to eat anything related to the devil, so let’s call them angeled eggs. Okay. I’ve made them before – and they’re here on my blog. Most people don’t expect curry powder to be in eggs, and yet, they’re SO delish. I also cut the eggs differently, across rather than lengthwise and I slice just a little flat space on the bottom of each egg half. That’s why they stand up and mostly don’t fall over. Go to the blog post if you’re interested in knowing more. I heard lots of raves, which makes me feel good.

Then I have a short story about my Kitchen Aid stand mixer. The one I had has bitten the dust. My old one was about 30 years old. A few years ago I discovered the beater blade, a gadget you can use in most stand mixers that scrapes the side of the stand mixer’s bowls, so you don’t have to hand-scrape with a spatula when you’re mixing. I loved it, but sometimes it would get a bit out of adjustment, as you need to move the mechanism that holds the blade (or paddle) up in order to accommodate the extra depth of the rubber blades on the beater. This adjustment is done with some very minute adjustments of a screw underneath the tilt head. My DH had to adjust it the first time – I simply couldn’t make it kitchen_aid_redwork right. He figured it out. So this one day I knew it needed some adjustment. I tried to do it myself and thought it was okay. I was mixing up cookies. As the batter got progressively more firm once I added the flour the mixer was laboring a little. I slowed it down, and BANG, the beater blade broke in half. It was made of plastic with the rubber edges. Dang. I went back to the regular blade. A few weeks later I bought a new beater blade, making the assumption that it was my fault that the thing broke, and that another one would work fine. I installed the new beater blade and some days later I was, again, making a batch of cookies. The dough was quite firm, I’ll admit. I could see that again, the motor was laboring, so I made an adjustment to the screw, thinking that this new beater blade was different. Well, before it had hardly made 2-3 circuits in the bowl this brand new beater blade broke in half. Oh my. Since I hadn’t finished my cookies, I reverted to the standard batter beater that comes with it, but darn, if the entire head of the Kitchen Aid would wiggled back and forth. If I turned up the speed it would wobble even more. Not good. I tried adjusting the screw. No difference. I think that breaking both beater blade somehow threw out the alignment of the mixer. So, I had to buy a new one. I might have purchased some great new mixer, but because I have an appliance garage, with exactly 15 7/8 inch height clearance, it was quite clear – no newer model for me – I replaced my old stand mixer with the same 4 1/2 quart Kitchen Aid I’d had before. I just chose a different color, and I think I’ll live with the hand-scraping of the bowl from now on. Love the color!

So that’s where I am today. I’ll be back in the kitchen soon. I have a long post I want to share with all of you – have you ever heard of Laurie Colwin? I’ve decided all my readers need to know about her. Coming soon.

Posted in pressure cooker, Utensils, on March 20th, 2013.

duocombi_large_horizontal_product

This post isn’t about a recipe. It’s just about pressure cookers, what makes them tick (ha! that’s a joke, the old-fashioned ones did kind of tick or jitter, new ones don’t). Most of this is synopsized (is that a word?) from my latest issue of Cook’s Illustrated. It was so interesting I thought I’d share it with you.

If you’ve been reading my blog for any length of time you’ll already know that I particularly like to know the “why” of things. The science of cooking. I imagine this comes from the genetics I got from my dad – he was an engineer, and probably would have liked me to be one too, but I took a different path. Yet, when it comes to cooking, as I’ve gotten older (oh, excuse me, mature!) I really like knowing why things work. Like what is the maillard reaction (that’s the effect of caramelization or browning in a pan, mostly related to meat, but it could be anything that’s cooked to a high enough heat and creates a fond, that brown stuff that sticks to the pan, where all the flavor lies)? Or how/why does baking powder or soda makes things rise. Why is arborio rice different than long grain and why do they cook differently? You know, those kinds of things.

Just a bit of pressure cooker background here – I was given a pressure cooker in 1962 when I got married the first time. I used it, and then one unfortunate day I was cooking artichokes, got distracted, went outside and totally forgot about the artichokes jiggling away in the kitchen. When I came back through the door about 30 minutes later, the smell assailed me – burned is all I can say. The pressure cooker, one of those old-old Presto versions – was still on the stove, the jiggly top had blown off and the artichokes were burned to a crisp and obviously there was no more water inside. The interior couldn’t be cleaned up, and I discovered immediately that the bottom of the pan was warped. Big time warped. It had developed a rounded bottom – so bad that the pan wouldn’t sit level anyway, although it was still barely usable (amazing, when you consider what I’d done to it!). Plus, I couldn’t get that burned smell out of the pan in any event. I kept it for years, out of guilt, I think, that I’d been so careless as to ruin the darned thing. Hoping there would be a solution. (No.)

But I’d remembered all these ensuing years how much time they saved sometimes. It was at a cooking class about 5-6 years ago that the instructor (Deb Buzar) made short ribs, and she did it in the pressure cooker. It wasn’t a pressure cooker class – but she’d arrived at the class at about 5pm, was somewhat short on time to prep for the class. But, she explained that she always does her barbecued short ribs in the pressure cooker – mostly because the recipe she shared (linked just above – and is still my go-to short rib recipe) was from her mother-in-law, and SHE had always made it in the pressure cooker. It was at that class I decided to buy one.

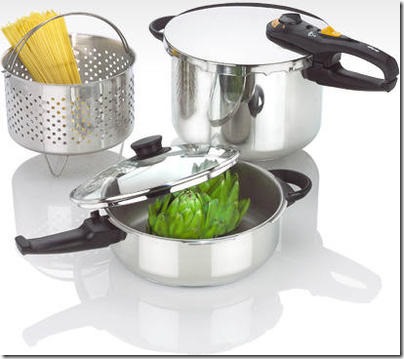
Being a judicious buyer as I am, I went online and read reviews about PC’s. Mostly at amazon.com. There are all varying prices – from under $100 to nearly $300. After reading reviews, I decided to buy a Fagor, and purchased a variation of the 5-piece set (the one you see pictured at the top) – Fagor Duo Combi 5-Piece Pressure Cooker Set. It has 2 different sized pans, with two lids – one which includes the rubber sealing ring that allows the pan to come to pressure, and the second one just an ordinary glass lid,  and also came with a pasta/steamer insert. I think it’s about $150. The set I bought from amazon didn’t come with the pasta insert and didn’t have the glass lid. I’ve been nothing but happy with my purchase. I don’t use it every day. I don’t even use it every week, but when I use it – I’m very grateful I have it. Lately I’ve used it most often for cooking dried beans, which has been a revelation to me. I’m not trying to convince you to buy a Fagor. I’m only sharing my process and that I’ve been happy with my decision.

So fast forward to the other day when I was reading Cook’s Illustrated, and they had a lengthy article about PCs. Purposely I didn’t flip the couple of pages to read which ones were their winners. Here’s what I learned.

Pressure cookers function based on a very simple principle. In a tightly sealed pot, the boiling point of liquid is higher. As the pot heats up, pressure begins to build. This pressure makes it more difficult for water molecules to turn to vapor – therefore raising the boiling point from 212 to 250 degrees. Why does this matter? The superheated steam generated in the cooker makes food cook faster. And because the pot stays closed, cooking requires much less liquid than usual, and flavors concentrate.

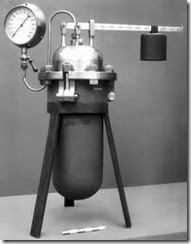
steam_digesterContraptions for cooking under pressure have been around for a long, long time. They were first invented by Denis Papin in 1679. He was a French mathematician and physicist and invented it because he wanted to reduce bones (probably from cows, pigs and sheep) to bone meal. Some time in the 1900’s, after World War II, there was a big surge to develop them for the home cook. At one time I used my badly warped pressure cooker to cook chicken backs and necks (which were dirt cheap back in the 1970’s), reduce them to mush, and feed them to my female dog who had just whelped and was quite thin and weary from caring for and feeding her litter of puppies. It worked like a charm to give her lots of calcium. The bone mixture was loaded with calories too. She wolfed it down.

Anyway, early pressure cookers had some inherent problems (and the article said there were some unscrupulous manufacturers too), but as the years have gone by they’ve been tested and designed for ease of use – and safety for home use. No toggle thing that ticks. With mine, I bring it up to temperature and it starts to spit steam. Once it’s a steady stream of steam, I reduce the temp, and it sits on the range with no need to watch it at all, until the minutes have ticked away. Once done, you can just let it cool down on its own. You can flip a toggle and release the steam, or I put it in my kitchen sink and run cold water over it for about 15 seconds and it’s down to a regular/no pressure. Mine has a tiny little plastic plug and when it’s under steam pressure the plug sticks up (kind of like those little plastic thingies that come in turkeys, that supposedly pop out when the turkey is done). Once pressure is released, the plastic plug slips back down into the lid so I know it’s safe to remove the lid. It’s very easy and I feel very safe using it.

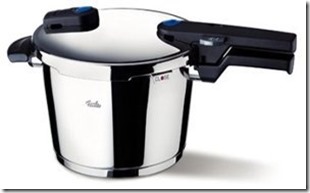
The article concluded that 6-quart pans aren’t very useful. Mine is an 8-quart, which was the preferred size. They also highly recommended a 9 inch width. Some are 7 1/2 inches, but they didn’t like them much. The bottom of pressure cooker pans enclose a heavy-duty aluminum ring, encased in stainless steel, that regulates and retains heat. If that ring is too small, food on the outer edges can burn. And they cautioned about using pans on a burner where the flame can lick up the sides and can damage both the locking mechanisms in the lids and the rubber gaskets. So don’t use the cooker on a really high BTU burner (those are always a wider ring of flame). Better to use a regular burner, although it will take a bit more time to bring it up to temperature. The 2 winners had base thicknesses of over 7 millimeters thick. Several other models were under 7 millimeters and didn’t perform as well. Some models didn’t quite reach/maintain the 250 degree desired temp. Only the top one did. fissler_vitaquick_pressurecookerThe 2nd best, their Best Buy model (the one I own, above) didn’t quite get to 250 degrees, but was very close. All the others were less, so cooking times were longer. Some models also lost fluid (meaning they vented too much steam). The two top models lost a very tiny amount, which is ideal. The number one model was the Fissler Vitaquick Pressure Cooker, 8.5qt.  It’s $279. The #2 choice was the one I own (see link in top paragraph if you’re interested).

Electric pressure cookers were also examined and found wanting, for a variety of reasons: smaller size (too small), the nonstick coating inside was less durable than the stainless steel in regular models, they lacked handles, they spun around when stirring, and weaker heating elements. The only model they half-heartedly recommended was Emeril by T-fal CY4000001 6-Quart Electric Pressure Cooker, Silver.

If you’re interested, the article says that 5 recipes from Cook’s Illustrated’s new book, Pressure Cooker Magic (not out yet, I gather, since I can’t find it online anywhere), are available for free for 4 months (until May 13th, 2013). You will have to sign in/up (free) in order to access the recipes. There’s one for Asian-Style Boneless Beef Short Ribs, Chicken Broth, Easy Chicken and Rice, Easy Ziti with Sausage and Peppers, and Parmesan Risotto.

I do have a number of recipes on my blog prepared in the pressure cooker. In case you’re interested, click on the links below. And I just posted 2 days ago an article about cooking beans – if you click on this link, you’ll go to that one, and do print out the 2-page chart which includes the cooking times for cooking every possible kind of bean in a pressure cooker.

Malaysian Inspired Pork Stew
Parsnips in Orange Sauce
Lamb Shanks with Garlicky Madeira Gravy
Sweet and Spicy Barbecued Country Ribs
Carnitas Tacos
Italian Pot Roast
Mushroom Risotto
Beef Stew with Dumplings
No Heat Beef Chili (the beans are made in the pressure cooker)

Posted in Veggies/sides, on March 18th, 2013.

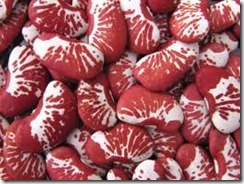
mixed_beans

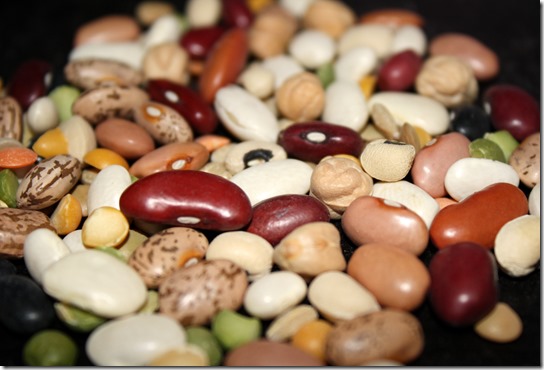
Just recently I learned how easy – and I mean EASY – it is to cook raw beans in a pressure cooker. So a few weeks later I was about to cook a different kind of bean, and didn’t know how long it would take to cook, so I went online to read about it. That led me to one site, to another, and to yet another and bingo – I found a chart. A wonderful chart that lists just about every bean known to man, and what the cooking times are for traditional stove-top cooking, pressure cooker times, and slow cooker times.

beans_speckled_redI tried to save the chart and had some trouble, so I contacted the website and asked them if I could use their chart here on my blog. They were kind enough to send me a revised PDF file so you can download it and keep it on hand.

So, thanks to the folks at Delectable Planet for helping – now you, too, can have a copy to keep in your kitchen. If you want to go to the actual chart on their webpage, click here.

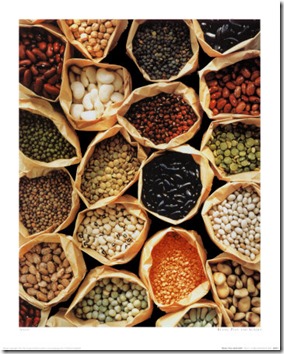
beans_in_bagsWhat I do is tape these kinds of things inside my kitchen cupboard doors. I have a few such must-haves – some 3×5 cards with my favorite salad dressings are there, and now this 2-pager with info about beans. Also my grilling chart graces another interior cupboard door so we never have to go far to look up what temperature to cook pork. Or chicken, etc. I don’t know about you, but I just can’t seem to remember from one time to the next, usually several weeks in between, the different temps.

printer-friendly PDF  – bean_chart was kindly provided by Delectable Planet

Posted in Fish, on March 16th, 2013.

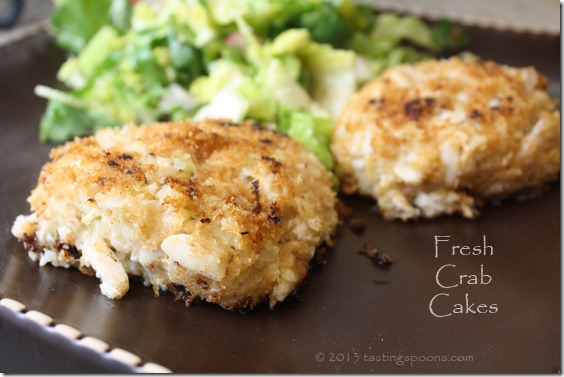
fresh_crab_cakes

Do you like crab? I sure do, yet I don’t get it – eat it – very often. Rarely, in fact. But this, oh, yes, I could eat this every so often. It takes some doing (i.e., there’s quite a bit of prep involved) but the result is succulent, sweet, ever-so tender and nearly falling apart with deliciousness.

I do hope all of you – since you’re foodies like I am – watch America’s Test Kitchen (the TV show). I have it automatically record on my Tivo, so I never miss a program. There have been many of them recording lately (more than one a week), and every single recipe they’ve made has been something I want to try. Which means I need to remember, the next time I’m at my computer, to go online to the TV series’ website to print it out. The website is different than the regular Cook’s Illustrated website. Why? Because you can get these recipes for free, whereas all the others are only available to subscribed members.

What I had in my refrigerator was one of those plastic “cans” of fresh crab, but they’re stabilized somehow and keep for quite awhile under refrigeration. You can get it at both Costco and Trader Joe’s. They’re one pound containers, with very little liquid. So, here’s the short-list of what has to be done:

  1. Toast the panko in a nonstick skillet until the crumbs get golden brown
  2. Soak the crab meat in milk for 30 minutes
  3. Chop up some raw shrimp which is added into the mixture
  4. Chop and cook some onion, celery and garlic
  5. Combine the drained crab and shrimp with the veggies, a little jot of cream, Dijon, hot pepper sauce and lemon juice, some seasonings and form into balls and let them rest, refrigerated, for awhile
  6. Gently – oh so gently – pat the toasted panko crumbs on both sides of each one
  7. Fry the very fragile crab cakes in some vegetable oil until golden brown, turning them with 2 spatulas and serve them immediately!

It took me about an hour to do all that prep, and when I got to the final part of frying, I had a tough time keeping the crab cakes in one piece. The instructions are clear – fry over medium-high heat for 3-4 minutes with oil shimmering in the pan, turn them over (using 2 spatulas, mandatory), add a bit more oil, turn down the heat, and continue frying for another 2-3 minutes until they’re done. If you cook them long enough – and at the absolute perfect temp (whatever that is) the crumbs have turned a dark golden brown and they help hold the crab cakes together.

What there isn’t in these crab cakes is a stick of filler. No bread crumbs (the panko is just on the outside, none in the mixture), or eggs. Or flour. Nothing. So you can imagine how fragile they are. But I managed to get 5 of them to come out beautifully. The other two, not so much. But oh well, it didn’t make them taste any less delicious, so what does it matter, right? Be sure to use fresh crab, not canned. And be careful about how salty the crab is – crab meat from King crab legs are often quite salty. Soaking the crab in milk is a great step – moisture is provided and it takes away any kind of off-flavors that might be lurking in the shellfish.

What’s GOOD: the clean, fresh taste of the crab – no filler, just good flavor all around. And texture from the panko – gosh those panko crumbs do a great job providing texture. Be sure to serve these the moment they’re out of the pan – I mixed up a salad and already had it on the plate so it was easy to place the crab cakes next to it and whisk the plates to the table. Except for taking the picture you see at the top!
What’s NOT: if I had to complain about anything it would be the amount of prep. But then, some things do take awhile to prepare – you want good flavor? then sometimes it requires some elbow grease, like these did.

printer-friendly PDF (created using Cute PDF Writer, not Adobe)
MasterCook 5+ import file – right click to save file (and remember where you put it), run MC, then File|Import

* Exported from MasterCook *

Fresh Crab Cakes

Recipe By: America’s Test Kitchen TV show, Jan. 2013
Serving Size: 6

1 pound lump crab meat — picked over for shells
1 cup milk
1 1/2 cups panko bread crumbs
Salt and pepper
2 stalks celery ribs — chopped
1/2 cup chopped onion
1 garlic clove — peeled and smashed
1 tablespoon unsalted butter
4 ounces shrimp — raw, peeled, deveined, and tails removed
1/4 cup heavy cream
2 teaspoons Dijon mustard
1/2 teaspoon hot pepper sauce
1 teaspoon lemon juice
1/2 teaspoon Old Bay seasoning — [I used Mural of Flavor fom Penzey’s]
4 tablespoons vegetable oil

Notes: Fresh crab meat will make these crab cakes taste even better. With packaged crab, if the meat smells clean and fresh when you first open the package, skip steps 1 and 4 and simply blot away any excess liquid. I managed to get 7 crab cakes (recipe said it made 8). You throw out the milk, and you’ll use about 3/4 of the panko crumbs.
1. Place crab meat and milk in bowl, making sure crab is totally submerged. Cover and refrigerate for at least 20 minutes.
2. Meanwhile, place ¾ cup panko in small zipper-lock bag and finely crush with rolling pin. Transfer crushed panko to 10-inch nonstick skillet and add remaining ¾ cup panko. Toast over medium-high heat, stirring constantly, until golden brown, about 5 minutes. The finely ground panko will brown first, so keep stirring so it doesn’t burn. Transfer panko to shallow dish and stir in ¼ teaspoon salt and pepper to taste. Wipe out skillet.
3. Pulse celery, onion, and garlic in food processor until finely chopped, 5 to 8 pulses, scraping down bowl as needed. Transfer vegetables to large bowl. Rinse processor bowl and blade and reserve. Melt butter in now-empty skillet over medium heat. Add chopped vegetables, 1/2 teaspoon salt, and 1/8 teaspoon pepper; cook, stirring frequently, until vegetables are softened and all moisture has evaporated, 4 to 6 minutes. Return vegetables to large bowl and let cool to room temperature. Rinse out pan and wipe clean.
4. Strain crab meat through fine-mesh strainer, pressing firmly to remove milk but being careful not to break up lumps of crab meat.
5. Pulse shrimp in now-empty food processor until finely ground, 12 to 15 pulses, scraping down bowl as needed. Add cream and pulse to combine, 2 to 4 pulses, scraping down bowl as needed. Transfer shrimp puree to bowl with cooled vegetables. Add mustard, hot pepper sauce, lemon juice, and Old Bay seasoning; stir until well combined. Add crab meat and fold gently with rubber spatula, being careful not to overmix and break up lumps of crab meat. Divide mixture into 8 balls and firmly press into 1/2-inch-thick patties. Place cakes on rimmed baking sheet lined with parchment paper, cover tightly with plastic wrap, and refrigerate for 30 minutes.
6. Coat each cake in panko, firmly pressing to adhere crumbs to exterior. If they’re fragile, hold the crab cake in one hand and gently pat the crumbs onto the flat side, then turn it over carefully and repeat for the 2nd side. Heat 1 tablespoon oil in now-empty skillet over medium heat until shimmering. Place 4 cakes in skillet and cook without moving them until golden brown, 3 to 4 minutes. Using 2 spatulas, carefully flip cakes, add 1 tablespoon oil, reduce heat to medium-low, and continue to cook until second side is golden brown, 4 to 6 minutes. Transfer cakes to platter. Wipe out skillet and repeat with remaining 4 cakes and remaining 2 tablespoons oil. Serve immediately.
Per Serving (the numbers here seem very high to me – there is almost no oil used – you only use about 3/4 of the bread crumbs, so it’s off by that amount. Shrimp and crab aren’t high in calories. 1/4 cup of cream isn’t much divided up into 6-8 cakes, so I don’t understand, but this is what my recipe program says): 461 Calories; 18g Fat (37.1% calories from fat); 26g Protein; 44g Carbohydrate; 2g Dietary Fiber; 112mg Cholesterol; 505mg Sodium.

Posted in Cookies, on March 14th, 2013.

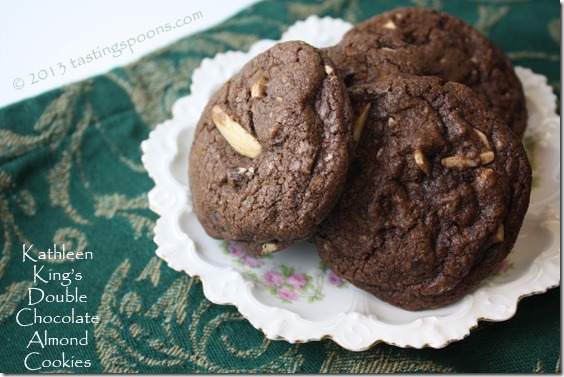
kathleen_kings_double_choc_almond_cookies

Ah, chocolate. White chocolate, dark chocolate and cocoa bound together into a light-textured cookie with some slivered almonds. Perfect with a fresh cup of coffee. Or for any chocoholic.

How many times have you made something, from a recipe on the ‘net, from a major site on the ‘net, and had it go wrong? After I mixed up this batch of cookies and had the first tray in the oven, I went about entering it into MasterCook, so I ended up at the Barefoot Contessa site on the Food Network. Saw 5 stars. Good. I copied all the ingredients and directions over, then thought I’d glance at the reviews. Oh my.

Well, there was a bunch of stuff there. Good and bad. Some people thought no wonder it failed because it’s not Ina’s recipe. It’s from Kathleen King. Some people watched the segment on TV and said that absolutely she used 2 1/2 POUNDS of butter, not 2 1/2 CUBES of butter. Big difference, obviously! Some people who made these actually put IN 2 1/2 pounds of butter and thought the cookies were just fine. Really? Others thought the dough was dry (mine was). Too dry. Still others had added in an extra egg yolk (I put in a 2nd egg). Others added some oil. Others reduced the amount of flour. My cookies were already mixed up completely, so I didn’t have a lot of options. I tasted a cookie from the first tray, and although it hadn’t completely cooled yet, I thought they might be a tad dry. So that’s when I added in the extra egg, assuming it could still be mixed up in my stand mixer. Yes, that worked. The motor was barely able to keep the beater moving and mix in. The batter was much more like a typical cookie dough. It was far too late to add in more butter – others who tried this a 2nd time added in 3 cubes of butter instead of the 2 1/2 and thought that was perfect. Others felt that using unsalted butter was just off, but I only had unsalted, and I thought the cookies were salted sufficiently. And, just so you know, some people made the recipe exactly as printed and thought it was fine, even though the cookies were slightly dry.

What surprises me, after reading about 50+ reviews, is that people at the Food Network should have double-checked the recipe and put a disclaimer or something ON the recipe, if not from the beginning, or at least after all these people have commented that there’s something wrong with the recipe. If the recipe IS correct, then put a statement there stating so. Or state that there was an error during the taping of the show, that 2 1/2 cubes is correct.  Or, is it really 2 1/2 pounds? It has been my experience that once a recipe goes up on the Food Network, it’s there and there it stays forever, without change or correction. They never (seem to) alter anything. Ever.

Fortunately, most cookies are a flexible medium. The science of them isn’t as exact as, say, a cake, or even a muffin or scone. Plus, what tastes good to one person may be awful to someone else. It could be the type of chocolate. It could be the texture. It could be the addition of nuts. It could be the sweetness. I prefer less-sweet cookies. Others think cookies need to be more like candy to suit them. So I guess you could say that cookies can be quite forgiving.

So when all was said and done, really all I did was add in another egg. The texture was much better – it had just a hint of crispy on the outside, and lovely, decadent softness on the inside. I happened to have some extra bitter chocolate chips on hand, so decided to use them here.  I used Valrhona white chocolate and chopped the pieces myself from a small block. I’m not usually a fan of white chocolate – to me, if I’m going to eat chocolate, I want real CHOCOLATE – the dark stuff, not this by-product that is called chocolate. To me it isn’t chocolate at all.

As I was making these cookies I was already writing up this post in my head. Already starting to tell the story about why I made them. That day (last Sunday) we were going to Pasadena to go out to dinner with friends there (that’s about an hour’s drive north of us). Wayne and Lucy, when they come to our house, always come bearing gifts – flowers, or some homemade basil oil Lucy’s made, or some candied nuts she’s whipped up. Something. So not having anything in my larder that would qualify, I decided to make cookies. I also have some of the wonderful Lindy’s Cheesecake left over, so I’ll probably take a couple of slices to them. It’s over a week old, and needs to be eaten or be thrown out!

What’s GOOD: oh, well, the chocolate, first and foremost. I enjoyed the extra bitter in these cookies, but regular chocolate chips would be just fine. I liked the texture from chocolate chips, the white chocolate chunks, and mainly the almonds. If you like white chocolate, this will float your boat. You could even interchange the volume of white to dark. In fact, you could put in other nuts, or peanut butter chips instead of the white. The add-ins are quite flexible. Do note that I’ve changed the recipe slightly (added an extra egg for some extra moisture).
What’s NOT: really nothing as long as you make the necessary changes to the recipe (which are in the recipe below). A good all-around chocolate cookie with lots of extras in it.

printer-friendly PDF (created using Cute PDF Writer, not Adobe)
MasterCook 5+ import file – right click to save file (and remember where you put it), run MC, then File|Import

* Exported from MasterCook *

Kathleen King’s Double Chocolate Almond Cookies

Recipe By: Ina Garten, Food Network, 2012
Serving Size: 52

2 1/3 cups all-purpose flour
3/4 cup cocoa powder — Dutch-processed if available
1 teaspoon baking soda
3/4 teaspoon salt
1 1/4 cups salted butter — (2 1/2 sticks) softened to room temperature
1 cup sugar
1 cup light brown sugar — firmly packed, or use dark brown
2 large eggs
1 teaspoon vanilla
1 cup white chocolate chips
1 1/2 cups semisweet chocolate chips — [I used extra bitter chips)
1 cup almonds — slivered, chopped

1. Preheat the oven to 350°.
2. In a medium bowl, combine the flour, cocoa powder, baking soda, and salt.
3. In the bowl of an electric mixer fitted with the paddle attachment cream the butter and sugars. Add the eggs and vanilla and mix together. Add the flour mixture and continue mixing until just combined.
4. Add the chocolates and almonds and mix until combined. Using two tablespoons or a small ice cream scoop, drop the dough two inches apart on sheet pans lined with parchment. Bake for 13 minutes.
5. Cool the cookies on the cookie sheets. The cookies should be very soft when they are removed from the oven. They will firm up as they cool.
Per Serving: 155 Calories; 9g Fat (50.0% calories from fat); 2g Protein; 18g Carbohydrate; 1g Dietary Fiber; 20mg Cholesterol; 111mg Sodium.

Posted in Brunch, Desserts, Miscellaneous, on March 12th, 2013.

mango_coulis

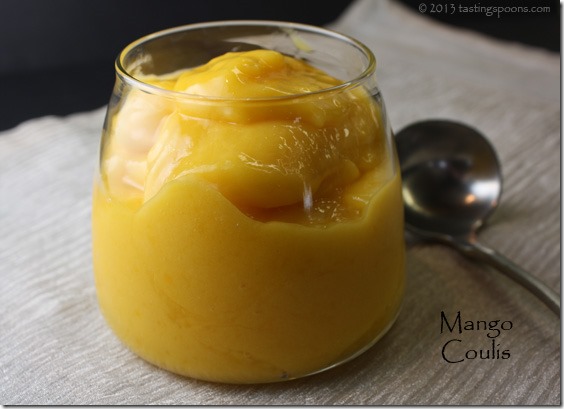
The easiest of sauces – you can make it as sweet as you prefer – I made it on the tart side. It would be great on top of French toast, breakfast yogurt (I can attest to that one since the left overs have garnished several morning bowls), or as a fruit puree with a creamy dessert like cheesecake. Yum.

If you read my blog regularly, you already know that I made Lindy’s Cheesecake and wrote up a post with a very brief history of Lindy’s deli in New York City. It closed in 1957, but the famous cheesecake lives on in home kitchens, and perhaps a lot of restaurants too, since the recipe became public. It was recently listed in Saveur magazine as one of the top 100 recipes ever.

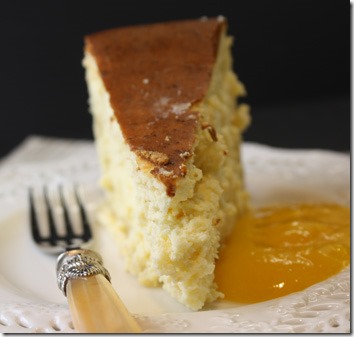
lindys_cheesecake_slice2When I made it, I decided it needed something along side – something with some color. It’s too early in the season for reliably sweet strawberries, so I decided to use mangoes. It was perfect. The recipe came straight out of the Joy of Cooking: 75th Anniversary Edition – 2006. Maybe it was in Rombauer’s earlier editions, but this is the book I own because my old one from the 1950’s was falling apart. I looked up many other recipes, and they were all the same – mangoes, sugar of some form and either lime or lemon juice. Plus just a bit of water to make the sauce almost pourable. That’s it. See? I said it was easy!

I whizzed it up in the food processor, although the blender would likely work just as well. I used the frozen mango chunks from Trader Joe’s. You could use fresh mangoes too. Do defrost the frozen ones some so they will puree. Add some citrus (the lemon juice or lime juice) and add as much sugar as you want – I used about a rounded 1/4 cup of powdered sugar. You can use regular sugar too. Either one. And then some water – the texture of the mangoes will determine how much water you’ll need – you want it thick, but not so you can’t pour it. In the photo at top you can see it’s almost the consistency of pudding, but it spread out flat once I put it on the plate with the cheesecake.

What’s GOOD: the delicious FRESH taste of mango. Citrus does that in all of its guises. I made mine on the tart side since the cheesecake was already plenty sweet, but use your own judgment based on what you’re serving it with. It keeps for several days. I think the recipe said 3, but I don’t know why it wouldn’t keep a week. It is also fantastic drizzled over Greek yogurt for our breakfast. And I just know it would taste wonderful on French toast.
What’s NOT: it was perfect for how I needed to use it, as a sauce for cheesecake.

printer-friendly PDF (created using Cute PDF Writer, not Adobe)
MasterCook 5+ import file – right click to save file (and remember where you put it), run MC, then File|Import

* Exported from MasterCook *

Mango Coulis

Recipe By: Joy of Cooking, 75th anniversary edition, 2006
Serving Size: 5

2 whole mangoes — (or use frozen chunks, about 1 1/2 cups)
1/4 cup to 1/2 cup confectioner’s sugar — or more to taste
1 tablespoon fresh lime juice — or lemon juice
About 2-3 T water

1. If using frozen mango, defrost. If using fresh, peel and core mangoes and cut into 1″ pieces.
2. In a food processor or blender combine the mangoes, lime juice and water. Blend until completely smooth, then add the sugar and blend. Add more water if it’s too thick. Taste for sweetness and add more citrus or sugar. If you’re serving this with a very sweet dessert, you can make the coulis less sweet. Refrigerate. Ideally, use up within 3 days. Add leftovers to a morning fruit smoothie or pour over fresh fruit and yogurt. Would also be delicious on top of French toast.
Per Serving (based on 1/4 cup sugar): 78 Calories; trace Fat (2.4% calories from fat); trace Protein; 20g Carbohydrate; 2g Dietary Fiber; 0mg Cholesterol; 2mg Sodium.

Posted in Desserts, on March 10th, 2013.

lindys_cheesecake_sliced

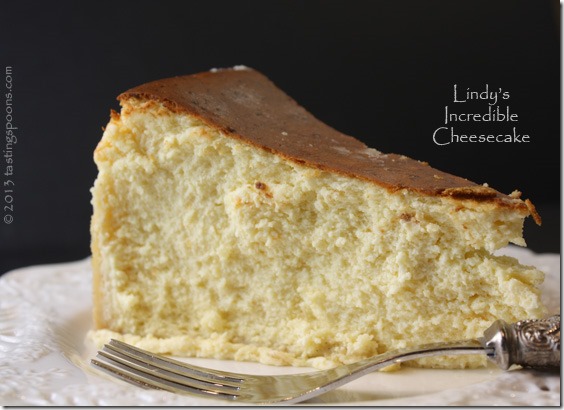
Can you just imagine the mouth-feel of a bite of that cheesecake? Smooth, rich, a little tiny bit citrusy, in between being a dry cheesecake (not a bad thing) and a wet cheesecake (some people prefer that type). This one leans more toward the dry, I suppose, but not DRY, if you get my drift.

Oh my goodness, is this cheesecake beyond delicious. It’s not something I make – hardly ever. It’s not something I even crave. Now my DH, that’s another story. Cheesecake is his #2 favorite dessert, 2nd only to carrot cake. I do have a recipe for a cheesecake here on my blog – it’s a very tall, light and airy cheesecake. I had it the first time back in about 1970, when I was living for a brief time in Oklahoma. It was called a Gourmet Cheesecake. It contains many egg whites whipped separately, so it retains height during baking. And it’s got a much different (light) texture. I do love that cheesecake. But, since I was cooking for several couples coming to dinner, I decided to try a new recipe, at Saveur.

This cheesecake, comes from the famous Lindy’s Restaurant in New York City. Not to be confused with the current-day restaurant by the same name. Lindy’s was opened in 1921 on Broadway, and it was really a Jewish deli, but they became known for sturgeon, corned beef and blintzes. And, their cheesecake. Milton Berle used to eat there nearly every day. Lots of notables ate there regularly. The owners – Lindy Lindemann and his wife Clara – ran it (and another one some blocks away) for many years.  According to Wikipedia, Lindy’s was especially well known for its cheesecake, which was at times credited as perhaps the most famous in the United States. The cheesecake was immortalized in Guys and Dolls, where Nathan Detroit and Sky Masterson sang its praises. You could even sing some of the songs from the musical while you made this. Ah, never mind. Most of you probably don’t know what Guys and Dolls was! The recipe for the cheesecake, fortunately, can live on in our own kitchens because we have the recipe. The famous recipe. The restaurant closed in 1957.

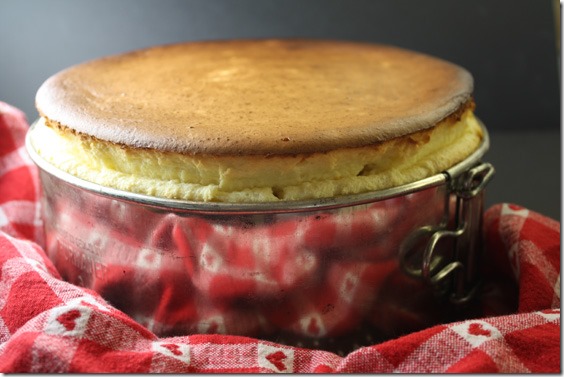
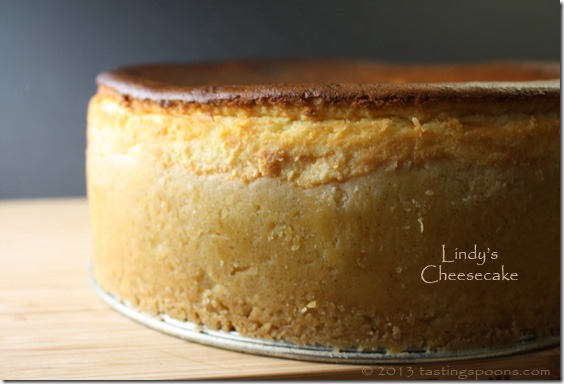
So, on to the recipe. This must – absolutely must be made in a 9-inch springform pan. Please don’t try to make it fit in an 8 incher. Or thinner in a 10-incher. In a 9-inch pan the cake rises up above the sides. When I peeked in the oven window about half way through and saw it I panicked! I thought it would spill over – not only ruining the cheesecake, perhaps, but also making a monumental mess on the floor of my oven. But no, it rose up, stayed up and peaked out about an inch above the top.

First you must make an easy crust – very similar to a pie crust – that contains the seeds from a vanilla bean, an egg yolk and lemon zest, then you chill it for an hour before pressing it with your fingertips on the bottom and all the way up the sides of the pan. The crust didn’t make it quite up to the top when I did it – but it didn’t seem to matter. Ideally, you can make the crust thin enough to go all the way up.

Then you make the filling. Do you even want to know how much cream cheese is in this? A full 2 1/2 pounds. A lot. It has a bunch of eggs and egg yolks in it too. And a little bit of orange and lemon zest. It has a little tiny amount of flour in it, vanilla and 1/4 cup of heavy cream. I can’t imagine what that little amount of cream does, but it’s added in at the very end of the mixing. Pour it into the pan and bake.

whole_cheesecake_just_baked

That was taken about 20 minutes after I took it out of the oven. I baked it to an exact 160° using an instant read thermometer. I stuck the probe into the side so there wouldn’t be a hole in the top. It took about an extra 7-8 minutes in my oven (over the 75 minutes suggested). First you bake it for about 15 minutes at 500°. Can you imagine? Yes. Then you reduce it to 200° and continue baking. The back side (you can’t quite see it in the photo above) got a little dark. I should have rotated the cake, but I was afraid it might deflate if I opened the oven door. Do try to leave ample room all around the cheesecake in the oven and don’t put it too close to the top, either.

lindys_cheesecake_whole

In this photo you can see the crust is about 2/3 to 3/4 of the way up the sides. You can barely see the delineation in this photo. It took several hours to let it cool. After an hour or so, I took off the springform side – but first I used a sharp knife to make certain none of the cheesecake was sticking to the side and let it cool several more hours. The other interesting tidbit is that this cheesecake needs to chill for at least 8 hours or overnight. That was wonderful for me so I made it the day before our dinner party. I put the springform back on the cake to store it, covered well with foil.

When it’s cut, use a very thin, sharp knife and have a tall glass of hot water handy as the cheesecake wants to stick to the knife. Dip the knife in the hot water between each cut.  I used a wedge to remove it, but a knife will work too – the crust is sturdy enough to hold the piece together fairly well. The very center didn’t come out cleanly – it’s a soft filling, so a little bit of it stuck.

I made a mango puree (a coulis) to serve on it or on the side of it. I don’t think Lindy’s served it with anything. It really doesn’t need anything to adorn it, but I thought a bit of added color would be nice. I bought frozen mango pieces at Trader Joe’s and made the puree the day before also.  I’ll post that recipe tomorrow or the next day. Anyway,  dessert was all done the day ahead.

lindys_cheesecake_slice2

After sitting (chilling) for 24 hours the cheesecake had deflated some. It was then about level with the side of the springform, and the center sunk too. I know it was done, though the center was still slightly jiggly when I took it out of the oven. Obviously that means the center surely wasn’t as “done” as the outer parts, but when researching this on the ‘net, I read several places that a cheesecake should be at 160° so that’s exactly what I did.

What’s GOOD: there is everything good to say about this dessert – unctuous texture, smooth, decadent, rich, full of the cheesy taste you look for when ordering a cheesecake. It has the drier texture that is coveted by most cheesecake fans. It’s spectacular to serve – I showed our dinner guests the cheesecake before cutting it and asked everyone if they wanted the mango coulis on the side. We had left overs twice and oh, was it ever good then too. Maybe even better because we were eating it after an ordinary meal and the cheesecake absolutely stood out.

What’s NOT: there is nothing, whatsoever, I could say about this other than it’s fantastic.

printer-friendly PDF (created using Cute PDF Writer, not Adobe)

MasterCook 5+ import file – right click to save file (and remember where you put it), run MC, then File|Import

* Exported from MasterCook *

Lindy’s Cheesecake Recipe

By: From the NYC restaurant (closed in 1951) but printed in Saveur, Nov. 2012
Serving Size: 12

CRUST:
1 cup flour
8 tablespoons unsalted butter — cubed
1/4 cup sugar
1 teaspoon lemon zest
1/4 teaspoon salt
1 large egg yolk
1/2 vanilla bean — seeds scraped and reserved
FILLING:
2 1/2 pounds cream cheese — softened (use full fat)
1 1/4 cups sugar
3 tablespoons flour
1 1/2 teaspoons orange zest
1 1/2 teaspoons lemon zest
1/2 teaspoon vanilla extract
5 whole eggs — plus 2 yolks
1/4 cup heavy cream

Note: You MUST use a 9-inch pan for this cheesecake. No substitutions.
1. CRUST: Combine flour, butter, sugar, zest, salt, yolk, and vanilla seeds in a bowl; rub with fingers until dough forms. Form dough into 2 rounds; wrap each in plastic wrap. Chill for 1 hour. Press 1 dough round onto bottom of a 9″ springform pan; pull off pieces from remaining dough and press around sides of pan all the way to the top. Dough will be very thin – be sure to fill all holes and gently press completely up the sides as the cheesecake pan will be completely full. Set aside.
2. FILLING: Heat oven to 500°. Beat cream cheese, sugar, flour, zests, and vanilla in a large bowl on medium-high speed of a hand mixer until smooth. Add eggs and yolks, one at a time, beating after each addition, until smooth; stir in cream. Pour filling into pan. Place cake in center of oven with ample room all around and bake until top begins to brown, about 15 minutes. Reduce heat to 200°, and bake until just set, about 1 hour more until it has reached an internal temperature of 160°. Transfer to a rack, and let cool completely. Cover and refrigerate at least 8 hours or overnight. Remove cake from pan and cut into slices to serve. I served this with a mango coulis, but it doesn’t really need any adornment.
Per Serving: 594 Calories; 45g Fat (67.5% calories from fat); 11g Protein; 37g Carbohydrate; trace Dietary Fiber; 237mg Cholesterol; 357mg Sodium.

Posted in Veggies/sides, on March 8th, 2013.

roasted_cheesy_onions

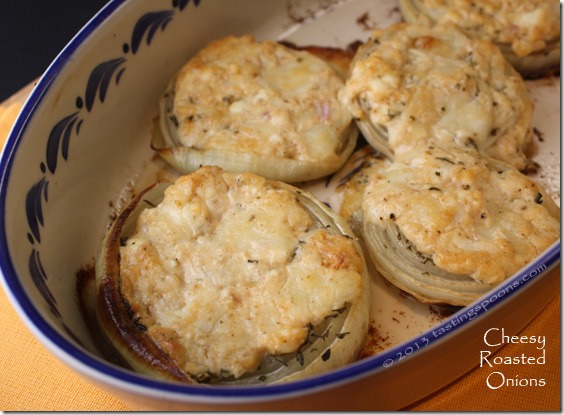
Simple, easy, tasty onions with delicious cheesy stuff on top. What could be better than that to accompany a hunk of meat?

When I read the recipe over at Kalyn’s Kitchen, I just knew I’d be trying it. I have a recipe here on my blog for Baked Onions with Thyme, that are a particular favorite of our family (that recipe came from an old Gourmet magazine). They’re quite easy too with lots of red wine added, but no cheesy topping, and they do take forever to roast – like 2+ hours. These, on the other hand, are thick slices of onions that are baked (roasted) in a hot oven for awhile, then topped with the cheesy stuff and allowed to bake longer – about another half hour – so the cheesy topping gets toasty brown and melts into deliciousness. So these take about an hour total in the oven.

Pretty much I followed Kalyn’s recipe, although I veered off slightly with the types of cheese I used. I made these twice, both times using slightly different cheeses (first: fresh mozzarella, goat cheese, Pecorino; second: regular Mozzarella, sharp cheddar, Gruyere and Parm. I preferred the 2nd grouping). Kalyn used pizza cheese and Pecorino. I think probably any mixture of cheese would work with this dish as long as you’ve got some of the soft melting cheese and some of the drier, high-flavored cheeses like Parm or Pecorino. The herbs just give the onions more flavor altogether, but you could probably vary those according to your taste, or by what you’re serving with it. If you’re doing sausages, add dill seed and fennel maybe. Italian steak or grilled Italian sausages? Add basil, thyme and rosemary. Chicken breasts are a basic palette, use whatever suits your fancy. Mexican? Add cumin and chili powder.

The cheesy mixture also has some mayo in it (to help bind it), Dijon, lemon juice, pepper, and in this version it’s fresh rosemary and fresh thyme. Those are the only two herbs still growing in my herb garden or what’s left of it from last summer. They survived our many nights of near freezing temps. As for the type of onion, I think you could use any variety – regular white or yellow, red or even Sweet onions. They’d all be just fine, although sweet onions contain more water, so they might take longer to roast (by about 5-10 minutes). The trick is to make sure the cheese mixture sort of sticks together when you mix it up. That way it will sort of stick together on the onion too. First, the thick onion slices are drizzled with oil, sprinkled with salt, pepper and herbs, then you roast them in the oven for about 15-20 minutes. The cheese mixture is stirred together and spread on the half-cooked onions, and you can add more cheese (Parm or Pecorino) on top so it will get nice and golden brown.  Back in the oven they go to finish the cooking. After 20 minutes, check to see if they’re tender – add another 5 or 10 minutes. And if the top isn’t brown enough, turn on the broiler for just a couple of minutes.

What’s GOOD: how easy they are to make – you just have to be in and around the kitchen for a little over an hour. The cheesy mixture is quite simple – use what you have on hand. Really any kind of cheeses should work. I served these to dinner guests and they were lovely, but they’re also simple enough to be a weeknight side as well. They’re great left over too.
What’s NOT: nothing I can think of. Delicious.

printer-friendly PDF (created using Cute PDF Writer, not Adobe)
MasterCook 5+ import file – right click to save file (and remember where you  put it), run MC, then File|Import

* Exported from MasterCook *

Cheesy Roasted Onions

Recipe By: adapted from Kalyn’s Kitchen, Feb. 2013
Serving Size: 6

ONIONS:
4 medium yellow onions — or sweet or red onions
1 tablespoon olive oil — for brushing onions (1 to 2)
1 teaspoon fresh rosemary — (or use 1/2 tsp. dried rosemary) finely chopped with large knife
2 tablespoons fresh thyme leaves — minced (or use 1 T. dried thyme)
GRATIN TOPPING:
6 tablespoons mayonnaise — [Kalyn used 4 T. low fat, 2 T full fat]
1 tablespoon fresh lemon juice — or lime juice
1/2 teaspoon Dijon mustard
1/3 cup mozzarella cheese — grated (or use chopped fresh Mozzarella)
1/3 cup Gruyere cheese — grated
1/3 tablespoon sharp cheddar cheese — grated (or use Pecorino)
2 tablespoons Parmigiano-Reggiano cheese — grated
2 teaspoons fresh rosemary — minced
2 teaspoons fresh thyme — minced
fresh ground black pepper to taste

Notes: if using sweet onions, the baking time might be a bit longer than in the recipe (because they contain more water). I baked them at 450 for 12 minutes, spread the topping on, then reduced the oven temp to 350 and baked them for about 25 more minutes. Both times I baked them, they required different baking times. Both times I made these I used different combos of cheese. First: small, fresh Mozzarella balls cut in half, soft goat cheese, Pecorino. Second time: Gruyere, regular Mozzarella, sharp cheddar and some Parm. I think I preferred the 2nd grouping of cheeses.
1. Preheat oven to 450°. Peel onions and cut in 1/2 inch slices. Spray or brush baking sheet with olive oil, then arrange onion slices in a single layer. Spray or brush onions with oil, then sprinkle with chopped herbs. Roast onions 15-20 minutes.
2. While onions roast, combine mayo, lemon juice, Dijon mustard, your cheeses of choice, herbs and black pepper in a small bowl. Mix together with a fork. (The mixture will be lumpy.)
3. Spray a 9″ x 13″ casserole dish with olive oil or nonstick spray. Remove baking sheet from the oven and use a turner to place onions in the casserole dish. Spread topping over onions (use a sandwich spreader if you don’t want to use your fingers). It’s okay if the mixture doesn’t cover every bit of the onions. Place casserole dish in oven and bake 25-35 minutes, or until top is golden brown and onions are slightly bubbling. Serve hot. If tops aren’t golden brown, use broiler and watch carefully so they don’t burn.
Per Serving: 203 Calories; 18g Fat (77.1% calories from fat); 5g Protein; 7g Carbohydrate; 2g Dietary Fiber; 19mg Cholesterol; 166mg Sodium.

Related Posts Plugin for WordPress, Blogger...