Get new posts by email:

Archives

Currently Reading

Here are the tastingspoons players. I’m in the middle (Carolyn). Daughter Sara on the right, and daughter-in-law Karen on the left. I started the blog in 2007, as a way to share recipes with my family. I’m still doing 99% of the blogging and holding out hope that these two lovely and excellent cooks will participate. They both lead very busy lives, so we’ll see.

– – – – – – – – – – – – – – – – – – – – – –

BOOK READING (from Carolyn):

Music of Bees, Eileen Garvin. Absolutely charming book about a woman in midlife, lonely, who raises bees, also makes unlikely friends. Heart-warming and very interesting about beekeeping.

A Postcard from Paris, Alex Brown. Really cute story. Dual time line, 1940s and present day about renovating an old apartment in Paris, things discovered.

Time of the Child, Niall Williams. Oh such a good book. Very small village in Ireland, 1960s. A baby is left on the doorstep. The town all whispers and helps. I listened to an interview of the author, which made me like him and his books even more.

Sipsworth, Simon Van Booy. If you like animals you’ll swoon. An old woman who really wants to die finds a tiny mouse in her house and befriends it and finds a reason to live. Utterly charming book.

The Forger’s Spell, Edward Dolnick. True story. For seven years a no-account painter named Han van Meegeren managed to pass off his paintings as those of Johannes Vermeer.

If You Lived Here, You’d be Home by Now, Christopher Ingraham. Could hardly put it down – about a journalist who takes on a challenge to move to small town in Minnesota and write about it. He expects to hate it and the people and place, but he doesn’t. Absolutely wonderful true story.

The River We Remember, William Kent Kreuger. 1950s, Minnesota. A murder and the aftermath. Could hardly put it down. Kreuger has such a vivid imagination and writing style.

How the Lights Gets In, Joyce Maynard. An older woman returns to New Hampshire to help care for her brain-injured son. Siblings and family, lots of angst and resentments.

The Filling Station, Vanessa Miller. Every American should read this book. A novelized retelling of the Tulsa massacre in 1921. Absolutely riveting.

The Story She Left Behind, Patti Callahan Henry. Love this author. Based on a true story. A famous author simply vanishes, leaving her husband and daughter behind. She had invented a mystical language no one could translate. Present day, someone thinks he’s solved the riddle, contacts the family. Really interesting read.

The Girl from Berlin, Ronald Balson. Love anything about Tuscany. An elderly woman is being evicted from a villa there, with odd deed provenance. Two young folks go there to help unravel the mystery. Loved it.

The Island of the Colorblind, Oliver Sacks, M.D. Nonfiction. The dr is intrigued by a remote Pacific island where most of the inhabitants are colorblind. He also unravels a mystery on Guam of people born with a strange neurological problem. Medical mysteries unveiled. Very interesting.

The Bookbinder, Pip Williams. Post 1914 London. Two sisters work at a bookbindery. They’re told to not read the books. One does and one doesn’t. One has visions beyond her narrow world; the other does not. Eventually the one gets into Oxford. Lovely story.

The Paris Express, Emma Donoghue. 1895 on a train to Paris, a disaster happens. You’ll delve into the lives of many people who survived and died in the crash.

A Race to the Bottom of Crazy, Richard Grant. This is about Arizona. Author, wife and child move back to Arizona where they once lived. Part memoir, research, and reporting in a quest to understand what makes Arizona such a confounding and irresistible place.

The Scarlet Thread, Francine Rivers. A woman’s life turned upside down when she discovers the handcrafted quilt and journal of her ancestor Mary Kathryn McMurray, a young woman who was uprooted from her home only to endure harsh frontier conditions on the Oregon Trail.

A Place to Hide, Ronald Balson. 1939 Amsterdam, an ambassador has the ability to save the lives of many Jewish children. Heartwarming.

Homeseeking, Karissa Chen. Two young Chinese teens are deeply in love, but in China. Then their families are separated. Jump to current day and the two meet again in Los Angeles.

North River, Pete Hammill. He always writes such a good story. A doctor works diligently healing people from all walks of life. His wife and daughter left him years before. One day his 3-yr old grandson arrives on his doorstep.

A Very Typical Family, Sierra Godfrey. A very messed-up family. Three adult children are given a home in Santa Cruz, Calif, but only if the siblings meet up and live in the house together. A very untypical scenario but makes for lots of messes.

Three Days in June, Anne Tyler. The usual Anne Tyler grit. Family angst. This wasn’t one of my favorites, but it was entertaining and very short.

Saved, Benjamin Hall. Author is a veteran war reporter. Ukraine, 2022, he nearly loses his life to a Russian strike. Riveting story – he survives, barely.

Grey Wolf, Louise Penny. Another Inspector Gamache mystery in Quebec. She is such an incredible mystery writer.

All the Colors of the Dark, Chris Whitaker. A missing person mystery, a serial killer thriller, a love story, a unique twist on each. Could hardly put it down.

Orbital, Samantha Harvey. Winner of 2024 Booker Prize. I don’t usually like those, but I heard the author interviewed and she hooked me. This is not a normal book with a beginning, a story and an end. It’s several chapters of the day in the life of various astronauts at the ISS (Int’l Space Station). All fictional. She’s been praised by several real astronauts for “getting it” about space station everyday life.

The Blue Hour, Paula Hawkins. An island off Scotland. Inaccessible except when the tide is out. Weird goings on. An artist. A present day mystery too.

Iron Lake, William Kent Krueger. A judge is murdered and a boy is missing. Riveting mystery.

Tell the Wolves I’m Home, Carol Ricks Brunt. 1980s. A 14-yr old girl loses her beloved uncle. Yet a new friendship arises, someone she never knew about.

Four Treasures of the Sky, Jenny Zhang. 1880s, a young girl is kidnapped in China and brought to the United States. She survives with many hurdles in the path.

The Boy Who Fell out of the Sky, Ken Dornstein. Memoir, 1988. The author’s brother died in the PanAm flight that went down in Lockerbie, Scotland. A decade later he tries to solve “the riddle of his older brother’s life.”

Worse Care Scenario, T.J. Newman. Oh my. Interesting analysis of what could/might happen if a jet crashed into a nuclear plant. Un-put-downable.

Song of the Lark, Willa Cather. Complicated weave of a story about a young woman in about 1900, who has a gifted voice (singing) and about her journey to success, not without its ups and downs.

Crow Talk, Eileen Garvin. Charming story which takes place at a remote lake in Washington State, about a few people who inhabit it, the friendships made, but also revolving around the rescue of a baby crow.

The Story Collector, Evie Woods. Sweet story about some dark secrets from an area in Ireland, a bit magical, faerie life, but solving a mystery too.

A Sea of Unspoken Things, Adrienne Young. A woman investigates her twin brother’s mysterious death. She goes to a small town in California to figure it out, to figure HIM out.

The King’s Messenger, Susanna Kearsley. 1600s England, King James. About one of his trusted “messengers,” and his relationship with a young woman also of “the court.” Lots of intrigue.

In the Shadow of the Greenbrier, Emily Matchar. Interesting mystery in/around the area of the famous resort in White Sulphur Springs, West Virginia.

Isola, Allegra Goodman. Hard to describe, survival story on an island in the 1600s.

Save the Date, Allison Raskin. Rom-com, witty, LOL funny. Clever.

The Sirens, Emilia Hart. Numerous time-lines, Australia. Mysteries abound, nightmares, abandoned baby, weird allergies.

Red Clay, Charles Fancher. LOVED this book. Mostly post-Civil War story about the lives of slaves in Alabama during Reconstruction.

Stars in an Italian Sky, Jill Santopolo. Dual time line, 1946 and recent time. Love stories and a mystery.

Battle Mountain, C.J. Box. Another one of Box’s riveting mysteries. Love his descriptions of the land.

Something Beautiful Happened, Yvette Corporon. A memoir of sorts in Greece, tiny island of Erikousa, where the locals hid Jews during WWII. All elusive stories told by the author’s grandmother.

The Jackal’s Mistress, Chris Bohjalian. 1860s Virginia, about a woman who saves the life of a Union soldier. Really good story.

Song of the Magpie, Louise Mayberry. Really interesting story about Australia back in the days when it was mostly a penal colony. Gritty strength of a woman trying to thrive with her farm.

The Boomerang, Robert Bailey. A thriller that will have you gripping the book. About a lot of secrets surrounding the president (fictional novel, remember) and his chief of staff and about cancer. A cure. Such a good story.

Care and Feeding, Laurie Woolever. Really interesting memoir of a woman driven to succeed in the restaurant business. She worked for Mario Batali and then Anthony Bourdain. Gritty stories.

Everything is Tuberculosis, John Green. Maybe not a book for everyone. A real deep dive into the deadly tuberculosis infection, its history. I heard the author interviewed and found the book very interesting.

The Book Lovers Library, Madeline Martin. Fascinating read about Boots’ drug stores’ lending library. And the people who worked in them.

The Arrivals, Meg Mitchell Moore. LOL funny, about a middle-aged couple whose children (and their various family members) return to the family home and the chaos that ensues.

My Life as a Silent Movie, Jesse Lee Kercheval. About grief. A big move to Paris, finding herself a new life with a new set of real blood family.

Escape, Carolyn Jessop. Another memoir about a woman really in bondage in Utah, Mormon plural marriage.
 

Tasting Spoons

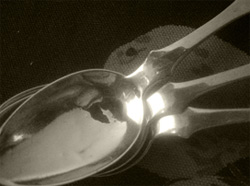
My blog's namesake - small, old and some very dented engraved silver plated tea spoons that belonged to my mother-in-law, and I use them to taste my food as I'm cooking.

Scroll down to the bottom to view my Blogroll

Posted in Cookies, on August 31st, 2009.

almond spice wafers coffee

It’s been several months since I’ve made any cookies. My friend Norma hasn’t been able to eat cookies for several months, and I had successfully convinced myself that I didn’t need to eat any if I wasn’t giving more than half of them to her! But we were having guests for dinner, and banana gelato was on the menu. I needed a cute cookie to stick in the top.

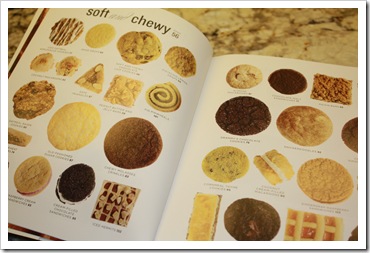
I have a copy of Martha Stewart’s newest cookie book, appropriately named ‘>Martha Stewart’s Cookies. What’s unique about this cookie cookbook is how it’s divided into chapters. There’s one for Light & Delicate; another for Soft & Chewy; yet another for Crumbly & Sandy; and Chunky & Nutty; also Cakey & Tender; and Crispy & Crunchy; and lastly Rich & Dense. This recipe came from the Crispy & Crunchy chapter. At the beginning (the table of contents, if you will) are pages (with the above titles) with photographs of each and every cookie. It makes deciding on a cookie SO much easier. You don’t have to read the recipe, or flip through dozens of pages to find pictures. You can see on msl cookies photos just 8-10 pages at the beginning exactly what each cookie looks like. There’s a picture of two of the pages from the Soft & Chewy section. Don’t want a sandwich cookie? No problem, you can gloss right over those. Anyway, it’s a cool method. I’ve had 2 or 3 cookies from this cookbook so far, and have been very pleased.
Perhaps I’ve mentioned it here before, but I have a real lack of willpower when it comes to cookie dough – eating it straight out of the mixing bowl. My favorite is chocolate chip. But this one, oooh, I’ll admit, this cookie dough was mighty tasty. From the brown sugar that sweetens them, plus the delicious spices throughout (cinnamon, nutmeg, ginger, cloves). I licked the spoon and promptly put all the prep parts in the dishwasher so I wouldn’t be tempted to continue searching for smidgens of batter somewhere.

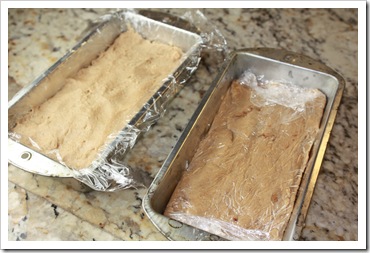
almond spice wafers pans Once you mix up the dough, you pack it into two smaller sized loaf pans (lined with plastic wrap), gently press it down evenly, fold over the wrap to seal it up and put them in the freezer overnight. Here’s what the pans looked like, at right.

After freezing them overnight, let them sit out for about 10 minutes so the dough is a bit easier to cut, then use a sharp knife to cut thin, thin slices. 36 of them out of each little loaf. They go onto Silpat-lined baking sheets, are stuck with a few sliced almonds and baked. That’s it. VERY easy.

Kitchen Tip:

Allow the dough to defrost about 10 minutes before trying to slice them into thin wafers.

The cutting and slicing is a bit tricky. Doesn’t matter a bit as far as the taste is concerned, but it’s almond spice wafers just bakeddifficult to cut even slices. Leaving the frozen dough out that 10 minutes does help a lot, though.

My cookies were not as perfect looking as in the Martha Stewart style. Now that I know more about the difficulty in slicing them evenly, I’ll hopefully do better on the next batch. Yes, there will be a next batch. These are good – would be especially good for Christmas.
printer-friendly PDF

Almond Spice Wafers

(like Moravian spice cookies)
Recipe: April 2008, Martha Stewart Living
Servings: 72
NOTES: I baked mine on Convection Bake at 385 degrees. They were done in 9 minutes. I did not freeze the cut cookies before baking, though.The cookie dough block is a bit hard to slice evenly. If you start slicing before it’s defrosted enough (softened that 10 minutes) you’ll have more uneven slices. The cookies DO spread a little on the baking sheet.

3 cups all-purpose flour
1 teaspoon baking soda
1/4 teaspoon salt
2 sticks unsalted butter — (1 cup) room temperature
1 1/2 cups dark brown sugar — packed
2 large eggs
2 teaspoons ground cinnamon
1 1/2 teaspoons ground ginger
1/2 teaspoon ground nutmeg
1/4 teaspoon ground cloves
1/4 cup sliced almonds

1. Line 2 mini loaf pans (6x3x3) with plastic wrap. Leave generous edges which you’ll fold over the top of the cookie dough.
2. Whisk together flour, baking soda, and salt. Beat butter and sugar with a mixer on medium speed for 4 minutes. Reduce speed to low. Add eggs and spices. Beat in flour mixture in 3 additions.
3. Press cookie dough into pans, and cover tightly with plastic wrap. Freeze overnight (or up to 1 month).
4. Preheat oven to 400 degrees. Remove dough from 1 pan. Let soften slightly (about 5-10 minutes). Cut eight 1/8-inch-thick slices with a sharp knife. Cover remaining dough, and freeze in pan until ready to slice and bake.
5. Place slices 1 1/2 inches apart on a cookie sheet lined with a nonstick baking mat. Top each with 2 to 3 almond slices. Freeze until firm, 5 minutes. Bake until dark golden brown, 9-10 minutes. Let cool on sheet on a wire rack. Repeat.
Per Serving: 64 Calories; 3g Fat (41.8% calories from fat); 1g Protein; 9g Carbohydrate; trace Dietary Fiber; 13mg Cholesterol; 29mg Sodium.

Posted in Beef, Desserts, Miscellaneous, Salads, Veggies/sides, on August 30th, 2009.

Last night we had some friends, Bob & Peggy, over for dinner. Bob is recovering from open heart surgery, but after just two weeks he felt up to coming to our house for dinner. Bless his heart! They have minimal air conditioning at their house, so I was grateful they’d come here, rather than me needing to package up everything  (hot) and take it to their house. Their kitchen is not air conditioned. Peggy said, don’t go to too much work. So instead of finding all kinds of new recipes, I decided to use some old tried-and-true ones.

No special appetizers – just some tortilla chips and a cheese dip. I did make a garbanzo bean salad that I read about yesterday on somebody else’s blog (I’ll write that up as a separate post, though). I had some meatloaf frozen which became the main dish of the meal. But instead of spreading it with my usual sweet and sour sauce, I decided to dig out the recipe for Red Peppers for Cold Meat that I wrote up last year. Perfect for a spoon full on top and along side a baby meatloaf. Then I made a watermelon salad that’s so refreshing in this hot-hot weather. And an old family standby, a chocolate cake from a mix. So here’s what I made:

Meatloaf – last time I made meatloaf, I froze them in individual portions (about 4 inches by 1 1/2 inches by 1 1/2 inches. Not only do they defrost a bit easier, but they take a lot less time to bake too. I used my old favorite, the meatloaf mixture only from my Sweet & Sour Meatloaf.

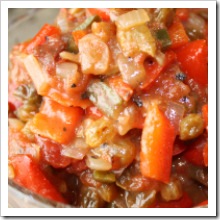
red peppers for cold meat 200 Red Peppers for Cold Meats – well, I’d used it before as a relish for baked meatloaf, and knew it tasted great. This time I had less red bell peppers, but I had a poblano/pasilla chile, so added that to the mixture. This time I used more onion too. The preparation of it is certainly flexible. It keeps for a long time in the refrigerator.

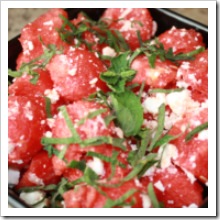
watermelon feta salad 200 Minted Watermelon & Feta Salad – this pairing is a match made in heaven. If you haven’t ever tried it, well, you’re missing something special. I was ever-so skeptical before tasting it the first time over a year ago, but now I’m a true convert. Especially when watermelons are in season (now). There is a Tomato & Watermelon Salad too, with red onion, but this one is a Martha Stewart recipe. I made it with watermelon, feta and mint since I had ample tomatoes in the red pepper mixture and in the garbanzo salad too.

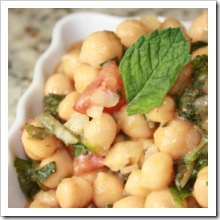
garbanzo Thai salad 200 Garbanzo Bean Salad with Thai Curry Sauce – Ever so easy to do. Couldn’t believe how easy. Uses canned chickpeas and bottled Thai red curry paste/sauce and coconut milk. Yes, this really is a cold salad. And extra delicious. Stay tuned in a few days for that recipe.

choc cake mix 200 German Chocolate Chip Cake – this is an old family standby that normally uses a German chocolate cake mix. I didn’t have one, so used a regular chocolate cake mix instead. It’s so simple – spread the cake batter in a 9×13 pan, sprinkle it with sugar, cinnamon, walnuts and about 2/3 cup of chocolate chips. Bake as usual. Some of the nuts and chips sink down into the cake; some stay on top. And the sugar/cinnamon mixture gives the cake a finished look without making frosting. Especially good with vanilla ice cream. I didn’t have any, so I used whipped cream instead.
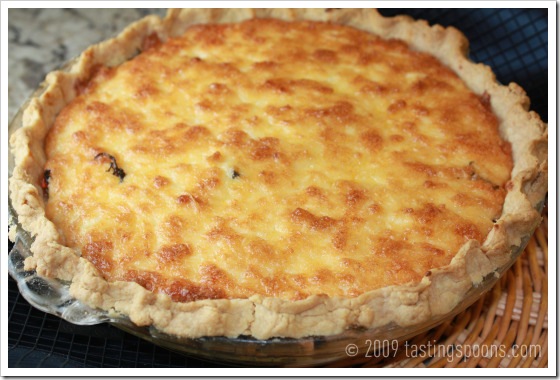
A year ago: Feta Tomato Gratin (easy appetizer)

Two years ago: Apple Cherry Walnut Green Salad

Posted in Appetizers, on August 29th, 2009.

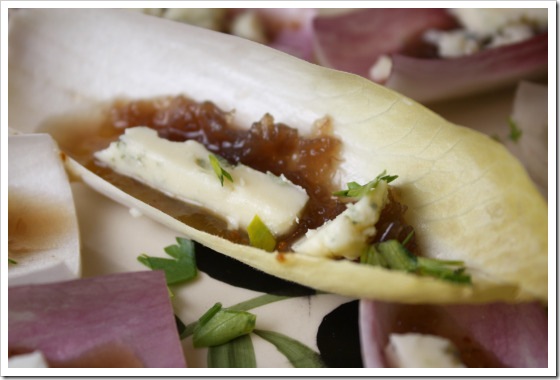
belg endive appetizer single

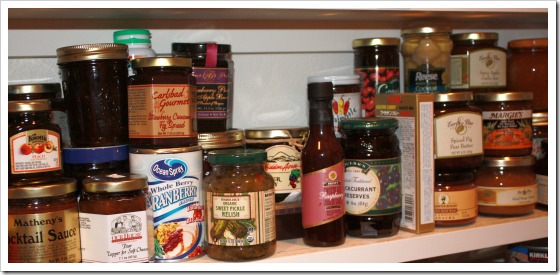
I don’t know about you, but I have a pantry with any number of little jars of “odd things.” Mostly they’re condiments, or other miscellaneous items that don’t exactly fit in the shelving category of canned vegetables, or canned fruit, or canned meat. One of my shelves does hold mostly the fruit/dessert type of stuff: evaporated milk, condensed milk, canned fruit of several varieties, honey, and almond paste.

Then there’s the veggie shelf with mostly beans and corn. I use very few canned vegetables other than those. Oh, canned tomatoes. There are a LOT  of those, since I use them in soups, stews, etc. Even though tomatoes are a fruit, we certainly don’t eat them like they are, so they go on the veggie shelf.

condiment shelf

There’s also a shelf for canned meat – mostly tuna and chicken. Some smoked albacore, some canned salmon too. I also have a shelf of jams, jellies, apple butter and those kinds of items. They probably ought to be over on the fruit/dessert shelf. But oh well, they’re not. And then I have two shelves, actually of things that don’t fit any of those categories. Things like canned red peppers. I don’t use those as a vegetable, so they don’t go on the veggie shelf. Canned eggplant caponata. Marinated artichoke hearts. Some kind of powdered onion dip I bought 10 years ago, and have never opened. A jar of small pickled green tomatoes. Sun dried tomato tapenade. Preserved Meyer lemon rosemary marinade. Cranberry sauce. Cocktail sauce. And a pear topping for soft cheese. See, all those kinds of things are mostly appetizers, so I guess in my weird brain, I lump them together. I buy them, and promptly forget they’re there. When I’m planning a company dinner, I rarely even LOOK there to see if I have something I can use. Big wrong.

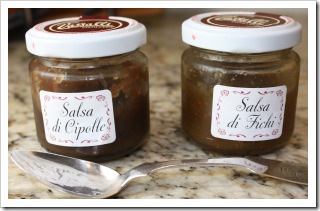
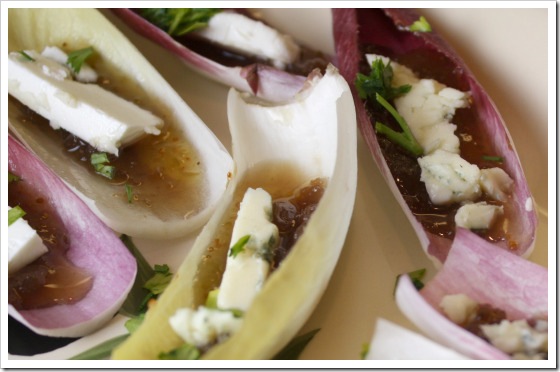
onion and fig But this time I was eyeballing these two cute little jars given to me by my friend Darlene. She and her husband went to Italy a couple of years ago and she bought these little darlings there. They’re caramelized onions and a fig compote. So how could I use them? Since I had some Belgian Endive in the refrigerator, I decided to create an appetizer with them.

Here’s all I did: I used a small spoon and laid down a small strip of the caramelized onion, then a small strip of the fig salsa, right next to the onion. Then I crumbled (or sliced) a tiny piece of goat cheese or blue cheese and put that on top. A little sprinkling of finely minced Italian parsley on top and I was done. Not like an appetizer with bread or crackers (well, I served those too) but this would certainly be healthier for us. I just used the Belgian Endive as the “boat” to contain the items. They made for very easy finger food as we and our guests sat out on our patio. So how were they? Very good. The savory (the onions) and the sweet (the figs) was complemented by the cheese (goat or blue).  I actually preferred the goat cheese, but both tasted good. The next time I made them I had some fresh figs, so I didn’t use the fig jam, but a quarter of a fig. I think those were even better. But then, fig season is short. Now.

belg endive appetizers tray
printer-friendly PDF

Belgian Endive with Caramelized Onion & Figs

Recipe: My own concoction
Servings: 6

2 heads Belgian Endive
3 tablespoons caramelized onions
3 tablespoons fig jam — or quartered fresh figs
2 ounces blue cheese — or soft goat cheese
1 tablespoon Italian parsley — minced

1. CARMELIZED ONION: If you can’t buy the already-prepared, halve and thinly slice a whole onion. To a saute pan add some olive oil and cook the onions. Be careful they don’t burn. You can add about a tablespoon of brown sugar if you’d like to. Cook them until most of the water has been rendered out of them and they’ve turned a deep, dark mahogany brown. Toward the end of cooking they can easily burn, so turn down the heat unless you can stand there to stir them frequently. Cool.
2. Cut off the root end of the Belgian Endive and separate them into leaves.
3. Using a small spoon, lay down a thin strip of caramelized onion lengthwise on the endive leaf.
4. Repeat, using fig jam. If using fresh figs, just put the fig off-center (so the cheese will fit).
5. Cut a thin strip of cheese and place on top of the filling (or next to the fresh fig).
6. Sprinkle tops with finely minced Italian parsley. Cover with plastic wrap and chill until ready to serve. These can be made several hours ahead.
Per Serving: 44 Calories; 3g Fat (55.6% calories from fat); 2g Protein; 3g Carbohydrate; 1g Dietary Fiber; 7mg Cholesterol; 134mg Sodium.

A year ago: Lamb Shepherd’s Pie
Two years ago: Normandy Apricot Custard (a veddy-veddy French dessert using fresh apricots)

Posted in Grilling, Pork, on August 28th, 2009.

mongolian pork chops

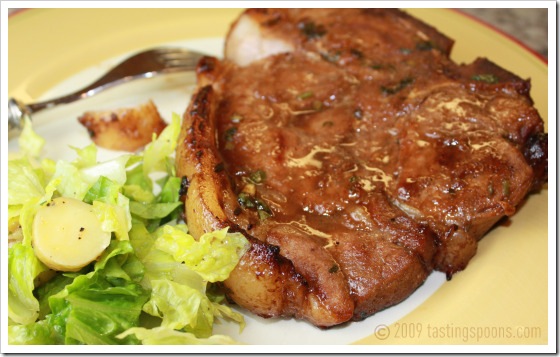
Here on this blog I’ve talked about Cindy Pawlcyn before. She’s the famous chef from Mustard’s Grill in Yountville. And Cindy’s Backstreet Kitchen in St. Helena. I wrote up a restaurant review of the latter, back in 2007 after my friend Cherrie and I ate there. My friend Linda gave me the ‘>Mustard’s Grill cookbook a couple of years ago. I’ve not made very many dishes from it (don’t know if I’ve even written up a single one), but Linda has been telling me that I needed to try the Mongolian Pork Chops. Finally, I did. They’re really good. Not too spicy hot – just seasoned highly with Asian condiments. According to the recipe in the cookbook, this is one of the menu favorites at the restaurant.

We used the last of our precious 4-H pig pork chops (the Berkshire pig we bought last summer) for this. They were oh-so tender. I had bone-in chops, not boneless, as you can see from the photo above. You can use either one, although the original recommends bone-in, exactly 1-inch thick.

You prepare a marinade that contains a lot of hoisin sauce (more of that than anything else), plus a tad of sugar, soy sauce, sherry vinegar, rice wine vinegar, a scallion, some hot sauce, black bean chile sauce, fresh ginger, fresh garlic, and some cilantro (including some chopped stems). The pork is marinated in that mixture for at least 3 hours, or overnight (overnight is better), then grilled briefly to get grill marks, then slowly cooked to 139 degrees (still slightly pink in the middle).

To accompany this I sautéed some sugar snap peas and mushrooms in a little butter, then during the last minute of cooking I added some rice wine vinegar (about a tablespoon) and a very small splash of dark sesame oil.  The mixture gave the sugar snaps a little Asian twist.
printer-friendly PDF

Mongolian Pork Chops

Recipe: Cindy Pawlcyn, Mustard’s Grill, Napa Valley
Servings: 6

1 cup hoisin sauce
1 tablespoon sugar
1 1/2 tablespoons tamari soy sauce
1 1/2 tablespoons sherry vinegar
1 1/2 tablespoons rice wine vinegar
1 whole scallion — minced
1 teaspoon tabasco sauce — or Vietnamese chile sauce
1 1/2 teaspoons black bean chile sauce
1 1/2 teaspoons fresh ginger — freshly grated
1 1/2 tablespoons fresh garlic — minced
1/2 teaspoon white pepper
60 ounces boneless pork top loin chops — cut 1″ thick

1. Pound meat with a mallet so pork is exactly 1 inch thick.
2. Combine all other ingredients in a bowl and mix well. Let chops marinate in mixture for 3 hours, or up to overnight in the refrigerator.
3. Heat a grill pan over medium-high heat. Remove chops from marinade and place on grill pan. Grill for 5 minutes on each side, turning after 2-3 minutes to produce nice crosshatch marks. Ideally, use a meat thermometer in one of the chops and remove when the meat reaches 139 degrees.
Per Serving (assumes you eat all the marinade): 438 Calories; 14g Fat (29.2% calories from fat); 53g Protein; 23g Carbohydrate; 1g Dietary Fiber; 129mg Cholesterol; 1050mg Sodium.

A year ago: Chocolate Spice Cupcakes
Two years ago: Spicy Garlic Cashew Chicken (oh yes, EVER so good)

Posted in Salads, Veggies/sides, on August 27th, 2009.

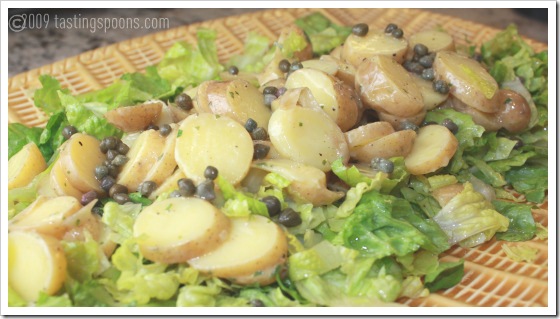
potato romaine saladIt may be a long time since I’d made this – as long as 14 years ago. On the day that our daughter, Dana, was married in our backyard. About 50 people were invited and having a catered lunch was just not in the cards. So I elicited help from family and friends to help with the last-minute food prep to serve a nice lunch buffet. I served a Cornish game hen salad that had been a favorite (still is), and this salad. In this dish we covered salad and carbs all in one.

Once Dana & Todd said their vows, we served shrimp & avocado salsa to keep everyone’s tummies under control. It was a very, very hot September day. My treasured punch bowl broke when we served the punch – I’d placed the bowl on a table outside and it sat in the sun for about 4-5 minutes before I poured the iced punch into the bowl. I heard the crack. And shortly thereafter, all the punch dribbled out the bottom of the bowl, all over the tablecloth and all over the patio. Sigh. I’ve never replaced the punch bowl. Thought about it, but haven’t.

Ideally this dish is made with red-skinned potatoes, but I had some of those new baby potatoes on hand – they’re called “teeny tiny potatoes.” The recipe came from Bon Appétit, way back in 1994. The recipe is available online, and some people who made it thought the dressing was too heavy and oily. Indeed, if you poured all the dressing onto the potatoes it might be – but I never have. I always have dressing left over, so keep that in mind. I’ve added another tablespoon of vinegar to the mix – I like it better myself.

A secret, if there is one, to this recipe is pouring apple cider vinegar over the hot potatoes. As with many absorbent carbs (like beans and potatoes), they benefit from a lot of acid. I have a sensational bean salad that I make that has almost no oil in it – all vinegar. The beans soak up the acid, and somehow the starch in the bean just neutralizes the vinegar. Don’t know how or why that works, but it does. This recipe works much the same way. You can leave the potatoes out at room temp for up to 4 hours, so it’s just a matter of making the Romaine salad part, tossing dressing on the potatoes, spreading them on top of the salad, then sprinkling capers on top.

I had leftovers after serving this, so I removed the Romaine and saved the all-dressed potatoes. The next night I made a more traditional green salad (Romaine, radishes, red cabbage only) and piled the potatoes on top. I also dressed the entire salad with the Dijon dressing too. I liked it better.

You can prepare the dressing up to a day ahead; just bring it to room temp before tossing it on the potatoes. I like this dish because it covers both salad and carbs – all in one. The dressing is a mustard-rich one – you definitely can taste more than a hint of the mustard. If you don’t like mustard, tone it down a bit. This salad can be taken to a picnic. Is great for a hot summer night.
printer-friendly PDF

Potato & Romaine Salad with Creamy Dijon Dressing

Recipe: Bon Appetit, April, 1994
Servings: 6
Note: you can also add red cabbage and radishes to the green salad (use sturdy types) to augment the salad, rather than just Romaine.

3 tablespoons Dijon mustard
2 tablespoons water
2 tablespoon white wine vinegar
1 teaspoon salt
1 teaspoon pepper — ground
1 1/4 cups olive oil — extra virgin
2 tablespoons whipping cream — chilled
2 tablespoons fresh basil — chopped fine
1 tablespoon fresh parsley — chopped
2 pounds potatoes — red-skinned
5 tablespoons cider vinegar
1/4 cup olive oil — extra virgin
2 tablespoons white wine vinegar
1 head romaine lettuce — coarsely chopped
2 tablespoons capers — drained

1. Dressing: Blend mustard, water, vinegar, salt, pepper in food processor. With machine running, add oil in slow, steady stream. Add cream; blend mixture until thick and creamy. Mix in herbs and pulse briefly. Can be prepared ahead one day. Cover & refrigerate. Bring to room temperature before using, thinning with water if dressing becomes too thick.
2. Salad: Cook potatoes in large pot of boiling water until tender, about 30 minutes. Drain and cool. Peel potatoes and cut into 1/3 inch thick slices. Transfer potatoes to large bowl. Sprinkle with cider vinegar. Can be made 4 hours ahead. Let stand at room temperature.
3. Whisk oil and vinegar in another large bowl. Add lettuce and toss to coat. Add capers to potatoes. Mix enough dressing into potatoes to coat. Spoon potatoes on top of romaine leaves and serve. You will not need all of the dressing.
Per Serving (assumes you use all the dressing): 643 Calories; 57g Fat (76.9% calories from fat); 6g Protein; 32g Carbohydrate; 5g Dietary Fiber; 7mg Cholesterol; 497mg Sodium.

A year ago: Cornish Game Hen Salad
Two years ago: Sicilian Tuna Salad

Posted in Desserts, Miscellaneous, on August 26th, 2009.

pie shell

Certainly I’ve admitted here before that pie crusts (at one time) were not my favorite thing. Well, to eat them was fine. To make, well, sometimes was iffy. Not anymore. But therein lies a story:

My mother, a real pie crust expert, only made the old-fashioned kind of Crisco (shortening) type. Even as a child I marveled at her ability to whip up a pie in nothing flat. She would combine the crust ingredients in a bowl, cut in the shortening, then sprinkle in the ice water. She’d mix and form it into a mound, flatten it a bit then start rolling. In about 8 rolls she’d have a perfectly round piecrust which she’d very easily pick up and lay into a pie plate. There were NO cracks. No dry edges. No thin parts either. If there were scraps, she’d put those on a separate baking sheet and spread with a little margarine, sugar and cinnamon and bake those for us to nibble on.

Therefore, I grew up thinking making and rolling pie crusts was easy. So one time, probably when I was about 12-14 I’d guess, I asked my mom if I could make the crust this time. She said “sure.” With her next to me, I did everything she told me to do (use ice water, handle it as little as possible, roll gently, don’t roll all the way to the edges, turn, sprinkle the surface with a bit of flour, but not too much, turn and roll some more).  With the kind of impatience I likely had, I did manage to get it into a ball, flatten it some and started rolling it out. I’m sure I was more interested in the rolling of it than the making of it. But anyway, you can guess from the tenor of this post that all did NOT go well. It stuck to the board, big time. It was lopsided. It was thin in places. It cracked right through the middle. When I tried to transfer it (after my mother had helped me patch it in several places) it completely fell apart. I was nearly in tears.

It’s likely I’d already manhandled it too much. My mother wrapped the dough in a ball and refrigerated it for 15 minutes and I tried again. Same thing happened. I think I walked away from piecrusts at that point, rarely to return. I watched my mother make them after that, but was never willing (or interested) to try it again.

When I first became a bride in 1962, I was a real novice cook. Living in a small cottage in Florida at one point, I decided to tackle another pie crust. You’ll laugh at this scene: I didn’t own a pie plate. With all the lovely wedding gifts I received, nary a pie plate. But I had a thin aluminum cake pan (nonstick didn’t exist back then), so I figured, oh well, I could make the pie in a cake pan. Sure thing. I thought. (Note to any new cooks here: don’t do it.) I managed to make the shortening pie crust somehow, patching it in a dozen places. Had a very hard time getting the crust to hold on the cake pan edge, of course. Pie crusts aren’t meant to hold onto a vertical surface. Anyway, I think it was a cherry pie made from the Joy of Cooking (a wedding gift). The dark and gloomy kitchen had a 2-burner stove and a small oven in it. It was difficult to see anything, but within about 20 minutes I knew something was wrong because I could hear some hissing coming from the oven. I could hardly see into the dark oven interior, but as soon as I opened the oven door smoke was pouring out. The pie had overflowed and was dripping all over the oven floor. Not knowing what to do, I just let it do its thing. The crust obviously wasn’t done. Well, the pie tasted okay, I guess, but it was hardly a pie. It was nary impossible to get the crust out of the pan because some of the filling had leaked through the crust and caramelized on the aluminum surface. Plus all the globs of sugary filling had dripped all over the oven. What a mess to clean. I’d never had to use oven cleaner (this was long before self-cleaning ovens). So can you see why I walked away from pie crusts? Yup. I did. For years and years and years.

My epiphany came probably 20 years later (can you imagine, I didn’t make a pie in all those years unless I could buy the ready-made shell!) I attended a cooking class where the instructor made quiche Lorraine. And she used a pie crust recipe from ‘>’>The Silver Palate Cookbook. As she whizzed up the crust ingredients in the food processor (BUTTER – oh my goodness BUTTER) it came together in a flash. She chilled it briefly and literally rolled it to soft perfection. Into the pie plate it went and any cracks were easily fixed. The butter gave the dough a softness that not only allows easy handling, but simple repairs as well.

My first butter pie crust was a resounding success. It was tender and flaky. It stood up around the edges (in a pie plate, of course!). Nothing leaked through the crust. It looked pretty. It tasted great. My guests thought I knew how to make a pie crust. Since then, I’ve never wavered from making a butter crust. A few have worked better than others, and I’m always open to some new combination, as long as butter is in the mix.

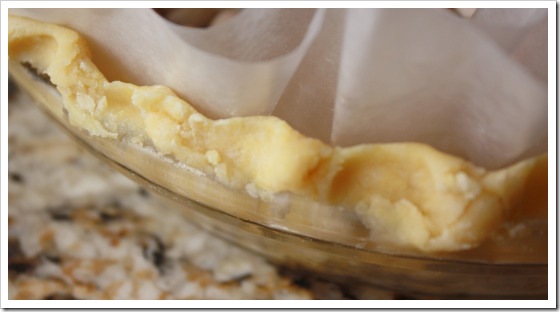
With a new cookbook at hand (a gift from my friend Cherrie, for my birthday), ‘>’>The Art and Soul of Baking (Mushet, 2009), I decided to try their version of a rich pastry crust. It’s very similar to many others (one cube of butter to 1 1/4 cups of flour). This one also had egg yolks (2) in it, which made it even more rich. But it worked like a charm. Probably the flakiest pastry I’ve ever made. It was mixed in the food processor. It was still cool enough from the cold butter and ice water, that I was able to roll it out immediately. I think I needed just a tiny half teaspoon more water in the mix (in the photo above you can see the raw pastry has a few dry edges). But, it went into the pan just fine.

The joy of this kind of pie crust is that it can be pressed, by hand, into the pie plate too, rather than using a rolling pin. So if you are pie crust challenged, or don’t own a rolling pin, by all means, just use your hands and press it in, starting in the middle. Put clumps of dough in the bottom of the pie plate and then start pressing toward the outside edges and up the sides. The recipe had ample quantity, so I didn’t lack for enough dough to put on a nice crimped edge.

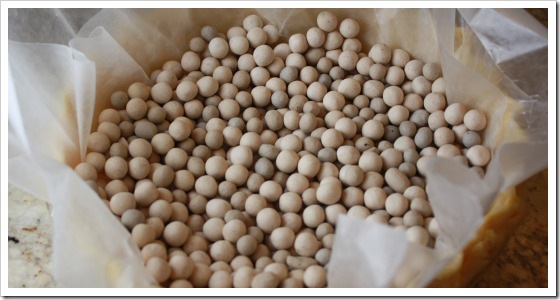
When I made the Tomato Pie, it required a partially baked crust. So, I put long strips of waxed paper in the middle of the raw shell and added pie weights. And pushed them as much as possible UP the sides so the top edges would stay in place. I use two sheets of waxed paper in the raw shell. I do trim down the corners that stick up (so they don’t come in contact with the heating elements), but not too much. I also discovered early on, that when you try to remove the pie weights by grabbing the waxed paper, you’ve got to have enough edges to pick up the whole thing.

pie weights There’s the raw shell with the pie weights. Carefully move them around so more of the weights are up the sides, as I said. Once the shell is partially baked, you let it cool for a couple of minutes. Have a heatproof bowl nearby, then very gently and very carefully pick up opposite sides of both sheets of waxed paper, lift and pour the pie weights into the bowl. (You may need to wash the pie weights – for sure you will if you only use one thickness of waxed paper – with two thickness, probably not.) Allow the pie weights to completely cool before returning them to a storage container (I use a quart sized freezer bag).

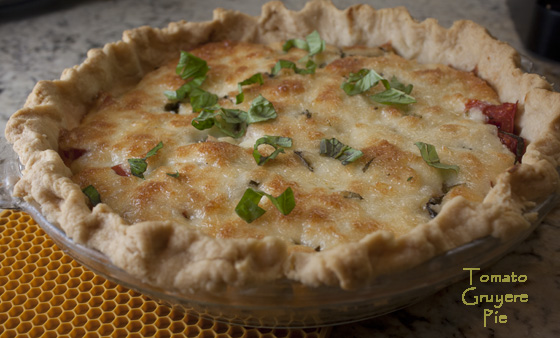
So there’s my pie crust story, and I’m sticking to it – the butter pastry, that is. Below is the finished pie. Isn’t this pretty? If you didn’t already print out the tomato pie recipe, be sure to try it. With the buttery flaky pie shell, it’s sublime. For a PDF of the shell, see bottom of recipe.

tomato pie whole
printer-friendly PDF

Shortcrust Pastry (Shell)

Recipe: The Art & Soul of Baking by Cindy Mushet
Servings: 8
NOTES: To blind bake, fill raw shell with waxed paper and pie weights and bake in a 375 oven for 10-20 minutes just until it turns the lightest of golden color.

FOR SAVORY CRUST:
1 1/4 cups all-purpose flour
1/4 teaspoon salt
4 ounces unsalted butter — very cold, cut in 1/2 inch cubes
2 large egg yolks
1 teaspoon ice water — or up to 3 teaspoons if needed
ADDITIONS FOR SWEET CRUST:
1/4 cup sugar
2 teaspoons vanilla extract

1. CRUST: Place the flour, sugar (only if you’re making a sweet crust) and salt in the bowl of the food processor. Pulse 5 times to blend. Add the ice cold butter pieces and pulse 6-8 times, just until the butter is the size of large peas.
2. In a small bowl whisk together the egg yolks, water (and vanilla if this is for dessert). Add it to the butter mixture, then process just until the dough begins to form small clumps, 5-10 seconds. Do not let the dough form a ball. Test the dough by squeezing a handful of clumps – when you open your hand, they should hold together. If they are crumbly and fall apart, sprinkle another teaspoon of water over the dough and pulse a few times then test it again. Repeat, if necessary.
3. Turn the dough out on a lightly floured work surface and knead gently 2-3 times, just to finish bringing it together. (If it still crumbles a bit too much, put it back in the processor and add another teaspoon of water and process again.)
4. Shape it into a disk about 6 inches in diameter. If the dough is still cool to the touch, continue on to the next step. If not, wrap in plastic wrap and chill for 30 minutes before continuing.
5. ROLLING PIN METHOD: Make sure the dough is cool, but if it’s too cold, it won’t be malleable, so allow it to sit out for 5 -10 minutes or so. If you try to roll it, it will crack and be totally unmanageable.Place the dough between 2 pieces of plastic wrap, wax paper or parchment paper. Gently roll it, turn and roll, always from the center out. Lift as you reach the outer edges so you don’t mash the tender dough into the paper. If the paper wrinkles, gently lift it up and replace it on top. Turn the dough over if needed.Roll is out until it’s about 11 inches in diameter. If the dough gets too warm place it on a baking sheet and chill for 30 minutes.
6. Peel off the top piece of paper and gently turn it over onto a pie pan/dish. Peel off the other piece of paper and gently move the dough into place. Trim larger edges (if you have any) and fold the outer edges under the top rim. If there are thin spots use a small piece of dough and gently press it into place.
7. PRESS-IN type: Chill dough for 30 minutes. Allow to sit out just a few minutes, then break the dough into smaller pieces (about 10-12) and place them around the pie pan. Using your fingers, press each piece – starting from the center of the pan – toward the outer edges. The warmth of your fingers will allow you to manipulate the dough fairly easily. Press the excess up the sides to form walls, making sure they are the same thickness as the bottom. Push the dough up to the top and fold over to crimp. If using a tart pan, just push the dough at the top to remove excess. Save excess dough in case you need to patch somewhere.
8. Chill dough, preferably, for about 30 minutes.
9. BLIND BAKE: Place two layers of waxed paper in the pie dish. Pour in pie weights (or dried beans) to mostly fill the pan. Trim paper edges just a bit (you need enough length, though, to lift the hot pie weights after it’s baked so don’t cut them too short) so it doesn’t touch any of the heating elements in the oven. Bake at 375 for about 8-15 minutes, or until just beginning to turn golden brown. Remove from oven and allow to sit on a rack for about 10 minutes. Gently remove paper with pie weights and allow to cool completely.
Per Serving: 215 Calories; 13g Fat (54.5% calories from fat); 3g Protein; 22g Carbohydrate; 1g Dietary Fiber; 84mg Cholesterol; 70mg Sodium.

A year ago: White Sangria
Two years ago: Italian Bragiole (a stuffed steak)

Posted in Vegetarian, Veggies/sides, on August 25th, 2009.

If you have tomatoes accumulating at a rapid rate at your house, oh, do I have a recipe for you today. To say this pie is delicious is a gross understatement. It’s not my recipe – it’s Elise’s, over at Simply Recipes. She got it from an acquaintance. And what a winner it is. The words of wisdom here are: sometimes the simplest of recipes are the best. This pie is nothing fancy – it contains onions, lots of tomatoes, fresh basil, cheese, mayo and some hot sauce. All piled into a pie shell in layers. And just so you know:

This recipe contains fat in the pie crust.

This recipe contains cheese (uh, yea, calories and fat)

This recipe contains mayonnaise (3/4 cup for the whole pie).

Other than that, it’s good for you  – nice chunks of tomatoes. (BG).

I’m going to write up a separate post about the pie shell (otherwise this post would be pages and pages long). So here we’ll just talk about the pie itself. I started off with a mixture of tomatoes (red and yellow heirlooms plus a small pile of smaller tomatoes right out of our garden. The heirlooms were very moist – VERY juicy. And that can be the slight undoing of this recipe – you’ve just got to get out as much of the liquid as possible. It’s not that the pie won’t be good, but the bottom shell will be soggy (as mine was). But I have a “fix” for it – next time I’ll add an extra step. More on that later.

Obviously, first you have to make a pie shell. We couldn’t find any refrigerated pie shells in our local stores, so with barely enough time, I made a crust myself. It was a very buttery savory shell. Flaky beyond belief. It was blind baked (about 20 minutes at 350) first. Meanwhile, I started in on the filling.

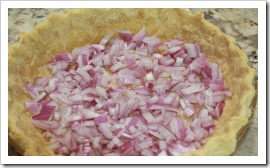
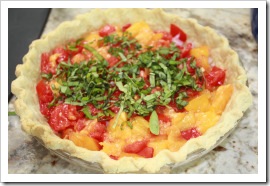
tomato pie oions First went in the chopped raw red onions. Next time I’d chop them up finer AND I’d cook them a bit. The onions were still crunchy when we ate the tart after 40 minutes of baking.

tomato pie basil

Next went in the chopped tomatoes that I’d drained on paper towels for about 15 minutes, AND I squeezed them to get out even more juice. I used about 3 1/2 cups for my large 9-inch pie plate.

Then I sprinkled in about 1/4 cup of fresh sliced basil leaves from our garden.

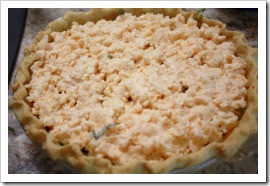
tomato pie toppingNext I mixed up an equal quantity (approximately) of shredded Gruyere cheese and mozzarella (not fresh), along with some bottled mayonnaise and a dash of hot sauce. Using my hands I pressed the cheesy clumps all over the top of the pie. I didn’t mash it down or try to make it a solid layer – there were a few holes. But they all disappeared during baking. Bake for 25-40 minutes or so until the top is golden brown.

tomato pie whole

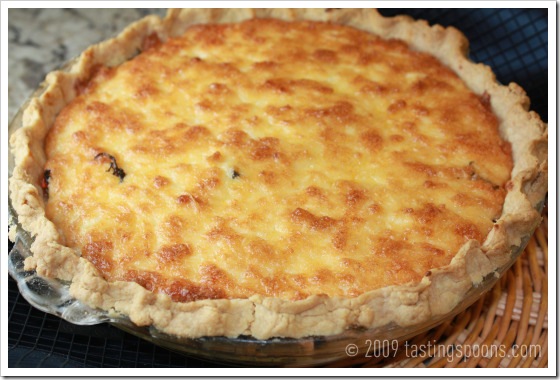
There it is, in all its gloriousness just out of the oven. We took it to our kids’ house and had it with some grilled Italian sausages and a delicious field greens salad topped with more garden-grown sliced tomatoes. The pie sat out for about an hour (uncovered in the trunk of the car for the 30-minute ride) and it was still nice and warm in the middle when it was served soon thereafter. Definitely eat it warm or hot. Next time I make this I’ll add a thin layer of cream cheese over the pastry – to keep the juice from waterlogging the pie shell. And a word of caution: Gruyere is what I used here – it was beyond wonderful – but it’s a very salty cheese, so I might not add any additional salt. Mozzarella can also be very salty too.

The result? Oh gosh. Juicy. Creamy. Cheesy. Flaky. Tomatoey. All over perfection. I’m writing this as we just had a tiny wedge as leftovers. I heated it in the microwave and it was just SO SO good. Can’t wait to have an occasion to make it again – before all the tomatoes are gone for the season.
printer-friendly PDF

Savory Tomato & Gruyere Pie

Recipe: Elise at Simply Recipes
Servings: 8 (maybe more like 6)
NOTES: NEXT TIME-I’ll spread a layer of light cream cheese (very softened) over the bottom and up the sides of the pie crust. It needs to be solid, otherwise the juice will leak through to the flaky pastry. If using Greyere, it’s a very salty cheese, so go very easy on the salt. Also, cook the onions just a little bit first.

1 whole pie shell — 9 inch
1/2 whole yellow or red onion — chopped finely
3 1/2 cups tomatoes — cut in half horizontally, squeezed to remove excess juice, roughly chopped, to yield 3 -4 cups
1/4 cup basil — sliced in thin strips
2 cups grated cheese — (combination of Gruyere and Mozzarella or sharp cheddar and Monterey Jack)
3/4 cup mayonnaise
1 teaspoon Tabasco sauce — (or more to taste)
Salt and freshly ground black pepper
Basil leaves for garnish

1 Preheat oven to 350°F. Place pie shell in oven and cook for 8-10 minutes or longer until lightly golden. If you are starting with a frozen crust, you’ll need to cook it a little longer. If you are using a homemade crust, freeze the crust first, then line the crust with aluminum foil and pre-bake it for 20 minutes, then remove the foil and bake an additional 10 minutes.
2 Squeeze as much moisture as you can out of the chopped tomatoes, using either paper towels, a clean dish towel, or a potato ricer. Squeeze gently in your hands, too, to get the last bit of juice out, without pulverizing the tomato flesh in the process.
3 Sprinkle the bottom of the pre-cooked pie shell with chopped onion. Spread the chopped tomatoes over the onions. Sprinkle the sliced basil over the tomatoes.
4 In a medium bowl, mix together the grated cheese, mayonnaise, Tabasco, a sprinkling of salt and freshly ground black pepper. The mixture should be the consistency of a gooey snow ball. Spread the cheese mixture over the tomatoes.
5 Place in oven and bake until browned and bubbly, anywhere from 25 to 45 minutes
Per Serving (and higher if you only serve 6 servings): 388 Calories; 33g Fat (74.2% calories from fat); 10g Protein; 16g Carbohydrate; 2g Dietary Fiber; 37mg Cholesterol; 450mg Sodium.

A year ago: Restaurant review of the Posh Peasant in San Clemente
Two years ago: Goat Cheese with Apricot Chutney

Posted in Desserts, on August 24th, 2009.

plum cobbler strip

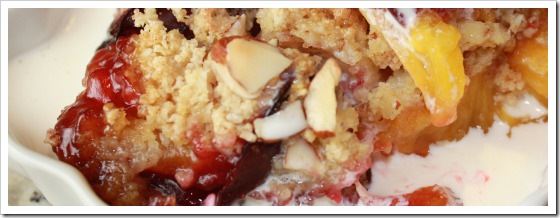
Oh my goodness gracious, was this ever good. Confession time here: I don’t know if I’ve ever made a plum cobbler. But this recipe may be the first, last and the only recipe I’ll ever use. I’d done a google search for plum recipes, went to the first result from plumrecipes.net and when I saw this title, well, that was all it took. I had about 8 really large California plums that needed to be eaten or used somehow. The recipe calls for 2 1/2 pounds – that was exactly what I had. If you have small plums, you’d best weigh them to make sure you have sufficient. This recipe could surely be halved easily enough, although half an egg is a bit of a problem!

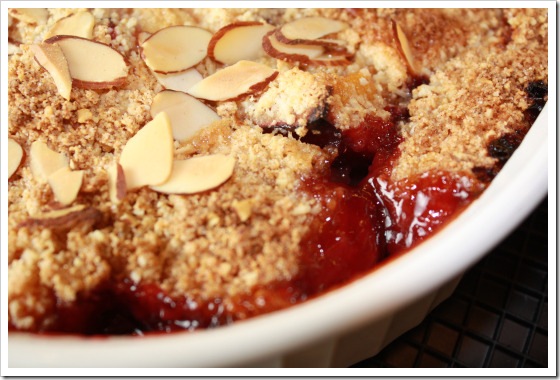
The pitted and quartered plums are mixed in a bowl with some brown sugar, cornstarch, cinnamon and lemon juice (I used lime, cuz that’s what I had). You pour them out into a baking dish (shallow, not deep). A few little bits of butter are dotted on the top. Then you mix in the processor some sugar (I used half Splenda), flour, baking powder, salt and almonds; then you add one egg and mix that. The mixture is gently sprinkled over the top of the plums. Gently pull a few of the plum quarters up, so a few of the ends are peeking through the streusel. A few more almonds are added to the top and the dish is baked for 45 minutes. Here’s what it looked like fresh out of the oven:

plum cobbler baked So, the prep probably took about 15 minutes max, baking was 45, and we were able to have a little scoop of it about 20 minutes later, with a little glug of heavy cream poured around it. Highly recommended!
printer-friendly PDF

Plum and Almond Cobbler (Easy)

Recipe: Plumrecipes.net
Servings: 8

1/2 cup light brown sugar — firmly packed
2 tablespoons cornstarch
1/2 teaspoon cinnamon
2 1/2 lb plums — pitted, quartered
2 tablespoons lemon juice
2 tablespoons unsalted butter — cut into bits
1 cup granulated sugar
3/4 cup all-purpose flour
1 teaspoon baking powder
1/2 teaspoon salt
3/4 cup sliced almonds
1 large egg — lightly beaten

1. In a bowl, whisk together the brown sugar, cornstarch and cinnamon. Add the plums, lemon juice and butter. Toss the mixture thoroughly and spoon into a shallow 3-quart baking dish.
2. Preheat oven to 375°F (190°C).
3. In a food processor, pulse together the granulated sugar, all-purpose flour, baking powder, salt, and ½ cup of the sliced almonds until the almonds are finely ground.
4. Add the egg and pulse until blended.
5. Spoon the flour mixture over the plum mixture, bringing some plum wedges up for presentation.
6. Sprinkle the remaining ¼ cup of almonds over the cobbler.
7. Bake in the middle of oven for 45 minutes, or until golden and bubbling. Allow to cool on rack. Serve warm.
Per Serving: 370 Calories; 12g Fat (26.8% calories from fat); 6g Protein; 65g Carbohydrate; 3g Dietary Fiber; 34mg Cholesterol; 209mg Sodium.

A year ago: Tomato Salad with Goat Cheese
Two years ago: Asparagus with Chile Butter

Posted in Pork, on August 22nd, 2009.

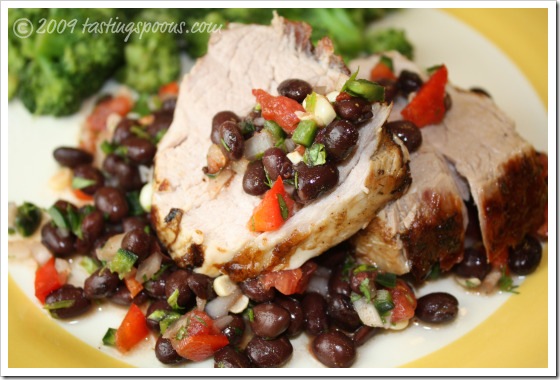
pork tend black bean salsa

Pork tenderloin is such a versatile meat. But it can also be very tricky – cook it even a degree or two past perfection and it’s dry and leathery. Even with my meat thermometer I let this one slip by – I forgot to set the alarm on the thermometer so the interior meat temp got to 149 (instead of 145) before I removed it from the oven. But it was still on the juicy side, though no longer pink in the middle, so it ended up tasting fine. Especially if you serve it with this delicious black bean salsa under and over it.

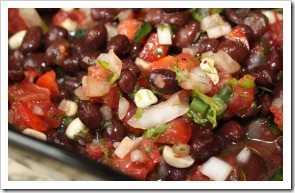
No printed recipe was involved here – I just decided I wanted to pan fry/brown the meat after marinating in lemon juice and oil, plus some oregano. Then I made the salsa with the rinsed and black bean salsa drained black beans, fresh tomato, red bells, onions, a bit of fresh corn off the cob, some pasilla chiles minced up (or use jalapeno) with some lemon juice (no oil in this at all) with some cilantro, dill, chipotle chile, cumin and some bottled chile powder, plus salt and pepper and a tiny sprinkling of sugar. I probably could have made my meal with just this salad/salsa and not missed the meat. But with the meat, it was a complete meal. I did serve some steamed broccoli on the side, but it was almost superfluous.

This was easy – marinate the meat overnight if you have time, whip together the salsa, then brown the meat and stick the whole pan in the oven to bake for just a VERY FEW minutes until it reaches perfect temp. Tent it with foil briefly, then slice on the diagonal and serve on a bed of the salsa. Done.

If you would like to stretch out the amount of meat here, just make more of the black bean salsa and serve fewer pieces of meat. I got 4 servings from one pork tenderloin with this recipe. Do try this, though – it’s worth making.
printer-friendly PDF

Roasted Pork Tenderloin with Black Bean Salsa

Recipe: My own concoction
Servings: 3

PORK & MARINADE:
1/2 whole lemon, juiced
3 tablespoons olive oil
2 teaspoons dried oregano — crushed in your hands
1 1/4 pounds pork tenderloin — drained
1 tablespoon olive oil for browning the meat
BLACK BEAN SALAD & SALSA:
16 ounces canned black beans — rinsed, drained
2 tablespoons red bell pepper — diced
1/4 cup corn kernels — fresh, cut off the ear
2 tablespoons onion — diced
1 small tomato — diced
2 tablespoons fresh lemon juice
1/2 teaspoon sugar
2 tablespoons fresh cilantro — minced
1 tablespoon fresh dill — minced
1/2 teaspoon chipotle chiles canned in adobo — mashed, finely minced
1/4 teaspoon chile powder
1/2 teaspoon ground cumin
1/2 teaspoon salt
1/4 teaspoon fresh ground black pepper

1. Prepare marinade: in a plastic bag combine the lemon juice, olive oil and oregano. Add the pork tenderloin, remove as much air as possible and seal bag. Refrigerate for 4 hours, or up to overnight. Turn the bag over a couple of times so more of the meat comes in contact with the marinade.
2. Salsa: Combine in a medium bowl the beans, red bell pepper, corn, onions, tomato, then add the lemon juice, sugar, cilantro, dill, chipotle chiles, chile powder, cumin and pepper. Season with salt, taste and add more salt if necessary. Cover and refrigerate until ready to serve. Make this up to 2-3 hours ahead of serving.
3. Preheat oven to 400.
4. In a large ovenproof skillet heat the olive oil to medium-high. Remove meat from marinade and gently dry off with a paper towel. Sear the meat on 3 sides, or 4, in the hot oil until just brown. Do not “cook” the meat – you only need to brown the outside.
5. Place pan in preheated oven. Preferably use a meat thermometer and bake the meat until it reaches 145. Remove from oven, tent the pan lightly with foil and set aside while you prepare the plates.
6. Using a serrated spoon, place an long oval of bean salsa down the center of the plate.
7. Place meat on a cutting board and slice it into angled slices and place in overlapping pieces on top of the bean salsa. Spoon another dollop of the salsa on top and serve immediately.
Per Serving: 558 Calories; 26g Fat (42.1% calories from fat); 49g Protein; 31g Carbohydrate; 10g Dietary Fiber; 123mg Cholesterol; 924mg Sodium.

A year ago: Tomatoes (everything you need to know about them)
Two years ago: Chipotle Meatballs

Posted in Desserts, on August 21st, 2009.

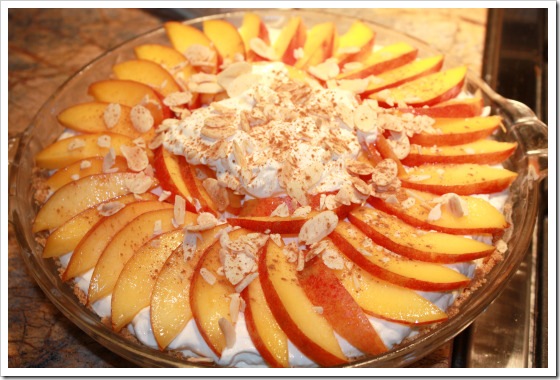
peach yogurt cheesecake whole

With a half flat of fresh, ripe nectarines, I offered to take dessert to our kids the other night. We had this a year or two ago when we were invited to some friends (Sandy & Bob’s) house for dinner one hot summer night. What I liked about it was that the dessert was minimally sweet. Better for us. And I like the sweet-tart taste.

Since we’re fans of Fage Greek yogurt, I decided to alter this recipe so I could include it, rather than the pre-packaged, sweetened cups of fruit-flavored yogurt, which I don’t like. It’s too sweet, and the yogurt is too thin. Fage does make a few types of fruit yogurt, but I didn’t opt to go that direction, knowing I could substitute.

The original recipe calls for a graham cracker crust, which is what I made. Sandy used ginger snaps (which was extra delicious). I had graham crackers on hand, so used those. I had 3 bricks of cream cheese (2 full fat, 1 low fat), and I had the fresh nectarines.

This pie/torte is really VERY easy to make. Took me less time than I thought, once you have all the ingredients ready to go. I used a combination of Fage fat free and full fat yogurt. I added some stone fruit jam in lieu of the peach-flavored yogurt. I didn’t add any Splenda or sugar in the cheesecake mixture, but I decided afterwards that I should have, so I’ve changed the recipe below to include it. It was sweet enough, barely, but I think most people would prefer it just a bit sweeter.

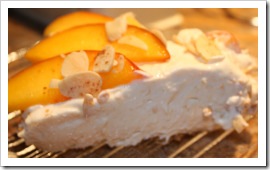
peach yogurt cheesecake slice The recipe is supposed to be made in a spring form pan, and there’s a reason for that. The filling is very goopy, because it’s not baked. It even has 1 1/2 packages of gelatin in it, but it was still a bit difficult to cut. There’s also a reason it’s supposed to chill for 24 hours – to make it easier to slice. I recommend you use two spatulas – one to use under the slice and the other one to help separate the slice from the next slice. Making it in a spring form pan allows you to get a flat pie wedge into and underneath each slice. The luscious, dripping nectarines were sublime on the top. They added sweetness, of course, but it was still a bit on the light side of sweet. Taste the filling – add more sugar if you want. It tasted sweet enough to me, but when it was served it seemed too tart. So, as I say, more sugar is in the recipe below. I made this in a 9-inch tall pie pan, and wouldn’t do that again – it really should be in the spring form. So do as I say, not as I did. Okay? I’ve also increased the amount of almond extract. The almonds sprinkled on top add a nice texture change. I dashed a bit of cinnamon on top just because I thought it would look pretty. No question, this pie/cheesecake is beautiful. And good tasting too.
printer-friendly PDF

Peach (or Nectarine) Yogurt Cheesecake

Recipe: From a friend, Sandy G.
Servings: 8-10

CRUST:
1 cup graham crackers — (or ginger snaps)
4 tablespoons unsalted butter — softened
1/2 teaspoon cinnamon
FILLING:
24 ounces cream cheese — room temp (may use some low fat)
1 1/2 envelopes unflavored gelatin
1/4 cup cold water
24 ounces Greek yogurt, fat-free — or low fat
1/4 cup peach jam — or apricot, if preferred
1/2 teaspoon almond extract
TOPPING:
2 whole fresh peaches — seeded, thinly sliced
1/4 cup toasted almonds

1. In a small bowl combine the crumbs with butter and cinnamon. Press into the bottom of a 10-iinch springform pan, or a tall 9-inch pie pan. Chill crust. If you use gingersnap crumbs, bake the crust at 400 for 10 minutes. Cool and chill.
2. In a large mixing bowl, beat softened cream cheese well. Soften the gelatin in the cold water, heat in microwave for 5-10 seconds until it’s dissolved. With mixer running, slowly add the gelatin into the cream cheese.
3. Begin adding yogurt, 1/2 cup at a time, beating thoroughly after each addition. Add almond extract. Pour into chilled pie crust, cover and refrigerate for about 12 hours.
4. Remove from springform pan. Garnish with thinly sliced peaches, to completely cover the cheesecake. Sprinkle top with toasted almonds, slice and serve.
Per Serving: 641 Calories; 41g Fat (56.1% calories from fat); 18g Protein; 53g Carbohydrate; 2g Dietary Fiber; 109mg Cholesterol; 504mg Sodium.

A year ago: A fun graphic from wordle.net
Two years ago: Schnecken Rolls

Related Posts Plugin for WordPress, Blogger...