Get new posts by email:

Archives

Currently Reading

Here are the tastingspoons players. I’m in the middle (Carolyn). Daughter Sara on the right, and daughter-in-law Karen on the left. I started the blog in 2007, as a way to share recipes with my family. I’m still doing 99% of the blogging and holding out hope that these two lovely and excellent cooks will participate. They both lead very busy lives, so we’ll see.

– – – – – – – – – – – – – – – – – – – – – –

BOOK READING (from Carolyn):

Music of Bees, Eileen Garvin. Absolutely charming book about a woman in midlife, lonely, who raises bees, also makes unlikely friends. Heart-warming and very interesting about beekeeping.

A Postcard from Paris, Alex Brown. Really cute story. Dual time line, 1940s and present day about renovating an old apartment in Paris, things discovered.

Time of the Child, Niall Williams. Oh such a good book. Very small village in Ireland, 1960s. A baby is left on the doorstep. The town all whispers and helps. I listened to an interview of the author, which made me like him and his books even more.

Sipsworth, Simon Van Booy. If you like animals you’ll swoon. An old woman who really wants to die finds a tiny mouse in her house and befriends it and finds a reason to live. Utterly charming book.

The Forger’s Spell, Edward Dolnick. True story. For seven years a no-account painter named Han van Meegeren managed to pass off his paintings as those of Johannes Vermeer.

If You Lived Here, You’d be Home by Now, Christopher Ingraham. Could hardly put it down – about a journalist who takes on a challenge to move to small town in Minnesota and write about it. He expects to hate it and the people and place, but he doesn’t. Absolutely wonderful true story.

The River We Remember, William Kent Kreuger. 1950s, Minnesota. A murder and the aftermath. Could hardly put it down. Kreuger has such a vivid imagination and writing style.

How the Lights Gets In, Joyce Maynard. An older woman returns to New Hampshire to help care for her brain-injured son. Siblings and family, lots of angst and resentments.

The Filling Station, Vanessa Miller. Every American should read this book. A novelized retelling of the Tulsa massacre in 1921. Absolutely riveting.

The Story She Left Behind, Patti Callahan Henry. Love this author. Based on a true story. A famous author simply vanishes, leaving her husband and daughter behind. She had invented a mystical language no one could translate. Present day, someone thinks he’s solved the riddle, contacts the family. Really interesting read.

The Girl from Berlin, Ronald Balson. Love anything about Tuscany. An elderly woman is being evicted from a villa there, with odd deed provenance. Two young folks go there to help unravel the mystery. Loved it.

The Island of the Colorblind, Oliver Sacks, M.D. Nonfiction. The dr is intrigued by a remote Pacific island where most of the inhabitants are colorblind. He also unravels a mystery on Guam of people born with a strange neurological problem. Medical mysteries unveiled. Very interesting.

The Bookbinder, Pip Williams. Post 1914 London. Two sisters work at a bookbindery. They’re told to not read the books. One does and one doesn’t. One has visions beyond her narrow world; the other does not. Eventually the one gets into Oxford. Lovely story.

The Paris Express, Emma Donoghue. 1895 on a train to Paris, a disaster happens. You’ll delve into the lives of many people who survived and died in the crash.

A Race to the Bottom of Crazy, Richard Grant. This is about Arizona. Author, wife and child move back to Arizona where they once lived. Part memoir, research, and reporting in a quest to understand what makes Arizona such a confounding and irresistible place.

The Scarlet Thread, Francine Rivers. A woman’s life turned upside down when she discovers the handcrafted quilt and journal of her ancestor Mary Kathryn McMurray, a young woman who was uprooted from her home only to endure harsh frontier conditions on the Oregon Trail.

A Place to Hide, Ronald Balson. 1939 Amsterdam, an ambassador has the ability to save the lives of many Jewish children. Heartwarming.

Homeseeking, Karissa Chen. Two young Chinese teens are deeply in love, but in China. Then their families are separated. Jump to current day and the two meet again in Los Angeles.

North River, Pete Hammill. He always writes such a good story. A doctor works diligently healing people from all walks of life. His wife and daughter left him years before. One day his 3-yr old grandson arrives on his doorstep.

A Very Typical Family, Sierra Godfrey. A very messed-up family. Three adult children are given a home in Santa Cruz, Calif, but only if the siblings meet up and live in the house together. A very untypical scenario but makes for lots of messes.

Three Days in June, Anne Tyler. The usual Anne Tyler grit. Family angst. This wasn’t one of my favorites, but it was entertaining and very short.

Saved, Benjamin Hall. Author is a veteran war reporter. Ukraine, 2022, he nearly loses his life to a Russian strike. Riveting story – he survives, barely.

Grey Wolf, Louise Penny. Another Inspector Gamache mystery in Quebec. She is such an incredible mystery writer.

All the Colors of the Dark, Chris Whitaker. A missing person mystery, a serial killer thriller, a love story, a unique twist on each. Could hardly put it down.

Orbital, Samantha Harvey. Winner of 2024 Booker Prize. I don’t usually like those, but I heard the author interviewed and she hooked me. This is not a normal book with a beginning, a story and an end. It’s several chapters of the day in the life of various astronauts at the ISS (Int’l Space Station). All fictional. She’s been praised by several real astronauts for “getting it” about space station everyday life.

The Blue Hour, Paula Hawkins. An island off Scotland. Inaccessible except when the tide is out. Weird goings on. An artist. A present day mystery too.

Iron Lake, William Kent Krueger. A judge is murdered and a boy is missing. Riveting mystery.

Tell the Wolves I’m Home, Carol Ricks Brunt. 1980s. A 14-yr old girl loses her beloved uncle. Yet a new friendship arises, someone she never knew about.

Four Treasures of the Sky, Jenny Zhang. 1880s, a young girl is kidnapped in China and brought to the United States. She survives with many hurdles in the path.

The Boy Who Fell out of the Sky, Ken Dornstein. Memoir, 1988. The author’s brother died in the PanAm flight that went down in Lockerbie, Scotland. A decade later he tries to solve “the riddle of his older brother’s life.”

Worse Care Scenario, T.J. Newman. Oh my. Interesting analysis of what could/might happen if a jet crashed into a nuclear plant. Un-put-downable.

Song of the Lark, Willa Cather. Complicated weave of a story about a young woman in about 1900, who has a gifted voice (singing) and about her journey to success, not without its ups and downs.

Crow Talk, Eileen Garvin. Charming story which takes place at a remote lake in Washington State, about a few people who inhabit it, the friendships made, but also revolving around the rescue of a baby crow.

The Story Collector, Evie Woods. Sweet story about some dark secrets from an area in Ireland, a bit magical, faerie life, but solving a mystery too.

A Sea of Unspoken Things, Adrienne Young. A woman investigates her twin brother’s mysterious death. She goes to a small town in California to figure it out, to figure HIM out.

The King’s Messenger, Susanna Kearsley. 1600s England, King James. About one of his trusted “messengers,” and his relationship with a young woman also of “the court.” Lots of intrigue.

In the Shadow of the Greenbrier, Emily Matchar. Interesting mystery in/around the area of the famous resort in White Sulphur Springs, West Virginia.

Isola, Allegra Goodman. Hard to describe, survival story on an island in the 1600s.

Save the Date, Allison Raskin. Rom-com, witty, LOL funny. Clever.

The Sirens, Emilia Hart. Numerous time-lines, Australia. Mysteries abound, nightmares, abandoned baby, weird allergies.

Red Clay, Charles Fancher. LOVED this book. Mostly post-Civil War story about the lives of slaves in Alabama during Reconstruction.

Stars in an Italian Sky, Jill Santopolo. Dual time line, 1946 and recent time. Love stories and a mystery.

Battle Mountain, C.J. Box. Another one of Box’s riveting mysteries. Love his descriptions of the land.

Something Beautiful Happened, Yvette Corporon. A memoir of sorts in Greece, tiny island of Erikousa, where the locals hid Jews during WWII. All elusive stories told by the author’s grandmother.

The Jackal’s Mistress, Chris Bohjalian. 1860s Virginia, about a woman who saves the life of a Union soldier. Really good story.

Song of the Magpie, Louise Mayberry. Really interesting story about Australia back in the days when it was mostly a penal colony. Gritty strength of a woman trying to thrive with her farm.

The Boomerang, Robert Bailey. A thriller that will have you gripping the book. About a lot of secrets surrounding the president (fictional novel, remember) and his chief of staff and about cancer. A cure. Such a good story.

Care and Feeding, Laurie Woolever. Really interesting memoir of a woman driven to succeed in the restaurant business. She worked for Mario Batali and then Anthony Bourdain. Gritty stories.

Everything is Tuberculosis, John Green. Maybe not a book for everyone. A real deep dive into the deadly tuberculosis infection, its history. I heard the author interviewed and found the book very interesting.

The Book Lovers Library, Madeline Martin. Fascinating read about Boots’ drug stores’ lending library. And the people who worked in them.

The Arrivals, Meg Mitchell Moore. LOL funny, about a middle-aged couple whose children (and their various family members) return to the family home and the chaos that ensues.

My Life as a Silent Movie, Jesse Lee Kercheval. About grief. A big move to Paris, finding herself a new life with a new set of real blood family.

Escape, Carolyn Jessop. Another memoir about a woman really in bondage in Utah, Mormon plural marriage.


Tasting Spoons

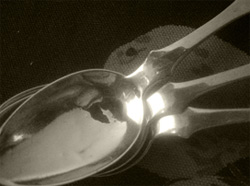
My blog's namesake - small, old and some very dented engraved silver plated tea spoons that belonged to my mother-in-law, and I use them to taste my food as I'm cooking.

Scroll down to the bottom to view my Blogroll

Posted in Breads, on March 18th, 2014.

last_word_nutmeg_muffins

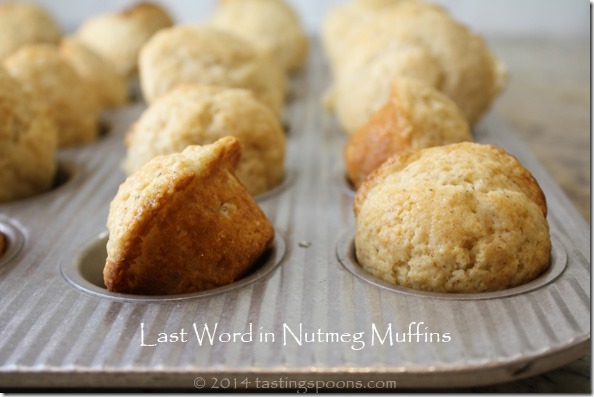
Isn’t that a funny name for a muffin? I thought so until I tasted these, and now I see why, without a doubt, you won’t want to make any other kind of recipe for a nutmeg muffin.

Using nutmeg in a muffin – as the main flavoring – is certainly edgy. Some people might even say risky. Yet I’ve learned to trust Marion Cunningham. What a consummate baker she is. As time has gone by, more and more, I’ve learned that she really knows her baked goods. She must be part chemist. But most home bakers would never think to add so much nutmeg – for this batch that makes about 14 regular muffins, or about 26 mini-muffins, you’ll use about 3+ tablespoons of freshly grated nutmeg. Specifically, Marion says to grate 1 1/2 whole nutmeg pods. That’s one PILE of nutmeg, I’ll tell you, now having done it. I didn’t measure how much it was – but I’d say it’s almost 1/4 cup’s worth. Do not, under any circumstances, use pre-ground jarred nutmeg for this.

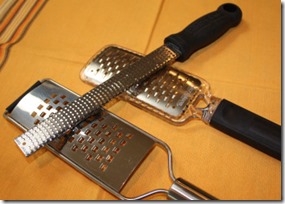
microplanes 350Using a rasp grater – a microplane grater – made easy work of it. I used the long, thin one on top in the photo at left. It probably took me about 5 minutes to get it done. The microplane creates airy shreds – lighter than other things you might grate. If you were to use regular ground nutmeg, it probably wouldn’t be anywhere near as much. But then, it also wouldn’t taste anywhere near as good. There is something significant that happens when you use freshly grated nutmeg.

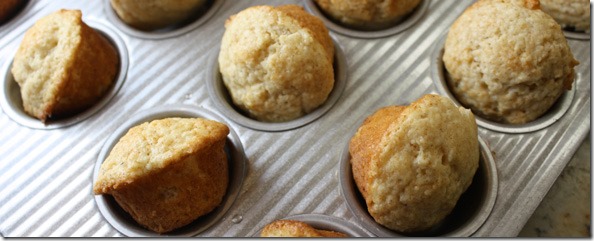
The batter was simple to throw together – you don’t even use a mixer – just a fork. First you combine all the dry ingredients. Then you combine the wet ingredients in another bowl and slowly add the wet into the dry and stir JUST until you don’t see any streaks of flour. It’s very important that you don’t over mix this batter – you’ll have tough muffins if you do. The batter is wet, and using a tablespoon of baking powder is certainly a lot, but these don’t rise over-much, considering. I filled each muffin cup to the top, so they all puffed up nicely.

nutmeg_muffin_pan

There’s more batter than you need, really, for one batch – I could have made another 3-4 mini-muffins, even after adding little dib-dabs of additional batter to each cup in the above 24-mini-muffin pan, so I poured the last of it into a greased glass (custard) cup and baked that right alongside the others – just for 5 minutes longer. The recipe indicates they’re best eaten warm, so I’ll probably reheat them in the microwave for about 5-7 seconds.

What’s GOOD: Loved the texture (light) of these. Right out of the oven they were heavenly. I ate one with nothing on it at all. This recipe exists on several other blog sites and most of the bakers served them with jam and/or butter. I’ll probably put out butter when I serve these to my friends who are coming to play Scrabble. The recipe indicates they stale quickly, so freeze them as soon as they cool down and defrost only what you need. The nutmeg flavor is sensational. But then, I love nutmeg.
What’s NOT: There was nothing not to like about these. Definitely a keeper.

printer-friendly CutePDF
Files: MasterCook 5+ and MasterCook 14 (click link to open in MC)

* Exported from MasterCook *

Last Word in Nutmeg Muffins

Recipe By: The Breakfast Book, Marion Cunningham
Serving Size: 14

2 cups all-purpose flour
3/4 cups sugar
1 tablespoon baking powder
1 1/2 whole nutmeg pods — grated (yes, really that much – it’s not a typo)
1/2 teaspoon salt
1 egg
3/4 cup heavy cream
3/4 cup milk
5 tablespoons butter — melted

NOTES: Can also be made as mini-muffins – makes about 26; bake for a shorter time, about 5 minutes less.
1. Preheat the oven to 400° F. Grease the muffin tins.
2. Stir together with a fork or whisk the flour, sugar, baking powder, nutmeg, and salt in a medium-size bowl, thoroughly combining the ingredients. Beat the egg well in a small bowl, then stir in the cream, milk, and butter and blend well. Add the cream mixture to the flour mixture and stir only until there are no streaks of flour. Don’t overmix.
3. Spoon batter two-thirds full into each muffin cup. Bake for about 20 minutes, or until the rounded tops are lightly golden. Remove muffins from the pan, and serve warm. Or cool on a rack and store or freeze for later use; warm before serving.
Per Serving: 201 Calories; 10g Fat (43.5% calories from fat); 3g Protein; 26g Carbohydrate; trace Dietary Fiber; 45mg Cholesterol; 239mg Sodium. (Mini-muffins would be half the amount)

Posted in Salad Dressings, Salads, on March 16th, 2014.

crunchy_napa_cabbage_salad

Oh gosh, this salad is just SO good. I think I could eat this every other night for the rest of my life and not get tired of it. Does that tell you anything? Like – – you need to make this? It’s that good!

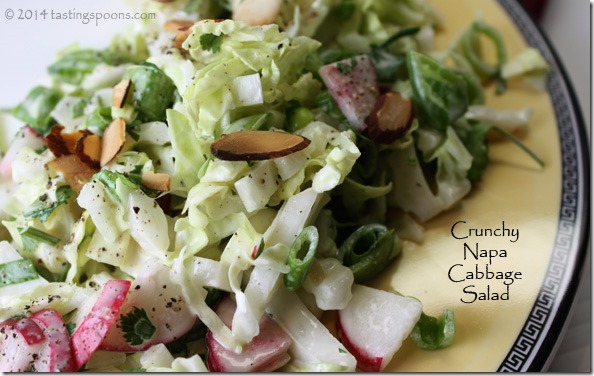
So what is this stuff? It’s mostly Napa cabbage cut into narrow shreds, a whole bunch of radishes, some snow peas (or sugar snap, because that’s what I had on hand), some green onions and toasted almonds. All that cloaked in a really delicious mayo-based dressing that’s sweet with a little bit of sugar, sour with a bit of white wine vinegar (I used white balsamic), and flavored with ground ginger, a bit of cayenne, a garlic clove and just a smidgen of toasted sesame oil and soy sauce. Then you add a cup of mayo. The salad part can be made ahead; so can the dressing; then you just combine them before serving, although you don’t use all the dressing. The salad is best served immediately, or within a few hours. The next day the cabbage is somewhat wilted, but the salad is still edible. Not at its peak, but still tasty. I don’t eat left over green salad cuz the green leaves just get limp – and to me they’re inedible. This cabbage salad was nowhere near that, so it IS definitely edible one day later.

The CRUNCH? It comes from the cabbage, the radishes, the peas and even the toasted almonds. All of it is crunchy. The origin of this recipe is Sunset Magazine. A month or two ago the magazine did a 25-year retrospective of their favorite recipes. This recipe – THIS ONE – was the #1 nominated recipe (from both readers and editors). More reason to make it. Again and again and again.

What makes it special? I’d say it’s the salad dressing. It has just a hint of Asian flavor (from the soy sauce and toasted sesame oil) but it’s very subtle. Truly, it is subtle. And I particularly liked the hint of sweet in it too. And the faint hint of heat from the cayenne. And it’s probably from the variety of veggies. The combo is just different. I don’t know who came up with this recipe, but I tip my hat to her/him.

What’s GOOD: absolutely everything. Love-love-love this salad. It’s going to go onto my favs list if that’s any indication of just how good it is.
What’s NOT: Nothing, other than the time required to slice and shred the veggies. But worth it, for sure.

printer-friendly CutePDF
Files: MasterCook 5+ and MasterCook 14 (click link to open in MC)

* Exported from MasterCook *

Crunchy Napa Cabbage Slaw

Recipe By: Sunset, January 2014
Serving Size: 8

1 pound Napa cabbage — coarsely shredded
12 ounces snow peas — strings removed, thinly sliced (or sugar snap peas)
1 1/3 cups radishes — thinly sliced
1 1/3 cups green onions — (including green tops), thinly sliced
1 1/3 cups cilantro — lightly packed, chopped
2/3 cup slivered almonds — toasted
CREAMY SOY DRESSING: (you’ll use 3/4 of this to dress the above salad)
3 tablespoons sugar
3 tablespoons white wine vinegar
1 tablespoon soy sauce
1 clove garlic — peeled, minced
1/2 teaspoon sesame oil
1/2 teaspoon ground ginger
1/4 teaspoon cayenne
1 cup mayonnaise

1. In a large bowl, combine cabbage, snow peas, radishes, green onions, and cilantro.
2. DRESSING: Whisk together sugar, white wine vinegar, soy sauce, garlic clove, ground ginger and toasted sesame oil, and cayenne. Whisk in 1 cup mayonnaise.
3. Add about three-quarters of dressing and the almonds to cabbage mixture; mix to coat. Taste and mix in more dressing if you like. Pour into a serving bowl.
Per Serving (not accurate as you don’t use all the dressing in the recipe): 342 Calories; 30g Fat (74.5% calories from fat); 6g Protein; 17g Carbohydrate; 4g Dietary Fiber; 10mg Cholesterol; 306mg Sodium.

Posted in Salad Dressings, on March 14th, 2014.

apple_cider_vinaigrette_close

The other night I made the best salad. I can’t say that on any ordinary evening I feel my green salads are exceptional. They’re GOOD, but not exceptional. And usually they’re good because I make my own salad dressings. This one, though, was about the salad itself, and it was likely enhanced because of the dressing. I’ll tell you about what was in it down below. . . it’s not like I could even come up with a recipe, exactly. But I will tell you what I put in this one.

The dressing, though, is what I’m mostly telling you about today. But first, I want to talk a bit about vinegar. If you read any of the foodie magazines, you’ve likely read somewhere about the sad state of apple cider vinegar in our country. Most of the stuff we buy at the grocery store (Heinz included) is just the straight white vinegar with a little bit of brownish coloring in it. It’s not cider vinegar at all. apple_cider_vinaigrette_in_cruet

According to Wikipedia, apple cider vinegar a type of vinegar [that is supposed to be] made from cider or apple must and has a pale to medium amber color. Unpasteurized or organic ACV contains mother of vinegar, which has a cobweb-like appearance and can make the vinegar look slightly congealed.

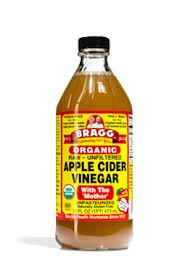
If you’re lucky enough to find apple cider vinegar that comes from some local farms, all the better, but on a bulk note, I generally buy Bragg Apple Cider Vinegar. According to their website,

“Certified Bragg Organic Raw Apple Cider Vinegar is unfiltered, unheated, unpasteurized and 5% acidity. Contains the amazing Mother of Vinegar which occurs naturally as strand-like enzymes of connected protein molecules. . . Bragg Organic Raw Apple Cider Vinegar is made from delicious, healthy, organically grown apples.”

bragg_vinegarAt upscale markets you can sometimes find lovely winery-produced wine vinegar and at organic farms (particularly apple orchards, I’d guess) you may be able to buy apple cider vinegar. Since I see that rarely, as I mentioned, I buy Bragg Apple Cider Vinegar Organic Raw — 32 fl oz – sometimes even at my regular grocery store. I prefer to buy the unfiltered that contains the “mother,” a clump of yeasty, spongy stuff that you’ll sometimes find in the bottom of a bottle of vinegar (only the apple cider type).

Back to this dressing, though . . . I went to my most recent salad dressing cookbook I bought last year, Vinaigrettes & Other Dressings: 60 Sensational recipes to Liven Up Greens, Grains, Slaws, and Every Kind of Salad. By Michele Anna Jordan. I leafed through, looking at every recipe. I’ve added one of her recipes in this book to my regular rotation, the Molasses Honey Vinaigrette. And I settled on this one to try something different. I did make two tiny changes – I used apple juice concentrate mixed with a little water (so it may have been slightly more concentrated than her recipe; and after tasting the dressing, I decided it was just a tad too acidic, so I added another T. of oil.

Why use Bragg?

Simple: it’s a true cider vinegar made with the must of apples, not just a white vinegar that’s colored to look like cider vinegar.

According to the author, she prefers to use this dressing on a cabbage slaw or on a chicken or duck salad. (I used it on a green salad!) She offers 4 variations on the recipe below – I have included them in the recipe below, although I haven’t tried any of these variations. A spicy version: adding 2 T. apricot, kumquat or fig jam and  3-4 garlic cloves (wow, 3-4?). Another variation has 1/2 cup pureed fresh mango in it and cilantro. A 3rd one adds 2 T. hot pepper jam, like jalapeno jelly; yet a 4th adds 1-2 tsp. chipotle chile powder and a T. of crème fraiche.

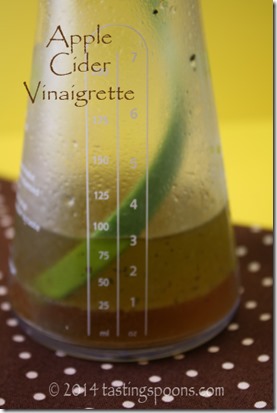
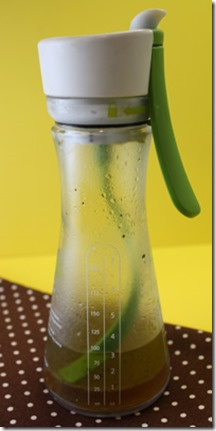
So, the mixture is combined in a glass jar, or as I did, in my handy-dandy Chef’n Emulstir 2.0, Salad Dressing Mixer. It was a gift for Christmas, and I will say, I use it a lot. After I make a salad dressing, of course, it resides in the refrigerator. Depending on what kind of oil I’ve used, it may be really firm (as in EVOO) and a bit thinner if I’ve used canola oil. I take the Chef’n Emulstir out of the refrigerator when I start fixing dinner, so that by the time I’m ready to toss the salad, it’s warmed up and will pour out of the spout and doesn’t clump on the salad. First, though, you grab the jar and flex the green handle thingy, which rotates inside the bottle, hence stirring it up well – emulsifying it as best I can.

The SALAD, then . . . for a salad to serve 3 people (we had a houseguest, our friend Joe Casali, of the Italian mushroom story) I used about 1 1/2 cups of Romaine, about 3/4 cup of arugula that I chopped up coarsely, 1-2 leaves of red leaf lettuce, 1/4 cup chopped-up sugar snap peas, about 1/2 cup chopped celery, mostly inner pieces, 1 medium tomato, chopped up in fairly small pieces, about 3 tablespoons of Feta cheese, crumbled, 2 T. toasted almonds, a few dried cranberries (craisins), a few pepitas, and lastly after dressing and plating the salads, I added 2 slices of avocado on each one.

What’s GOOD: I liked this dressing a lot. I have just enough for another salad. The author says to use up all the dressing in one go, but I didn’t do that. I’ll add an addendum here if I find the dressing doesn’t taste great at the 2nd iteration.
What’s NOT: nothing that I can think of. All dressings are best the day they’re made, but that doesn’t keep me from making larger quantities. Nothing in dressings can really spoil except with very long term storage (the oil could turn rancid, but that’s a long shot).

printer-friendly CutePDF
Files: MasterCook 5+ and MasterCook 14 (click link to open in MC)

* Exported from MasterCook *

Apple Cider Vinaigrette

Recipe By: Adapted very slightly from Michele Anna Jordan, from her book Vinaigrettes and Other Dressings
Serving Size: 6

2 tablespoons apple juice, frozen concentrate
1 tablespoon water
2 tablespoons apple cider vinegar — [I use Bragg brand]
3/4 teaspoon Kosher salt
Freshly ground black pepper
6 tablespoons extra virgin olive oil — [I used about a tablespoon more]

1. In a glass jar add the apple juice concentrate and water. Stir or shake to combine.
2. Add the remaining ingredients and shake well before pouring over a green salad of your choice. Also goes well on a cabbage slaw or a chicken salad.
NOTES: VARIATIONS (I haven’t tried any of these):
(1) Zesty – add 2 T. apricot, kumquat or fig jam and 3-4 minced garlic cloves. Serve on pork or pork sliders.
(2) Mango – add 1/2 cup fresh mango puree and 2 T cilantro leaves. This one is best on fruit salads.
(3) Spicy – add 2 T. hot pepper jam – serve with chevre cheese and leafy greens.
(4) Smoky – add 1-2 tsp chipotle chili powder and a T. of creme fraiche. This particularly goes well with carrots, jicama and radishes.
Per Serving: 130 Calories; 14g Fat (91.8% calories from fat); trace Protein; 3g Carbohydrate; trace Dietary Fiber; 0mg Cholesterol; 237mg Sodium.

Posted in Books, on March 12th, 2014.

A couple of weeks ago I attended an all-day book event. An annual affair put on by the Literary Women of Long Beach. If you’re lucky enough to snag a ticket ($80 per – they allow 800 people to attend and they sell out almost immediately) you’ll be book-blessed for sure. All the proceeds of this yearly event go to the Long Beach Public Library. This was the 2nd year I’ve been able to go, and again, I came home inspired by the (women) author’s speeches and in awe of their writing abilities AND their poise at the podium. I’d only heard of two of the authors prior to the gathering, but I came away wanting to know more about each and every one of them.

Here’s the list – I’m not suggesting these are great book reads for everyone, but I’m planning to read some of them. Here they are:

Denise Kiernan – she’s written a best-seller entitled The Girls of Atomic City: The Untold Story of the Women Who Helped Win World War II. A documentary (book) about The (1944) Manhattan Project (Oak Ridge, Tennessee), an ultra-secret project to enrich uranium which went into the atomic bomb. Kiernan weaves the story of 2 women (and others) who lived there, who didn’t know until 1945, when the atomic bomb was dropped over Hiroshima, what they’d helped accomplish. Even the people who lived and worked there (in a locked compound) didn’t know what the overall project was about. Her talk, including some very funny stories about the centenarians she interviewed, was riveting. (I will tell you that 2 at my table had read this book, and although they enjoyed the beginning with the stories of the 2 women, neither of them particularly liked the 2nd half.)

Then there was Karen Connelly. A Canadian, she has written a number of things (including recently a book of poetry) but she’s more noted for her edgy books about Burma. In her speech she talked about her love of travel – she has a very indulgent husband, as she travels to the nether regions of the world, sometimes dangerous places. But Burma (Myanmar) has stolen a part of her heart. She’s a woman with a message (oppression, poverty, race relations and gender politics) and uses her novels to raise our awareness. Burmese Lessons is her most recent one. She also wrote The Lizard Cage. A couple of women at my table had read Burmese Lessons and were more than turned off by the over-the-top sex in it. She explained in her speech that her intense affair with a man who is a Burmese revolutionary was the genesis of the book, and that the explicit sex chronicled her relationship with him.

amanda_coplinEveryone attending this literary event chose to go to a break-out session with one of three authors. Mine was Amanda Coplin, a young debut author. She grew up in Wenatchee, Washington, the land of orchards and harvests of fruit. Hence her book, The Orchardist: A Novel. It has an unusual premise – it takes place at the turn of the 20th century. Picture a man who borders on ugly, who is lonely but plodding along on his ranch in central Washington State. Enter two young teenage girls, both pregnant prostitutes, who hide out in the orchard. From that plays out a very intriguing story. Amanda shared how these characters had been inhabiting her brain for a long time before she put pen to paper. The man, the orchardist, is much like her beloved deceased step-grandfather, who helped raise her. Several in our group had read this book and highly recommended it. I have it on my Kindle and will read it eventually. Amanda was a very likable speaker with wonderful stories to tell.

The next talk was with Madeline Miller. Her recent book is The Song of Achilles: A Novel. She’s a student (and teacher) of the Classics. For the last 10 years she’s tutored and taught Latin, Greek and madeline_millerShakespeare to high school students. In describing how she came to write this book she explained she was intrigued by some mention of Petroclus, Achilles’ best friend in The Iliad. So Miller worked for years writing, re-telling Homer’s tale of Achilles from the voice of this friend (lover), Petroclus. No question Miller is a scholar. No question Miller is passionate about her subject. She’s devoted years to studying languages and classic literature. This book has been translated in 23 languages. Although I was very interested in her speech, I don’t know that I’m up to the challenge of reading a book (sorry, a novel) about The Iliad.

Lastly, we heard from Susan Orlean. This woman was very impressive. Very knowledgeable about susan_orleannumerous subjects. She’s a staff writer at The New Yorker. She’s written essays most of her adult life, mostly on non-fiction subjects. She wrote the bestseller (that became a movie, Adaptation) The Orchid Thief: A True Story of Beauty and Obsession. She talked about being inspired to live life outside our box, our boundaries, to learn. Education is a key element in her life since she has written about such esoteric subjects as taxidermy, women surfers, the subject of “permanence,” and female bullfighters. Her journey – the point when she discovers some subject she wants to investigate – that’s her student phase. Then she reads and researches – that’s her discovery stage. Then she assumes the role of teacher – by writing about that subject. She’s not an expert at it, but finds more than enough fodder to write an in-depth essay (or maybe a book). If she writes for The New Yorker, you know she’s one very sharp woman. She’s also written the definitive book about Rin Tin Tin – Rin Tin Tin: The Life and the Legend. She’s written numerous other books – go to her web page if you’re interested. Here’s a link to a search I did at The New Yorker, if you’re interested in looking at any of her essays there. She’s just about finished writing a brand new book called The Library Book. She said it was available for pre-order, but I can’t find any online mention of it. This new book is an in-depth history of the Los Angeles Public Library. And no, she doesn’t live in L.A.

Posted in Beef, Pork, on March 10th, 2014.

swedish_meatballs_ala_ikea

Gee whiz – I sure should have photographed these delicious meatballs on a colored plate, eh? I darkened it a bit so you could see some contrast. Can you even tell they’re meatballs? No matter, though, if you have a hankering for Swedish Meatballs – it’s the taste that will win you over.

Only a couple of times have I dined on Ikea’s Swedish Meatballs. We used to have the store near us, but they moved to a much larger building about 15 miles away, so I don’t visit it very often. But I’ve not forgotten how delicious their meatballs are. For whatever reason I was craving comfort food, so with some defrosted ground beef on hand, I decided to make this rendition (from the Food Network) of Ikea’s Swedish Meatballs.

I do recall when I had Ikea’s version, the meatballs were very soft. To me, that means filler, and yes, I suppose these do have some (bread, in this case), but not enough to make them quite fall apart. Almost, but not quite. The onions and garlic are cooked separately (to make sure they’re  cooked through), then combined with some milk (so the milk soaks into the bread completely). I didn’t have any dry bread crumbs, but had fresh. I should have used less milk, so my meatballs were very wet. The baking process, though, cooked off the liquid.

Once you form the 1-inch meatballs, they’re refrigerated for about an hour, then baked in a hot oven for about 20 minutes. Meanwhile you make the sauce, which is really just a beef broth gravy and a bit of heavy cream at the end. The only unusual thing in it is Worcestershire sauce. Not in the recipe, but I did put in just a little bit of freshly grated nutmeg in the gravy. Allspice is the predominating spice in the meat, with a little bit of cinnamon and nutmeg, giving them that distinct taste. Just before serving, the meatballs are added into the gravy and heated through.

The pièce de résistance, though, is the jam. Traditionally it’s lingonberry (which you can buy at Ikea). I had some Montana huckleberry jam which was just great with it. Each and every bite should have just a tiny bit of the jam – it gives it a hint of sweetness. I served this with mashed potatoes (I think that’s traditional) though some serve it with egg noodles. You’ve heard me say before that I think Costco’s instant mashed potatoes are great. I wouldn’t serve them for Thanksgiving or a fancy dinner, but they’re amazingly true to home made mashed potatoes. And ever-so easy to make. In this case the gravy and meatballs are the stars of the show anyway. The potatoes are almost an afterthought, but a necessary one.

We had a friend over for dinner – Irene – who has Norwegian heritage. She swooned over these meatballs and said “oh, these taste just like my mother used to make.” You can’t get a more hearty recommendation than that, can you? I sent her home with some left overs.

What’s GOOD: Oh gosh, we thought these were wonderful. Absolutely mouth-watering delicious. Whether they’re true to the store’s version, I don’t know, but they’re very, very close and definitely worth making. Yes, I’ll be making them again, according to this recipe! I have another version of Swedish Meatballs on my site, but these are better!

What’s NOT: not a thing.

printer-friendly CutePDF

Files: MasterCook 5+ and MasterCook 14 (click link to open in MC)

* Exported from MasterCook *

Almost-Famous Swedish Meatballs

Recipe By: Food Network’s rendition of Ikea’s Swedish meatballs
Serving Size: 6

1 cup bread crumbs
2 tablespoons unsalted butter
1/3 cup white onion — minced
2 cloves garlic — minced
1/2 teaspoon ground allspice
Kosher salt and freshly ground white pepper, dash of cinnamon and nutmeg
1/2 cup milk
1 teaspoon Worcestershire sauce
3/4 pound lean ground beef
1/2 pound ground pork — lean
1 large egg — plus 1 egg white, beaten
Vegetable oil — for brushing
GRAVY:
5 tablespoons unsalted butter
4 tablespoons all-purpose flour
3 cups low sodium beef broth
2 teaspoons Worcestershire sauce
1/2 cup heavy cream
Kosher salt and freshly ground black pepper
4 tablespoons fresh parsley — chopped Lingonberry jam — for serving (optional)

1. Make the meatballs: Put the breadcrumbs in a large bowl. Heat the butter in a skillet over medium heat. Add the onion, garlic, allspice, 2 teaspoons salt and 1/4 teaspoon white pepper and cook, stirring, until soft, about 5 minutes. Add the milk and Worcestershire sauce and bring to a simmer. Pour the milk mixture over the breadcrumbs and stir to make a thick paste; let cool. Add the beef, pork, egg and egg white to the bowl and mix until combined.
2. Brush a baking sheet with vegetable oil. Roll the meat into 1-inch balls and arrange on the prepared baking sheet. Cover with plastic wrap and refrigerate at least 1 hour.
3. Preheat the oven to 400 degrees F. Bake the meatballs until cooked through, about 20 minutes.
4. Make the gravy: Melt the butter in a large skillet over medium heat. Add the flour and cook, whisking, until smooth. Whisk in the beef broth and Worcestershire sauce and bring to a simmer. Add the cream and meatballs. Reduce the heat to medium low and simmer until the gravy thickens, about 10 minutes. Season with salt and black pepper. Transfer to a serving dish; sprinkle with the parsley and serve with lingonberry jam, if desired. (Serve with mashed potatoes or over egg noodles.)
Per Serving: 584 Calories; 43g Fat (66.6% calories from fat); 27g Protein; 21g Carbohydrate; 1g Dietary Fiber; 171mg Cholesterol; 293mg Sodium.

Posted in easy, Pork, on March 8th, 2014.

skillet_pork_chops_apples_onions

Did we have pork chops in the freezer? Check. Apples? Yes, one. Check. Onions? Yes, always one of those on hand. Check. Italian Parsley? Yup. Check. Lemon juice? Oh yes. Check.

I’m sure you’re all just like I am – we eat different meats in rotation. Sort of. Chicken, chicken, fish, chicken, pork, chicken, fish, and way down the rotation list, lamb. This particular night I was in the mood for pork and sure enough, we still had two more pork chops from the Berkshire pig. I think this dinner will be the last, however. We have a Berkshire ham, which we’ll probably have for Easter, and I think I have one more pound of ground pork. When those are gone, I’ll be completely empty of Berkshire. Sadly.

Lucky is the word for me when it comes to pleasing my hubby – Dave never complains no matter what I serve him. Only when we’ve had the same leftovers 3 times does he grumble a little. I rarely do that – I try to insert something else in between, or I try to re-invent the dish somehow. But with some things that’s not possible. When I’ve defrosted meat to begin with, made something, I don’t like to re-freeze it. It’s already been frozen and I’ve read that meat just loses flavor when you do that. I’ve been known to do it with soup, when the protein comprises very little of the taste in the soup itself. Like tonight, for instance, as I’m typing this, I have meatballs in the refrigerator, chilling. From a couple of pounds of defrosted ground beef. (I’m making something close to Ikea’s Swedish Meatballs – if it’s good, I’ll post it in a few days.) I made a big batch – bigger than I should have I think – and my only hope is that we’ll have a guest over to help eat it up. Because I don’t want to freeze them.

Okay, back to pork chops. I’d saved this recipe in MasterCook – and so my notes say, I found it on Oprah’s website, although it’s a Mark Bittman recipe. Must have been awhile ago. But I searched for pork chop recipes within my to-try recipes and this one just seemed the best fit. And talk about easy!

The chops were seasoned with salt and pepper, browned in a skillet. Some vermouth was added to the pan along with a minced-up shallot. The chops are removed, and then you add the sliced apples and onion and cook that for awhile with some chicken stock, then the chops go back into the pan for a little while – maybe 10 minutes – while the sauce reduces down a bit. That’s it. Add a tidbit of butter (as a finish to the sauce) and garnish with Italian parsley. Done. I had a smidgen of rice left over from the chicken tikka masala I’d made the other night, so I added just enough to give the plate a rounding-out. It was enough for the sauce to soak into, which was delicious.

What’s GOOD: how quick and easy the dish was to make. My DH loved it – but then, he loves pork chops just about any way I’ll make them. Loved the interplay between the savory sauce and the sweet apple. Apple and pork really do go together well.

What’s NOT: nothing at all, really. Liked the dish a lot.

printer-friendly CutePDF

Files: MasterCook 5+ and MasterCook 14 (click on link to open in MC)

* Exported from MasterCook *

Skillet Pork Chops with Apples

Recipe By: Mark Bittman’s How To Cook Everything Basic (via Oprah’s website)
Serving Size: 4

2 pounds pork chops — preferably bone in (6 to 8 ounces each) 1″ thick [I used chops that were 1/2″ thick so cooked it for less time]
2 tablespoons olive oil
Salt and freshly ground black pepper
1/2 cup dry white wine — or light-bodied beer [I used vermouth]
2 tablespoons chopped shallot — or red onion
3 medium apples — peeled, cored, halved, and sliced [I used less]
1 large onion — halved and sliced
1/2 cup chicken stock — or more as needed
1 tablespoon fresh lemon juice
1 tablespoon butter
2 tablespoons parsley — chopped fresh for garnish

1. Blot the chops dry with a paper towel. Put a large skillet over medium-high heat and add the olive oil. When it’s hot, add the chops, turn the heat to high, and sprinkle with salt and pepper. When they brown and release from the pan easily, turn the chops, season again, and cook this side the same way. The whole process should take about 2 minutes per side or 3 to 5 minutes total.
2. Reduce the heat to medium and add the wine—be careful here; the wine may splatter a bit when it hits the hot oil—and the shallot and cook, turning the chops once or twice, until the wine is almost evaporated, 1 or 2 minutes. Transfer the chops to a plate and return the pan to the heat.
3. Add the apples and onion to the hot pan and stir until they start to stick, 1 or 2 minutes. Add the stock, stirring and scraping up any browned bits from the bottom of the pan. Return the chops to the pan, along with any juices accumulated on the plate. Bring the mixture to a boil, reduce the heat so it bubbles steadily, then cover.
4. Cook, stirring occasionally and turning the chops once or twice, until the chops are tender, 5 to 10 minutes; add another 1/2 cup stock or water if the apples start to stick. When the chops are done, they will be firm to the touch, their juices will run just slightly pink, and when you cut into them the color will be rosy at first glance but turn pale within seconds. By this time the apples and onions will also be soft. Stir in the lemon juice and butter and taste and adjust the seasoning. Serve the chops with the sauce on top, garnished with the parsley.
Per Serving: 535 Calories; 32g Fat (56.7% calories from fat); 36g Protein; 20g Carbohydrate; 3g Dietary Fiber; 119mg Cholesterol; 390mg Sodium.

Posted in Chicken, easy, on March 6th, 2014.

easy_chicken_tikka_masala_leftover_chicken

Last week I was just craving Indian food. We have a couple of Indian restaurants in our vicinity, but since I was craving chicken tikka masala, I knew I’d prefer my own version rather than a less flavorful restaurant variety. However, I had left over chicken, not fresh, raw. What to do? Easy  solution – make my favorite recipe but adapt it using the already cooked chicken.

Spotting a nice little Kosher chicken at Trader Joe’s a week ago, I bought the 3.5 pound baby and we had a really lovely roast chicken dinner from my favorite-est recipe. It was loverly, as they say. The meat was so very moist and tender. When we finished, I still had half a chicken left over, so I picked all the meat off the bone and stuck it in a Zip-loc bag and put it in the refrigerator, having no idea what I’d do with it. So when the Indian food craving hit, I just decided I’d adapt my recipe I already have for chicken tikka masala, but here I’d use the already cooked chicken.

It wasn’t hard to do, and I put the dinner together in a jiffy. First I got out all the ingredients – I chopped up the chicken meat, got out all the spices, prepped the vegetables, opened the can of tomatoes, minced the garlic and ginger. Then I got out my Breville BRC600XL The Risotto Plus Sauteing Slow Rice Cooker and Steamer to make rice (it has a standard rice setting which made just perfect Basmati rice). Once that was going I started the sauce. I tossed the chicken pieces with the spices first, then I added in the  yogurt. That was set that aside while I fired up the pan on the range. It was quick work with the onion and garlic, added in some other spices, and the canned tomatoes including their juices.  When everything was ready I added in the chicken which had been “marinating” in the yogurt and garam masala and stirred it into the pan. This recipe does contain a little bit of cream – I used less than usual and I mixed it with some whole milk I had. I allowed it to come up to a very slow simmer – I didn’t allow it to actually simmer, though, as the dish was “done” at that point. If I’d allowed it to boil, even gently, it might have separated from using some milk in it. Maybe not, but I wasn’t taking any chances.

What I wanted was for the chicken to be done at the precise time the rice was done. The basmati rice prepared in the risotto cooker is perfection when the heat switches off, so I was all ready and scooped rice out on the plate, then added some of the chicken in masala sauce on top, sprinkled with cilantro and we were ready to eat.

What’s GOOD: I think this was every bit as good as the original recipe made with raw, bone-in chicken. Of course, the kosher chicken was ever-so moist anyway. This recipe was super-easy. And super good too. I’d definitely make this again when I have left over chicken.

What’s NOT: nothing at all. Altogether good dish.

printer-friendly CutePDF

Files: MasterCook 5+ and MasterCook 14 (click on line to open in MC)

* Exported from MasterCook *

Quick and Easy Chicken Tikka Masala

Recipe By: Adapted from America’s Test Kitchen
Serving Size: 3

CHICKEN:
1/4 teaspoon ground cumin
1/4 teaspoon ground coriander
1/8 teaspoon cayenne pepper
2 teaspoons garam masala
1 1/2 cups cooked chicken — approximately, chopped
1/2 cup yogurt — whole-milk preferably
MASALA SAUCE:
1 1/2 tablespoons vegetable oil
1/2 medium onion — diced fine (about 1 1/4 cups)
1 medium garlic clove — minced or pressed through a garlic press (about 2 teaspoons)
2 teaspoons fresh ginger — grated
1/2 serrano pepper — ribs and seeds removed, flesh minced (see note above), or one large jalapeno [optional]
1/2 tablespoon tomato paste
1/2 tablespoon garam masala
14 ounces canned tomatoes — use chopped or chop yourself
1 teaspoon sugar
1/4 teaspoon table salt
1/3 cup heavy cream — or whole milk
1/8 cup fresh cilantro leaves — chopped (or mint, if preferred) for garnish

1. FOR THE CHICKEN: Combine cumin, coriander, cayenne and garam masala in medium bowl. Add the cooked chicken pieces and stir until the chicken has picked up all the dry spices. Then add the yogurt and combine; set aside.
2. FOR THE SAUCE: Heat oil in large Dutch oven over medium heat until shimmering. Add onion and cook, stirring frequently, until light golden, 8 to 10 minutes. Add garlic, ginger, chile, tomato paste, and garam masala; cook, stirring frequently, until fragrant, about 3 minutes. Add crushed tomatoes, sugar, and salt; bring to boil. Reduce heat to medium-low, cover, and simmer for 15 minutes, stirring occasionally. Stir in cream and return to simmer. Remove pan from heat and cover to keep warm. If using milk instead of cream, don’t allow the mixture to boil or it will separate.
3. Add the chicken yogurt mixture to the pan. Allow the mixture to warm up gently and when it’s hot, taste for seasonings. Add chicken broth if needed if the sauce is too thick. Stir in cilantro or sprinkle it on top as a garnish and serve over hot basmati rice.
Per Serving: 345 Calories; 22g Fat (55.6% calories from fat); 25g Protein; 13g Carbohydrate; 2g Dietary Fiber; 101mg Cholesterol; 477mg Sodium.

Posted in Desserts, on March 4th, 2014.

olive_oil_gelato

If you’d told me any time in the past that I’d be raving about a gelato made with olive oil, I’d have thought you were crazy. Olive oil and gelato or ice cream just don’t seem to have any affinity for one another. But I was wrong. Dead wrong! This gelato is smooth and heavenly. And I’d have wondered about the prudency of using very expensive olive oil also. Trust me here . . .

Likely I wouldn’t have even made this gelato having seen the recipe – just because I thought it didn’t sound all that appealing. But, because Nancy Silverton devised the recipe for Dario’s Olive Oil Cake that you read about a couple of weeks ago (that I’ve now made twice and I’m very carefully hoarding the few pieces that are left), she offered up the recipe for this gelato that she serves with the cake in one or more of her restaurants. That was a good enough endorsement for me to serve it. The recipe appeared in the Los Angeles Times.

We were going to a dinner party. We have this 4-couple gourmet group that meets every few months, and Peggy & Gary decided to do something way different – we had a vegetarian meal. And meads_green_dooroh, was it ever fabulous. Their coffee/espresso bar and café near downtown Orange, called Mead’s Green Door Café, is on the corner of Chapman and Parker, in case any of you are local readers. It’s the cutest little place – kind of eclectic and homey. They close early on Sundays, so Peggy & Gary hosted our group at the café at 5:00 pm. They’d set up a lovely long table and a kind of a serving/buffet table along another space. Bottles of wine were set out, glasses poured, an appetizer enjoyed, a short tour ensued for those who hadn’t been to the café before, including Peggy’s baking realm in the back. Three of the 4 women are bakers, and we all swooned a little over the TWO Hobarts (Hobart makes an industrial kitchen sized mixer) in the back kitchen, and the 8-foot  x 4 foot long work tables in the center.

I’m going to share some of the recipes from the dinner – including 2 fantastic salads that I can’t wait to make myself (from Sunset Magazine) and Peggy will, she said, share the lentil loaf with balsamic barbecue sauce that was so good, I can’t wait to try also. But today I’m telling you about the olive oil gelato.

The ingredients aren’t all that different – EXCEPT for the olive oil. And how it’s added is also very different. First you make the 6 egg yolk custard with milk, sugar, cornstarch, sugar and some powdered milk. Oh, and a bit of corn syrup and salt. It’s put through a sieve and chilled thoroughly (at least a few hours, but overnight worked for me). Then just before you pour this into the ice cream maker, you slowly pour in and mix gently the cup of heavy cream and the 3/4 cup of very good quality extra virgin olive oil. FYI: I used Trader Joe’s new Reserve EVOO. It mixed in beautifully – no streaks or separation. I poured it into the machine and it became gelato in about 40 minutes. I scooped it all into a freezer container and allowed it to completely freeze overnight.

What’s GOOD: Oh my, yes, this stuff is fabulous. I just can’t quite describe the texture – ever-so smooth and unctuous, is about all I can say. There was no vanilla in it. No flavorings of any kind. So it’s the olive oil that shines through, I guess, but it’s not like you can taste the olive oil. You can’t, really. It has a lovely yellow color with just a tinge of green from the EVOO. But not really green. Don’t for a second think this gelato/ice cream comes out green. It’s just that colors are made up of parts of lots of colors, so you can have yellow with a tinge of green. If I’d put the gelato in a green cup you might have been able to see more of the green. I’ll definitely be making this one again!
What’s NOT: I can’t think of anything we didn’t like about it – everyone raved about it when they tasted it. It did need to sit out on the counter for awhile to be soft enough to scoop, but once we did, it scooped nicely (which isn’t always the case with home made ice cream).

printer-friendly CutePDF
Files: MasterCook 5+ and MasterCook 14 (clicking on link will open the recipe in MC)

* Exported from MasterCook *

Olive Oil Gelato

Recipe By: Nancy Silverton, from Mozza cookbook
Serving Size: 8

6 extra large egg yolks
1/4 cup cornstarch
3 cups whole milk
3/4 cup sugar — plus 2 tablespoons
1/4 cup nonfat dry milk powder
2 tablespoons light corn syrup
1/2 teaspoon kosher salt
1 cup heavy whipping cream
3/4 cup extra-virgin olive oil — finishing-quality

1. Fill a large bowl with ice water and set a smaller bowl inside. Set a fine-mesh strainer in the smaller bowl. In a medium bowl, whisk together the egg yolks and cornstarch.
2. Combine the milk, sugar, milk powder, corn syrup and salt in a 4-quart saucepan and whisk to break up and dissolve the milk powder. Heat the milk mixture over high heat until it begins to bubble, then immediately remove from the heat.
3. Slowly add one-half cup of the hot milk mixture to the bowl with the eggs, whisking constantly. Continue to whisk in half of the milk, one-half cup at a time, enough to warm the eggs slightly.
4. Pour the egg and milk mixture into the pot with the milk, return the pot to medium-low heat and cook, stirring constantly with the whisk or a wooden spoon, until the gelato base thickens enough to coat the back of a spoon.
5. Pour the gelato base through the strainer into the bowl set over ice water and set aside to cool to room temperature. Transfer the base to an airtight container and refrigerate for at least several hours and up to three days.
6. Remove the ice cream mixture from the refrigerator, pour it into a bowl and stir in the cream and olive oil. Pour the mixture into the bowl of an ice cream or gelato maker, and spin it according to the machine instructions. Serve the gelato straight from the maker or transfer it to an airtight container and place it in the freezer until you’re ready to serve it. Serve the gelato within a few hours of spinning it, before it hardens. [If made ahead, just allow the container to sit out at room temperature for about 8-10 minutes and the gelato will be soft enough to scoop.]
Per Serving: 492 Calories; 38g Fat (68.7% calories from fat); 6g Protein; 33g Carbohydrate; trace Dietary Fiber; 213mg Cholesterol; 197mg Sodium.

Posted in Breads, on March 2nd, 2014.

sourdough_white_bread_cooling

I nearly forgot to post this one – my 2nd venture back into sourdough after a hiatus of about 20 years. Can’t you just about smell the hint of yeast bread? It was divine.

There are plenty of recipes out there on the ‘net for sourdough bread. And mine likely isn’t all that unusual.  But it’s the one I made most often – way back in the 1960s and 70s when I baked bread regularly. With a new sourdough starter at hand, I wasn’t about to venture into new territory, but wanted to make this first loaf with the trusted recipe.

Probably the most difficult thing about sourdough – once you have a starter going – is to remember  to take it out a day before you want to use it (to bake something), and refresh the batch with fresh flour and warm water and allow it to regenerate. I don’t know about you, but even though I have a calendar that I keep (on my iPhone and on my computer) I never know from one day to the next whether I’ll really be home on any set morning or afternoon – even if there’s nothing on my calendar. I may get an invitation to meet a girlfriend for lunch. My DH may ask me to meet him somewhere for lunch. I have regular things I do every week or two. I have meetings now and then. But anyway, you do need to make sure you’ll be home for most of the time required in this recipe. There’s time to go run an errand to the grocery store, but not time to go sit in a doctor’s office or to the car wash. The dough has to rise twice, and it’s a good thing to be hanging around watching it now and then. Especially the 2nd rising, as it takes less time. The amount of time you’re actually working with the dough is small, but in the rising processes it just needs to be watched (and maybe talked to nicely, maybe setting it in a warmer place).

sourdough_white_breadSo, here’s the method. This assumes you’ve already let the sourdough sit overnight (to GET the fresh starter you’ll need for the bread), and you begin with just ONE CUP of it. You can use more if you’d prefer, but it might make more batter than you’ll be able to deal with. You could make biscuits with the remainder, but that’s a story for another day.

YEAST: In a small glass measuring cup you want to get the yeast started. Now this part is something I’ve almost always done – ever since I learned how to bake bread. I mix the package of dry yeast in the warm/hot water with 1/4 tsp of ground ginger and 1/4 tsp of granulated sugar. Back in the 60’s I did a lot of reading about yeast and bread – everything I could get my hands on at the library (and there wasn’t a whole lot) and some book I read talked about adding ground ginger to the yeast mixture along with a tiny bit of sugar. What this does is allow the dissolving yeast something to feed on – the little molecules of yeast actually like to climb, as I recall reading, and if it’s got something there to climb on – like the ginger and sugar, it will climb. It’s a little thing, and you don’t have to do it if you’d rather not, but I’m of the opinion that it helps – it allows all the yeast to work. You want to use a glass, plastic or ceramic bowl (a Pyrex measuring cup is what I always used but now I use a plastic one). You do NOT want to use a metal bowl or measuring cup – yeast doesn’t particularly like metal at this stage.

FLOUR: Many yeast breads can be made with all-purpose flour, but over the years I learned that there’s a reason you use bread flour (which allows for the development of more gluten, which in turns gives the rise and a better texture). I use King Arthur’s if I can, but regular grocery-store bread flour will be fine. You’ll use less King Arthur bread flour than you will regular bread flour, fyi.

DOUGH: So, you’ve got one very gooey cup of sourdough starter in a large bowl. (In my recipe below I’ve also given you one word of advice – if you wear rings – take them off to knead sourdough.) Now you’ll start adding in the stuff. To it you add the yeast mixture, sugar, salt and flour. That’s it. You can do this first step in a stand mixer with the dough hook (I did, although I didn’t have  a stand mixer years ago and kneaded all my bread by hand). Using the dough hook makes the kneading SO much easier.

CONSISTENCY: If there’s one thing I have learned over the years about bread baking and particularly sourdough it’s to NOT add any more flour than you absolutely need to handle the dough. The more flour, the drier and more crumbly the bread will be. Having made bread in the new no-knead Sullivan Street Bakery method,  the European Peasant Bread (which is an extremely wet dough) you come to realize bread doesn’t need as much flour as you might think. That style allows for lots of bubbles and a very open crumb.

KNEADING: Here, with a sandwich bread you must add enough flour so you can knead it – in this kind of fine-crumb bread, you do need to knead it well to remove all the bubbles. With the no-knead, you want lots of bubbles to make a hole-y bread, while with sandwich bread, bubbles are your enemy. You almost can’t over-knead a yeast (sandwich) bread dough. But you can do it with the dough hook during both kneading steps. The 2nd time you’ll find the dough is much more malleable, supple and smooth. I prefer to knead it with the dough hook the 1st time and do it by hand the 2nd time. During the first mixing, it’s important to knead it well (which is why I use the stand mixer and dough hook) because you want to develop and push and pull the yeast and its interaction with the flour. If you don’t do that, the bread won’t rise correctly. The rising action just won’t happen the way you want it to. During the 2nd mixing, all you really are trying to do is punch/push out most of the bubbles.

DOUGH HOOK: Start the mixer on low until the batter has started to come together. In a regular sized Kitchen Aid stand mixer, this 2-loaf sized batter/dough will nearly fill the bowl – it doesn’t to begin with, but once the gluten begins developing the dough wants to climb the dough hook. You may need to stop it and pull it off. Don’t run the motor so fast that the mixer moves on the countertop. Kneading bread dough is the hardest thing a stand mixer can do, just about, so just go slow and increase the speed gradually. Let it run/knead for longer than you might think. It mixes up soon enough, but just let it go – probably for 4-6 minutes at least.

RISING WHERE?: In my present kitchen I don’t have an ideal place for dough or bread pans to rise, but I’ve finally found a location on top of my toaster oven, which puts a bowl or the pans within about 2-3 inches of our under-cabinet fluorescent lights. They don’t give off a lot of heat, but it’s better than sitting on our granite countertops, which are cold even in 90° weather. Lots of people create make-shift places to proof bread – like turning on your oven to its lowest temp for a few minutes, then turning it off and adding the bowl or pans. That works for awhile, but not for anything like 90 minutes. Some people put a pan of boiling water in the oven, and that will take about an hour to cool off, then you can repeat the process. You can create a cardboard box with a light bulb to heat up the space – just don’t over heat. Also know that in the winter, it’ll take longer for the dough to rise if the kitchen is cool. Some people just add more yeast (which works). If you add enough yeast bread dough will rise even if it’s in the refrigerator. That’s the genesis of refrigerator yeast rolls – you’ll find lots of recipes for those on the ‘net.

SHAPE: After the 1st rise, you punch down the dough, knead it for several minutes, until it does get that smooth texture. Cut the dough in half using a serrated knife and shape each half. You can do these in bread pans or on a flat sheet . . .

PANS: You might be able to put this dough on a flat baking sheet, but my experience with these kinds of wetter doughs is that as it rises it spreads out and not much up. So you’ll have a loaf that looks more like a ciabatta rather than a sandwich loaf. There’s a fine line between a wet dough that spreads and a more firm dough that will rise UP. You’ll need to test your own to see if it works. When in doubt, use bread pans or a ceramic bowl – an oval with sides. Or a Le Creuset  will work too. There are 2 sizes of bread pans – 8” and 9”. If you use 8” these loaves will be quite high. The 9” probably works better, but both will work. Don’t go out and buy 9” pans if you don’t have them.

THE FINGER TEST: Most experts tell you that to tell if the dough has risen enough you poke two fingers into the dough and if it doesn’t push back, it’s risen enough. The other test is the “double in bulk.” I try to eyeball the mound of dough and know when it’s about reached the double size. In most recipes this will take about 2 hours. During that time you don’t touch it or do a thing to it. If it’s warmer on one side than the other, rotate the bowl half way through.

PUNCHING DOWN: A few recipes (but not this one) tell you to punch down the dough while it’s still in the bowl – this is a method that uses 3 rising times. It merely means using your fist (without rings on any fingers) and punching the dough in as far as it will go then kind of gathering it up and turning it over and letting it rise again.

2nd RISING: My experience is that the 2nd rise takes less time – usually about 45 minutes to an hour. I also have learned over the years that you want the dough to have risen ALMOST to the point you’d like it to look once it’s fully baked. In other words, the bread isn’t going to rise much at all, if any, once  you put it in the oven. I like the bread to have a nice mound above the bread-pan-edge, so I allow it to proof (rise) until it reaches that point. Be careful with the pans – don’t bang them or you could deflate the dough. I made a slash on the top of both loaves when I made mine, but you probably don’t have to. I cut into it only about 1/2 inch. Don’t slash very far down the side of the loaf or it might almost spill out sideways. That you don’t want. Just slash it on the top, 2 cuts about 3 inches or so long. They make special utensils for this, but any good sharp knife will work fine.

BAKING: Be sure to preheat the oven so it’s nice and hot. If you want to, turn the loaves around once during the baking. But don’t bang the oven door. When you remove the loaves, tap on the top with your fingernail or knuckle – you’ll hear a hollow sound – you’ll know they’re done. Some bread is so tender and soft you can’t possibly place the loaves on the top of the bread pan edges to cool, but sourdough makes a hearty crust and you can with this one. When in doubt, remove the bread from the pans immediately and let them cool on a wire rack. If you leave the bread in the pans, they’ll begin to steam from all the trapped heat – it will make the crust soft – not what you want here.

Yeast Bread Internal Temps:

According to several websites, yeast bread made with a combo of bread flour and regular all-purpose flour is done once it reaches 175° F; if bread flour only is used, bake to 185°F. Many yeast bread recipes also say 190-200°F. A baguette needs to be baked to 210°F.

SLICING: Don’t slice the bread too soon. This is an oft-made mistake – if you cut the bread before it’s cooled you’ll tear the tender bread. If that suits your meal to have irregular torn parts, then do go ahead, but if you want nice sandwich slices, wait for the bread to cool. I’ve become, over the years, very adept at slicing even slices of bread. How? I don’t know for sure – I watch the far side of the knife carefully as I begin the slicing with a serrated knife. Don’t push the knife down too far with each back and forward stroke. A gentle pressure works better – that way you can re-angle the knife if needed to make an even slice.

AH, BUTTER AND EAT!: Well, all that effort and all these instructions – now spread with some  unsalted butter (or salted if you’d prefer) and enjoy it. If you put much other than butter on it you’ll not even taste the sourdough.

STORING & FREEZING: My experience is that bread keeps best in the freezer. Because we’re just a family of 2, we don’t eat much bread at any meal, let alone much in a single day – some days we have none. So I do two different methods:  (1) I slice the bread, stack maybe 2 or at the most 3 pieces and wrap well in foil, then I put that in a Ziploc freezer bag, suck out the air with a straw (you know how to do that, right? – seal the Ziploc closure with only a tiny opening at one end in which you slip a straw. Holding the closure almost closed, just barely holding the straw between both hands, suck on the straw to draw out any air in the bag and quickly slide out the straw as you continue to hold it shut and seal it up). Then that Ziploc goes into the freezer. (2) I do sometimes use my vacuum sealer to prep a chunk of bread ( 2-3 inches long, unsliced) and when it begins the vacuum seal part, I only let it go until the interior bread just begins to shrink in and I stop the vacuum seal. Does that make sense? If you continue to pull air out it will press all the texture out of the inner, tender bread. So that’s why you continue only until it begins to indent the middle of the bread. Then that vacuum-sealed piece goes into the freezer. It usually takes less than half an hour to defrost either type. When I defrost the thick chunk of bread (unsliced) I usually lay the chunk down flat and slice horizontally to get an even slice. It’s much harder to slice bread that doesn’t have an end crust as it gives the chunk integrity to hold itself up.

Whew, that was one very long post. Hope this helps someone . . .

printer-friendly CutePDF
Files: MasterCook 5+ and MasterCook 14 (click on link to open in MC)

* Exported from MasterCook *

Sourdough Bread San Francisco Style

Recipe By: An old favorite of mine, from the 1960’s
Serving Size: 28

1 1/2 cups hot water
1 package active dry yeast
1/4 teaspoon ground ginger — (I know, it’s odd)
1/4 teaspoon granulated sugar
1 cup sourdough batter
2 teaspoons sugar
2 teaspoons salt
3 1/2 cups bread flour
1 cup bread flour — or maybe 1 1/2 cups used on the kneading board

Notes: The ground ginger and sugar in the yeast mixture adds no flavor – it’s there only to give the yeast a little something to feed on. It’s an old “trick” I learned in the 1960s when I first started baking bread. It gives the yeast a little jump start, supposedly.
1. In a 2-cup measuring glass cup (or something similar, but NOT metal) add the hot tap water (not too hot or it will kill the yeast) and ground ginger and tiny bit of sugar, then sprinkle in the yeast, stirring to dissolve. Set aside for about 5-10 minutes to allow the yeast to bloom. If it doesn’t get lumpy and bubbly, it may not be active yeast anymore.
2. Place sourdough batter in a large bowl and add sugar, salt, then add the yeast mixture along with a cup or so of flour. Stir well so all the ingredients are thoroughly mixed before adding more flour. Add about 3 more cups of flour and stir until it’s one big ball of dough, adding a bit more flour if needed to bring it together.
3. [If you wear rings, I recommend you take them off for this step and for Step #5.] Pour the mixture out onto your kitchen counter – sprinkle the board and the dough very lightly with more flour – and knead for 3-4 minutes until the dough is one cohesive ball and has no streaks of flour. It’s better if this dough (at this point) is VERY STICKY. You can also do this step with a dough hook on your stand mixer, or the plastic dough blade in the food processor. Don’t over-work the dough at this point.
4. Roll dough into a lightly greased bowl (big enough to allow the dough to double in size) and place in a warm environment – about 90°F for 1 1/2-2 hours until the dough has doubled.
5. Punch dough down and pour out onto a flour-sprinkled surface again and knead well for 8-10 minutes (or use the dough hook of stand mixer or dough blade in food processor) and work the dough until it’s a very smooth ball, elastic in texture. Add more flour in very small increments if the dough is too sticky. The aim is to just barely keep the stickiness under control. Adding more flour at this point can make a dry loaf of bread.
6. Using your hands mold the dough into an elongated oval, or a large round, or into 2 loaf shapes for bread pans. Pull the outside edges down and underneath so you have a very smooth surface. NOTE: sometimes sourdough bread just won’t hold its shape on a flat baking sheet surface, but will rise and just spread out rather than up. If that happens, you’ll need to confine it in a bread pan or some other shaped pan or oven-proof casserole dish so it has sides to contain it.
7. Dampen a light weight cotton kitchen towel (not terrycloth because it will snag on the dough) and lay it over the sourdough and place the loaf, again, in a warm place. It will take less time to rise, about 1 – 1 1/2 hours.
8. Preheat oven to 400°F. Place a shallow pan of just-under-boiling water on an oven shelf below the shelf for the bread. Brush the outside edges of the bread with water and use a very sharp knife (serrated works) to cut at least 2 slashes (about 3 inches long each) across the dough, near the top, at least an inch or 2 apart. Bake for 35 minutes for bread loaves, about 40 minutes for a French (oval) shaped loaf) and about 55 minutes for one very large round loaf.
Per Serving: 82 Calories; trace Fat (4.2% calories from fat); 3g Protein; 16g Carbohydrate; trace Dietary Fiber; 0mg Cholesterol; 153mg Sodium.

Posted in Appetizers, easy, on February 28th, 2014.

crostini_grape_leaves_olives

Need an easy artichoke heart mixture to serve to guests that’s tasty and very quick to put together? And has no mayo or sour cream in it?

This recipe has been in my arsenal for years, from a decades-ago class I took from Joanne Weir. I’d forgotten all about it, but noticed that it didn’t have a photo attached to it (this in my MasterCook software program I use for all my recipes). That’s an automatic signal that I took the class long before I began taking a quick pix of the food when I attended the class. It also meant I’d not written it up here on my blog either! Since it’s an easy recipe to make, I chose to include it for a dinner party we were having recently.

Making it the day before is no problem – in fact it helped me to get at least one dish done ahead of time. This topping/dip keeps for about a week or so. In the class Joanne just chopped up the ingredients on a cutting board. It calls for canned or defrosted artichoke hearts, not marinated type, a few brined grape leaves, garlic, green olives –  Joanne called for picholine but I couldn’t find that type the day I went shopping so I used a plain green olive – some Parmigiano cheese, lemon juice and just a little bit of EVOO to smooth it out. That’s IT. Easy, huh? Changing the type of olive in this would likely change the flavor profile a little bit. Don’t use kalamata – they would overpower the mixture. Don’t use ripe olives, and don’t use the green stuffed olives either.

When I made this I used the food processor – I was into “easy” that day. If you’d prefer a bit more texture to the spread, then definitely do the mince and chop version. Do allow the mixture to refrigerate for a few hours – so the garlic isn’t so harsh and it has time to permeate it all.

What’s GOOD: how easy it is to make, plus it keeps for awhile. Make it 2 days ahead – that’s fine too. Very tasty – you definitely know it’s artichoke hearts but you can’t exactly pick out the grape leaves (it adds just a little bit of sharpness) along with the lemon juice. Very delish appetizer that I’ve made over and over.
What’s NOT: you might not have brined/jarred grape leaves on hand (I didn’t) but I found them easily enough at my local upscale market. And you might not have the right olives – but I substituted some other small green olives instead.

printer-friendly CutePDF
Files: MasterCook 5+ and MasterCook 14 (click link to open in MC)

* Exported from MasterCook *

Crostini with Artichokes, Grape Leaves and Olives

Recipe By: From a cooking class with Joanne Weir
Serving Size: 8

6 large artichoke hearts — frozen, defrosted (or canned, drained)
4 whole grape leaves — bottled, rinsed
1/3 cup green olives — Picholine, pitted, chopped
1 clove garlic — minced
1/2 teaspoon grated lemon peel
8 shaves Parmigiano-Reggiano cheese — crumbled
1 1/2 tablespoons extra virgin olive oil
1 tablespoon lemon juice
Salt and pepper to taste
24 pieces French baguette sliced
lemon wedges for garnish

Notes: This can be made ahead, but don’t add garlic until just before serving. Use a country bread – coarse textured, about 2 inches in diameter. You can also grill the bread slices rather than bake them. I made this in a food processor until it was smooth, so I didn’t do quite so much mincing and chopping and let the processor do all the work.
1. Remove the stems from the grape leaves before mincing.
2. In a bowl combine the chopped artichoke hearts, grape leaves, olives, cheese, garlic and lemon zest. Pour mixture onto a cutting board and continue to chop together until coarsely chopped. Place mixture back in the bowl and add cheese, olive oil, lemon juice, salt and pepper to taste. Use plenty of salt, as once you put it on bread, it dilutes the salt. Taste for additional lemon juice as well. If made ahead, allow mixture to sit out at room temp for at least 30 minutes.
3. Coat the thin bread slices with olive oil and a little salt, then bake in a 400° oven until just crisp. Do not overbake. Serve crostini with a thin slather of the artichoke mixture.
Per Serving: 292 Calories; 7g Fat (21.3% calories from fat); 11g Protein; 47g Carbohydrate; 6g Dietary Fiber; 4mg Cholesterol; 709mg Sodium.

Related Posts Plugin for WordPress, Blogger...