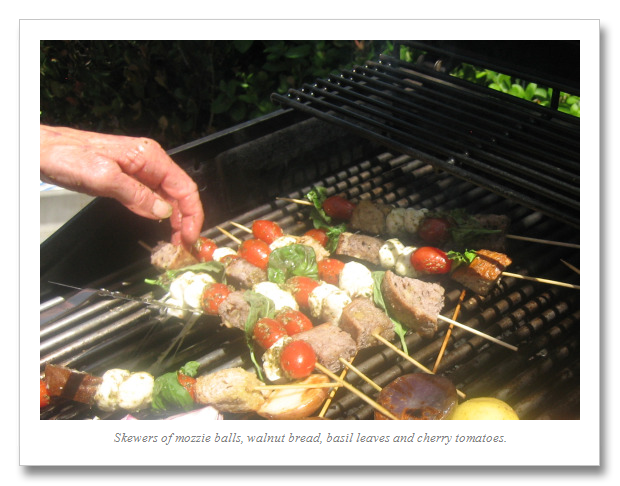
These skewers were so pretty. And very tasty. At the Tarla Fallgatter cooking class two weeks ago she made these mozzarella-walnut bread-tomato appetizer skewers. The brown cubes you see in the
Read the rest of this entry »


Here are the tastingspoons players. I’m in the middle (Carolyn). Daughter Sara on the right, and daughter-in-law Karen on the left. I started the blog in 2007, as a way to share recipes with my family. I’m still doing 99% of the blogging and holding out hope that these two lovely and excellent cooks will participate. They both lead very busy lives, so we’ll see.
– – – – – – – – – – – – – – – – – – – – – –
BOOK READING (from Carolyn):
Music of Bees, Eileen Garvin. Absolutely charming book about a woman in midlife, lonely, who raises bees, also makes unlikely friends. Heart-warming and very interesting about beekeeping.
A Postcard from Paris, Alex Brown. Really cute story. Dual time line, 1940s and present day about renovating an old apartment in Paris, things discovered.
Time of the Child, Niall Williams. Oh such a good book. Very small village in Ireland, 1960s. A baby is left on the doorstep. The town all whispers and helps. I listened to an interview of the author, which made me like him and his books even more.
Sipsworth, Simon Van Booy. If you like animals you’ll swoon. An old woman who really wants to die finds a tiny mouse in her house and befriends it and finds a reason to live. Utterly charming book.
The Forger’s Spell, Edward Dolnick. True story. For seven years a no-account painter named Han van Meegeren managed to pass off his paintings as those of Johannes Vermeer.
If You Lived Here, You’d be Home by Now, Christopher Ingraham. Could hardly put it down – about a journalist who takes on a challenge to move to small town in Minnesota and write about it. He expects to hate it and the people and place, but he doesn’t. Absolutely wonderful true story.
The River We Remember, William Kent Kreuger. 1950s, Minnesota. A murder and the aftermath. Could hardly put it down. Kreuger has such a vivid imagination and writing style.
How the Lights Gets In, Joyce Maynard. An older woman returns to New Hampshire to help care for her brain-injured son. Siblings and family, lots of angst and resentments.
The Filling Station, Vanessa Miller. Every American should read this book. A novelized retelling of the Tulsa massacre in 1921. Absolutely riveting.
The Story She Left Behind, Patti Callahan Henry. Love this author. Based on a true story. A famous author simply vanishes, leaving her husband and daughter behind. She had invented a mystical language no one could translate. Present day, someone thinks he’s solved the riddle, contacts the family. Really interesting read.
The Girl from Berlin, Ronald Balson. Love anything about Tuscany. An elderly woman is being evicted from a villa there, with odd deed provenance. Two young folks go there to help unravel the mystery. Loved it.
The Island of the Colorblind, Oliver Sacks, M.D. Nonfiction. The dr is intrigued by a remote Pacific island where most of the inhabitants are colorblind. He also unravels a mystery on Guam of people born with a strange neurological problem. Medical mysteries unveiled. Very interesting.
The Bookbinder, Pip Williams. Post 1914 London. Two sisters work at a bookbindery. They’re told to not read the books. One does and one doesn’t. One has visions beyond her narrow world; the other does not. Eventually the one gets into Oxford. Lovely story.
The Paris Express, Emma Donoghue. 1895 on a train to Paris, a disaster happens. You’ll delve into the lives of many people who survived and died in the crash.
A Race to the Bottom of Crazy, Richard Grant. This is about Arizona. Author, wife and child move back to Arizona where they once lived. Part memoir, research, and reporting in a quest to understand what makes Arizona such a confounding and irresistible place.
The Scarlet Thread, Francine Rivers. A woman’s life turned upside down when she discovers the handcrafted quilt and journal of her ancestor Mary Kathryn McMurray, a young woman who was uprooted from her home only to endure harsh frontier conditions on the Oregon Trail.
A Place to Hide, Ronald Balson. 1939 Amsterdam, an ambassador has the ability to save the lives of many Jewish children. Heartwarming.
Homeseeking, Karissa Chen. Two young Chinese teens are deeply in love, but in China. Then their families are separated. Jump to current day and the two meet again in Los Angeles.
North River, Pete Hammill. He always writes such a good story. A doctor works diligently healing people from all walks of life. His wife and daughter left him years before. One day his 3-yr old grandson arrives on his doorstep.
A Very Typical Family, Sierra Godfrey. A very messed-up family. Three adult children are given a home in Santa Cruz, Calif, but only if the siblings meet up and live in the house together. A very untypical scenario but makes for lots of messes.
Three Days in June, Anne Tyler. The usual Anne Tyler grit. Family angst. This wasn’t one of my favorites, but it was entertaining and very short.
Saved, Benjamin Hall. Author is a veteran war reporter. Ukraine, 2022, he nearly loses his life to a Russian strike. Riveting story – he survives, barely.
Grey Wolf, Louise Penny. Another Inspector Gamache mystery in Quebec. She is such an incredible mystery writer.
All the Colors of the Dark, Chris Whitaker. A missing person mystery, a serial killer thriller, a love story, a unique twist on each. Could hardly put it down.
Orbital, Samantha Harvey. Winner of 2024 Booker Prize. I don’t usually like those, but I heard the author interviewed and she hooked me. This is not a normal book with a beginning, a story and an end. It’s several chapters of the day in the life of various astronauts at the ISS (Int’l Space Station). All fictional. She’s been praised by several real astronauts for “getting it” about space station everyday life.
The Blue Hour, Paula Hawkins. An island off Scotland. Inaccessible except when the tide is out. Weird goings on. An artist. A present day mystery too.
Iron Lake, William Kent Krueger. A judge is murdered and a boy is missing. Riveting mystery.
Tell the Wolves I’m Home, Carol Ricks Brunt. 1980s. A 14-yr old girl loses her beloved uncle. Yet a new friendship arises, someone she never knew about.
Four Treasures of the Sky, Jenny Zhang. 1880s, a young girl is kidnapped in China and brought to the United States. She survives with many hurdles in the path.
The Boy Who Fell out of the Sky, Ken Dornstein. Memoir, 1988. The author’s brother died in the PanAm flight that went down in Lockerbie, Scotland. A decade later he tries to solve “the riddle of his older brother’s life.”
Worse Care Scenario, T.J. Newman. Oh my. Interesting analysis of what could/might happen if a jet crashed into a nuclear plant. Un-put-downable.
Song of the Lark, Willa Cather. Complicated weave of a story about a young woman in about 1900, who has a gifted voice (singing) and about her journey to success, not without its ups and downs.
Crow Talk, Eileen Garvin. Charming story which takes place at a remote lake in Washington State, about a few people who inhabit it, the friendships made, but also revolving around the rescue of a baby crow.
The Story Collector, Evie Woods. Sweet story about some dark secrets from an area in Ireland, a bit magical, faerie life, but solving a mystery too.
A Sea of Unspoken Things, Adrienne Young. A woman investigates her twin brother’s mysterious death. She goes to a small town in California to figure it out, to figure HIM out.
The King’s Messenger, Susanna Kearsley. 1600s England, King James. About one of his trusted “messengers,” and his relationship with a young woman also of “the court.” Lots of intrigue.
In the Shadow of the Greenbrier, Emily Matchar. Interesting mystery in/around the area of the famous resort in White Sulphur Springs, West Virginia.
Isola, Allegra Goodman. Hard to describe, survival story on an island in the 1600s.
Save the Date, Allison Raskin. Rom-com, witty, LOL funny. Clever.
The Sirens, Emilia Hart. Numerous time-lines, Australia. Mysteries abound, nightmares, abandoned baby, weird allergies.
Red Clay, Charles Fancher. LOVED this book. Mostly post-Civil War story about the lives of slaves in Alabama during Reconstruction.
Stars in an Italian Sky, Jill Santopolo. Dual time line, 1946 and recent time. Love stories and a mystery.
Battle Mountain, C.J. Box. Another one of Box’s riveting mysteries. Love his descriptions of the land.
Something Beautiful Happened, Yvette Corporon. A memoir of sorts in Greece, tiny island of Erikousa, where the locals hid Jews during WWII. All elusive stories told by the author’s grandmother.
The Jackal’s Mistress, Chris Bohjalian. 1860s Virginia, about a woman who saves the life of a Union soldier. Really good story.
Song of the Magpie, Louise Mayberry. Really interesting story about Australia back in the days when it was mostly a penal colony. Gritty strength of a woman trying to thrive with her farm.
The Boomerang, Robert Bailey. A thriller that will have you gripping the book. About a lot of secrets surrounding the president (fictional novel, remember) and his chief of staff and about cancer. A cure. Such a good story.
Care and Feeding, Laurie Woolever. Really interesting memoir of a woman driven to succeed in the restaurant business. She worked for Mario Batali and then Anthony Bourdain. Gritty stories.
Everything is Tuberculosis, John Green. Maybe not a book for everyone. A real deep dive into the deadly tuberculosis infection, its history. I heard the author interviewed and found the book very interesting.
The Book Lovers Library, Madeline Martin. Fascinating read about Boots’ drug stores’ lending library. And the people who worked in them.
The Arrivals, Meg Mitchell Moore. LOL funny, about a middle-aged couple whose children (and their various family members) return to the family home and the chaos that ensues.
My Life as a Silent Movie, Jesse Lee Kercheval. About grief. A big move to Paris, finding herself a new life with a new set of real blood family.
Escape, Carolyn Jessop. Another memoir about a woman really in bondage in Utah, Mormon plural marriage.

My blog's namesake - small, old and some very dented engraved silver plated tea spoons that belonged to my mother-in-law, and I use them to taste my food as I'm cooking.
Scroll down to the bottom to view my Blogroll
Posted in Appetizers, Grilling, on June 7th, 2010.
These skewers were so pretty. And very tasty. At the Tarla Fallgatter cooking class two weeks ago she made these mozzarella-walnut bread-tomato appetizer skewers. The brown cubes you see in the
Read the rest of this entry »
Last weekend our daughter Sara and her family were with us for an overnight, sandwiched in between the numerous softball league games our granddaughter Sabrina was in. But they made it to our house for dinner, overnight and breakfast the next morning. Getting up early, I came downstairs, tiptoeing past the downstairs guest room only to find Sara sitting out in our patio reading a magazine. She’d risen early because our grandson had wiggled his way into bed with Sara and John at about 5 am, kind of pushing Sara out of bed. Sara and I had a nice, quiet visit over some hot tea before the family got up.
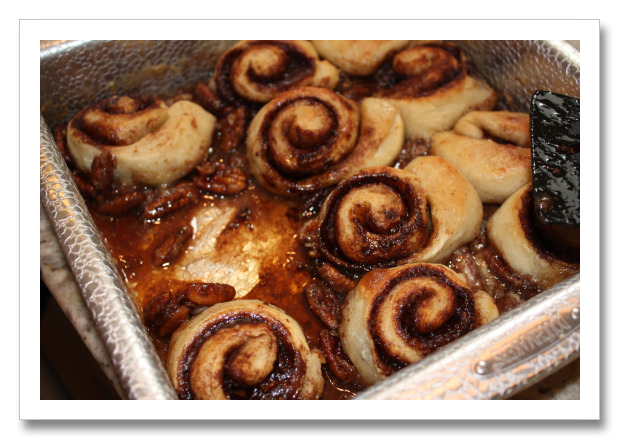
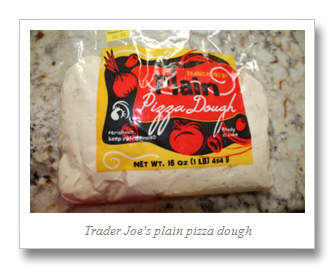
Anyway, Sara was telling me about the favorite sticky buns she makes regularly at home, using Bridgeford frozen bread dough. I said, well, I have a 1-pound package of Trader Joe’s raw pizza dough. Did she think that might work? She thought about it and said why not? So, with both of us working at it (me mostly taking notes as I watched her), we managed to find all the necessary ingredients in my kitchen pantry. This version is so easy. What’s different about these is the addition of heavy cream in the bottom (that becomes the top if you invert the whole thing after baking). I hunted all over the internet and didn’t find a single recipe using this method.
To tell you the truth, sticky buns aren’t something I crave. I know they’re loaded with sugar and probably full of fat, and the resulting calories have a direct conduit from my mouth to my hips. Besides, with Dave a diabetic, he shouldn’t have any of these (he didn’t, I did). So thankfully, I’ve been able to resist every single one of those mall bakeries who hawk sticky buns like they’re nothing but the equivalent of a couple of cookies.
But Sara’s version was so darned easy. And they were ever-so tasty. We didn’t frost them – that seemed over the top, we thought. They had plenty of sugar in them as it was.
Sara didn’t have the recipe with her, but she thought she could remember it by heart. She makes them often enough she doesn’t even use a recipe anymore. She thinks the recipe came from a Better Homes & Gardens magazine from 1989. It’s not on the magazine’s website (probably because it’s from too long ago).
First of all, try to allow time for the dough to rise some. We didn’t have the luxury of that, so they only rose for about 15 minutes before we had to put them in the oven. And do put this in an 8×8 pan, not a 9×9 (as I did). Plus, it’s possible that the Bridgeford bread dough may be more quantity . . . we didn’t know. In either case, they didn’t really fill up the 9×9 pan quite enough. But it didn’t matter one bit to the taste!
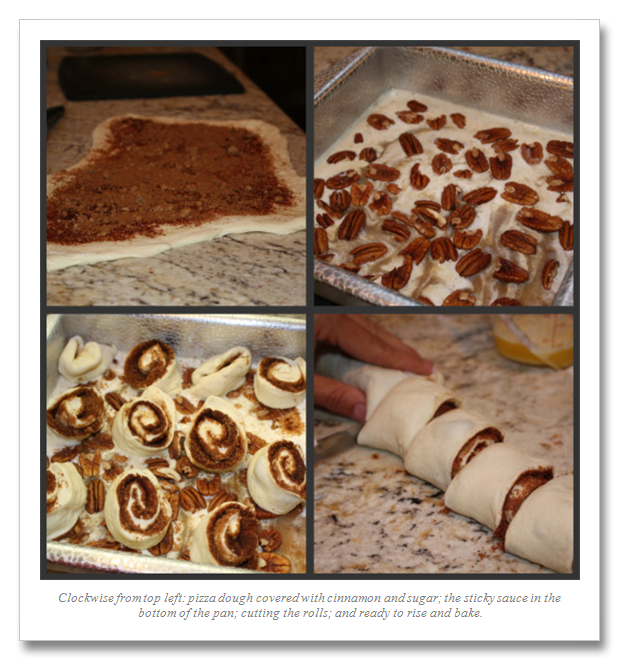
In the bottom of the pan you mix whipping cream and brown sugar, then sprinkle the whole pecans over it. The dough is rolled or spread out into a rectangle (guessed at about 10×14), it’s brushed with most of a half a cube of melted butter, then sprinkled with a mixture of brown sugar and cinnamon. You roll it up, try to seal the edges a bit, then cut into 12 equal pieces and they’re gently laid in on top of that creamy pecan stuff. Cover and allow to rise if you can, then bake for 25-30 minutes. I ended up turning on the broiler for just a few minutes to brown the top. And so very good. With a bunch of hungry mouths to feed, the 12 little buns were gone in a flash. Thanks, daughter!
Recipe By: Daughter Sara’s recipe that she’s adapted from an ancient Better Homes & Gardens magazine
Serving Size: 8
NOTES: If you don’t have pizza dough, use a frozen bread dough (defrosted) instead.
BASE:
1/3 cup brown sugar
3/4 cup heavy cream
1 cup pecans — left whole
DOUGH:
1 pound pizza dough — (raw, readymade)
4 tablespoons unsalted butter — melted
1/3 cup brown sugar
2 teaspoons cinnamon
1. In the bottom of an 8×8 pan, add the brown sugar and heavy cream. With a spoon stir it together until mostly mixed.
2. Sprinkle the top with the pecans and set aside.
3. Preheat oven to 350°.
4. Using extra flour to keep down the stickiness, spread the pizza dough into a rectangle (about 10 x 14 approx).
5. Melt the butter in the microwave and using a pastry brush, brush the butter over the dough, leaving a 1/2 inch border around all 4 edges. Reserve just a bit of butter to add later.
6. Mix the brown sugar and cinnamon in a small bowl and sprinkle (use a spoon, it’s easier) all over the dough, still leaving the border around the edges. Roll up the dough from the long side, and attempt to seal the edge with water, if possible. Using a serrated knife, cut the dough roll into 12 equal pieces. Place the pieces over the base, leaving space between each bun so they have room to spread and rise. Brush the tops with any of the remaining butter. Cover lightly and allow to rise about 30 minutes (or more if you have time).
7. Bake for 25-30 minutes or until golden brown on top. If the tops aren’t brown, turn on the broiler for just a few minutes – that’s all it will need. Watch that it doesn’t burn.
8. Allow to cool at least 5 minutes. You can turn the entire pan over onto a serving plate, or use a spatula to serve each bun with some of the bottom sauce drizzled over the top.
Per Serving: 389 Calories; 25g Fat (55.5% calories from fat); 5g Protein; 39g Carbohydrate; 2g Dietary Fiber; 46mg Cholesterol; 16mg Sodium.
A year ago: Chocolate Pudding (Dorie Greenspan’s)
Two years ago: Rosemary Pork Loin
Posted in Salads, on June 4th, 2010.
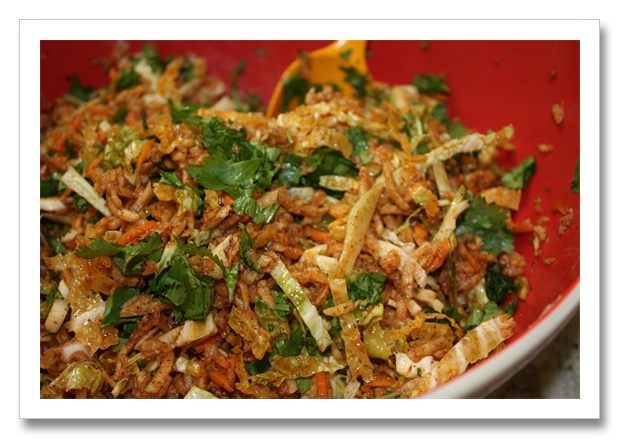
Don’t you think this photo looks like pad thai? Or chow mein? Or fried rice even? But it’s not, it’s jicama, carrots and Napa cabbage with a spicy sweet (honey) and sour (lime juice) dressing.
Some months ago I was down sick with bronchitis, and spent countless hours in front of my TV trying to find something worth watching (distracting) so I wouldn’t cough so much. I must have been watching an old Bobby Flay show, and thought this sounded interesting. Of course, he makes it look like something you can throw together in a matter of 3-4 minutes. He has a sous chef to do all the manual labor, though. In this case I let my food processor do nearly all the work, so it wasn’t really all that difficult to shred the jicama and carrots. Napa cabbage is quite easy to slice and cut too. Cilantro is added at the last – I added more than the original recipe indicated, but then I love cilantro. Substitute parsley if you don’t care for it.
I’m just not sure I like shredded jicama, though. Since I do enjoy the crunchiness of jicama (cut in very small pieces), I thought the texture would hold up if it was shredded. For me it didn’t, but I liked the flavor very much. So next time I make this (yes, I’ll make it again) I’ll do two things: (1) julienne the jicama into tiny little matchsticks; and (2) use pale golden honey, not dark. I’d forgotten how jicama absorbs whatever you put on it. In this case the dressing was quite dark, so it makes the slaw look more like pad thai, or chow mein than it did crispy white jicama.
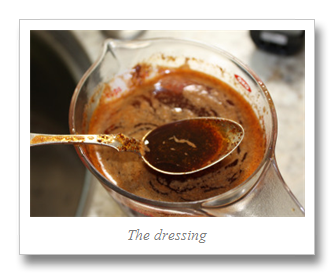
The salad is really more about the dressing (fresh lime juice, honey, oil, ancho chili powder) than it is about the jicama. Or the carrots or Napa cabbage. In reading the reviews on the recipe’s site, some people liked the dressing, others didn’t. Some people liked the texture, others didn’t. Some liked the chili powder, some didn’t. Amazing how tastes differ. Ancho chili powder really has almost no heat to it – anchos are smoked, dried and ground poblano chiles. It adds lots of flavor but almost no heat. But it’s also a dark red color, so that added darker color to the salad. Our grandchildren didn’t much care for it, but most of the adults did. What it is, is different. Good flavor, tasty and different.
Recipe By: Bobby Flay
Serving Size: 8
NOTES: You can also julienne the jicama, rather than shred it. Bobby Flay recommends shredding (I did it in the food processor) which makes the jicama almost soft. You lose the crunch, so if you enjoy the crunchy texture, cut it into matchstick pieces and continue the recipe from there.
1 large jicama — peeled and finely shredded
1/2 head Napa cabbage — finely shredded
2 whole carrots — shredded
1/2 cup fresh lime juice
2 tablespoons rice vinegar
2 tablespoons ancho chili powder
2 tablespoons honey — pale golden, not dark
1/2 cup canola oil
Salt and freshly ground black pepper
1/2 cup fresh cilantro leaves — finely chopped
1. Place jicama, cabbage, and carrots in a large bowl. Whisk together the lime juice, vinegar, ancho powder, honey, and oil in a medium bowl. Season with salt and pepper, to taste.
2. Pour the dressing over the jicama mixture and toss to coat well. Fold in the cilantro. Let stand at room temperature for 15 minutes before serving.
Per Serving: 187 Calories; 14g Fat (64.4% calories from fat); 1g Protein; 16g Carbohydrate; 5g Dietary Fiber; 0mg Cholesterol; 30mg Sodium.
A year ago: Pacific Rim Shrimp Pasta Salad
Two years ago: Myths about Searing Meat
Posted in Uncategorized, on June 3rd, 2010.
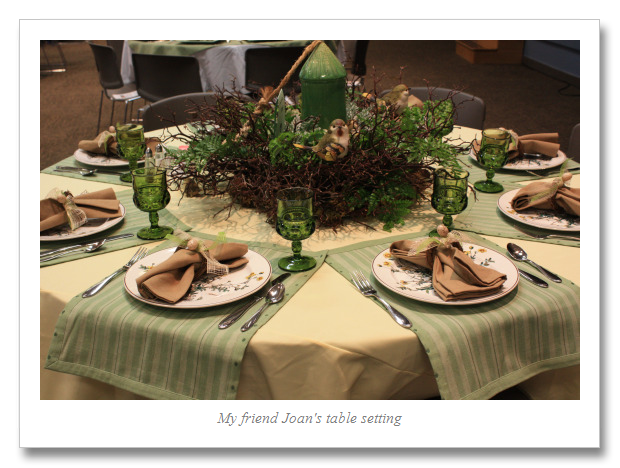
Several weeks ago we had a ladies luncheon at our church. I’d agreed to set one table because I thought it was going to be a tea, a luncheon tea. Turned out it wasn’t. Nothing to do with tea, actually. But the deal is that a hostess sets a table of her own things and she gets to attend the lunch for free. Time is allowed ahead to set up the table. My friend Joan took a natural twig type wreath she hangs on the wall at home and added some greenery and some cute birdies sitting on it. She put a ceramic birdhouse in the middle, added some color coordinated placemats, plates, napkins and glassware. I thought her table was really lovely. Joan has a real dramatic flair for decorating – you should see her house! It’s gorgeous.
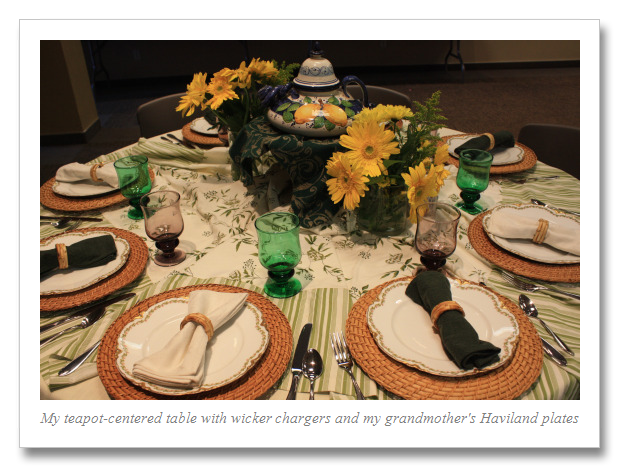
Meanwhile, I was stuck on the tea theme, so I used a centerpiece of a pretty (decorative only) ceramic teapot that I bought in Cortona, Italy some years ago. Sorry you can’t see the teapot very well. It has a very unique shape, short, squat with an adorable corkscrew spout (that’s navy blue – you can barely see it on the left of the pot hidden in the greenery). The green print tablecloth I scrunched up all around the table to give it some character, then I used some wicker chargers, green and brown glasses, and green and beige napkins. The plates are larger luncheon sized plates that belonged to my grandmother, my dad’s mother. Sorry you can’t see them very well, they’re really quite pretty. I often mix formal and casual things on the same table.
This grandmother Bessie, who lived in a small central California town called Keyes (between Modesto and Turlock), enjoyed entertaining her lady friends for coffee and dessert on special afternoons. Her scrapbook type recipe collection that my mother gave me many years ago contained just dessert recipes. Nothing but cakes, as I recall. And none of her own – they were just clippings from newspapers, magazines, church newsletters and things of that sort glued to the scrapbook pages. There weren’t any notes, either, sad to say, so there was no way to know if she’d even made any of them. Most of the recipes were very elaborate, labor-intensive cakes and icebox type whipped cream desserts, none of which appealed to me, so eventually I threw it out. But over the years my grandmother accumulated a whole lot of china dessert and lunch sized plates. I do have them all – a mixture of things, mostly Haviland. And I do use them often. Obviously there was some breakage over the years so I have 2 of one type, 3 of some, 5 of a couple, and this group has 9, I think. I’m sure my grandmother would be happy that I’m using her plates, don’t you think?
A year ago: Grilled Caesar Salad with Chicken
Two years ago: Broccoli Rabe
Posted in Appetizers, easy, on June 2nd, 2010.
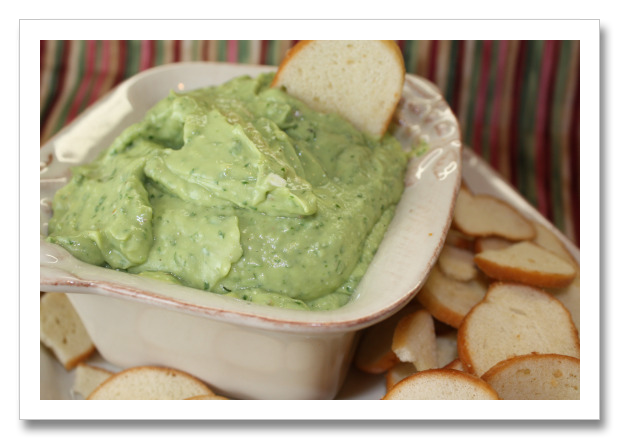
Nope, that’s not guacamole. There are some similar flavors here, but it’s definitely not guacamole. It IS a kind of avocado dip, but made with all the flavors of Caesar dressing. Meaning it contains anchovies (just a little bit), Parmesan cheese, sour cream, garlic, lime juice, lemon juice, and this one contains some cilantro too. And avocado . . .
Read the rest of this entry »
Posted in Desserts, on June 1st, 2010.
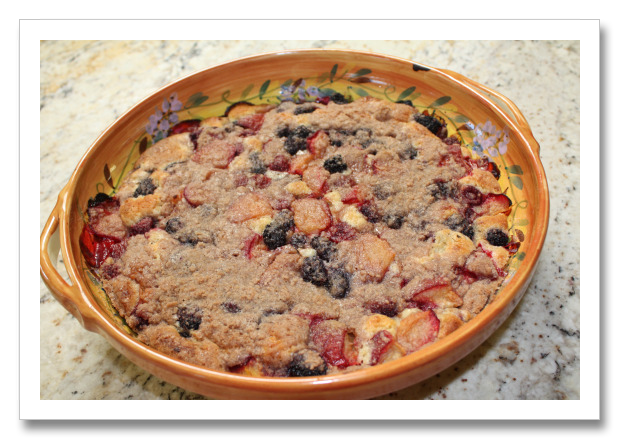
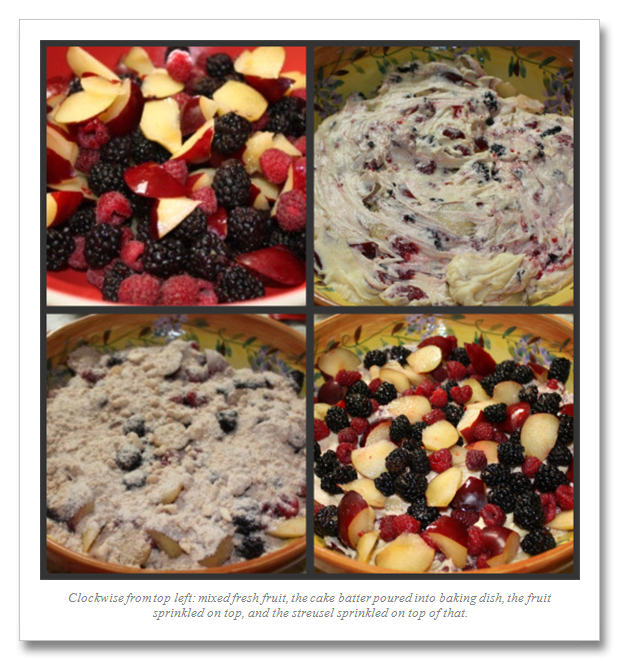
At yet another cooking class last week, when Tarla Fallgatter was making this streusel cake, it sounded familiar. Like maybe she’d made this for a previous class, perhaps. When I got home I checked my recipe software and sure enough, she had made this before, but with slightly different fruit. The one from 2007 used mostly peaches. This one was mostly apricots and plums. But the cake is the same. The streusel is the same. And it’s very good. Altogether good. Also quite easy too. It was served warm with a nice scoop of vanilla ice cream. I think everyone at the class did everything possible except lick the plate. This is going on my favorites list, if it’s not already there.
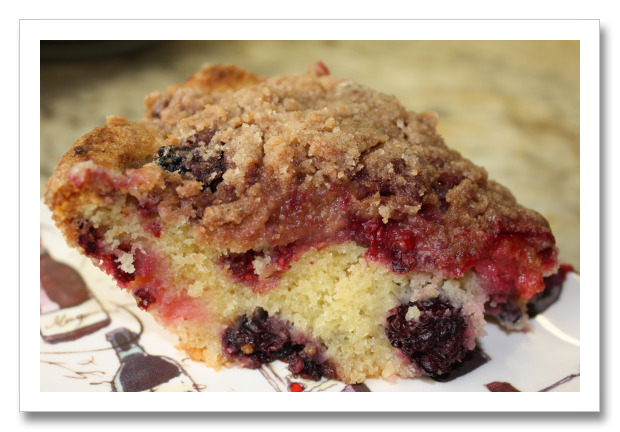
There’s a cake batter. There’s a streusel mixture that’s made in a food processor. And there’s chopped up fresh fruit (mostly stone fruit, or you can use whatever fruit you’d like in this case). You add half the fruit TO the cake batter, spread it in a 9×9 (or something close to that size) pan, then sprinkle the top with the remaining fruit, then add the streusel. Bake. Easy. Quick. And extra tasty. Tarla happened to use plums, which are in season at the moment. And I used them too. She used apricots too (I didn’t). We both used raspberries and blackberries too. Do make the preponderance of the fruit stone fruit. She also said you could add lemon zest to the batter. And if you like nuts in this kind of dish, substitute about 2 T. of nuts for 2 T. of the flour in the streusel mixture. The dish full will serve a lot of people, actually, as you serve relatively small portions. Do note that it’s more fruit than it is cake. I like that part, and there’s only 1 1/3 cups of sugar in the whole thing. The recipe says it’ll serve 10; I think it’s more like 12, but with smaller portions. Use a large spoon to scoop a serving onto a plate, then add the ice cream on the side. Then dig in.
Recipe By: From a Tarla Fallgatter cooking class, 2010
Serving Size: 10
NOTES: If you like nuts, substitute some of the flour in the streusel for chopped nuts. This can be made with any stone fruit and different berries. Whatever is available in season.
STREUSEL:
1/3 cup all-purpose flour — minus one tablespoon
1/4 cup sugar
1 teaspoon ground cinnamon
1 pinch salt
1/4 cup unsalted butter — cut in small pieces, chilled
CAKE:
1 1/3 cups flour
1 1/2 teaspoons baking powder
1/2 teaspoon salt
1 1/2 sticks unsalted butter — softened
1 cup sugar
1 1/2 teaspoons vanilla
1/4 teaspoon almond extract
3 large eggs
1/4 pound apricots — cut in 1/2 inch pieces
1/4 pound plums — cut in 1/2 inch pieces
1/4 pound raspberries
2 1/2 cups vanilla ice cream
1. Position rack in lower third of oven and preheat to 375. Butter a 9-inch square baking pan, or an oval pan of a similar size. (Make sure there is sufficient room in the dish for all the cake and fruit – you don’t want it to overflow in the oven.) Butter the pan.
2. STREUSEL: In a food processor combine flour, sugar, cinnamon and salt. Add cold butter and pulse in until the butter pieces resemble small peas. Set aside.
3. CAKE: Mix the flour, baking powder and salt together. Beat butter and sugar in a food processor until creamy. Add vanilla and almond extracts. Add eggs, one at a time. Add flour and pulse just to combine. Gently fold in HALF of each of the three fruits into the batter and spread batter into the prepared pan. Distribute the remaining fruit evenly on top.
4. Sprinkle streusel over the fruit and bake until the cake springs back in the center when lightly pressed, about 45-55 minutes. Let cake cool in its pan on a rack. Serve warm with ice cream.
Per Serving: 443 Calories; 24g Fat (47.7% calories from fat); 6g Protein; 53g Carbohydrate; 2g Dietary Fiber; 128mg Cholesterol; 244mg Sodium.
A year ago: Oven Fried Chicken
Two years ago: Frosty Strawberry Squares
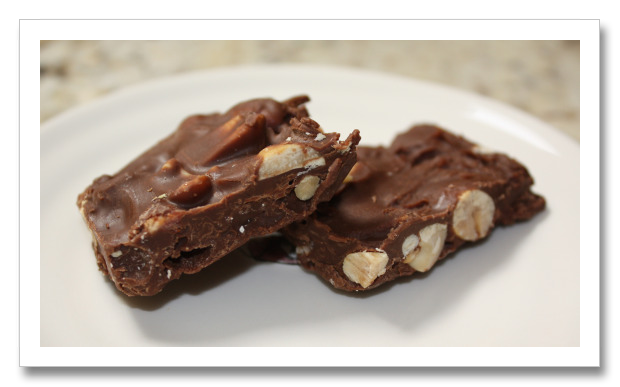
Do not, I mean it, do not turn up your nose at this combination! Do you like chocolate? Do you like peanuts? Do you like bacon? Do you like salted caramel? Well then, you’ll like this. Caramel isn’t in this bark, but I’m talking about the taste combination of caramel and salt. The bacon provides the salty taste. You can see a bit of the bacon on the left piece in the photo – the kind of rusty brown color sticking up a bit in the middle. The bacon gives the bark a chewy crunch. The bacon isn’t really crispy, but it’s chewy. That’s when you get the salty taste.
Phillis Carey made this bark at the cooking class about bacon. She happened to use milk chocolate, but if I make it I’ll use some dark chocolate too. Making it is super easy. Really. First you cook up some chopped bacon (using thin bacon like Farmer John’s, and not maple flavored). You can microwave the chocolate (Trader Joe’s bar chocolate is great), then you add the peanuts and bacon, pour it out onto a parchment-lined baking sheet and refrigerate. See, I said it’s easy. Very do-able. And a great taste.
This note added later: my friend Cherrie, who went to the class with me, made the bacon bark, but with dark chocolate and macadamia nuts. And the bacon, of course. It was outstanding. For me, better than the milk chocolate. The photo of the dark chocolate/macadamia ones are on the right.
printer-friendly PDF
Recipe By: Phillis Carey
Serving Size: 12
NOTES: You can also add some chopped dried apricots or dried cranberries to this mixture if that sounds appealing. If the nuts you use are not salted, add some salt to the chocolate mixture.
8 slices bacon — not thick type, not maple flavored
1 pound milk chocolate — or dark, if preferred, chopped
1 cup roasted peanuts — or hazelnuts — salted
1. Cook bacon over medium heat in a large nonstick skillet, until crispy and browned. Remove to paper towels to drain. Chop bacon finely.
2. Place chocolate in a large glass or pottery bowl and place in microwave on high power for one minute. Stir and cook another minute longer, and stir until smooth. Stir in bacon and peanuts.
3. Pour mixture over a parchment-lined baking sheet. Refrigerate at least one hour or until firm. Break (preferably) or cut into pieces to serve. It’s best served at room temp.
Per Serving: 290 Calories; 20g Fat (58.2% calories from fat); 7g Protein; 25g Carbohydrate; 2g Dietary Fiber; 12mg Cholesterol; 197mg Sodium.
A year ago: Grilled Flatbread with Lamb & Feta, and Mini-Muffins with Apple, Sage and Goat Cheese
Two years ago: Syrian Pita Bread Salad (a green salad with pita chips)
Posted in Veggies/sides, on May 28th, 2010.

It’s just downright amazing how fat (bacon in this case) can make just about anything taste delicious. Oh my yes. Bacon. These potatoes are just fantastic. You need to make these the very next time you want potatoes as a side dish. This is another recipe from my class with Phillis Carey.
First you need to select the right sized potatoes – you want Yukon Gold’s that are a max of 3 inches long, about. You’ll eventually cut them in half crosswise, so you want them to be rounder rather than longer, if you get the drift. The potatoes are simmered in water (with skin) until they are just barely tender, then once cooled, you remove the skins, cut them in half and place them cut sides down in an oiled (and bacon drizzled) baking dish. Then they are baked further before sprinkling with cooked bacon, cheese, and garlic. The parsley is sprinkled on before serving. Just scrumptious. Ideally serve these with a nice roast, or filet mignon, or grilled steak. Even a roast chicken!
printer-friendly PDF
Recipe By: From a Phillis Carey cooking class 5/2010
Serving Size: 4
1 1/2 pounds Yukon Gold potatoes — (each about 3″ in diameter), or red potatoes
3 ounces bacon — halved lengthwise, then cut crosswise 1/2″ pieces
1 tablespoon olive oil
1/4 cup Parmigiano-Reggiano cheese — grated (or use cheddar, or sprinkle Blue on at end)
1 whole garlic clove — finely chopped
2 tablespoons Italian parsley
1. Preheat oven to 425° with rack in lowest position.
2. Generously cover potatoes with cold water (in a 2-quart pot with 1 1/2 teaspoons salt added). Bring to a boil, then simmer, partially covered, until potatoes are JUST tender when pierced with a small, sharp knife, about 12 minutes. Drain. Cool potatoes until they’re cool enough to handle, then peel. Cut potatoes in half crosswise.
3. Cook bacon in a large, heavy skillet over medium heat, stirring, until cooked through, but still flexible. Drain on paper towels, reserving fat in skillet.
4. Brush bottom of a 15×10 shallow baking pan with oil and half of the reserved bacon fat. Sprinkle potatoes with a little salt and pepper and arrange, cut sides down, in baking pan, in a single layer. Bake until the undersides are golden brown, about 30-35 minutes.
5. Reduce oven temp to 375°. Turn potatoes over, then sprinkle with cheese, bacon and garlic, then drizzle with remaining bacon fat (if fat has congealed, reheat briefly). Bake until cheese is melted, about 15 minutes. Sprinkle with parsley and serve.
Per Serving: 317 Calories; 15g Fat (44.3% calories from fat); 13g Protein; 31g Carbohydrate; 2g Dietary Fiber; 22mg Cholesterol; 444mg Sodium.
A year ago: Sicilian Tuna Salad (a favorite)
Two years ago: Apple Buttermilk Scone Round
Posted in Appetizers, Breads, on May 27th, 2010.
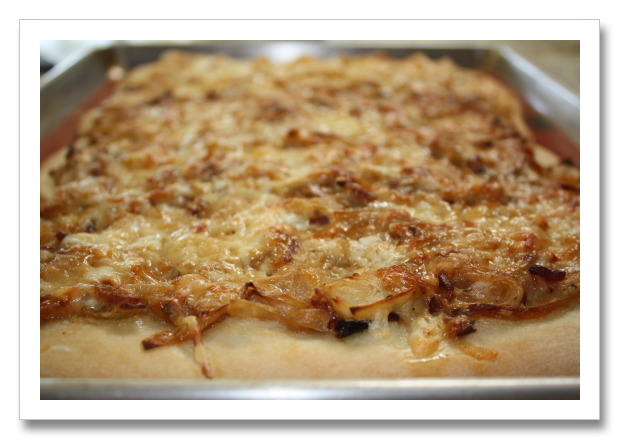
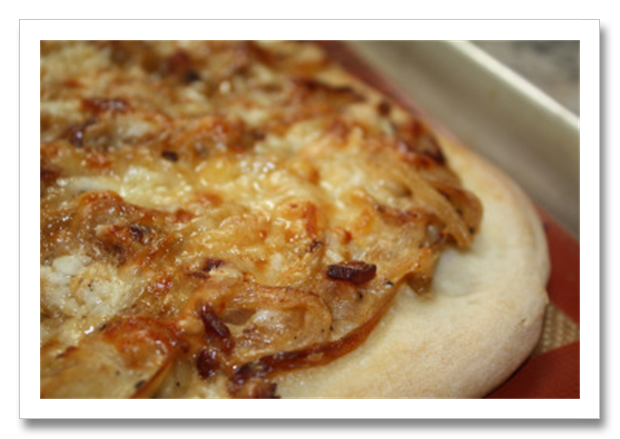
At the bacon-oriented cooking class last week, Phillis Carey served numerous dishes, including this bread/tart/pizza thing that she mentioned was one of her top favorite dishes anytime, anywhere. That kind of recommendation is something I listen to closely. So when it was served early-on in the class, we all had great expectations. It did not disappoint!
This could be served as an appetizer. It could be served as a dinner dish – with a salad (that’s what I did) – or with soup. If there was such a thing as a French pizza, this would be it. It’s rich. Not only are the onions rich, but you stir it up with some sour cream (I used light) and an egg, along with a little squirt of Dijon mustard. Then you add some cheese on top. I happened to have some goat-cheese Monterey jack cheese on hand (Trader Joe’s). I mixed it with Gruyere and sprinkled that on top – you don’t need much. Oh my yes this was fabulous.
Buying a raw ball of pizza dough is so darned easy. A 1-pound ball (Trader Joe’s) is just enough to fill one of the 15×10 baking pans. Do use a Silpat underneath . . . the dough will adhere to it well and it takes very little effort to push it out to the edges. If you don’t have a Silpat, I am pointing my finger at you … telling you to go out and buy one. You’ll not regret it. I use mine all . . . the . . . time. The filling is piled on top (leaving a 1/2 inch border of dough) then cheese is sprinkled. It bakes for about 25 or so minutes – do use convection bake on this one. You want the underside of the pizza to be just golden brown – so check for that as it’s baking.
If you don’t have convection bake it might take another 5 minutes or so of traditional baking time. Let it rest for a few minutes (so you don’t burn the roof of your mouth) before serving.
printer-friendly PDF
Recipe By: From a Phillis Carey cooking class 5/2010
Serving Size: 6
8 slices bacon — smoky type, thick-sliced, chopped
5 cups yellow onions — sliced
1 large egg
1/2 cup sour cream
2 teaspoons Dijon mustard
1/2 teaspoon salt — (maybe optional)
1/2 teaspoon freshly ground black pepper
1 pinch ground nutmeg — freshly grated
1 pound pizza dough
1/2 cup Gruyere cheese — grated
1. Preheat oven to 375 using convection bake, if that’s available.
2. Saute bacon in heavy, large skillet over medium-high heat until slightly crisp. Drain out most of the bacon drippings. Add onions to bacon and saute over medium heat until onions are very tender and golden, about 20 minutes. Cool.
3. Whisk egg, sour cream, mustard, salt (if using), pepper and nutmeg in a large bowl to blend. Stir this into the cooled onion mixture.
4. PIZZA DOUGH: Use a large baking sheet and line it with a Silpat. Roll and stretch the pizza dough out onto the Silpat. If it shrinks, stretch it as far as it will go, cover with a slightly dampened tea towel and wait 10 minutes. Stretch the dough again. Allow it to rest a 2nd time and stretch the dough until it’s nearly filled the pan.
5. Spread the onion mixture over the dough, leaving a 1/2 inch unadorned border around edges. Sprinkle the pizza with the cheese (it will seem like very little, but it’s sufficient). Bake the tart until the onion-custard is set and crust is golden brown around the edges and on the bottom (use a knife to lift up the crust to see if the bottom is browned), about 25 minutes.
6. Remove the pizza from the pan and put out onto a cooling rack (off the baking sheet). Allow to cool about 10 minutes, then slice and serve in wedges or rectangles.
Per Serving: 357 Calories; 14g Fat (35.4% calories from fat); 13g Protein; 45g Carbohydrate; 3g Dietary Fiber; 61mg Cholesterol; 392mg Sodium.
A year ago: ButterSCOTCH pudding
Two years ago: Mashed Potatoes with Shallots and Truffle Oil
Posted in Breads, on May 26th, 2010.
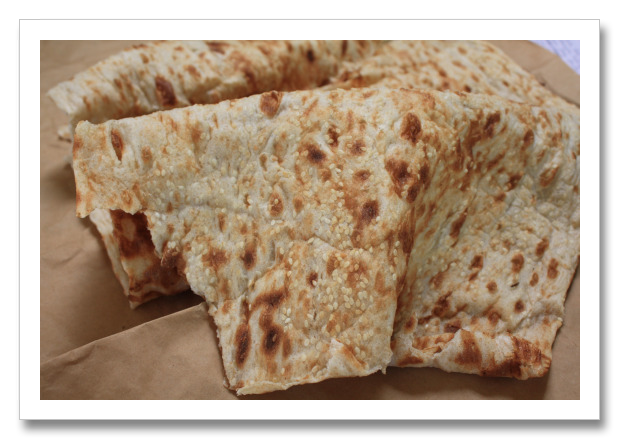
Most of you have probably never heard of sangak. It’s a bread. A wonderfully fragrant, thin stretchy sesame-topped bread. At a local market here, called Wholesome Choice, they carry a variety of ethnic foods, provide a full meat department, including helal, plus an indoor hot deli with ethnic foods from about 4-5 different cuisines.
Last week I stopped at Wholesome Choice in Irvine and while I shopped for produce, my DH waited in the hot bread line to buy a strip of sangak (also written sagnak sometimes). It’s an Iranian bread, cooked in a hot stone oven, and it’s popular in their culture. Sangak is/was the staple food of the Persian army. It’s soft, chewy, light, holey, stretchy, spongy and moist all at the same time. I absolutely love this stuff. The pieces are about 12-14 inches wide and probably 3-4 feet long. Maybe longer. A family of 4 would easily devour the entire thing.
When we buy it, it’s brought absolutely blistering hot right from the stone oven on a dowel and flopped over onto a piece of lightweight brown butcher paper. It’s loosely folded up and placed in your grocery cart. And I defy you to not have some as you browse the shelves or stand in the check-out line.
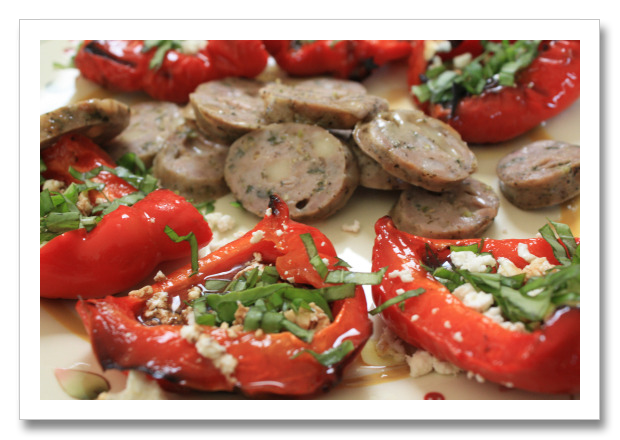
That night our longtime friend Joe came to visit and stay overnight with us. Instead of going out to eat (my choice), by popular demand, I brought out some leftovers and we made dinner with sangak, some Sabra brand hummus with lemon, grilled red bell peppers I had on hand, with some Feta, basil, olive oil and balsamic. We also had a little bit of leftover grilled Italian sausage. It was a heavenly light dinner. We ate all but about 6 inches of the sangak bread. I haven’t tried this technique yet (but was informed this works), but if you have leftover sangak, tear or cut it into pieces, layer it between waxed paper, seal in plastic and freeze it. When defrosted (eat it within a day or two) reheat it in a skillet or on the grill for just a brief time.
A year ago: Mini-Mocha Choc Chip Cookies
Two years ago: Field Greens with Fire Roasted Poblanos
Three years ago: Sausage Pinwheels


Leave a Comment!