Get new posts by email:

Archives

Currently Reading

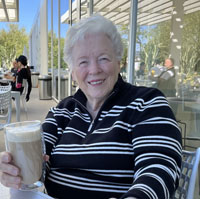
Here are the tastingspoons players. I’m in the middle (Carolyn). Daughter Sara on the right, and daughter-in-law Karen on the left. I started the blog in 2007, as a way to share recipes with my family. I’m still doing 99% of the blogging and holding out hope that these two lovely and excellent cooks will participate. They both lead very busy lives, so we’ll see.

– – – – – – – – – – – – – – – – – – – – – –

BOOK READING (from Carolyn):

Music of Bees, Eileen Garvin. Absolutely charming book about a woman in midlife, lonely, who raises bees, also makes unlikely friends. Heart-warming and very interesting about beekeeping.

A Postcard from Paris, Alex Brown. Really cute story. Dual time line, 1940s and present day about renovating an old apartment in Paris, things discovered.

Time of the Child, Niall Williams. Oh such a good book. Very small village in Ireland, 1960s. A baby is left on the doorstep. The town all whispers and helps. I listened to an interview of the author, which made me like him and his books even more.

Sipsworth, Simon Van Booy. If you like animals you’ll swoon. An old woman who really wants to die finds a tiny mouse in her house and befriends it and finds a reason to live. Utterly charming book.

The Forger’s Spell, Edward Dolnick. True story. For seven years a no-account painter named Han van Meegeren managed to pass off his paintings as those of Johannes Vermeer.

If You Lived Here, You’d be Home by Now, Christopher Ingraham. Could hardly put it down – about a journalist who takes on a challenge to move to small town in Minnesota and write about it. He expects to hate it and the people and place, but he doesn’t. Absolutely wonderful true story.

The River We Remember, William Kent Kreuger. 1950s, Minnesota. A murder and the aftermath. Could hardly put it down. Kreuger has such a vivid imagination and writing style.

How the Lights Gets In, Joyce Maynard. An older woman returns to New Hampshire to help care for her brain-injured son. Siblings and family, lots of angst and resentments.

The Filling Station, Vanessa Miller. Every American should read this book. A novelized retelling of the Tulsa massacre in 1921. Absolutely riveting.

The Story She Left Behind, Patti Callahan Henry. Love this author. Based on a true story. A famous author simply vanishes, leaving her husband and daughter behind. She had invented a mystical language no one could translate. Present day, someone thinks he’s solved the riddle, contacts the family. Really interesting read.

The Girl from Berlin, Ronald Balson. Love anything about Tuscany. An elderly woman is being evicted from a villa there, with odd deed provenance. Two young folks go there to help unravel the mystery. Loved it.

The Island of the Colorblind, Oliver Sacks, M.D. Nonfiction. The dr is intrigued by a remote Pacific island where most of the inhabitants are colorblind. He also unravels a mystery on Guam of people born with a strange neurological problem. Medical mysteries unveiled. Very interesting.

The Bookbinder, Pip Williams. Post 1914 London. Two sisters work at a bookbindery. They’re told to not read the books. One does and one doesn’t. One has visions beyond her narrow world; the other does not. Eventually the one gets into Oxford. Lovely story.

The Paris Express, Emma Donoghue. 1895 on a train to Paris, a disaster happens. You’ll delve into the lives of many people who survived and died in the crash.

A Race to the Bottom of Crazy, Richard Grant. This is about Arizona. Author, wife and child move back to Arizona where they once lived. Part memoir, research, and reporting in a quest to understand what makes Arizona such a confounding and irresistible place.

The Scarlet Thread, Francine Rivers. A woman’s life turned upside down when she discovers the handcrafted quilt and journal of her ancestor Mary Kathryn McMurray, a young woman who was uprooted from her home only to endure harsh frontier conditions on the Oregon Trail.

A Place to Hide, Ronald Balson. 1939 Amsterdam, an ambassador has the ability to save the lives of many Jewish children. Heartwarming.

Homeseeking, Karissa Chen. Two young Chinese teens are deeply in love, but in China. Then their families are separated. Jump to current day and the two meet again in Los Angeles.

North River, Pete Hammill. He always writes such a good story. A doctor works diligently healing people from all walks of life. His wife and daughter left him years before. One day his 3-yr old grandson arrives on his doorstep.

A Very Typical Family, Sierra Godfrey. A very messed-up family. Three adult children are given a home in Santa Cruz, Calif, but only if the siblings meet up and live in the house together. A very untypical scenario but makes for lots of messes.

Three Days in June, Anne Tyler. The usual Anne Tyler grit. Family angst. This wasn’t one of my favorites, but it was entertaining and very short.

Saved, Benjamin Hall. Author is a veteran war reporter. Ukraine, 2022, he nearly loses his life to a Russian strike. Riveting story – he survives, barely.

Grey Wolf, Louise Penny. Another Inspector Gamache mystery in Quebec. She is such an incredible mystery writer.

All the Colors of the Dark, Chris Whitaker. A missing person mystery, a serial killer thriller, a love story, a unique twist on each. Could hardly put it down.

Orbital, Samantha Harvey. Winner of 2024 Booker Prize. I don’t usually like those, but I heard the author interviewed and she hooked me. This is not a normal book with a beginning, a story and an end. It’s several chapters of the day in the life of various astronauts at the ISS (Int’l Space Station). All fictional. She’s been praised by several real astronauts for “getting it” about space station everyday life.

The Blue Hour, Paula Hawkins. An island off Scotland. Inaccessible except when the tide is out. Weird goings on. An artist. A present day mystery too.

Iron Lake, William Kent Krueger. A judge is murdered and a boy is missing. Riveting mystery.

Tell the Wolves I’m Home, Carol Ricks Brunt. 1980s. A 14-yr old girl loses her beloved uncle. Yet a new friendship arises, someone she never knew about.

Four Treasures of the Sky, Jenny Zhang. 1880s, a young girl is kidnapped in China and brought to the United States. She survives with many hurdles in the path.

The Boy Who Fell out of the Sky, Ken Dornstein. Memoir, 1988. The author’s brother died in the PanAm flight that went down in Lockerbie, Scotland. A decade later he tries to solve “the riddle of his older brother’s life.”

Worse Care Scenario, T.J. Newman. Oh my. Interesting analysis of what could/might happen if a jet crashed into a nuclear plant. Un-put-downable.

Song of the Lark, Willa Cather. Complicated weave of a story about a young woman in about 1900, who has a gifted voice (singing) and about her journey to success, not without its ups and downs.

Crow Talk, Eileen Garvin. Charming story which takes place at a remote lake in Washington State, about a few people who inhabit it, the friendships made, but also revolving around the rescue of a baby crow.

The Story Collector, Evie Woods. Sweet story about some dark secrets from an area in Ireland, a bit magical, faerie life, but solving a mystery too.

A Sea of Unspoken Things, Adrienne Young. A woman investigates her twin brother’s mysterious death. She goes to a small town in California to figure it out, to figure HIM out.

The King’s Messenger, Susanna Kearsley. 1600s England, King James. About one of his trusted “messengers,” and his relationship with a young woman also of “the court.” Lots of intrigue.

In the Shadow of the Greenbrier, Emily Matchar. Interesting mystery in/around the area of the famous resort in White Sulphur Springs, West Virginia.

Isola, Allegra Goodman. Hard to describe, survival story on an island in the 1600s.

Save the Date, Allison Raskin. Rom-com, witty, LOL funny. Clever.

The Sirens, Emilia Hart. Numerous time-lines, Australia. Mysteries abound, nightmares, abandoned baby, weird allergies.

Red Clay, Charles Fancher. LOVED this book. Mostly post-Civil War story about the lives of slaves in Alabama during Reconstruction.

Stars in an Italian Sky, Jill Santopolo. Dual time line, 1946 and recent time. Love stories and a mystery.

Battle Mountain, C.J. Box. Another one of Box’s riveting mysteries. Love his descriptions of the land.

Something Beautiful Happened, Yvette Corporon. A memoir of sorts in Greece, tiny island of Erikousa, where the locals hid Jews during WWII. All elusive stories told by the author’s grandmother.

The Jackal’s Mistress, Chris Bohjalian. 1860s Virginia, about a woman who saves the life of a Union soldier. Really good story.

Song of the Magpie, Louise Mayberry. Really interesting story about Australia back in the days when it was mostly a penal colony. Gritty strength of a woman trying to thrive with her farm.

The Boomerang, Robert Bailey. A thriller that will have you gripping the book. About a lot of secrets surrounding the president (fictional novel, remember) and his chief of staff and about cancer. A cure. Such a good story.

Care and Feeding, Laurie Woolever. Really interesting memoir of a woman driven to succeed in the restaurant business. She worked for Mario Batali and then Anthony Bourdain. Gritty stories.

Everything is Tuberculosis, John Green. Maybe not a book for everyone. A real deep dive into the deadly tuberculosis infection, its history. I heard the author interviewed and found the book very interesting.

The Book Lovers Library, Madeline Martin. Fascinating read about Boots’ drug stores’ lending library. And the people who worked in them.

The Arrivals, Meg Mitchell Moore. LOL funny, about a middle-aged couple whose children (and their various family members) return to the family home and the chaos that ensues.

My Life as a Silent Movie, Jesse Lee Kercheval. About grief. A big move to Paris, finding herself a new life with a new set of real blood family.

Escape, Carolyn Jessop. Another memoir about a woman really in bondage in Utah, Mormon plural marriage.
 

Tasting Spoons

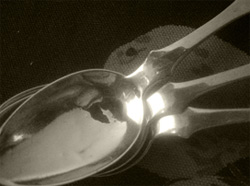
My blog's namesake - small, old and some very dented engraved silver plated tea spoons that belonged to my mother-in-law, and I use them to taste my food as I'm cooking.

Scroll down to the bottom to view my Blogroll

Posted in Pork, on January 26th, 2024.

Love rice? Love Chinese food? Have access to Chinese sausage? Make this!

For some reason I was craving Chinese food, and I didn’t really want to go out somewhere. I had a package of Chinese sausage in my refrigerator, so I decided to do something with it. Truth to tell, I know nothing about Chinese sausage. I’d never had it before, but I’d spotted packages of it at my local Costco. In a shelf-stable package. It said it would keep for about a year. Meat? Really? A year on my pantry shelf? Hmmm. Well, I had put it in my refrigerator, where it had languished for at least 4-5 months. I went online and searched recipes, and decided on this one, that’s just slightly adapted from Jaden’s Steamy Kitchen.

So, first I followed the recipe directions for rinsing the rice. Usually I don’t bother, but in this recipe it said it was important, to wash off the starch, so the rice would not stick together. I must say, I was impressed with the fluffiness of the finished rice – it definitely was fluffy and didn’t stick together at all. So, the rinsed rice was put into a large frying pan (big, must have been an 11-inch one), water was added. Nothing else The sausage links are nestled into the rice and then turn on the heat. The recipe was specific about watching the pan for the first sign of bubbling around the edges. At that point you lower the heat, cover the pan and let it cook for exactly 18 minutes.

Meanwhile, you prepare the sauce that will go into the rice. You make the sauce with shallot and garlic, then add two kinds of soy sauce (or you can jerry-rig the dark one, see notes, although I didn’t add the suggested honey or molasses – it was sweet enough without it, for me anyway) and some dry sherry. And a bit of water. Once cooked, the rice has to sit (covered, no peeking) for 5 minutes. The I removed those sausage links (keeping the pot covered) and cut them up into little diagonal slices. Those were added to the sauce, then I poured the whole thing over the pan of white rice and stirred and fluffed like crazy. Then a tiny drizzle of sesame oil.

Green onions and cilantro were added as a garnish to the servings. Well, there was just one serving, mine. Oh my goodness, was it ever good. The sausage was a bit on the salty side, so I’m glad I used low-sodium soy sauce. The little bit of Asian sesame oil adds a really nice touch to it.

What’s GOOD: every little tiny morsel of this was good. Healthy? Oh, maybe not, but it sure was tasty. I tried not to overeat; I was very tempted to. I had ample leftovers, so they went into the freezer for another day when I feel I can have a heaping portion of rice! Loved the flavors throughout, the sherry, even, the cilantro, the soy/shallot/garlic sauce. All good. Delicious.

What’s NOT: can’t say there is anything that wasn’t good. It wasn’t hard to make at all. Uses two pans. I had all the ingredients on hand, so it was a fast meal to make. Could make it on the fly if I had last-minute guests, even.

printer-friendly PDF and MasterCook file (click link to open recipe)

* Exported from MasterCook *

Chinese Sausage and Rice

Recipe: Adapted from Jaden’s Steamy Kitchen
Servings: 6

1 1/2 cups long grain rice — jasmine rice preferred
2 3/4 cups water
6 Chinese sausage links
SAUCE:
1 tablespoon vegetable oil
2 cloves garlic — smashed
1 shallot — roughly chopped
1/4 cup soy sauce — use low-sodium if preferred
2 tablespoons dark soy sauce — see notes
1 tablespoon dry sherry
2 tablespoons sugar
2 tablespoons water
1/4 teaspoon Asian sesame oil
TOPPINGS:
1/2 cup green onions — chopped
1/2 cup cilantro — chopped

NOTES: If you do not have dark soy sauce, substitute: with 2T regular soy sauce + 1 tsp honey or molasses.
1. Wash the raw rice grains fist. Fill a large pot with the rice and cold water to cover. Use your hands to swish the rice grains, loosening any extra starch and dirt. Rice (like beans) is a raw ingredient and it is important to wash and rinse. Washing also rids the rice of extra starch, which will give light, fluffy, airy rice – not heavy, sticky and starchy. Tip the pot and carefully pour out the water. Repeat two more times. Drain as much water as possible from the pot.
2. Measure and add in the 2 3/4 cups of water.
3. Snuggle the sausage in the rice grains. Turn the heat to high. When the water near the edge of the pot starts bubbling, cover the pot and reduce the heat to low. Cook for 18 minutes. Note: While the rice is cooking, make the Sauce.
4. When the rice is finished cooking, turn off heat and keep covered – no peeking Let it sit with the lid on for 5 minutes to finish the steaming process.Remove the sausage links and cut them (carefully, they’re hot) into diagonal slices about 1/2 or 3/4″ thick.
5. SAUCE: In a small saucepan, add oil, garlic and shallot. Turn heat to low and let the garlic and shallot cook slowly until they begin to brown but not burn. Use a slotted spoon and remove the shallots and garlic and discard, leaving the flavored oil. Add remaining ingredients and simmer until thickened, about 2 minutes. Add shallot garlic mixture back in. Add the sausage and stir it thoroughly, then pour the sauce over the rice and stir to combine.
6. Serve with green onions and cilantro on top.
Per Serving: 302 Calories; 23g Fat (60.0% calories from fat); 14g Protein; 20g Carbohydrate; 1g Dietary Fiber; 0mg Cholesterol; 897mg Sodium; 5g Total Sugars; 0mcg Vitamin D; 18mg Calcium; trace Iron; 107mg Potassium; 42mg Phosphorus.

Posted in Brunch, GF or Gluten Free, on January 19th, 2024.

Sorry, that photo isn’t better. That’s one of the little baked eggs, cut in half, oozing onto the plate.

There, is that better, at left? Cute muffin cup baked eggs and bacon.

A post from Carolyn, but Karen is the one who made this. On Christmas morning my D-I-L, Karen, made these for our breakfast. She was so thoughtful, to make something my cousin Gary could have, that was GF. My family is very considerate of his GF restrictions. I usually make a GF dessert for one or more of our family gatherings, so the hostess doesn’t have to think about it. I made two this year (desserts). For Thanksgiving it was a pumpkin dessert, Pumpkin Praline Custard, that’s been on my blog for years. Then for Christmas I made a GF poppy seed Bundt cake (recipe up soon) that was amazingly good. Light and fluffy. Gary enjoyed it, and what was left I packed up for him to put in his backpack on the plane when he flew home.

Back to this breakfast . . . Karen bought a package of  Cup4Cup GF flour on amazon. It’s the best mix of GF flours I’ve tasted. After Christmas I ordered a package of it and will be trying it in coming months. Next year the goal is to make GF popovers when Gary visits. I made popovers for Christmas Day dinner (it’s become a “thing” that I make them frequently when I visit my son and his family as they all love-love them), though I didn’t make them GF. I didn’t know there was a recipe out there that worked. Popovers are so finicky with wheat flour, let alone GF mixtures, but since Christmas I’ve found more than one recipe for GF popovers. I think I’ll try them here at home first.

As an added note, I made popovers a couple of days ago when I was visiting them, and I absolutely NAILED it with the recipe and now I need to go back to tweak the recipe that’s already here on my blog and add notes. Anyway, a week or so ago I listened to a podcast on Milk Street radio, an interview with Rose Levy Beranbaum, and in it she talked extensively about various flour (all purpose) and how they differ in the amount of protein they end up with in the finished product. With her advice in mind, I bought a bag of BLEACHED Gold Medal flour, weighed the exact amount (in grams) needed for the popovers, made them like that (with eggs, milk, and in this case some melted beef fat Karen had on hand). Oh my goodness. Perfect. If you’re interested in learning more about the flour intelligence in this, click here to go to Rose’s page on ingredients, and scroll down to FLOUR. Until now I’ve used  unbleached all purpose flour for everything, unless cake flour was called for in the recipe. I now know I need to use bleached flour for all cakes, cookies, biscuits, etc. I guess I’ll be phasing out my unbleached flour as I don’t make bread hardly at all anymore.

THE PIECRUST: Karen used this flour (picture at right) to make the GF piecrusts. Recipe below. It’s a normal crust – this special cup4cup GF flour, salt, butter, apple cider vinegar and cold water. Karen said the dough was quite easy to work with. Do note that the recipe below makes two crusts, or enough to make 24 of these little piecrust cups. She cautions you to NOT press the dough into the corners as that stretches it – when it bakes it will shrink. So, gently press and mold the dough without stretching to get into those corners.

Into the bottom of each pastry crust Karen spread about a teaspoon of whole-grain mustard. Then she added a few little cubes of the pancetta (or cooked bacon, whatever your preference). The eggs were separated and the yolk is carefully added into the cup. The egg whites are mixed  up a little bit, to make them more pourable and it was added to each muffin cup, up to about 2/3 full. Don’t over-fill as they might bubble up and over (which would make a BIG mess in your oven). She sprinkled salt, pepper and paprika over the top, then added grated Cheddar cheese on the top.

The egg cups are baked for 20-25 minutes, or until the egg is set and the cheese and the crust are golden brown. Sprinkle with chopped parsley when it’s served. Every oven is different – so watch the eggs carefully that you don’t overbake them.

What’s GOOD: all of it was good. The piecrust was perfect – flaky and I’d never have known it was GF. The eggs were perfectly cooked (oozy, just the way I like them). Karen did a great job on this breakfast. She served it with a lovely tray of fresh fruit and coffee.

What’s NOT: only that there are several steps to making these – the piecrust itself, of course, and then making the filling. Karen simplified it well (using those tiny cubes of pancetta instead of having to cook bacon).

printer-friendly PDF and MasterCook file (click link to open recipe)

* Exported from MasterCook *

GF Mini Pancetta (or Bacon) and Egg Cups with Cheddar

Recipe: One online recipe and a cookbook recipe – combined
Servings: 12

Butter, for greasing
FILLING:
2 tablespoons whole grain mustard
12 slices pancetta — or bacon (diced) cooked and drained
12 small eggs
Freshly ground black pepper
1/2 teaspoon paprika
1 cup grated Cheddar cheese — or more if needed
2 tablespoons fresh parsley
GF PIE CRUST: (makes enough for a double crust)
2 1/2 cups GF flour — plus more for the board
1/2 teaspoon sea salt
2 sticks unsalted butter — in 1/2″ dice
1 teaspoon apple cider vinegar
1/3 cup cold water — or up to 1/2 cup

NOTES: Take care NOT to force the dough circles into the muffin pans – stretching – as this will lead to the dough shrinking while it is baking. So, gently ease dough into the pan and gently press it into the edges.
1. Preheat oven to 350°F. Lightly grease a 12-cup muffin pan.
2. Roll dough (using half of the below recipe) to 1/4 inch thickness on a lightly floured board and cut out 12 circles approximately 5″ in diameter. Gently lift and insert dough into muffin pan, pleating sides as necessary to fit into the cups. Do not stretch the dough.
3. Place about 1/2 teaspoon of mustard into the base of each pastry shell and add the pancetta (or bacon).
4. Separate the eggs. Gently place an egg yolk into each muffin cup. Very lightly mix the egg whites so they will pour easily. Add just enough egg white into each muffin cup to fill the shell about 2/3 full. DO NOT overfill. Season to taste with pepper and paprika, and sprinkle grated cheese evenly over the tops of the pastries.
5. Bake for 20-25 minutes, or until the egg is set and the cheese is golden brown. Serve warm, sprinkled with chopped parsley.
6. CRUST: Put the flour, sea salt and sugar, if using, in a food processor and pulse to combine.
7. Sprinkle the cold butter over the flour in the food processor. Pulse until the mixture looks crumbly with larger, pea-sized chunks of butter (those chunks of butter equal a flaky crust!). Drizzle the apple cider vinegar over top.
8. Turn the machine on and immediately start drizzling cold water through the feed tube. Stop the machine once the mixture starts to come together and looks shaggy. Give the dough a pinch—if it sticks together, it’s ready to go. If not, turn the machine on again and drizzle in a bit more water. You might not need all of the water—you’re looking for a shaggy dough, not a cohesive ball. Do NOT over-process the dough – it’s good to have little visible chunks of butter, which make a flakier crust.
9. Transfer the dough to a lightly floured surface and shape it into a ball. Divide the dough into 2 equal pieces and form each into a flat disk. Wrap the disks in plastic wrap and refrigerate them for at least 30 minutes or for up to 2 days. Do Ahead: The wrapped disks can be placed in zip-top freezer bags and frozen for up to 3 months. Thaw in the refrigerator overnight before using.
10. If the dough has been in the fridge for several hours, let it sit at room temperature until slightly softened, about 10-20 minutes. Roll it out on a lightly floured piece of parchment paper. If the dough immediately starts to crack once you start rolling, it’s too cold—give it a few more minutes to warm up. If the edges crack as you roll (which they probably will, so no fear!) simply patch them as needed.
Per Serving: 252 Calories; 24g Fat (84.6% calories from fat); 9g Protein; 1g Carbohydrate; trace Dietary Fiber; 237mg Cholesterol; 260mg Sodium; trace Total Sugars; 1mcg Vitamin D; 102mg Calcium; 1mg Iron; 90mg Potassium; 150mg Phosphorus.

Posted in Salads, Vegetarian, Veggies/sides, on January 12th, 2024.

Green beans – oh so delicious – can be a veg or a salad.

Over Christmas there was quite a bit of too-ing and fro-ing from one family location to another. Going south, we (my cousin Gary from NorCal was here) met on the 23rd for a big family dinner and gift exchange and one of the family’s homes in Corona del Mar. I think there were about 25 people there, with 22 of them being part of my daughter-in-law’s extended family. I took a gluten-free dessert and something else . . . at this moment I can’t recall what I made. I think it was a salad of some kind. Oh well, it will come to me . . . Then on the 24th my cousin Gary and I drove north to La Canada (where my son Powell and his family live). We had a lovely dinner that night, paella and all the extras from a local Spanish restaurant. We had desserts leftover from the 23rd, and we had lovely Sangria to enjoy too.

Because their house was full-up with guests, Gary and I were treated to an overnight at The California Club. My son and his wife have joined it and they have 30+ rooms available. It’s in downtown Los Angeles. It’s like a private country club but without a golf course. In the morning we enjoyed coffee (Gary had other things; me just the coffee) in the bar at the Club. We were sorry they had to provide food for guests on Christmas morning, but we weren’t the only people staying there, and the waiter was ever-so nice. Then we returned to the house for an official breakfast.

Karen made some GF eggs in pastry cups (recipe to come soon). They were just delicious and I was amazed at the flakiness of the pastry. I did a huge charcuterie board (I made Gary help me with the creating of it) which everyone munched on during the afternoon. For dinner Powell grill-rotisserie-d a double boneless leg of lamb stuffed with all kinds of herbs, and everyone else helped out with other dishes to round out the dinner. It was a fabulous meal – a formal dining room setting with the family china. I think the lamb was the most tender leg of lamb I’ve ever eaten – it was as tender as prime rib or a tenderloin.

So, this green bean dish . . . it comes from Milk Street, and you can tell, it’s Russian. First you make the Adjika (I’m assuming it means “sauce”). It’s comprised of a LOT of fresh mint (thank goodness I have it growing in abundance in my yard), Jalapeno chiles, garlic, salt, a bit of oil and some ground coriander. The green beans were cooked just past the crunchy stage, then they’re tossed with the sauce, some yogurt, lemon zest and juice and garnished with more fresh mint and some toasted walnuts. I made the mint sauce (the Adjika) at home so it was easy to mix in when composing the dish.

What’s GOOD: I thought these were stupendous. I’d have loved to have had leftovers the next day, but I left them for Karen and family to enjoy. Definitely a keeper and one I want to make again. Although I have mint growing, I’ll need to wait a few weeks for the patch to recover from harvesting so much of it for this dish! We’re having very cold temps at night, and mint doesn’t much like that – often it dies off in the winter. I was just lucky there was plenty when I needed it. We have several family members who can’t eat nuts, so the picture doesn’t show them – I had them nearby for people to sprinkle on top as they wanted. Make the sauce earlier in the day, and make the yogurt sauce ahead also. The green beans could be made ahead too, so all you’d have to do is toss everything. The dish is very low in calorie. I made a double batch to feed all of us.

What’s NOT: There are a few steps to making this – none is difficult, just a bit time consuming.

printer-friendly PDF and MasterCook file (clink link to open recipe)

* Exported from MasterCook *

Green Beans with Georgian Mint-Chili Sauce

Recipe By: Milk Street, Jul/Aug 2018
Servings: 6

ADJIKA: (makes about 1/2 cup)
2 cups fresh mint — lightly packed
1 medium Jalapeno peppers — stemmed, seeded and coarsely chopped
1 medium garlic cloves — smashed, peeled
2 teaspoons salt
1/2 tablespoon neutral oil — or olive oil
1/2 teaspoon ground coriander
GREEN BEANS:
kosher salt
1 1/2 pounds green beans — trimmed
Adjika mint-chili sauce (from above)
1/4 cup Greek yogurt, full fat
1 tablespoon lemon zest
2 tablespoons lemon juice
1/4 cup fresh mint — torn (lightly packed)
1/3 cup walnuts — toasted, finely chopped (DIVIDED)

1. ADJIKA: In a food processor, combine all ingredients. Process until finely chopped, 1 to 2 minutes, scraping the bowl as needed. Transfer to a small bowl or jar, cover and refrigerate for at least 1 hour or up to 4 days. Don’t discard any tender mint stems; they’re fine to use here, as the food processor will break them down. Don’t use the relish immediately after processing. Allowing it to rest for at least one hour before serving allows the flavors to bloom.
2. GREEN BEANS: In a large pot over high, bring 4 quarts water and 2 tablespoons salt to a boil. Fill a large bowl with ice water. Add green beans to boiling water and cook until crisp-tender, about 3 minutes. Drain, then transfer to ice bath. Let stand until completely cooled, about 3 minutes. Drain and pat dry.
3. In a large bowl whisk yogurt, zest, juice, mint Adjika (use all of it) and salt. Add beans and toss until evenly coated. Gently stir in the garnishing mint and half the walnuts. Taste and season with more salt if needed. Transfer to a serving platter and sprinkle with remaining walnuts.
Per Serving: 127 Calories; 18g Fat (71.2% calories from fat); 5g Protein; 12g Carbohydrate; 4g Dietary Fiber; 2mg Cholesterol; 99mg Sodium; 5g Total Sugars; 0mcg Vitamin D; 60mg Calcium; 2mg Iron; 324mg Potassium; 89mg Phosphorus.

Posted in Uncategorized, on January 8th, 2024.

At Thanksgiving and Christmas every year I make a few things that I’ve made for decades. I suppose I could go to all the trouble of creating new, cropped photos of all these things, and write up a new blurb about them. But if you’ve been reading my blog for awhile, you may have already seen them in years past. I’m not going to do that this time – it’s a ton of work. I’m just going to list them, in blog-style conversation and if you’re interested, you can click on the link.

At Thanksgiving, I made my usual cranberry relish. It’s different because it contains apple, a whole orange (including the skin and pith) and some fresh ginger (that you’d not know was there except I’m telling you). It keeps for about a month.

Early in December I made Bishop’s Bread, something I learned to make back in the 1960s and it’s filled with chocolate chips, walnuts and maraschino cherries. So it’s a fruitcake, but doesn’t have all those citron things in it. As I write this I still have part of a loaf that I nibble on with coffee or tea every few days.

Several of us gathered together to make Christmas cookies this year. Each person brought one cookie (already made, or mostly made) that was shared with our group of four. And we baked several throughout the day. We tried a couple of new recipes. Cranberry Moscow Mule Cookies are different, all the flavors of a Moscow mule, but in cookie form. They’re quite sweet. Not certain we’ll make them again. We always make Chocolate Almond Saltine Bars, and this year we made a double batch as one batch didn’t give each of us enough.

We tried a new snowball cookie called Bee’s Knees, and although they were fine, they weren’t as good as the ones we usually make, so we’ll go back to our original next year, I think. I made a double batch of Chocolate Salami, which is a real treat for me. It’s a mixture of bittersweet chocolate, cookie crumbs (this time I used graham crackers although I think the Biscoff cookie crumbs are better) and nuts, rolled into a log, chilled, then you slice them and they look kinda-sorta like salami.

We’d talked about making potato chip cookies (they were a winner last year) but we ran out of time. As it was, we baked nearly all day and since all of us are “of a certain age,” we were TIRED. Next year we’ll go back to the Cranberry Noels that have been a favorite for many years.

We also made Bushwhacker Bars (similar to the cocktail, but a cookie, obviously). I don’t think we liked them that much, so I didn’t write up the recipe to share. If anyone wants the recipe, click the link and it goes to Food & Wine magazine. If you make them, cut back on the sugar.

Nearly all the cookies are gone now – I gifted some, took some when I went to someone’s house, and I ate a lot of them myself. There are a few of the Cranberry Moscow Mule cookies left, but they’re not a favorite so they languish in the freezer.

Lots of baking . . . lots of dishes, and thanks to Jackie and Dianne for washing up dishes a jillion times that day. I made some soup, my Dad’s lentil soup, for us so we wouldn’t eat too much cookie dough, and we dashed out to visit a local store that was all decked out for Christmas. We had a really nice time of it. We skipped our usual cookie baking one of the years during Covid, but it’s nice to be back in the cookie groove again. At the end of the day we divided up everything so we all went home with about 6 different cookies, I think.

Posted in Chicken, on January 5th, 2024.

An easy weeknight chicken breast dinner that comes together fairly quickly.

Can you tell I made this before Christmas? What with those Christmas plates (Spode ones with the Christmas tree in the middle, you know that one, it’s been around forever). So, this dish is a chicken breast stuffed with all kinds of goodies – a little bit of cream cheese, some pepper jack cheese too, some poblano chiles (or you could use canned California green chiles, sliced), then it has a green chile salsa with onions and the remaining poblanos in the sauce. These are so very easy to make. Just have all the ingredients on hand (I did).

First off, consider the size of the chicken breast. I used a package of Costco’s sealed packet of chicken breasts. And there were only two of them in the packet. But they were huge. So I cut them each in half, crosswise. Then, I sliced each of those in half horizontally to make an open-book type of breast that’s suitable for stuffing. When doing the horizontal cut, stop cutting about 1/2″ from the other side so you can open it up to a nice chicken surface. Each made a nice-enough chicken breast serving, so I got four servings out of two breasts. Next time I make these I will pound all of those pieces a little bit as all of them were a bit too thick. I mean, they were fine, but they plumped up thicker once baked.

The poblano peppers should be blistered (to remove the skins), but if you’re short on time, you can make this without that step. Saute the onion and peppers in a bit of olive oil until the onions are translucent (otherwise they won’t cook through in the oven when it’s baked).

There are the chicken breasts sort-a, kind-a sealed up, seasoned, with the onions and peppers around the outside.

There’s the casserole with the salsa on top, before baking.

First you spread some softened cream cheese on one side of the chicken open book. Then place in a slice or two of pepper jack, then some of the poblano chile strips. Fold the chicken over so it mostly covers the filling. Place in a greased baking dish. Then you pour all the onions and remaining chiles around the chicken breasts, add the jar of green chile salsa (I use Trader Joe’s) and make sure some of it is spread on top of each breast. This doesn’t have to bake long – chicken breasts cook fairly quickly. Use an instant read thermometer and make sure the center of the breast has reached 150ºF. I served this with rice seasoned with lime juice and some broccoli.

What’s GOOD: loved everything about this – the melty, oozy cheese, the poblanos, and just how moist the chicken was. It was quite simple and easy to put together; maybe 30 minutes of prep work, then about 25-30 minutes in the oven. It made a very nice company meal.

What’s NOT: nothing, really. I’d definitely make this again.

printer-friendly PDF and MasterCook file (click link to open recipe)

* Exported from MasterCook *

Easy Cheesy Green Chile Chicken

Recipe: Adapted from Half Baked Harvest
Servings: 4

1 pound boneless skinless chicken breasts — see notes
2 ounces cream cheese — at room temperature
3 ounces pepper jack cheese — sliced
2 poblano peppers — sliced (or substitute whole canned California green chiles, cut into slices)
1 small yellow onion — chopped or sliced
1 teaspoon chili powder
1 teaspoon smoked paprika
1 teaspoon garlic powder
kosher salt and black pepper
2 tablespoons extra virgin olive oil
22 ounces salsa verde — Trader Joe’s jar
fresh cilantro and lime wedges for serving

NOTE :If you use really large chicken breasts, cut them in half across the breast.
1. Preheat the oven to 400° F.
2. Prep the peppers: slice each poblano open lengthwise, cut into about 3-4 pieces, removing the stem, seeds and membranes. Place them on a foil lined small baking sheet skin side up and roast for 8-12 minutes until the skin has blistered. Watch carefully so you don’t burn them. Allow to cool some, then remove the skin as best you can.
3. Slice the chicken through the middle horizontally to within a 1/2 inch of the other side. Open the 2 sides and spread them out like an open book. Spread the cream cheese on one side of the chicken, then add the slices of pepper jack and a few poblano pepper slices. Fold the other side of the chicken over the peppers/cheese, like a book, to enclose the filling. Place the chicken in a baking dish. Rub with olive oil.
4. In a small bowl combine the chili powder, paprika, garlic powder, salt and pepper. Rub the seasonings all over the chicken.
5. In a skillet add olive oil and gently cook the onions and remaining poblano chiles until the onions are translucent. Pour this mixture around the chicken. Drizzle everything with olive oil, then pour over the salsa verde. Bake 20-25 minutes, until the chicken is cooked through. Check with an instant read thermometer – chicken should be at least 150 F. Serve with fresh cilantro and lime wedges. Serve with rice seasoned with lime juice.
Per Serving: 425 Calories; 23g Fat (49.3% calories from fat); 35g Protein; 19g Carbohydrate; 6g Dietary Fiber; 116mg Cholesterol; 1661mg Sodium; 7g Total Sugars; trace Vitamin D; 208mg Calcium; 3mg Iron; 1100mg Potassium; 447mg Phosphorus.

Posted in Cookies, on December 29th, 2023.

 A winner of a recipe from Cook’s Illustrated.

A couple of weeks ago I was invited at the last minute to a lovely Christmas luncheon and cookie exchange, so I needed to make some quick and easy cookies. Since I love anise biscotti, and I love lemon, I decided these were just the ticket.

There isn’t anything difficult about these cookies. Know, though, that these are more the tea- or coffee-dunking style – i.e., these are quite dry and hard. Actually, that’s the way the original Italian biscotti were back in the day – they contained next to no fat at all. These do have some butter in the dough, but not a lot. They are edible without dunking, but be careful you don’t crack a tooth! I’d suppose Italians today would think soft (or at least not hard) biscotti are blasphemy to the true cuisine of Italy.

The dough comes together very easily and it makes two loaves. Once baked, it’s cooled a bit, then slice them, and they go back in the oven to dry out thoroughly. This recipe makes about 40 biscotti (two loaves). I love the lemon flavor, and I like anise too. A great combination.

What’s GOOD: easy recipe, really like the subtle lemon flavor and the anise. I’d not thought of that as a combination, but it is. These keep for ages, although I keep them in the freezer. Each cookie is just 57 calories and 1 gram of fat.

What’s NOT: nothing whatsoever. Great little cookie.

printer-friendly PDF and MasterCook file (click link to open recipe)

* Exported from MasterCook *

Lemon Anise Biscotti

Recipe By: Cook’s Illustrated
Servings: 40

2 cups all-purpose flour
1 teaspoon baking powder
1/4 teaspoon table salt
4 tablespoons unsalted butter
1 cup granulated sugar
2 large eggs
1 tablespoon anise seed
1/4 teaspoon vanilla extract
1 tablespoon grated lemon zest

1. Sift first three ingredients together in a small bowl.
2. Whisk butter and sugar together in a large bowl to a light lemon color; add eggs, one at a time, mixing well before adding the next egg. Add vanilla extract and lemon zest. Sift dry ingredients over egg mixture, then fold in until dough is just combined.
3. Adjust oven rack to middle position and heat oven to 350°F. Halve dough and turn each portion onto an oiled cookie sheet covered with parchment. Using floured hands, quickly stretch each portion of dough into a rough 13-by-2-inch log, placing them about 3 inches apart on the cookie sheet. Pat each dough shape to smooth it. Bake, turning pan once, until loaves are golden and just beginning to crack on top, about 35 minutes.
4. Cool the loaves for 10 minutes; lower oven temperature to 325°F. Cut each loaf diagonally into 3/8-inch slices with a serrated knife. Lay the slices about 1/2-inch apart on the cookie sheet, cut side up, and return them to the oven. Bake, turning over each cookie halfway through baking, until crisp and golden brown on both sides, about 15 minutes. Transfer biscotti to wire rack and cool completely. Biscotti can be stored in an airtight container for at least 1 month. Or freeze up to 2-3 months.
Per Serving: 57 Calories; 1g Fat (23.2% calories from fat); 1g Protein; 10g Carbohydrate; trace Dietary Fiber; 12mg Cholesterol; 27mg Sodium; 5g Total Sugars; trace Vitamin D; 12mg Calcium; trace Iron; 13mg Potassium; 24mg Phosphorus.

Posted in Desserts, on December 22nd, 2023.

If you’re a fan of chocolate . . . cherries . . . mascarpone cheese . . .whipped cream and cake, you’ll want to make this.

Another recipe from the double cooking class a few weeks ago. Sorry I don’t have a better photo of it. Daughter Sara and I both swooned over this cake, and have decided we need to make it some time over the holidays. Decadent? Oh yes. Chocolatey? Absolutely. Smooth and tender? Yes, indeed. If you’re a fan of chocolate, cherry and a tender cake, this will float your boat.

There are three different steps to making this: (1) marinating the cherries; (2) baking the cake; and (3) making the frosting and obviously then frosting the cake. First you need to do the cherries – you can use frozen cherries, no problem. Defrost first, then heat with cherry brandy or kirsch and some sugar and let it simmer for 10 minutes or so. Cool and chill. That part can be made up to five days ahead of time.

Next, the cake. You need two 9-inch cake pans here with nonstick cooking spray all over the inside. Making the cake batter isn’t difficult – it’s one of those hot water cakes (makes for a very tender cake). The only chocolate is unsweetened cocoa powder. Everything else is the normal stuff for making a cake. The batter, however, is quite thin. Don’t be concerned. Pour into the two pans, bake for 30-35 minutes, let the cakes cool in the pans for 10 minutes then gently remove them and cool completely on racks. You can make the cake layers 2 days ahead or if you want to, freeze them, several weeks ahead is fine.

The frosting is a combo of heavy cream and mascarpone cheese. So good. Sturdy with the mascarpone in it. The cakes need to be sliced in half to make four layers. Diane had a great idea – if you cut a tiny little V in the side of each cake, you can be certain you’ll put those two thinner slices back together so they lay flat if you line up the V. The cherries are halved and you use about 1/2 cup on each layer. The cake needs chilling time, at least 4 hours or up to 24. Makes it even easier – make it the day ahead (and refrigerate it, of course).

What’s GOOD: the cake is so chocolatey and tender. The frosting is not ordinary – loved the combo of whipped cream and mascarpone. The cherry element is unexpected and a nice complement to the chocolate. Hence the name, black forest! Altogether fabulous.

What’s NOT: only that there are three steps. A bit time consuming. But worth it. Do a lot of it ahead – easier for the hostess. The finished cake wants to be refrigerated at least 4 hours or  overnight.

printer-friendly PDF and MasterCook file (click link to open recipe)

* Exported from MasterCook *

Black Forest Cherry Cake

Recipe By: Diane Phillips, cooking class 12/2023
Servings: 12 (or up to 16)

CAKE:
2 cups sugar
1 3/4 cups unbleached flour
3/4 cup cocoa powder — unsweetened
1 1/2 teaspoons baking powder
1 1/2 teaspoons baking soda
1 teaspoon salt
2 large eggs
1 cup whole milk
1/2 cup vegetable oil
2 teaspoons vanilla extract
1 cup boiling water
CHERRIES:
3 cups sweet cherries — pitted, either frozen and defrosted, or fresh
1/4 cup cherry brandy — or kirsch
1/4 cup sugar
FROSTING:
2 cups heavy cream
1 1/2 cups mascarpone cheese
1/2 cup sugar
1 cup dark chocolate shavings — for garnish
10 maraschino cherries — pitted, for garnish

NOTE1: The juice (vodka) used to soak the cherries is used to brush on each layer of the cake. Don’t discard it.
NOTE2: For the class, Diane cut about a 4″ circle in the center of the cake. She cut small wedges from the side of the cake and once those were plated, the center provided another 3-4 servings, so the cake would feed about 16 people.
1. CAKE: Preheat oven to 350°F. Coat two 9″ baking pans with nonstick cooking spray.
2. In a large bowl whisk together sugar, flour, cocoa, baking powder and soda, and salt. Stir in eggs, milk, oil and vanilla. With an electric mixer beat on medium speed for 2 minutes. Stir in boiling water and mix until blended, about 2 more minutes. Batter is very thin. Divide batter equally between the two pans and bake until a skewer inserted in the center comes out clean, 30-35 minutes.
3. Remove pans and cool on a wire rack for 10 minutes. Remove the cakes from the pans and let cool completely on wire racks. You can make these ahead to this point and refrigerate for up to 2 days, or freeze for up to 6 weeks. Defrost before proceeding.
4. CHERRIES: In a saucepan combine the ingredients, bring to a simmer and cook for 10 minutes.
5. Drain the cherries, saving the juices and allow to cool before assembling the cake. Cut the cherries in half if you have time.
6. The cherries and juice can be cooled, covered and refrigerated (separately) for up to 5 days.
7. FROSTING: In a large bowl beat the cream until stiff peaks form. Add the mascarpone cheese and beat until smooth.
8. Cut each cake layer in half horizontally. TIP: cut a tiny notch on the side of each cake so when you re-assemble the cake with the frosting you can line up the cake the way it should be (and hopefully level).
9. Lay strips of waxed paper or paper towels on the outside of the cake plate (to catch crumbs and drips). Set a cake half on serving plate. Brush cake with some of the cherry/cherry brandy juice. Spread with some of the cream mixture and top with some of the cherries.
10. Continue to layer with cake, juice, cream frosting, cherries and repeat. If there is enough frosting leftover, spread on the top and sides of the cake.
11. Decorate the top and sides of the cake with chocolate shavings and arrange maraschino cherries around the top of the cake. Refrigerate cake for at least 4 hours, or up to 24 hours ahead.
Per Serving: 668 Calories; 40g Fat (52.1% calories from fat); 8g Protein; 74g Carbohydrate; 3g Dietary Fiber; 118mg Cholesterol; 559mg Sodium; 55g Total Sugars; 1mcg Vitamin D; 114mg Calcium; 2mg Iron; 266mg Potassium; 181mg Phosphorus.

Posted in Pork, Veggies/sides, on December 15th, 2023.

Is this ever delicious! So worth making. Long simmered pork shoulder chunks in a brothy sauce, ladled over a fresh batch of oven-baked polenta, and topped off with gremolata (the green stuff in the center).

So there’s a cute story about this – – we had this on New Years’ Eve, for dinner. My son-in-law, John, (Sara’s husband) was in l-o-v-e with it. He had seconds. Then he ate what was left on their son’s plate. He said: “Oh, where has this been for the last 56 years?” Obviously, he’s 56 now. Does that give you a clue as to how good this is?

A couple of weeks ago my friend Cherrie and my daughter Sara and I met in La Jolla (a seaside village north of San Diego) to attend a cooking class. I don’t believe I’ve been to a cooking class since we attended this same kind of class last December. Phillis Carey and Diane Phillips (both long-time cooking instructors and cookbook authors) taught the class, aimed at Christmas feasts. Diane is either Italian herself, or her husband is (they own a home in Spoleto, Italy and divide their time between San Diego and Tuscany). Phillis doesn’t teach cooking classes anymore (she’s retired except for taking some group cruise ship tours in various parts of the world with cooking and food as the emphasis). I miss Phillis’s classes.

But anyway, Phillis and Diane teach the equivalent of a full cooking class each at this particular event – a full course meal, demonstration and then everyone gets to sample the food. Diane did 6 dishes, Phillis did 5, I believe. There were several stars in the mix, and this was one of them. Sara and I decided we’d like to prepare this over New Years’ weekend sometime. We’re going to be in the desert with family visiting that weekend and it’ll make a great company meal. The flavor was just over the top delicious. A pork shoulder is used, cut up into small chunks (see photo below) and it’s served over a very easy baked polenta. Diane explained that some while back she just didn’t want to buy veal shanks anymore (they’re so very expensive, and it’s so inhumane to slaughter a very young steer), so she tried pork shoulder. Here’s the photo of it simmering.

Here on my blog I already have a recipe for osso bucco using pork shanks. But this one is very different using the pork shoulder. What’s there not to like about all the flavor from the fat in that pork shoulder? You do get to skim some of that fat off during the cooking process. The pork is browned then all the aromatics are added (onion, carrot, celery, sage, wine, broth, tomatoes). The meat is simmered for about 2 hours, or until the pork is super-tender. Diane recommends making it the day before, refrigerating it (that’s when you can remove the fat that rises to the top), then it’s merely a matter of reheating it. Serve with Gremolata – to me it “makes” the dish. It’s a mixture of freshly chopped Italian parsley, orange and lemon zest and fresh garlic (finely minced). See photo below.

The polenta was super-easy – you combine water, polenta style cornmeal, salt and pepper in a baking dish. You leave it uncovered, transfer to a 375°F oven and bake for an hour. Then you stir in Parm and butter. You want to serve the meal immediately when the polenta comes out of the oven while it’s creamy and hot, though you can add more hot broth or water to it to loosen it if it has to sit a few minutes.

What’s GOOD: everything about this was yummy. So tender, the meat, delicious juices running all over the plate, and the creamy polenta that is a match made in heaven. Serve it with gremolata (garlic, lemon zest, orange zest and Italian parsley). So pretty and it truly adds a lot of extra flavor.

What’s NOT: only that you need to start this several hours ahead (or ideally the day before).

printer-friendly PDF and MasterCook file (click link to open recipe)

* Exported from MasterCook *

Pork Shoulder Osso Bucco

Recipe By: Diane Phillips, cooking class, 12/2023
Servings: 8

2 tablespoons butter
1 tablespoon olive oil
4 pounds pork shoulder — cut into 1″ cubes
1 1/2 teaspoons salt
1 teaspoon freshly ground black pepper
1 cup onion — finely chopped
1 cup carrot — finely chopped
1 cup celery — finely chopped
1 teaspoon dried sage
1/2 cup dry white wine — or vermouth
1/2 cup low sodium chicken broth
1/2 cup low sodium beef broth
30 ounces canned tomatoes — including juice
GREMOLATA:
4 cloves garlic — minced
grated zest of one lemon
grated zest of one orange
1/2 cup Italian parsley — chopped
OVEN BAKED POLENTA:
8 cups water
2 cups polenta — medium grind cornmeal, not instant type
2 teaspoons salt
1/2 teaspoon freshly ground black pepper
4 ounces Parmigiano-Reggiano cheese — grated (about 2 cups)
4 tablespoons unsalted butter — cut into pieces

1. In a 5-quart Dutch oven, melt butter in the oil. Sprinkle pork cubes with salt, pepper and brown the meat a few pieces at a time, until they are nicely crusted on all sides, removing them from the pan and adding more, as they are browned. Remove all the meat and set aside.
2. Add onion, carrot, celery and sage and saute for 5 minutes, until the vegetables begin to soften and turn translucent.
3. Add the wine and scrape up any browned bits on the bottom of the pan.
4. Add broth and tomatoes and bring to a boil. Add the pork into the pan, along with any accumulated juices. Simmer the meat for 2 hours, covered, or until pork is tender. At this point the dish can be cooled to room temp, covered and refrigerated up to three days of frozen for 2 months. Reheat over low heat before serving.
5. GREMOLATA: In a small bowl combine garlic, zests, and parsley. Set aside.
6. Remove any fat that may have accumulated on the top of the stew; serve with oven baked polenta and garnish the top with the Gremolata.
7. POLENTA: Adjust oven rack to middle position and preheat to 375°F. Coat the inside of a 9×13 baking dish with non-stick spray.
8. Combine water, polenta, salt and pepper in baking dish. DO NOT COVER.
9. Transfer uncovered dish to oven and bake until water is absorbed and polenta has thickened, about 60 minutes.
10. Remove baking dish from oven and whisk in Parm cheese and butter and stir until polenta is creamy and smooth. Plan to serve the osso bucco immediately after the polenta is cooked through. If you let it sit it will become much more firm. You can add broth or water to is to loosen is up, but it’s ideal served immediately.
Per Serving: 658 Calories; 43g Fat (59.8% calories from fat); 50g Protein; 15g Carbohydrate; 3g Dietary Fiber; 175mg Cholesterol; 1708mg Sodium; 7g Total Sugars; 2mcg Vitamin D; 277mg Calcium; 3mg Iron; 466mg Potassium; 612mg Phosphorus.

Posted in Cookies, on December 10th, 2023.

These just sounded so different – had to try them.

A recent issue of Food & Wine intrigued me because it contained different Christmas cookies than I’d ever made or even considered. Amongst them was this. I like a Moscow Mule once in awhile. I like gingersnaps. I love cranberries. Hence, it sounded like a winner.

This cookie requires a couple more steps than many – first you either have to buy or make a ginger syrup. But, fully disclosure here, those of us who gathered to bake cookies yesterday, could barely taste the massive amount of ginger contained in these cookies. Dianne actually made the dough that morning and it needed to chill for 4 hours (better overnight is my motto here). She and I worked on these cookies. Because the batter appeared to be really loose, first we baked one tray of them and figured out they were too loose – they almost spread into a cake. The cookie is very soft when first baked. Another item of disclosure here too, they need to cool awhile on the cookie sheets before trying to remove them. So we added about 2 tablespoons of extra flour, which was just about right. A note is in the recipe below about this.

So what makes it a Moscow Mule cookie, you ask? A full CUP of vodka (wow). Although not all of it ends up in the cookies – you soak the cranberries in it and reserve what’s left of the vodka for another use (maybe nice in a mixed drink of some kind where cranberry juice is called for?). You can substitute 7-UP in it if preferred. It also contained a HALF CUP of the ginger syrup, a bunch of lime zest and two tablespoons of fresh grated ginger (plus there was a ton of fresh ginger in the ginger syrup too). Be sure to make a thorough shopping list before attempting these!

Having a cookie scoop really helped with these. Dianne scooped and plopped the dough into my hand and I swirled them around in the powdered sugar before placing on a parchment-lined cookie sheet. These darned cookies DO stick, so even if you have those kind-of corrugated sheet pans, use parchment anyway. When the cookies bake they become speckled with the sugar – crackled is the word used in cookie baking, I believe. Love the look of them. Do, as I mentioned above, allow them to cool on the pans. The recipe says 2 minutes. I recommend more than that.

What’s GOOD: well, they’re very festive looking. And they taste good. Maybe not the highest on my list of cookies I’d make again – but they’re different (I like that). I’m not a fan of sugar cookies at all, so yes, I liked that they’re a very unusual cookie. The dried cranberries in them are nice to encounter, AND you can definitely taste the booze.

What’s NOT: well, that you have to make a ginger syrup (or buy one). Ideally start that the day before. And you need to chill the cookie dough at least 4 hours or overnight. Again, this dough is very soft. What surprised the four of us who met to do Christmas cookie baking, is that the ginger was almost so subtle we couldn’t taste it. Very odd, considering how much ginger is in them.

printer-friendly PDF and MasterCook file (click link to open recipe)

* Exported from MasterCook *

Cranberry Moscow Mule Gingersnaps

Recipe: Food & Wine
Serving: 48

2 cups sweetened dried cranberries
1 cup vodka — or 7-Up
3 cups all purpose flour — plus 2 tablespoons
4 teaspoons ground ginger
2 teaspoons ground cinnamon
2 teaspoons baking powder
1 teaspoon kosher salt
2 cups packed dark brown sugar
12 tablespoons unsalted butter — melted
1/2 cup ginger syrup — (such as Ginger People) see Notes for making your own
2 tablespoons lime zest — from 3-4 limes (or more if they’re small)
2 tablespoons fresh ginger — peeled and grated
4 large eggs
3 cups powdered sugar

1. Place dried cranberries in a small microwavable bowl. Add vodka, pressing cranberries to submerge. Microwave on high until steaming, 45 seconds to 1 minute. Cover tightly with plastic wrap, and let stand until cranberries are plump, about 10 minutes. Drain and set aside, reserving cranberry-flavored vodka for another use.
2. Whisk together flour, ground ginger, cinnamon, baking powder, and salt in a medium bowl. Set aside. The extra 2-3 tablespoons of flour place in a separate bowl and use as needed to make a firmer dough.
3. Combine with mixer: brown sugar, butter, ginger syrup, lime zest, and grated fresh ginger until smooth and evenly combined, about 30 seconds. Add eggs; mix until combined, about 30 seconds. Add flour mixture until just combined. If batter is really soft/loose, add in the additional flour. Fold in plumped cranberries until evenly dispersed throughout dough. Cover and refrigerate dough until thoroughly chilled and firm, at least 4 hours or up to 1 day. (Do not skip this step, as batter is loose.)
4. Preheat oven to 400°F. Place powdered sugar in a bowl. Using a 1-inch cookie scoop, drop a dough ball (about 1 tablespoon) into powdered sugar, and roll until heavily coated. Place coated dough ball on a parchment paper–lined baking sheet. Repeat procedure to form 12 cookie dough balls, spacing at least 2 inches apart. Bake in preheated oven until cookies are puffed in center and lightly browned around edges, 9 to 11 minutes. Remove from oven. Let cookies cool on baking sheet 2-5 minutes. Transfer to a wire rack; serve warm, or let cool completely. Repeat scooping, rolling, and baking process with remaining cookie dough and remaining powdered sugar.
Per Serving (ginger syrup isn’t included): 170 Calories; 3g Fat (18.9% calories from fat); 1g Protein; 31g Carbohydrate; 1g Dietary Fiber; 23mg Cholesterol; 73mg Sodium; 23g Total Sugars; trace Vitamin D; 35mg Calcium; 1mg Iron; 38mg Potassium; 38mg Phosphorus.

Posted in Beef, Miscellaneous, on November 30th, 2023.

There were a couple of posts I’d forgotten about writing up. This one for sure. Herbdacious is an herb paste you prepare in bulk (well, it makes a cup or so) and  you use it judiciously in other things. The meatloaf? With Kalamata olives? How’s that for different?

You have to hand it to chefs these days – well, maybe for a long time. It’s their job to make ordinary things better; or to create some new method of cooking, or combine unusual ingredients to make an all-new flavor of something. The latter is the case here – who would have thought of using Kalamata olives in a meatloaf? Never in a million years would I have created that! I was skeptical. Yet, this meatloaf is delicious. It’s definitely savory – you know what I mean in that some meatloaves have a sweet topping, like ketchup. My old family favorite is one of those with a sweet and sour tomato-based topping. This one – although it does have a bit of honey in it, it’s still a very savory meatloaf.

Over the  years I’ve had a love-hate relationship with Kalamata olives. Early on, I was in love with them, put them in everything. But they’re fairly bitter, and as my taste buds have changed with age (is that a thing?). I do use them occasionally, but not often. My first instinct was to use a different olive, but then I’d be changing the recipe from what Vivian Howard intended, so I did use the Kalamata. Thank goodness they sell them pitted these days. And indeed, I liked them in the meatloaf.

But first, we have to talk about Herbdacious. This is another one of Vivian Howard’s flavor heroes. So what is it, you ask? It’s a thick olive oil, garlic and herb/cheese/lemon juice paste. It stores well in the frig (with a little olive oil film on top to keep it fresh) or you can freeze it. The meatloaf recipe calls for 2/3 cup of Herbdacious. The Herbdacious recipe below makes 2 cups (mostly it’s made in a blender), so you’ll have plenty leftover to use in something else (soup?, a vinaigrette? stew? see below). For ideas, Vivian suggests:

. . . mix with mayo for/on a BLT, slather on corn on the cob, drizzle over bean soup, on grilled or sauteed veggies, over a baked potato, add to guacamole or avocado toast, dot on a tomato or watermelon salad with creamy cheese, slather on bread with cheese for garlic bread, as a green base for pizza, to dress pasta or grain salads, in deviled eggs or egg salad, toss with stale bread to make croutons.

The meatloaf is mixed up like any other meatloaf although it have one unusual ingredients: Greek yogurt. This recipe makes one huge meatloaf. If I made it again, I think I would shape it into two loaves, but if you’re feeding a crowd, then go for the full 2 1/2 pound loaf. Instead of bread crumbs, Vivian calls for crushed saltine crackers. With the herbdacious in it, the mixture is a pretty unusual color – kind of green/brown.  See the photo below, kinda greenish. But the finished product doesn’t look unusual at all.

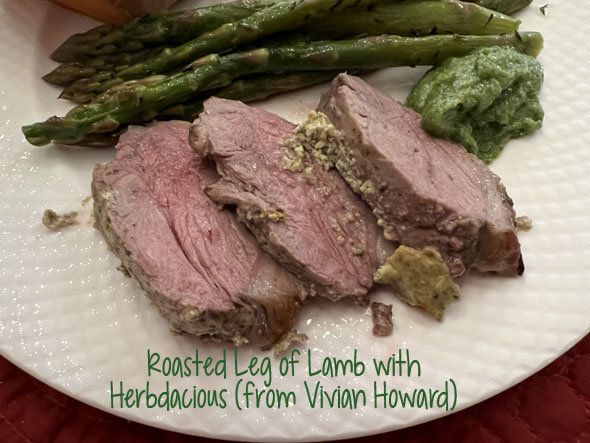
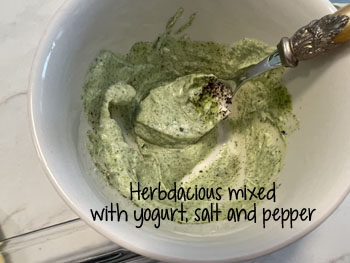
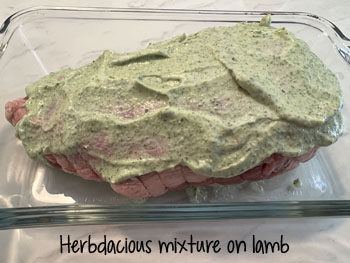
In her cookbook she included recipes to use herbdacious: a clam dish, as a marinade for leg of lamb, part of Italian meat sauce (gravy), a chicken salad, a new version of Chex Mix (Chex and Cheez-Its, nuts, saltines, bagel chips), a Caesar salad vinaigrette, a zucchini sauce for fettucine, in a citrus salad, and lastly, in mashed potatoes. I haven’t made any of those yet. I should!

If you’re willing to try a very different kind of meatloaf, I recommend this one.

What’s GOOD: the meatloaf is wonderfully moist and flavorful from the Kalamata olives and the sun-dried tomato topping. I’m not a huge fan of sun-dried tomatoes, but this topping was good; I ate it. The meatloaf would make great sandwiches afterwards, and certainly is something I’d be willing to make for guests (since it’s so unusual).

What’s NOT: this has a couple of unusual ingredients, and it makes a huge meatloaf. Am sure it could be scaled down to a 1 1/2-pound variety, however.

MEATLOAF: printer-friendly PDF and MasterCook file (click link to open recipe)

HERBDACIOUS: printer-friendly PDF and MasterCook file (click link to open recipe)

* Exported from MasterCook *

Meatloaf with Herbdacious

Recipe By: Vivian Howard, This Will Make It Taste Good
Servings: 12

1 tablespoon EVOO
2 large onions — finely diced
2 1/2 teaspoons kosher salt — divided use
1 teaspoon freshly ground black pepper
2 large eggs
1/2 cup Greek yogurt, full fat
2/3 cup Herbdacious
1 cup Kalamata olives, pitted — drained, chopped
2 tablespoons Worcestershire sauce
2 1/2 pounds ground beef
1/2 cup saltine crackers — or bread crumbs
TOPPING:
1/2 cup tomatoes, sun-dried — drained, chopped finely
1 1/2 cups roasted red peppers — drained, chopped
2 tablespoons honey
2 tablespoons red wine vinegar

1. Preheat the oven to 325°F.
2. Warm a 10-inch skillet on medium heat.
3. Dice the 2 onions. Sauté the onions for 10 minutes until translucent and soft. Season the onions with 1 tsp salt and pepper.
4. Add parchment paper to a 9 X 13-inch baking pan.
5. TOPPING: Combine the sun-dried tomatoes, roasted red peppers, honey, vinegar, and 1/2 tsp salt in a blender. Blend the ingredients until smooth.
6. On a cutting board, roughly chop the Kalamata olives. Measure and then crush the saltine crackers, then set aside.
7. In a large bowl, whisk together the eggs, Greek Yogurt, Herbdacious, Kalamata olives, beef, crushed saltine crackers, and remaining 1 tsp salt. Gently mix the ingredients in the bowl, not too much to overwork the ingredients.
8. Spray the baking pan with the parchment paper with non-stick spray.
9. Dump the meat mixture on the parchment paper in the baking dish. Shape the meat into a rectangle block, around 3 X 3 X 12-inches. Spread the tomato mixture over the top of the meatloaf, taking care to spread it over all the sides.
10. Bake the meatloaf, on the middle rack, for 1 hour, or until the internal temperature reaches 165°F. Remove the meatloaf from the oven and let it rest for 3-5 minutes before serving.
Per Serving: 396 Calories; 37g Fat (68.1% calories from fat); 22g Protein; 17g Carbohydrate; 2g Dietary Fiber; 100mg Cholesterol; 1400mg Sodium; 6g Total Sugars; trace Vitamin D; 81mg Calcium; 3mg Iron; 474mg Potassium; 231mg Phosphorus.

. . .

Herbdacious

Recipe By: Vivian Howard, This Will Make It Taste Good
Servings: 12

2 heads garlic — peeled (about 20 cloves)
2/3 cup EVOO
1 cup fresh basil — packed
1/4 cup fresh parsley — packed
1/4 cup fresh dill — packed – or mint, chervil or cilantro
1/4 cup green onions — roughly chopped, green parts only
1/2 cup Parmigiano-Reggiano cheese — grated (use a Microplane)
3 tablespoons fresh lemon juice
Zest of 2 lemons
1 1/2 teaspoons kosher salt

1. In a small saucepan, bring the garlic cloves and olive oil up to a simmer over very low heat. If it begins to sizzle and boil, pull it off the heat and allow it to cool slightly before you return it to the hot eye of the stove. The idea is to slowly poach the garlic in the oil rather than fry it. This could take as long as 20 minutes if you keep the heat extremely moderate. When the garlic is done, it will be soft and just slightly browned.
2. This garlic confit plus its oil are kitchen heroes in their own right and can be used anywhere you want mellow garlic notes. You could stop this recipe right here and save those little garlic bombs in the fridge for a month, as long as they are submerged in oil. Pureed, the cloves are especially useful as a means to thicken and add flavor to sauces.
3. But you don’t get to herbdacious by calling it quits early. Once the garlic confit is completely cool, put it and all the remaining ingredients in the most powerful blender you have and let it rip until the mixture is smooth and green. Store herbdacious in a sealed container in your fridge for up to 2 weeks or in your freezer for up to 3 months. Makes 2 cups.
Per Serving: 148 Calories; 15g Fat (87.4% calories from fat); 4g Protein; 1g Carbohydrate; trace Dietary Fiber; 7mg Cholesterol; 407mg Sodium; trace Total Sugars; trace Vitamin D; 125mg Calcium; trace Iron; 33mg Potassium; 72mg Phosphorus.

Related Posts Plugin for WordPress, Blogger...