Get new posts by email:

Archives

Currently Reading

Here are the tastingspoons players. I’m in the middle (Carolyn). Daughter Sara on the right, and daughter-in-law Karen on the left. I started the blog in 2007, as a way to share recipes with my family. I’m still doing 99% of the blogging and holding out hope that these two lovely and excellent cooks will participate. They both lead very busy lives, so we’ll see.

– – – – – – – – – – – – – – – – – – – – – –

BOOK READING (from Carolyn):

Music of Bees, Eileen Garvin. Absolutely charming book about a woman in midlife, lonely, who raises bees, also makes unlikely friends. Heart-warming and very interesting about beekeeping.

A Postcard from Paris, Alex Brown. Really cute story. Dual time line, 1940s and present day about renovating an old apartment in Paris, things discovered.

Time of the Child, Niall Williams. Oh such a good book. Very small village in Ireland, 1960s. A baby is left on the doorstep. The town all whispers and helps. I listened to an interview of the author, which made me like him and his books even more.

Sipsworth, Simon Van Booy. If you like animals you’ll swoon. An old woman who really wants to die finds a tiny mouse in her house and befriends it and finds a reason to live. Utterly charming book.

The Forger’s Spell, Edward Dolnick. True story. For seven years a no-account painter named Han van Meegeren managed to pass off his paintings as those of Johannes Vermeer.

If You Lived Here, You’d be Home by Now, Christopher Ingraham. Could hardly put it down – about a journalist who takes on a challenge to move to small town in Minnesota and write about it. He expects to hate it and the people and place, but he doesn’t. Absolutely wonderful true story.

The River We Remember, William Kent Kreuger. 1950s, Minnesota. A murder and the aftermath. Could hardly put it down. Kreuger has such a vivid imagination and writing style.

How the Lights Gets In, Joyce Maynard. An older woman returns to New Hampshire to help care for her brain-injured son. Siblings and family, lots of angst and resentments.

The Filling Station, Vanessa Miller. Every American should read this book. A novelized retelling of the Tulsa massacre in 1921. Absolutely riveting.

The Story She Left Behind, Patti Callahan Henry. Love this author. Based on a true story. A famous author simply vanishes, leaving her husband and daughter behind. She had invented a mystical language no one could translate. Present day, someone thinks he’s solved the riddle, contacts the family. Really interesting read.

The Girl from Berlin, Ronald Balson. Love anything about Tuscany. An elderly woman is being evicted from a villa there, with odd deed provenance. Two young folks go there to help unravel the mystery. Loved it.

The Island of the Colorblind, Oliver Sacks, M.D. Nonfiction. The dr is intrigued by a remote Pacific island where most of the inhabitants are colorblind. He also unravels a mystery on Guam of people born with a strange neurological problem. Medical mysteries unveiled. Very interesting.

The Bookbinder, Pip Williams. Post 1914 London. Two sisters work at a bookbindery. They’re told to not read the books. One does and one doesn’t. One has visions beyond her narrow world; the other does not. Eventually the one gets into Oxford. Lovely story.

The Paris Express, Emma Donoghue. 1895 on a train to Paris, a disaster happens. You’ll delve into the lives of many people who survived and died in the crash.

A Race to the Bottom of Crazy, Richard Grant. This is about Arizona. Author, wife and child move back to Arizona where they once lived. Part memoir, research, and reporting in a quest to understand what makes Arizona such a confounding and irresistible place.

The Scarlet Thread, Francine Rivers. A woman’s life turned upside down when she discovers the handcrafted quilt and journal of her ancestor Mary Kathryn McMurray, a young woman who was uprooted from her home only to endure harsh frontier conditions on the Oregon Trail.

A Place to Hide, Ronald Balson. 1939 Amsterdam, an ambassador has the ability to save the lives of many Jewish children. Heartwarming.

Homeseeking, Karissa Chen. Two young Chinese teens are deeply in love, but in China. Then their families are separated. Jump to current day and the two meet again in Los Angeles.

North River, Pete Hammill. He always writes such a good story. A doctor works diligently healing people from all walks of life. His wife and daughter left him years before. One day his 3-yr old grandson arrives on his doorstep.

A Very Typical Family, Sierra Godfrey. A very messed-up family. Three adult children are given a home in Santa Cruz, Calif, but only if the siblings meet up and live in the house together. A very untypical scenario but makes for lots of messes.

Three Days in June, Anne Tyler. The usual Anne Tyler grit. Family angst. This wasn’t one of my favorites, but it was entertaining and very short.

Saved, Benjamin Hall. Author is a veteran war reporter. Ukraine, 2022, he nearly loses his life to a Russian strike. Riveting story – he survives, barely.

Grey Wolf, Louise Penny. Another Inspector Gamache mystery in Quebec. She is such an incredible mystery writer.

All the Colors of the Dark, Chris Whitaker. A missing person mystery, a serial killer thriller, a love story, a unique twist on each. Could hardly put it down.

Orbital, Samantha Harvey. Winner of 2024 Booker Prize. I don’t usually like those, but I heard the author interviewed and she hooked me. This is not a normal book with a beginning, a story and an end. It’s several chapters of the day in the life of various astronauts at the ISS (Int’l Space Station). All fictional. She’s been praised by several real astronauts for “getting it” about space station everyday life.

The Blue Hour, Paula Hawkins. An island off Scotland. Inaccessible except when the tide is out. Weird goings on. An artist. A present day mystery too.

Iron Lake, William Kent Krueger. A judge is murdered and a boy is missing. Riveting mystery.

Tell the Wolves I’m Home, Carol Ricks Brunt. 1980s. A 14-yr old girl loses her beloved uncle. Yet a new friendship arises, someone she never knew about.

Four Treasures of the Sky, Jenny Zhang. 1880s, a young girl is kidnapped in China and brought to the United States. She survives with many hurdles in the path.

The Boy Who Fell out of the Sky, Ken Dornstein. Memoir, 1988. The author’s brother died in the PanAm flight that went down in Lockerbie, Scotland. A decade later he tries to solve “the riddle of his older brother’s life.”

Worse Care Scenario, T.J. Newman. Oh my. Interesting analysis of what could/might happen if a jet crashed into a nuclear plant. Un-put-downable.

Song of the Lark, Willa Cather. Complicated weave of a story about a young woman in about 1900, who has a gifted voice (singing) and about her journey to success, not without its ups and downs.

Crow Talk, Eileen Garvin. Charming story which takes place at a remote lake in Washington State, about a few people who inhabit it, the friendships made, but also revolving around the rescue of a baby crow.

The Story Collector, Evie Woods. Sweet story about some dark secrets from an area in Ireland, a bit magical, faerie life, but solving a mystery too.

A Sea of Unspoken Things, Adrienne Young. A woman investigates her twin brother’s mysterious death. She goes to a small town in California to figure it out, to figure HIM out.

The King’s Messenger, Susanna Kearsley. 1600s England, King James. About one of his trusted “messengers,” and his relationship with a young woman also of “the court.” Lots of intrigue.

In the Shadow of the Greenbrier, Emily Matchar. Interesting mystery in/around the area of the famous resort in White Sulphur Springs, West Virginia.

Isola, Allegra Goodman. Hard to describe, survival story on an island in the 1600s.

Save the Date, Allison Raskin. Rom-com, witty, LOL funny. Clever.

The Sirens, Emilia Hart. Numerous time-lines, Australia. Mysteries abound, nightmares, abandoned baby, weird allergies.

Red Clay, Charles Fancher. LOVED this book. Mostly post-Civil War story about the lives of slaves in Alabama during Reconstruction.

Stars in an Italian Sky, Jill Santopolo. Dual time line, 1946 and recent time. Love stories and a mystery.

Battle Mountain, C.J. Box. Another one of Box’s riveting mysteries. Love his descriptions of the land.

Something Beautiful Happened, Yvette Corporon. A memoir of sorts in Greece, tiny island of Erikousa, where the locals hid Jews during WWII. All elusive stories told by the author’s grandmother.

The Jackal’s Mistress, Chris Bohjalian. 1860s Virginia, about a woman who saves the life of a Union soldier. Really good story.

Song of the Magpie, Louise Mayberry. Really interesting story about Australia back in the days when it was mostly a penal colony. Gritty strength of a woman trying to thrive with her farm.

The Boomerang, Robert Bailey. A thriller that will have you gripping the book. About a lot of secrets surrounding the president (fictional novel, remember) and his chief of staff and about cancer. A cure. Such a good story.

Care and Feeding, Laurie Woolever. Really interesting memoir of a woman driven to succeed in the restaurant business. She worked for Mario Batali and then Anthony Bourdain. Gritty stories.

Everything is Tuberculosis, John Green. Maybe not a book for everyone. A real deep dive into the deadly tuberculosis infection, its history. I heard the author interviewed and found the book very interesting.

The Book Lovers Library, Madeline Martin. Fascinating read about Boots’ drug stores’ lending library. And the people who worked in them.

The Arrivals, Meg Mitchell Moore. LOL funny, about a middle-aged couple whose children (and their various family members) return to the family home and the chaos that ensues.

My Life as a Silent Movie, Jesse Lee Kercheval. About grief. A big move to Paris, finding herself a new life with a new set of real blood family.

Escape, Carolyn Jessop. Another memoir about a woman really in bondage in Utah, Mormon plural marriage.


Tasting Spoons

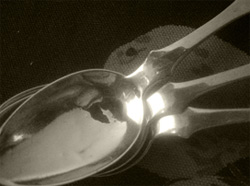
My blog's namesake - small, old and some very dented engraved silver plated tea spoons that belonged to my mother-in-law, and I use them to taste my food as I'm cooking.

Scroll down to the bottom to view my Blogroll

Posted in Beverages, Brunch, Desserts, on May 25th, 2013.

horchata_lua_2

Horchata is a refreshing rice-based drink from Latin America. It’s very easy to make, and if you’re so inclined, you can add some Kahlua to it as we did. Not traditional, but oh-so good.

Recently our four-couple gourmet group got together for a brunch. What fun we had, even though it wasn’t a nice day – one of those cloudy, overcast days that we, here in Southern California, don’t understand much, except in June, when we usually  have that kind of weather for the entire month, hence we call it “June Gloom.” But it was on Cinco de Mayo (the 5th). Early May!

One of the gals brought my Tuscan Sangria with Tuaca. We had 4 different salsas with chips (2 of them you’ll see here in a few days), then our main food included a egg/chile/cheese baked dish, caramelized carnitas tacos served with hot flour tortillas, guacamole and slivers of radishes. We also had a no-bake vegetarian enchilada dish that was surprisingly good. I’ll post that too. This, our dessert, was a horchata milk shake. I’d seen the recipe in Food and Wine, and since I like horchata, this one, with ice cream, sounded more like a dessert than a beverage to serve with a meal. So that’s what I did. And most of us ended up adding some Kahlua to the drink – making it a boozy drink, but not much. Just enough to taste it.

Horchata (hor-chaatah) is an agua fresca (meaning fresh water). All agua frescas are non-alcoholic and are common refreshing drinks served all over Latin America. In many Mexican restaurants here in California anyway, they serve some type of agua frescas – either horchata or tamarindo (tamarind) or hibiscus (also a favorite of mine – have never made it, I just buy it when I see it). We visit a Saturday morning farmer’s market some miles from us, and one of the food trucks there almost always has the hibiscus agua fresca, or the tamarind one. They’re all sweet, including horchata.

Anyway, horchata is easy enough to do, but since I’d never made it before, it was all new to me, other than I knew it was rice based. First I measured out rice, added water and whole cinnamon sticks (horchata typically is a cinnamon flavored drink). That sat overnight (out on the kitchen counter, not refrigerated). You remove the cinnamon sticks (see ERRATA below), then pour the entire mixture into the blender. The rice was not cooked at all, but after it sat in liquid all night, it was softened somewhat. Nothing is heated up during the making of horchata. I turned on the blender and let it go a bit, then added in some toasted sliced almonds, sugar and cinnamon. And here’s the most difficult thing you’ll do – pour the mixture through a fine-mesh strainer. Do NOT try to push the mixture through – you want the sieve to catch whatever rice it can, although it is ground up, you understand! I poured in about a cup and just let it sit until it had drained through. I rinsed the sieve and did it again, and again. It will take a few minutes for that, but truly that’s the most time consuming thing you’ll do making horchata.

Kahlua Tip:

If you do add Kahlua to this drink, don’t use much – you still want to taste the cinnamon, banana and almond flavors.

At that point in the making I poured it into a pitcher and refrigerated it (several hours before our get-together). When I was ready to serve it I put it back in the blender, added sweetened condensed milk, the banana, vanilla ice cream and ice. I tasted it and put in a tiny bit more horchata_lua_1of the sweetened condensed milk. Truth to tell, in our drive to the hosts’ home, my pitcher, with lid, slid and some of the horchata ended up on the carpet in my car’s trunk. Ooph! I wasn’t sure how much quantity I really had left, so needed to guesstimate how much to add in. Pour into glasses, add a straw and sprinkle the top with the cinnamon sugar mixture.

OPTIONAL: I served the horchata milk shakes in silver tumblers – they’re actually mint julep cups. Some people were drinking coffee with whipped cream on top and Kahlua was on the table. One person added a little jot of Kahlua to their horchata and he made very noisy mmmmmm’s, so someone else added Kahlua, and in short order nearly everyone had added Kahlua. Knowing that horchata is really a non-alcoholic drink, I wasn’t so sure it would be a good thing! Oh, was I wrong. It was fabulous. My only caveat: don’t add too much Kahlua or it does overpower the delicacy of the cinnamon, almond and banana flavors.

ERRATA: I have to confess, I forgot to take out the cinnamon sticks after the rice had soaked overnight. I glanced at the recipe and didn’t see the instructions. I just missed it. So our horchata was a bit grainy from the ground-up cinnamon – but you know what? Everyone seemed to love it that way. They said they liked it grainy and would definitely do it that way if they made it. Well, okay then!

What’s GOOD: every little sip of it was fantastic. I’d definitely make this again, with or without the Kahlua. I didn’t mind the grainy texture from the cinnamon sticks, but that’s up to you. Traditionally, remove the cinnamon sticks! You could lighten up the recipe some by using sugar-free ice cream, or light ice cream. There’s also low-fat sweetened condensed milk in grocery stores too. This one’s a keeper.
What’s NOT: nothing. Absolutely nothing wrong with this at all!

printer-friendly PDF – created using Cute PDF Writer, not Adobe
MasterCook 5+ import file – right click to save (remember where), run MC, File|Import

* Exported from MasterCook *

Horchata Milk Shake

Recipe By: Food & Wine, May 2013
Serving Size: 4 (maybe 5)

1 cup long-grain white rice — rinsed well
3 cups water
4 medium cinnamon sticks — cracked
1/4 cup sliced almonds
1 tablespoon ground cinnamon — plus 1/4 teaspoon
1 tablespoon sugar
1/4 cup sweetened condensed milk — plus 2 tablespoons
1/2 banana — (2 ounces)
1 pint vanilla ice cream
1/2 cup ice
OPTIONAL: Kahlua to taste, about 2 tsp per serving

1. In a bowl, cover the rice with the water. Add the cinnamon sticks and let stand at room temperature for at least 3 hours or overnight; discard the cinnamon sticks.
2. Meanwhile, in a skillet, toast the almonds over moderate heat, tossing, until fragrant, 3 minutes. In a small bowl, stir 1 tablespoon of the ground cinnamon with the sugar.
3. Transfer the rice and its liquid to a blender. Add the almonds and puree for 2 minutes. Strain the horchata through a fine sieve into a bowl. Rinse out the blender.
4. Return the horchata to the blender and add the condensed milk, banana and the remaining 1/4 teaspoon of ground cinnamon and puree. Add the ice cream and ice and blend. Pour the shake into glasses, sprinkle the cinnamon sugar on top and serve.
5. OPTIONAL: Add Kahlua to each glass (about 2 tsp). Don’t overdo the Kahlua as it will overpower the delicate cinnamony flavor of the horchata.
Per Serving (this is off some because you don’t consume all the rice – some yes, all? no): 482 Calories; 15g Fat (26.0% calories from fat); 10g Protein; 83g Carbohydrate; 10g Dietary Fiber; 36mg Cholesterol; 91mg Sodium.

Posted in Veggies/sides, on May 23rd, 2013.

asparagus_bits_of_bacon

Lovely steamed asparagus tossed with walnut (or hazelnut) oil and lemon juice, topped with a crispy mixture of bacon and onions. Very tasty.

‘Tis the season for asparagus and I love the stuff. I have my favorite ways of making it, the Crumbled Asparagus, and Roasted Asparagus with Chile Butter. But I wanted to try some new version of the green stuff. Out on my kitchen counter was Dorie Greenspan’s book, Around My French Table: More Than 300 Recipes from My Home to Yours. There was a recipe, and I had all the ingredients on hand. Even better!

Actually, I pan-steamed the asparagus (large-ish skillet, a little olive oil, a little water, lid) until it was just barely done. Meanwhile I cooked up the bacon. I’ve changed the recipe just slightly, below, because 3 slices of extra-thick bacon was just too much, I thought. But when I served it, it was there, and 3 of us ate that entire platter of asparagus. And all the bacon. Ah-hem.

The asparagus is drained and then drizzled with the mixture of walnut oil (or hazelnut) and lemon juice. I did it with my hands because I needed to gently work the little bit of fluid all over the asparagus. A tall order. I think I probably used a bit more oil and lemon juice, then the warm bacon-onion mixture was lapped on top. Done.

What’s GOOD: Good texture, good flavor from the walnut oil and lemon juice. And the bacon. Well, what’s there not to like! It was relatively easy – 2 pans and a bowl.
What’s NOT: really nothing. I won’t call it a “wow” dish, but it was really good.

printer-friendly PDF – created using Cute PDF Writer, not Adobe
MasterCook 5+ import file – right click to save (remember where), run MC, File|Import

* Exported from MasterCook *

Asparagus with Bits of Bacon

Recipe By: Adapted slightly from Dorie Greenspan’s book, Around My French Table
Serving Size: 4

2 slices thick-sliced bacon
1/2 small yellow onion — finely diced
3/4 pound asparagus — ends trimmed down, partially peeled if they’re large
2 tablespoons water
1 tablespoon walnut oil — or hazelnut oil
1 teaspoon lemon juice
Salt and freshly ground black pepper

1. In a small skillet render the bacon over very low heat for 8-10 minutes, until it’s crispy and browned slightly. Remove to a paper towel.
2. Pour out all but a teaspoon of the bacon fat and return skillet to the stove. Add onion and cook it until it’s softened but not brown, about 7-8 minutes. Add bacon back to the pan and keep warm.
3. Meanwhile, in another skillet large enough to hold all the asparagus, add the water and then the asparagus. Gently move the stalks around, cover and cook over medium heat. Periodically move the asparagus so they all cook evenly. Press the tip of a sharp knife in the asparagus – when it gives with no pressure remove it from the heat and drain.
3. Combine the oil and lemon juice in a small bowl. Place the cooked asparagus on a serving plate, drizzle the vinaigrette over the top and add the bacon and onion mixture. Serve immediately.
Per Serving: 83 Calories; 7g Fat (69.8% calories from fat); 3g Protein; 3g Carbohydrate; 1g Dietary Fiber; 5mg Cholesterol; 103mg Sodium.

Posted in easy, Fish, on May 21st, 2013.

baked_salmon_agave_and_lime

Wow. Was this easy baked salmon ever off the charts delicious! I almost can’t wait to make it again, it was that good. The salmon is flavored with red onions, garlic and green onions, then soaked in olive oil, agave nectar and lime juice. And an itty-bitty pinch of cinnamon.

This salmon dish could hardly be easier. Well, maybe a little, but we’re not talking much effort to make this, that’s all I’m saying. The recipe came from a fellow blogger, Karina Allrich, also known as the Gluten-Free Goddess. Karina eats GF (gluten free), but she has plenty of “regular” recipes as well (meaning they’re not alternative-flour-centric) on her very popular blog. This one was from some years ago. I used the essence of it and adapted it slightly to suit our family. Agave nectar, although it’s a low glycemic carb and slow absorbing into the body of a normal person, is still SUGAR to a any person, let alone for a diabetic, like drinking sugar syrup.

salmon_packet_rawAt left is a photo of the fish before I sealed it up in foil – onions, garlic, green onions and you can see the olive oil/agave mixture around the bottom.

There were 4 of us for dinner that night, and since this dish is made in individual foil packets (hooray for easy cleanup!), I was able to adapt my DH’s serving with less agave. The other 3 portions were as the recipe shows below. Here’s what I did differently from Karina’s recipe: (1) I sprayed the foil to make sure the salmon wouldn’t stick; (2) I reduced the amount of agave and olive oil, just because I thought 1/3 cup of each was more than needed for 4 servings – in any case, you don’t eat all of it anyway; and (3) I used ample of the dark green part of the green onions – flavor, I suppose, but also for color. The only thing I’ll do differently next time – and I’ve put this in the recipe below – is place the slices of garlic underneath the salmon. We found the garlic was still nearly raw when placed on top of the salmon. Perhaps if the garlic was placed in direct contact with the salmon flesh it would cook, but I’d put the onions on first, then the garlic and they were definitely raw. Anyway, I salted and peppered the salmon first, added the pinch of cinnamon, then thin slices of red onion are placed on the salmon fillets, a bunch of the green onions, then I mixed up the olive oil/agave mixture and used a spoon to drizzle it all over the top of the salmon. It puddled below in the packet, but all of the salmon was dampened with the mixture. Then, just before sealing it up I squeezed a half of a lime over the top – I drizzled it directly on the salmon. The packets were sealed up, then I placed them on a big rimmed baking sheet (4 just barely fit).

The 350° was just right – the salmon cooked in exactly 20 minutes. The fillets we had were about 1” at the thickest part, so 20 minutes was perfect. If you have thinner fillets, you’ll want to reduce the baking time by a few minutes.

What’s GOOD: every single, solitary morsel of this dish was fantastic. The fact that it’s relatively easy to make just made it even more fun to prepare. Worthy of a company meal for sure. The taste is on the sweet side – just know that going in.
What’s NOT: nothing. Absolutely nothing!

printer-friendly PDF (created using Cute PDF Writer, not Adobe)
MasterCook 5+ import file – right click to save (remember where), run MC, File|Import

Baked Salmon with Agave and Lime

Recipe By: Adapted slightly from Karina’s Kitchen blog, 2008
Serving Size: 4

24 ounces salmon, skinless
1/2 red onion — thinly sliced
4 whole scallions — sliced (using equal amounts of dark green tops)
3 whole garlic cloves — sliced
Sea salt and freshly ground black pepper
2 tablespoons extra virgin olive oil
2 tablespoons agave nectar
2 whole limes — halved
1 pinch cinnamon

1. Preheat the oven to 350ºF.
2. Tear off eight pieces of foil; two for each piece of salmon.The top piece can be slightly smaller than the bottom one. Spray 4 pieces with EVOO spray. Place garlic pieces on the foil, in a line where you are going to place the salmon. Then place one serving of salmon on one piece of foil, folding under the thin, tapered edge of the fish. Season with a little sea salt and fresh ground pepper.
3. Sprinkle the salmon with onions and scallions.
4. Combine the olive oil, agave, lime juice and touch of cinnamon in a glass measuring cup. Pour the sauce all over the salmon pieces.
5. Place the remaining pieces of foil on each serving and fold the edges to create a packet.
6. Bake in a preheated oven for roughly 20 minutes, until it flakes easily- but is not dried out. One inch thick fillets were perfect at exactly 20 minutes. When serving, remove the fish from the packet and place on a warm serving plate; discard the juices.
Per Serving: 284 Calories; 13g Fat (40.5% calories from fat); 35g Protein; 7g Carbohydrate; 1g Dietary Fiber; 88mg Cholesterol; 118mg Sodium.

Posted in Chicken, on May 19th, 2013.

chicken_in_a_bowl

A very easy rendition of a French classic baked chicken. Every French home cook knows how to make one or more versions of this super-tender and juicy chicken dish, most often served on Sundays when the family typically gathers ‘round the table.

Have you ever been in Paris, or anywhere else in France for that matter, on a Sunday? They roll up the sidewalks in most places. It’s nearly impossible to find a restaurant open (except in hotels). Stores are closed. Businesses are closed, and most definitely cafes and restaurants are buttoned up tight. At home the matriarch is leisurely making a big lunch for the family, and often it’s this dish, or something similar.

We’d purchased a whole chicken from a meat purveyor at one of our local farmers’ markets. It was grown in the old-fashioned natural way without hormones and not treated with antibiotics. She was a small bird – about 3 1/2 pounds. Since I’d recently purchased a lidded ceramic dish that is mostly made for this kind of meal, I wanted to do this birdie in the new pot. First I went to some of my French cookbooks and didn’t find much to help me. Then I pulled out Dorie Greenspan’s Around My French Table: More Than 300 Recipes from My Home to Yours. Sure enough, she had several recipes and she told the same story I did above – about the Sunday chicken supper. She offers about 3-4 recipes for chicken done whole in either a ceramic pot (like I was using) or in a cast iron covered pan. One was made with Armagnac. Another was for lazy people, she said. It used a nice piece of bread set on the bottom underneath the bird, and that bread is her reward that she eats when the chicken is just done. That one used a whole head of garlic and was roasted dry. Yet another is called “hurry-up-and-wait roast chicken” – it’s roasted half the time on one side, turned over and roasted some more, and once removed from the oven you must impale the bird on something to allow the juices to gravitate to the breast. That sounded like too much trouble that evening since I was late starting dinner. But I do know, now, where to go for inspiration for more whole bird recipes to do in my pottery pot.

Here below is the chicken before baking. chicken_in_a_pot_beforeThis recipe is loosely based on a recipe by the same name in Dorie’s group. It called for preserved lemon. I don’t have any of that, so I just improvised with several things in this recipe. I was ever-so pleased with the results. I had an orange-fleshed sweet potato, a Russet potato, some organic carrots, shallots, mushrooms, garlic and the fresh herbs (rosemary, thyme and parsley) in our kitchen garden. There above you can see the chickie in the pot – turned sideways. I’d browned her on several sides in a nonstick skillet first so she wouldn’t be pale. I nestled all the veggies and aromatics around the bird, added chicken broth and vermouth and on went the lid and it baked in a 450° oven for 55 minutes. I’m glad to know that the ceramic pot can withstand that kind of heat. In my naïveté, I’d have never thought to roast the chicken that hot – I’d probably have used my usual 350° oven. But  it was superb.

chicken_in_a_pot_bakedAt right you can see the finished chicken. Not much difference in appearance, huh? The juices in the bottom were SO flavorful, so that’s why I served a piece of bread with it. Ideally it should have been toasted, but it was already 7:30 when I got dinner on the table, so I waived the need to toast. We dipped pieces of the bread in the juice in our individual bowls. I served the left overs in the same way. I’d removed all the chicken meat from the carcass and just piled a mixture of everything into the same bowls. It was just as good the 2nd time around.

What’s GOOD: every single, solitary thing about this was wonderful, including the soft morsels of garlic. There’s nothing quite like a eating a naturally-grown chicken with lots of simple ingredients.
What’s NOT: can’t think of a thing!

printer-friendly PDF – created using Cute PDF Writer, not Adobe
MasterCook 5+ import file – right click to save (remember where), run MC, File|Import

* Exported from MasterCook *

Chicken in a Pot

Recipe By: My own concoction, but very loosely based on a recipe in Around My French Table by Dorie Greenspan
Serving Size: 4

2 tablespoons grapeseed oil
More oil for rubbing on the bird
3 1/2 pounds chicken
2 whole carrots — cut in chunks
1 stalk celery — halved
4 large shallots — peeled
1 whole Russet potato — peeled, large chunks
1 whole yam — peeled, cut in large chunks
1 1/2 cups crimini mushrooms — left whole, cleaned
8 whole garlic cloves — peeled, left whole
1 whole lemon — cut in thirds, seeded
1 cup chicken broth
1/3 cup vermouth
1 sprig fresh rosemary — about 6″ long
2 sprigs fresh thyme
6 sprigs parsley

1. In a large nonstick skillet heat oil over medium-high heat. Using your hands, rub more oil on all the surfaces of the chicken (washed and paper towel dried first). Place chicken in the pan and brown on as many surfaces as you are able to, using a set of tongs to help hold the chicken in place. The more golden brown you can make the chicken at this phase, the nicer it will look when served.
2. Use a large lidded ceramic dish or clay cooker and place the chicken in the middle. Ideally the dish will be just big enough to hold all the ingredients. Place one chunk of lemon in the chicken cavity. Add all the vegetables, garlic, shallots, lemon around the outside of the bird. Nestle the fresh herbs all over the top. Pour the chicken broth and wine down the side (not on the chicken).
3. Cover the pot and bake for 55 minutes. Remove from oven and allow to cool for 5 minutes. Remove lid and remove the herbs (discard). Remove chicken to a carving board and cut serving pieces or slices and place in heated bowls. Discard the 2 lemon chunks and discard. Divide vegetables (including garlic) into bowls and spoon at least 1/4 cup of the juices into each bowl. Serve with a slice of toasted baguette (or two) to dip into the juices in the bowl.
Per Serving (the recipe assumes you eat all the fat, so that’s why the calorie and fat content are so high): 867 Calories; 53g Fat (56.6% calories from fat); 57g Protein; 34g Carbohydrate; 7g Dietary Fiber; 261mg Cholesterol; 479mg Sodium.

Posted in Miscellaneous, on May 17th, 2013.

peperonata_russ_parsons

Peperonata is a sauce. Or a kind of relish. Not exactly a condiment, but surely it could be. You could even eat it plain with a piece of toast – or as an appetizer on baguette slices you’ve toasted. It means “stewed sweet peppers,” and that’s exactly what it is. Note the tiny basil and parsley flecks in the sauce.

Last week I promised I’d give you a recipe from my write-up about bell peppers, and some other recipes that were at the forefront of my mind took first place. And, truth be told, I think I liked the scones and tea sandwiches better than I liked this bell pepper dish. Not that it wasn’t good – it was – but it wasn’t great. And yet, some people might think this was terrific. If you’re a lover of bell peppers, you might just think this was the cat’s meow. The taste is gentle – nothing about it pushes the taste envelope – and sometimes that’s a good thing. When you want to have some vegetables, or in my case I wanted a sauce to serve on these stuffed eggplant things, well, this might be the right thing. Last time I served these (they’re a ready-made product from Personal Gourmet) I made a creamy tomato sauce. This time I wanted something altogether different.

The recipe came from the book I told you about when I wrote up the essay about bell peppers, How to Pick a Peach by Russ Parsons. The recipe is also available online at the Los Angeles Times. He got this recipe from a book called Honey from a Weed: Fasting and Feasting in Tuscany, Catalonia, the Cyclades and Apulia by Patience Gray. Parsons recommended that of the 4 recipes included in the book, his favorite was tuna-stuffed peppers. But they were meant as an appetizer, finger food actually, and it just didn’t appeal to me. I had all the ingredients for the peperonata, so I went with it.

It was quite easy to make – the onions were gently sautéed in olive oil, then you add some chopped peperonata_pestotomatoes (not a lot), the roasted and peeled peppers and a roasted jalapeno. A bit of red wine and that cooks a short time and then you add a kind of basil-parsley pesto (pictured at left) – it contains garlic, basil and parsley only. That cooks a really short time and it’s done.

You can eat it hot, room temp or cold. In the finished picture at the top, you can see the flecks of basil or parsley on the peppers. The green mixture kind of muddies the color, I thought, but it’s the flavor that’s important, ya’ know? The color contrast of the peppers with the pesto (above) was so pretty. Then it was gone . . . once I stirred it in.

What’s GOOD: it’s easy. It’s tasty, although not off the charts – at least not my charts. It’s versatile – it could be mixed with pasta too.
What’s NOT: only that it wasn’t a “wow.” But if you like more subtle flavors, have a bunch of bell peppers to use, this mixture works!

printer-friendly PDF – created using Cute PDF Writer, not Adobe
MasterCook 5+ import file – right click to save (remember where), run MC, File|Import

* Exported from MasterCook *

Peperonata

Recipe By: From Patience Gray’s Honey from a Weed (also online at Los Angeles Times)
Serving Size: 6

5 tablespoons olive oil
1 onion — sliced
3/4 cup chopped tomatoes — seeded
5 bell peppers — preferably a mixture of red and yellow, roasted, peeled and seeded, cut into bite-size pieces
3/4 cup red wine
Salt
1/2 jalapeno pepper — roasted, peeled and seeded
2 cloves garlic
1 cup fresh basil leaves — chopped
1/4 cup chopped parsley

Note: This makes a lot – make a half recipe and you’ll probably have plenty!
1. Warm 2 tablespoons of olive oil in a large skillet over medium heat. Add the onion and cook until it softens, about 5 minutes. Add the tomatoes and bell peppers and cook briefly. Add the red wine and 1/2 teaspoon of salt. Cover and cook, stirring occasionally, about 10 minutes. Remove the lid and continue cooking, stirring occasionally, another 10 to 15 minutes. Check frequently toward the end, as the peppers will want to stick to the bottom of the pan.
2. Meanwhile, pound the jalapeno and garlic into a paste in a mortar with another 1/2 teaspoon of salt. Add the basil and parsley; pound to a paste. Add 3 tablespoons of the oil and stir, grinding more with the pestle. The sauce should have a rather loose consistency, somewhat more liquid than pesto. [I did this with some difficulty in a blender – had to add a little more oil to get the mixture going.]
3. Stir the sauce into the peppers, taste for salt and heat through, 2 minutes. This is good hot, cold or anywhere in between.
Per Serving: 163 Calories; 12g Fat (69.0% calories from fat); 2g Protein; 10g Carbohydrate; 3g Dietary Fiber; 0mg Cholesterol; 25mg Sodium.

Posted in Desserts, on May 15th, 2013.

almond_cake_lemon_creme_fraiche

A hearty cake with some polenta and a food-processor-made almond meal. The topping has a lemon syrup poured over and it’s allowed to soak in, then you put on a crème fraiche glaze. Do serve with some whipped cream or ice cream – it needs it.

This recipe came from a cooking class with Tarla Fallgatter. It’s a recipe she found at Food & Wine last year. Since I get that magazine, I guess I breezed on by it. The cake is not your typical light-as-a-feather style – this is a more rustic version since it contains not only almond meal (that you make yourself – do not use purchased almond meal) but also polenta or cornmeal.

almond_polenta_cake_topThere are several steps to making this, but it’s not difficult. Hopefully you have a stand mixer, as the sugar and egg mixture needs to mix for about 10 minutes or so – until they attain a ribbony texture. Raw almonds are pulsed to a small mince with the polenta in the food processor. You definitely do NOT want almond meal – that’s too fine – this is a rustic cake with some definite tooth-bite to it. The dry ingredients are added in and the cake is baked in a 10-inch springform pan. While it’s baking you make a lemon sugar syrup – nothing more than a simple syrup with lemon juice in it and it’s poured over the hot cake – while it’s still in the springform pan – that way the sugar syrup will soak down into the cake. Once it’s cooled, you remove the pan and frost with the crème fraiche glaze. (It has lemon juice in it too.) That’s it. Tarla sprinkled candied violets over the top, but that’s purely optional.


almond_polenta_cake_side_whole

What’s GOOD: the different texture – this isn’t a layer cake kind of dessert. Expect some chew to it and it’s not overly moist either. That’s why it needs to be served with something else like whipped cream or ice cream, and definitely some sugared berries or juicy stone fruit. Really delicious flavor, though.Worth making.
What’s NOT: really nothing – it does take some time and effort to make, though. None of the steps are daunting, however.

printer-friendly PDF – created using Cute PDF Writer, not Adobe
MasterCook 5+ import file – right click to save (remember where), run MC, File|Import

* Exported from MasterCook *

Almond Cake with Lemon and Crème Fraîche Glaze

Recipe By: From Tarla Fallgatter, cooking instructor, 2013 (originally from Food & Wine, 2012)
Serving Size: 10

CAKE:
1 stick unsalted butter — melted and cooled, plus more for the pan
1 cup almonds — whole, unsalted
1 1/3 cups all-purpose flour
1/2 cup polenta — or cornmeal
1 tablespoon baking powder
Finely grated zest of 1 lemon
1/2 teaspoon salt
4 large eggs — at room temperature
1/2 cup granulated sugar
3/4 cup crème fraîche
SYRUP:
1/2 cup water
1/2 cup granulated sugar
1 tablespoon fresh lemon juice
GLAZE:
1/2 cup powdered sugar
3 tablespoons crème fraîche
1 tablespoon fresh lemon juice

1. CAKE: Preheat the oven to 350°. Butter a 10-inch springform pan.
2. Spread the almonds on a rimmed baking sheet and bake for about 4 minutes, until they are slightly fragrant. Let the almonds cool completely. In a food processor combine the almonds and cornmeal. Coarsely chop them – pulse the mixture until the almonds are finely ground but not pasty.
3. In a large bowl, whisk together the ground almond mixture, flour, baking powder, rosemary, lemon zest and salt. In the bowl of a standing electric mixer fitted with the whisk, combine the eggs and sugar and beat at medium-high speed until tripled in volume, 10 minutes, or until it’s ribbony in texture. With the mixer at low speed, add the crème fraîche, then drizzle in the melted butter just until incorporated. Using a rubber spatula, gently fold the egg mixture into the dry ingredients in 3 batches. Scrape the batter into the prepared pan and bake for about 30 minutes, until a paring knife inserted in the center of the cake comes out clean.
4. SYRUP: While the cake is baking prepare syrup. In a small saucepan, combine the water, sugar and lemon juice and boil for 3 minutes. Let cool.
5. Set the hot cake on a rimmed baking sheet and pour the syrup evenly over it. Let the cake cool completely. Remove the side and bottom of the pan and transfer the almond cake to a platter.
6. GLAZE: In a medium bowl, whisk together the confectioners’ sugar, crème fraîche and lemon juice until smooth. Spread the glaze all over the top of the cake. Let stand until the glaze sets slightly, then cut into wedges and serve.
7. Ideally, serve this with some sugared fresh fruit that has marinated for half an hour or so – like strawberries or peaches so they make a syrup. Since the cake is a bit on the dry side, you’ll enjoy the moisture from the fruit.
Per Serving: 469 Calories; 25g Fat (47.5% calories from fat); 9g Protein; 54g Carbohydrate; 3g Dietary Fiber; 130mg Cholesterol; 295mg Sodium.

Posted in Breads, Brunch, on May 13th, 2013.

lavender_white_choc_chip_scones

The scones we made for the tea – apricot orange on the left, and the favorite, lavender white chocolate chip on the right.

Today you’re going to get 2 recipes – for both scones Sara and I made for her tea recently. They were easy and totally different. The lavender ones used heavy cream as the fat (mostly) and the apricot ones used butter and buttermilk. Both were good, but everyone seemed to favor the lavender white chocolate chip ones over the apricot. Maybe because the texture was slightly different – they were a bit more moist – in fact the batter was really wet when Sara scooped them onto the cookie sheet. It’s hard to tell from the photo but the apricot ones were actually cut in rounds, while the lavender ones were drop scones and they spread some as they baked.

If you happen to have lavender in your garden, do harvest and dry some (providing you don’t use any pesticide on it – you’d not want to be eating that!). If not, you can buy Culinary French Lavender (1 oz) online. Lavender buds don’t keep fresh and vibrant tasting for all that long, so I’d recommend you use whatever you buy within 6 months or so. If you buy any online, unless you use it a lot, I’d buy the smallest quantity available. The one linked above offers free shipping – that’s nice since herbs don’t weigh all that much in small quantities!

The lavender scones came from an article in the San Diego Union Tribune. The recipe is from a bakery in San Diego called Cups. The buttermilk scone recipe came from a very old cook book of Sara’s, a Sunset Breakfast & Brunch cookbook (out of print). She mentioned that it’s her favorite go-to scone recipe and has been for years. I should compare it to my favorite go-to Buttermilk Scones recipe that I’ve been making for about 25 years or so.

Lavender Scone printer friendly PDF
Lavender Scone MasterCook 5+ file

* Exported from MasterCook *

Lavender White Chocolate Chip Scones

Recipe By: Adapted very slightly from Cups, a San Diego bakery
Serving Size: 12 (I think it made more than 12)

2 1/2 cups all-purpose flour
2 tablespoons baking powder
2 tablespoons sugar
1 teaspoon sea salt
2 teaspoons culinary lavender buds
1 cup white chocolate chips — or chunks
1 cup unsalted butter — cut into cubes and chilled
1 1/4 cups heavy whipping cream — chilled
TOPPING:
1 egg — beaten
1 cup turbinado sugar — (unprocessed sugar such as Sugar in the Raw)
1 teaspoon culinary lavender buds

1. Preheat oven to 400°.
2. Sift flour, baking powder, sugar and salt into a medium-sized bowl. Work the butter cubes into the dry ingredients with a pastry cutter (or you can use two knives) until it resembles loose crumbs. Add lavender buds and chocolate chips.
3. With a spoon, gently mix in the cream until just incorporated.
4. Pat the dough with your hands, forming a 7-inch circle. Cut into 6 to 8 wedges for traditional, triangular-shaped scones, or cut rounds with a 2-inch cutter for flat, round scones. (You can also scoop dough with an ice cream scoop to get nice, rounded scones; that’s the method used at Cups. This latter is the method we used – the dough was very soft and loose, so the scones were flatter – but they were incredibly moist and soft.)
5. TOPPING: Mix sugar and lavender buds together, and place in airtight jar for one week before using.
6. Place the scones on a parchment or Silpat-lined cookie sheet, glaze with egg mixture and top with lavender sugar for a crunchy top.
7. Bake scones for 12 to 15 minutes; take them out of oven just as the tops begin to turn golden.
Per Serving: 498 Calories; 30g Fat (54.9% calories from fat); 5g Protein; 51g Carbohydrate; 1g Dietary Fiber; 93mg Cholesterol; 445mg Sodium.

. . .

Apricot Scone printer friendly PDF
Apricot Scone MasterCook 5+ file

* Exported from MasterCook *

Buttermilk Scones with Apricots and Orange Zest

Recipe By: Adapted slightly from Sunset, Breakfast & Brunch
Serving Size: 18

3 cups all-purpose flour
3/4 cup cold butter — cut in small bits [1 1/2 cubes]
1/3 cup sugar
3/4 cup dried apricots — finely chopped, or dates or currants [in original recipe]
1/2 teaspoon baking soda
2 teaspoons grated orange peel — [original recipe used 1 teaspoon]
2 1/2 teaspoons baking powder
1 cup buttermilk
3/4 teaspoon salt
TOPPING:
1 tablespoon half and half
1/4 teaspoon ground cinnamon
2 tablespoons sugar

1. Preheat oven to 425°. In a large bowl, stir together flour, sugar, baking powder, soda and salt.
2. Using a pastry blender, cut butter into flour mixture until it resembles coarse cornmeal; stir in dried fruit and orange peel.
3. Make a well in the center of the mixture; add buttermilk all at once.
4. Stir with fork until dough cleans the sides of the bowl. Gather dough into a ball, and turn out onto a floured surface. Roll or pat into a 1/2 inch-thick circle. Cut out shapes using a 2 ½ inch cookie cutter.
5. Using a pastry brush, brush tops with cream and sprinkle with cinnamon sugar.
6. Bake for 12 minutes or until lightly browned.
Per Serving: 183 Calories; 8g Fat (39.3% calories from fat); 3g Protein; 25g Carbohydrate; 1g Dietary Fiber; 21mg Cholesterol; 285mg Sodium.

Posted in Breads, Vegetarian, on May 11th, 2013.

cucumber_sandiwiches

Well. There are tea sandwiches, and then there are THESE tea sandwiches. Oh gosh were they delicious. As I’m writing this – and it’s breakfast time this moment – I’d eat these for breakfast if I had any of them!

Our daughter Sara decided to throw a tea for a group of her girlfriends. Her rule: no children allowed – it was going to be a time for her friends, all busy moms – to sit and relax. Since we were driving there to visit them that evening, she asked if I’d come early. Of course! I’m always up for tea! At home, I made two kinds of cookies to help her – the Baked Cinnamon Toasts I’ve already raved about here and the Moravian Sugar Cookies, although my recipe calls them Almond Spice Wafers. I also made lemon curd, and couldn’t believe it when we got all done and realized we’d forgotten to put it out! Oh, so sad. Sara made the middle cookies you can see below, rich chocolate shortbread kind of cookies pillowed with a chewy caramel layer. cookies_for_teaSara made 2 kinds of tea – a rooibos, which is her day to day favorite decaf tea, and a pot of Earl Grey. She also put out some gorgeous spring strawberries, sugar, milk, teacups and saucers, some crème fraiche that I sweetened with a little bit of sugar (this was in lieu of clotted cream), and napkins, of course.

The COOKIES: Baked Cinnamon Toasts are on the left, Sara’s chocolate caramel filled cookies in the middle and the Almond Spice Wafers on the right. Sara thought the Cinnamon  Toasts were the hit of the cookie category. I agree. I had about 5-6 of them I kept at home and within a day they were gone – even my DH, who rarely eats anything sweet – gobbled down 2-3 of them. Guess I’ll have to make them again.

I’ll write up a post in the next day or so with the two scones we made. One an apricot-orange and the star of the show, a lavender white chocolate chip.

The winner of the tea sandwich category at Sara’s tea was this cucumber one. I mean, what would a ladies’ tea be without some cucumber sandwiches? Sara found some tea sandwich suggestions at this website. For this sandwich it said:  Cucumber-Butter – Mix 4 tablespoons softened butter, 1/2 teaspoon grated lemon zest and 1 tablespoon chopped fresh herbs. Spread on white bread and sandwich with sliced cucumber. Trim the crusts and cut into pieces.   We were making 5 whole sandwiches (which made 4 little quarters each), so we had 20 of each sandwich we made. I added minced chives, lemon zest, some salt and a teaspoon or so of fresh minced thyme leaves. I used 1 cube of butter for the 5 sandwiches and it was just enough.

Over the years, I’ve learned that you need to get just the right proportion of filling to bread.

Tea Sandwich Advice:

Make one tiny test sandwich with the filling and taste to see if it’s too bready, or too buttery or has too much filling. Adjust and taste again until you get it just right!

So in this case, with our first taste test, there wasn’t enough butter. The butter needed salt too. And the cucumber wasn’t quite thick enough. Obviously start with very soft butter, add the flavorings and taste. Cut off the crusts on the bread. We chose not to make round cutouts (too much trouble), so I generously buttered both sides of the bread and placed 4 cucumber rounds on each sandwich. We chose to cut just one slice rather than use many ultra-thin slices as I knew the multiple slices would slip and the sandwich would come apart from the moisture in the cucumbers. So one slice – in our case the cucumber was about 1/8 inch+ thick. The bread used was some very, very soft white sandwich bread we bought here in our local village at a Japanese bakery called Cream Pan. They make the softest and fluffiest white sandwich bread. Kind of like Weber’s bread, but a whole lot more tasty. With the cucumber in place the other bread slice was very carefully positioned, then I gently – oh so gently – cut the sandwich into 4 squares, trying not to cut into any of the cucumbers.

The sandwiches went onto a nice serving tray and Sara covered the platter with a dampened tea towel, which kept them very fresh for the hour prior to the start of the tea. We didn’t refrigerate them – but there wasn’t anything like mayo in anything, so that worked just fine.

prosciutto_pea_puree_sandwichesThe other tea sandwich was just okay. I probably wouldn’t make them again, but it was certainly different. Sara really wanted sandwiches containing some prosciutto, so the website suggestion said: Pea-Prosciutto: puree 1/2 cup thawed frozen peas with 1 tablespoon each olive oil and water in a blender; season with salt and pepper. Spread inside a split loaf of focaccia and fill with prosciutto and shaved parmesan. Cut into squares. 

My suggestion had been to use ham instead of prosciutto, but Sara really wanted the prosciutto, so I bought some imported less-salty prosciutto from our local Italian deli. Sara made the pea puree, which was cinchy easy. I spread the bread with the pea puree, then we took small strips of the prosciutto and layered about 3 ultra-thin slices on each sandwich, added some shaved Parmigiano-Reggiano (very thin). My other suggestion to Sara had been that we chop up the prosciutto instead of laying it in strips (ribbons, really) in the sandwich, but Sara wanted to SEE the prosciutto. Cutting this sandwich was more of a challenge because of the grain of the meat, cut the long way it was easy, but across the prosciutto grain was difficult. For sure use a serrated knife, like a bread knife and use a gentle repetitive sawing motion. Even she agreed later that it would have been easier to eat if we’d chopped it up. Prosciutto has a tendency to be kind of stringy – very do-able if you’re eating a slice out of hand, but not so easy when it pulls apart a dainty tea sandwich! But overall, we were unimpressed with this sandwich. It needed something moist in it – like a thin-thin slice of tomato maybe, or lettuce? And I think I would have added some mayo to the pea puree. I don’t think anybody went back for seconds on this sandwich, but that’s mostly because the cucumber one was SO delicious.

What’s GOOD: well, the herb butter just “made” the sandwich, I think. And the combo of the so very soft thin white bread [it was so perfect for this . . . too bad white bread isn’t all that healthy!] with the crispy cucumber slice, and the lemon zest. It was all just fantastic!
What’s NOT: nothing at all – just know you can’t make this very far in advance – an hour or so. Enlist someone’s help with it so if you’re the hostess you can be doing other things like stirring up scones and boiling water for the tea, setting the table, etc.

printer-friendly PDF – created using Cute PDF Writer, not Adobe
MasterCook 5+ import file – right click to save file (remember where), run MC, File|Import

* Exported from MasterCook *

Cucumber Herb-Butter Tea Sandwiches

Recipe By: foodnetwork.com
Serving Size: 10
Description: Makes 20 small quarter-sandwiches.

10 slices sandwich bread — (very fresh)
1/2 cup unsalted butter — softened to room temp
1 1/2 tablespoons fresh chives — finely minced
2 teaspoons fresh thyme — finely minced
1 teaspoon fresh lemon zest
Salt to taste
20 slices cucumber — cut slightly more than 1/8″ thick

NOTES: Advice – make one small sandwich to get the proportion of butter- to bread – to cucumber, until it tastes right.
1. In a small bowl combine the butter, chives, thyme, lemon zest and salt. If time permits, allow this to sit for 2-3 hours (or overnight) to blend flavors.
2. Cut crusts off the bread. Working on one sandwich at a time (to keep the bread ultra fresh) spread a generous amount of the herb butter on one side of each piece of bread.
3. Place 4 cucumber slices on the sandwich, separated and not overlapping. Place second piece of bread over and very gently slice the sandwich into 4 small squares.
4. Place sandwiches on a serving platter and cover with a moderately damp tea towel for up to about an hour. Re-dampen the towel if it dries out too much.
Per Serving: 230 Calories; 11g Fat (40.1% calories from fat); 6g Protein; 31g Carbohydrate; 5g Dietary Fiber; 25mg Cholesterol; 163mg Sodium.

Posted in Essays, on May 9th, 2013.

peppers_mixed

If you’re not all that interested in knowing more about bell peppers, well, I understand. Come back in a couple of days and there will be a recipe up again on the blog. The “food scientist” in me wants more info sometimes, just better knowledge about the food products I buy, even if they’re something I’ve been purchasing for decades.

Prior to about 1980, there was only one kind of bell pepper available – GREEN. Which is why I didn’t like them much. My Dad loved stuffed green peppers (filled with a ground beef and rice mixture and served with tomato sauce). I thought these were vile – I could eat the filling, but the pepper part was bitter, acidic. That stuffed pepper style was very popular during the 1950-70 time frame.

Somewhere around 1960 shoppers were offered a choice of colors –  and bell pepper sales soared. I do remember when they first began appearing in grocery stores – the ones from Holland. But oh, were they ever expensive – way beyond my food budget. In the 30 years after that our per capita consumption of bell peppers quadrupled. According to the USDA, on any given day, about a quarter of Americans were eating some amount of a bell pepper, which is double the amount we’d eat of a French fry. Well, that’s a good thing! The same percentage increase occurred with chile peppers too, although it’s leveled off in the last 20 years. All the credit is due to the Dutch, who figured out how to outsmart nature. You probably already know this – all peppers start out green, and it’s only because they are left on the bush or vine that the colors develop.

Why do Bell Peppers Turn Color?

The scientific explanation – as fruits begin to mature and develop sugar, the sweetness alters their chemical makeup and the chlorophyll start to break apart, which then permits the underlying colors to develop.

Because peppers are a very tender product, they’re very susceptible to bugs and viruses (who knew? viruses? really?). Only very careful farming can produce a fully ripe and colored bell pepper without it developing blemishes and soft spots. Holland’s farmers raise all of theirs in greenhouses, which is why they’re so pristine (and expensive).

Our taste buds really only recognize two tastes in peppers – sweet or hot. Well, I’ll add a 3rd one – bitter, which is what is in green bells – to me, anyway. There are 22 wild varieties of peppers out there and 5 domesticated ones. Most peppers are grown in California and Florida. Chile peppers mostly come from Mexico, where there are at least 3 varieties that grace nearly every Mexican family’s table with regularity. I’m guessing those are: jalapeno, serrano, and poblano. We can find those at our grocery stores every day here in Southern California.

bellpepper2What makes a chile pepper hot is capsaisin (cap-SAY-eh-sun), and if you remember nothing else from this little write-up, the heat in peppers comes MOSTLY from the ribs. Not the seeds. That’s not to say that if you bite into a piece of the green of a jalapeno, you won’t taste heat – you will, but the real heat is in the little whitish/yellowish rib membrane inside the pepper. Remove those and you’ll have a much milder pepper experience. Unless, of course, you WANT the heat, in which case leave it in! Different peppers contain different concentrations of capsaicin (like habanero, the hottest, to the bell pepper which has the least) . And the heat is caused by a recessive gene. That was news to me! What’s interesting is that the heat in chiles can vary not only by variety, but also from peppers on the same bush. Little Japanese shishito peppers (at left) are the most variable – about one in every dozen will be hot enough to blow off the top of your head. Figuratively, of course.

CHOOSING PEPPERS: With the bell peppers, choose the heaviest ones, the ones that are the most filled out and the darkest in color. They’re the sweetest. The recommendation is to choose the peppers that have the boxiest shape with the flattest sides. And obviously, don’t buy one that has a blemish or a soft spot anywhere. Chile peppers should be average size and also unblemished and definitely firm. No soft ones at all.  The best prices on all peppers is in the mid-summer when they are available in abundance.

STORING PEPPERS: They’ll keep best if wrapped well and stored in the refrigerator at about 45°. That’s the temp of most refrigerators. No colder than that, though, or the peppers will start to break down.

Nearly all this information came from Russ Parsons’ book How to Pick a Peach: The Search for Flavor from Farm to Table.

Peppers for Cold Meat – my favorite recipe you’ll find here on my blog that showcases bell peppers – it’s a sweet and sour kind of relish that’s just a match made in heaven for almost any kind of meat. It’s easy to make and keeps for weeks and weeks.

Posted in Salads, on May 7th, 2013.

roasted_beet_salad_feta_hazelnuts

There isn’t a single thing in this salad that I didn’t just l-o-v-e. Freshly roasted beets, mildly salted Feta cheese, quinoa, arugula (or fresh greens), roasted hazelnuts and a just a little bit sweet pear vinegar dressing. Oh yum!

If you want to try a different kind of salad – this one with quinoa (a high protein grain) and fresh roasted beets – is worth making. Oh gosh, it was really nice.

Toasted Hazelnuts:

Sometimes you can buy them already skinned and toasted. If not, toast in a 350° oven for 10-15 minutes, stirring once or twice until golden brown. Remove, cool a minute or two then wrap them in a tea towel, wind it up firmly and rub on a countertop or in your hands (just make sure the edge doesn’t come loose) and most of the skins will come off.

The Bulgarian Feta is less salty than some, so you can eat slightly bigger chunks of it in a salad. Seek it out, if you have sources for something other than the usual high sodium Feta. You do need to toast the hazelnuts (they’re so much better if you toast them), and if they still have the skins on them, rub vigorously with a terrycloth towel after you toast them and most of the skins will come off. I can never get all the skin off, but enough so the nuts don’t have an overall bitter taste.

beets_in_foilIn all the years of cooking beets, I’ve never done them this way, the way Tarla Fallgatter made them at the cooking class. She bought beets all of about the same size (making for more even baking) and cut off all but about 2” of the stems on each one – leaving the tail on them too – if you cut the tail, the beet will bleed a lot more of its juices – same with cutting off the tops. Anyway, each beet is wrapped separately in foil, sealed up fairly well and placed in a RIMMED baking sheet or casserole dish. Something that’s just a little bit bigger than the beets are.  It may be hard to see – but those are about 5 separate foil packets, standing upright. Tarla strongly believes that beets roasted this way have a much more intense flavor – sweeter – and with a better texture. She’s a graduate of the Cordon Bleu School in Paris, so she ought to know!

Once baked, you need to open them up so they’ll cool a bit, then remove the skin, root end and stems. Allow to cool a bit more if they’re still hot. Wear a pair of plastic gloves if you’d prefer not to get your hands and fingernails purple for the rest of the day.

While the beets roast, work on the quinoa. This was a new way of preparing quinoa too – Tarla toasted the dry quinoa in a skillet for 2-3 minutes until the tiny grains were lightly toasted. They actually began to pop a little in the pan (like spices do); then you add the chicken stock and simmer covered for 15 minutes or so, or until they’re just tender.

The dressing is very simple – pear vinegar and sherry vinegar, honey mustard, olive oil and seasonings. The greens or arugula are tossed with some of the dressing, the beets (quartered) are tossed with a bit of the dressing (in a separate bowl), the cheese is cut up in cubes and when you add the quinoa, the quinoa sticks to the cheese – I thought it made a really beautiful looking salad. It’s easier to add the beets on top – that way each person will get an equal amount of beets.

What’s GOOD: every single thing about it – tasty, pretty, healthy. Worth making.
What’s NOT: just that it does take a bit of time to make everything (about an hour for the beets, 15 minutes or so for the quinoa, 10-15 for the hazelnuts. But I think you’ll hear raves.

printer-friendly PDF (created using Cute PDF Writer, not Adobe)
MasterCook 5+ import file – right click to save file (remember where), run MC, File|Import

* Exported from MasterCook *

Roasted Beet and Quinoa Salad

Recipe By: From Tarla Fallgatter, cooking instructor, 2013
Serving Size: 6

4 medium beets — tops cut, but 2″ of stems remaining
1/2 cup red quinoa
1 cup chicken stock
3 cups salad greens — or arugula
1/2 cup hazelnuts — roasted, skin rubbed off, coarsely chopped
4 ounces Feta cheese — Bulgarian preferred, or other lower-salt type
VINAIGRETTE:
3 tablespoons pear vinegar
1 tablespoon sherry vinegar
2 teaspoons honey mustard
6 tablespoons olive oil
Salt and pepper to taste

1. Preheat oven to 350°. Wrap each beet individually in foil, stems up. Place on a rimmed cookie sheet or baking dish and bake until tender, about 50 minutes. Test with sharp point of a knife to make sure beets are tender. Unwrap beets and allow to cool for 10-15 minutes, then rub the skin off the beets. Cut into wedges.
2. Saute quinoa for 2-3 minutes in a dry skillet, until they’re lightly toasted. They will begin to pop and jump around in the pan. Add chicken stock and bring mixture to a simmer. Cover and cook over very low heat for 15 minutes, or until quinoa is tender. Drain off any excess liquid.
3. In a small bowl or jar combine the dressing ingredients and shake to combine.
4. Toss the greens with some of the vinaigrette until coated. Add the quinoa and toss again. Add hazelnuts and cubed Feta, tossing very lightly. The quinoa will stick to the Feta.
5. Drizzle more of the dressing on the wedged beets. Spoon salad mixture onto individual plates and add beets on top.
Per Serving: 331 Calories; 26g Fat (68.4% calories from fat); 8g Protein; 19g Carbohydrate; 4g Dietary Fiber; 17mg Cholesterol; 640mg Sodium.

Related Posts Plugin for WordPress, Blogger...