Get new posts by email:

Archives

Currently Reading

Here are the tastingspoons players. I’m in the middle (Carolyn). Daughter Sara on the right, and daughter-in-law Karen on the left. I started the blog in 2007, as a way to share recipes with my family. I’m still doing 99% of the blogging and holding out hope that these two lovely and excellent cooks will participate. They both lead very busy lives, so we’ll see.

– – – – – – – – – – – – – – – – – – – – – –

BOOK READING (from Carolyn):

Music of Bees, Eileen Garvin. Absolutely charming book about a woman in midlife, lonely, who raises bees, also makes unlikely friends. Heart-warming and very interesting about beekeeping.

A Postcard from Paris, Alex Brown. Really cute story. Dual time line, 1940s and present day about renovating an old apartment in Paris, things discovered.

Time of the Child, Niall Williams. Oh such a good book. Very small village in Ireland, 1960s. A baby is left on the doorstep. The town all whispers and helps. I listened to an interview of the author, which made me like him and his books even more.

Sipsworth, Simon Van Booy. If you like animals you’ll swoon. An old woman who really wants to die finds a tiny mouse in her house and befriends it and finds a reason to live. Utterly charming book.

The Forger’s Spell, Edward Dolnick. True story. For seven years a no-account painter named Han van Meegeren managed to pass off his paintings as those of Johannes Vermeer.

If You Lived Here, You’d be Home by Now, Christopher Ingraham. Could hardly put it down – about a journalist who takes on a challenge to move to small town in Minnesota and write about it. He expects to hate it and the people and place, but he doesn’t. Absolutely wonderful true story.

The River We Remember, William Kent Kreuger. 1950s, Minnesota. A murder and the aftermath. Could hardly put it down. Kreuger has such a vivid imagination and writing style.

How the Lights Gets In, Joyce Maynard. An older woman returns to New Hampshire to help care for her brain-injured son. Siblings and family, lots of angst and resentments.

The Filling Station, Vanessa Miller. Every American should read this book. A novelized retelling of the Tulsa massacre in 1921. Absolutely riveting.

The Story She Left Behind, Patti Callahan Henry. Love this author. Based on a true story. A famous author simply vanishes, leaving her husband and daughter behind. She had invented a mystical language no one could translate. Present day, someone thinks he’s solved the riddle, contacts the family. Really interesting read.

The Girl from Berlin, Ronald Balson. Love anything about Tuscany. An elderly woman is being evicted from a villa there, with odd deed provenance. Two young folks go there to help unravel the mystery. Loved it.

The Island of the Colorblind, Oliver Sacks, M.D. Nonfiction. The dr is intrigued by a remote Pacific island where most of the inhabitants are colorblind. He also unravels a mystery on Guam of people born with a strange neurological problem. Medical mysteries unveiled. Very interesting.

The Bookbinder, Pip Williams. Post 1914 London. Two sisters work at a bookbindery. They’re told to not read the books. One does and one doesn’t. One has visions beyond her narrow world; the other does not. Eventually the one gets into Oxford. Lovely story.

The Paris Express, Emma Donoghue. 1895 on a train to Paris, a disaster happens. You’ll delve into the lives of many people who survived and died in the crash.

A Race to the Bottom of Crazy, Richard Grant. This is about Arizona. Author, wife and child move back to Arizona where they once lived. Part memoir, research, and reporting in a quest to understand what makes Arizona such a confounding and irresistible place.

The Scarlet Thread, Francine Rivers. A woman’s life turned upside down when she discovers the handcrafted quilt and journal of her ancestor Mary Kathryn McMurray, a young woman who was uprooted from her home only to endure harsh frontier conditions on the Oregon Trail.

A Place to Hide, Ronald Balson. 1939 Amsterdam, an ambassador has the ability to save the lives of many Jewish children. Heartwarming.

Homeseeking, Karissa Chen. Two young Chinese teens are deeply in love, but in China. Then their families are separated. Jump to current day and the two meet again in Los Angeles.

North River, Pete Hammill. He always writes such a good story. A doctor works diligently healing people from all walks of life. His wife and daughter left him years before. One day his 3-yr old grandson arrives on his doorstep.

A Very Typical Family, Sierra Godfrey. A very messed-up family. Three adult children are given a home in Santa Cruz, Calif, but only if the siblings meet up and live in the house together. A very untypical scenario but makes for lots of messes.

Three Days in June, Anne Tyler. The usual Anne Tyler grit. Family angst. This wasn’t one of my favorites, but it was entertaining and very short.

Saved, Benjamin Hall. Author is a veteran war reporter. Ukraine, 2022, he nearly loses his life to a Russian strike. Riveting story – he survives, barely.

Grey Wolf, Louise Penny. Another Inspector Gamache mystery in Quebec. She is such an incredible mystery writer.

All the Colors of the Dark, Chris Whitaker. A missing person mystery, a serial killer thriller, a love story, a unique twist on each. Could hardly put it down.

Orbital, Samantha Harvey. Winner of 2024 Booker Prize. I don’t usually like those, but I heard the author interviewed and she hooked me. This is not a normal book with a beginning, a story and an end. It’s several chapters of the day in the life of various astronauts at the ISS (Int’l Space Station). All fictional. She’s been praised by several real astronauts for “getting it” about space station everyday life.

The Blue Hour, Paula Hawkins. An island off Scotland. Inaccessible except when the tide is out. Weird goings on. An artist. A present day mystery too.

Iron Lake, William Kent Krueger. A judge is murdered and a boy is missing. Riveting mystery.

Tell the Wolves I’m Home, Carol Ricks Brunt. 1980s. A 14-yr old girl loses her beloved uncle. Yet a new friendship arises, someone she never knew about.

Four Treasures of the Sky, Jenny Zhang. 1880s, a young girl is kidnapped in China and brought to the United States. She survives with many hurdles in the path.

The Boy Who Fell out of the Sky, Ken Dornstein. Memoir, 1988. The author’s brother died in the PanAm flight that went down in Lockerbie, Scotland. A decade later he tries to solve “the riddle of his older brother’s life.”

Worse Care Scenario, T.J. Newman. Oh my. Interesting analysis of what could/might happen if a jet crashed into a nuclear plant. Un-put-downable.

Song of the Lark, Willa Cather. Complicated weave of a story about a young woman in about 1900, who has a gifted voice (singing) and about her journey to success, not without its ups and downs.

Crow Talk, Eileen Garvin. Charming story which takes place at a remote lake in Washington State, about a few people who inhabit it, the friendships made, but also revolving around the rescue of a baby crow.

The Story Collector, Evie Woods. Sweet story about some dark secrets from an area in Ireland, a bit magical, faerie life, but solving a mystery too.

A Sea of Unspoken Things, Adrienne Young. A woman investigates her twin brother’s mysterious death. She goes to a small town in California to figure it out, to figure HIM out.

The King’s Messenger, Susanna Kearsley. 1600s England, King James. About one of his trusted “messengers,” and his relationship with a young woman also of “the court.” Lots of intrigue.

In the Shadow of the Greenbrier, Emily Matchar. Interesting mystery in/around the area of the famous resort in White Sulphur Springs, West Virginia.

Isola, Allegra Goodman. Hard to describe, survival story on an island in the 1600s.

Save the Date, Allison Raskin. Rom-com, witty, LOL funny. Clever.

The Sirens, Emilia Hart. Numerous time-lines, Australia. Mysteries abound, nightmares, abandoned baby, weird allergies.

Red Clay, Charles Fancher. LOVED this book. Mostly post-Civil War story about the lives of slaves in Alabama during Reconstruction.

Stars in an Italian Sky, Jill Santopolo. Dual time line, 1946 and recent time. Love stories and a mystery.

Battle Mountain, C.J. Box. Another one of Box’s riveting mysteries. Love his descriptions of the land.

Something Beautiful Happened, Yvette Corporon. A memoir of sorts in Greece, tiny island of Erikousa, where the locals hid Jews during WWII. All elusive stories told by the author’s grandmother.

The Jackal’s Mistress, Chris Bohjalian. 1860s Virginia, about a woman who saves the life of a Union soldier. Really good story.

Song of the Magpie, Louise Mayberry. Really interesting story about Australia back in the days when it was mostly a penal colony. Gritty strength of a woman trying to thrive with her farm.

The Boomerang, Robert Bailey. A thriller that will have you gripping the book. About a lot of secrets surrounding the president (fictional novel, remember) and his chief of staff and about cancer. A cure. Such a good story.

Care and Feeding, Laurie Woolever. Really interesting memoir of a woman driven to succeed in the restaurant business. She worked for Mario Batali and then Anthony Bourdain. Gritty stories.

Everything is Tuberculosis, John Green. Maybe not a book for everyone. A real deep dive into the deadly tuberculosis infection, its history. I heard the author interviewed and found the book very interesting.

The Book Lovers Library, Madeline Martin. Fascinating read about Boots’ drug stores’ lending library. And the people who worked in them.

The Arrivals, Meg Mitchell Moore. LOL funny, about a middle-aged couple whose children (and their various family members) return to the family home and the chaos that ensues.

My Life as a Silent Movie, Jesse Lee Kercheval. About grief. A big move to Paris, finding herself a new life with a new set of real blood family.

Escape, Carolyn Jessop. Another memoir about a woman really in bondage in Utah, Mormon plural marriage.


Tasting Spoons

My blog's namesake - small, old and some very dented engraved silver plated tea spoons that belonged to my mother-in-law, and I use them to taste my food as I'm cooking.

Scroll down to the bottom to view my Blogroll

Posted in Cookies, Desserts, on June 24th, 2013.

lemon_lime_macaroon_bars

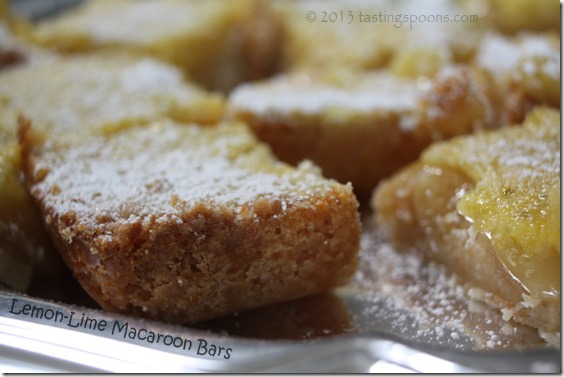
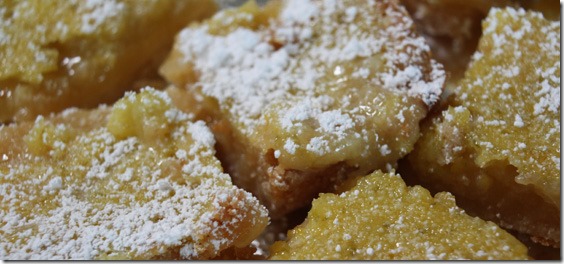
Nothing revolutionary here except these have some lime juice and zest as well as lemon. And they’re certainly citrus-potent, sweet, acidic, textural from the shortbread type base and delicate all at the same time. Worth making.

Recently I met my friend Gwen for lunch. She, who still works in the big-mad-crazy 70+ hour a week corporate world, and always has oodles of fascinating stories to share about her work life. She flies back and forth to Chicago, meets with corporate attorneys, leads meetings, does long-term strategic planning, guides her staff, smooths CEO feathers and all those kinds of things. I keep telling her she needs to write a book. One of her rare down-time activities is baking, and she makes mounds of Christmas cookies each year, so when she mentioned these lemon-lime coconut macaroon bars she’d made recently, I knew I’d want to try them.lemon_lime_bars_wide

The recipe was in a very recent Sunset Magazine. And as I mentioned above, they’re similar to many lemon bar recipes, except there is toasted coconut in the pastry/cookie base part, and the filling is loaded with lemon and lime juices and zest from both.

What’s GOOD: well, the citrus-centric flavor, of course. These are very tart and sweet and loaded with flavor. I liked the coconut addition in the pastry base – it gave a nice – and different flavor to the bars that I enjoyed. The bars are on the wet side, so the powdered sugar dissolves onto the top – at least it did for me – within 10 minutes or so. Just sprinkle the sugar on before serving.
What’s NOT: nothing, really. Easy to make.

printer-friendly PDF – created using Cute PDF Writer, not Adobe
MasterCook 5+ import file – right click to save (remember where), run MC, File|Import

* Exported from MasterCook *

Lemon-Lime Macaroon Bars

Recipe By: Stephanie Spencer, Sunset, May 2013
Serving Size: 32

CRUST:
2 cups coconut — shredded, sweetened, toasted*
1 1/2 cups flour
3/4 cup powdered sugar
2 tablespoons cornstarch
1/4 teaspoon kosher salt
1 cup cold butter — cut into chunks
FILLING:
1/4 cup flour
2 cups granulated sugar
4 large eggs
2 teaspoons lime zest
2 teaspoons lemon zest
1/4 cup lime juice
1/4 cup lemon juice
Powdered sugar (optional) for sprinkling on top

Note: I used unsweetened, organic coconut which is in smaller shreds than the traditional. I added about 1/4 cup more powdered sugar to the crust mixture to compensate. When toasting it took only 4 minutes.
1. Preheat oven to 350°. Make crust: Pulse all ingredients except butter in a food processor. Add butter and pulse until crumbly and butter is in small pieces.
2. Grease a 9- by 13-in. baking pan. Press crust into bottom and slightly up sides. Bake until light golden, 25 minutes. Let cool 20 minutes.
3. Make filling: Whisk together flour and granulated sugar in a medium bowl, then whisk in eggs and citrus zest and juice just to blend. Pour over crust and bake until only slightly jiggly in center, about 22 minutes. Let cool, chill several hours or overnight, and cut into bars. Dust with powdered sugar if you like.
*Toast coconut at 350° on a rimmed baking sheet until light golden, about 5 minutes.
Per Serving: 165 Calories; 8g Fat (43.3% calories from fat); 2g Protein; 22g Carbohydrate; 1g Dietary Fiber; 42mg Cholesterol; 83mg Sodium.

Posted in Beverages, Brunch, Desserts, on May 25th, 2013.

horchata_lua_2

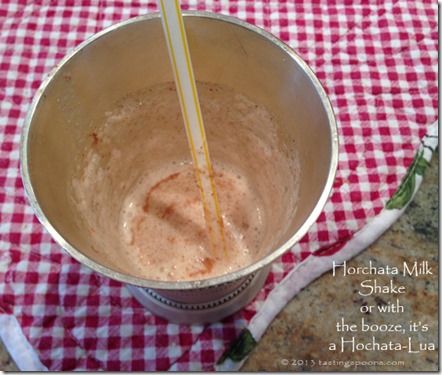
Horchata is a refreshing rice-based drink from Latin America. It’s very easy to make, and if you’re so inclined, you can add some Kahlua to it as we did. Not traditional, but oh-so good.

Recently our four-couple gourmet group got together for a brunch. What fun we had, even though it wasn’t a nice day – one of those cloudy, overcast days that we, here in Southern California, don’t understand much, except in June, when we usually  have that kind of weather for the entire month, hence we call it “June Gloom.” But it was on Cinco de Mayo (the 5th). Early May!

One of the gals brought my Tuscan Sangria with Tuaca. We had 4 different salsas with chips (2 of them you’ll see here in a few days), then our main food included a egg/chile/cheese baked dish, caramelized carnitas tacos served with hot flour tortillas, guacamole and slivers of radishes. We also had a no-bake vegetarian enchilada dish that was surprisingly good. I’ll post that too. This, our dessert, was a horchata milk shake. I’d seen the recipe in Food and Wine, and since I like horchata, this one, with ice cream, sounded more like a dessert than a beverage to serve with a meal. So that’s what I did. And most of us ended up adding some Kahlua to the drink – making it a boozy drink, but not much. Just enough to taste it.

Horchata (hor-chaatah) is an agua fresca (meaning fresh water). All agua frescas are non-alcoholic and are common refreshing drinks served all over Latin America. In many Mexican restaurants here in California anyway, they serve some type of agua frescas – either horchata or tamarindo (tamarind) or hibiscus (also a favorite of mine – have never made it, I just buy it when I see it). We visit a Saturday morning farmer’s market some miles from us, and one of the food trucks there almost always has the hibiscus agua fresca, or the tamarind one. They’re all sweet, including horchata.

Anyway, horchata is easy enough to do, but since I’d never made it before, it was all new to me, other than I knew it was rice based. First I measured out rice, added water and whole cinnamon sticks (horchata typically is a cinnamon flavored drink). That sat overnight (out on the kitchen counter, not refrigerated). You remove the cinnamon sticks (see ERRATA below), then pour the entire mixture into the blender. The rice was not cooked at all, but after it sat in liquid all night, it was softened somewhat. Nothing is heated up during the making of horchata. I turned on the blender and let it go a bit, then added in some toasted sliced almonds, sugar and cinnamon. And here’s the most difficult thing you’ll do – pour the mixture through a fine-mesh strainer. Do NOT try to push the mixture through – you want the sieve to catch whatever rice it can, although it is ground up, you understand! I poured in about a cup and just let it sit until it had drained through. I rinsed the sieve and did it again, and again. It will take a few minutes for that, but truly that’s the most time consuming thing you’ll do making horchata.

Kahlua Tip:

If you do add Kahlua to this drink, don’t use much – you still want to taste the cinnamon, banana and almond flavors.

At that point in the making I poured it into a pitcher and refrigerated it (several hours before our get-together). When I was ready to serve it I put it back in the blender, added sweetened condensed milk, the banana, vanilla ice cream and ice. I tasted it and put in a tiny bit more horchata_lua_1of the sweetened condensed milk. Truth to tell, in our drive to the hosts’ home, my pitcher, with lid, slid and some of the horchata ended up on the carpet in my car’s trunk. Ooph! I wasn’t sure how much quantity I really had left, so needed to guesstimate how much to add in. Pour into glasses, add a straw and sprinkle the top with the cinnamon sugar mixture.

OPTIONAL: I served the horchata milk shakes in silver tumblers – they’re actually mint julep cups. Some people were drinking coffee with whipped cream on top and Kahlua was on the table. One person added a little jot of Kahlua to their horchata and he made very noisy mmmmmm’s, so someone else added Kahlua, and in short order nearly everyone had added Kahlua. Knowing that horchata is really a non-alcoholic drink, I wasn’t so sure it would be a good thing! Oh, was I wrong. It was fabulous. My only caveat: don’t add too much Kahlua or it does overpower the delicacy of the cinnamon, almond and banana flavors.

ERRATA: I have to confess, I forgot to take out the cinnamon sticks after the rice had soaked overnight. I glanced at the recipe and didn’t see the instructions. I just missed it. So our horchata was a bit grainy from the ground-up cinnamon – but you know what? Everyone seemed to love it that way. They said they liked it grainy and would definitely do it that way if they made it. Well, okay then!

What’s GOOD: every little sip of it was fantastic. I’d definitely make this again, with or without the Kahlua. I didn’t mind the grainy texture from the cinnamon sticks, but that’s up to you. Traditionally, remove the cinnamon sticks! You could lighten up the recipe some by using sugar-free ice cream, or light ice cream. There’s also low-fat sweetened condensed milk in grocery stores too. This one’s a keeper.
What’s NOT: nothing. Absolutely nothing wrong with this at all!

printer-friendly PDF – created using Cute PDF Writer, not Adobe
MasterCook 5+ import file – right click to save (remember where), run MC, File|Import

* Exported from MasterCook *

Horchata Milk Shake

Recipe By: Food & Wine, May 2013
Serving Size: 4 (maybe 5)

1 cup long-grain white rice — rinsed well
3 cups water
4 medium cinnamon sticks — cracked
1/4 cup sliced almonds
1 tablespoon ground cinnamon — plus 1/4 teaspoon
1 tablespoon sugar
1/4 cup sweetened condensed milk — plus 2 tablespoons
1/2 banana — (2 ounces)
1 pint vanilla ice cream
1/2 cup ice
OPTIONAL: Kahlua to taste, about 2 tsp per serving

1. In a bowl, cover the rice with the water. Add the cinnamon sticks and let stand at room temperature for at least 3 hours or overnight; discard the cinnamon sticks.
2. Meanwhile, in a skillet, toast the almonds over moderate heat, tossing, until fragrant, 3 minutes. In a small bowl, stir 1 tablespoon of the ground cinnamon with the sugar.
3. Transfer the rice and its liquid to a blender. Add the almonds and puree for 2 minutes. Strain the horchata through a fine sieve into a bowl. Rinse out the blender.
4. Return the horchata to the blender and add the condensed milk, banana and the remaining 1/4 teaspoon of ground cinnamon and puree. Add the ice cream and ice and blend. Pour the shake into glasses, sprinkle the cinnamon sugar on top and serve.
5. OPTIONAL: Add Kahlua to each glass (about 2 tsp). Don’t overdo the Kahlua as it will overpower the delicate cinnamony flavor of the horchata.
Per Serving (this is off some because you don’t consume all the rice – some yes, all? no): 482 Calories; 15g Fat (26.0% calories from fat); 10g Protein; 83g Carbohydrate; 10g Dietary Fiber; 36mg Cholesterol; 91mg Sodium.

Posted in Desserts, on May 15th, 2013.

almond_cake_lemon_creme_fraiche

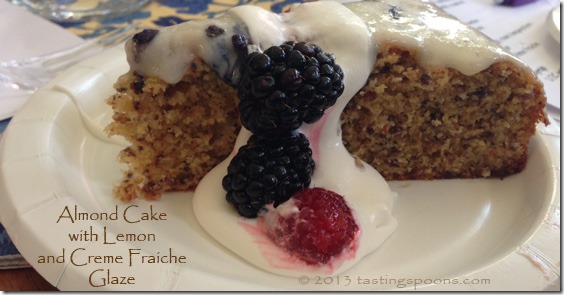
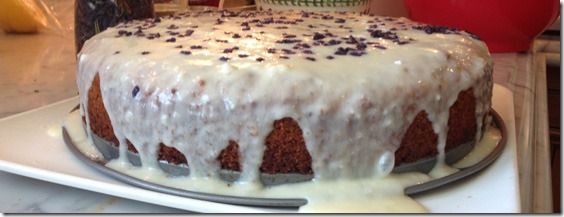
A hearty cake with some polenta and a food-processor-made almond meal. The topping has a lemon syrup poured over and it’s allowed to soak in, then you put on a crème fraiche glaze. Do serve with some whipped cream or ice cream – it needs it.

This recipe came from a cooking class with Tarla Fallgatter. It’s a recipe she found at Food & Wine last year. Since I get that magazine, I guess I breezed on by it. The cake is not your typical light-as-a-feather style – this is a more rustic version since it contains not only almond meal (that you make yourself – do not use purchased almond meal) but also polenta or cornmeal.

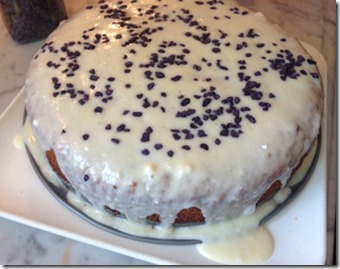
almond_polenta_cake_topThere are several steps to making this, but it’s not difficult. Hopefully you have a stand mixer, as the sugar and egg mixture needs to mix for about 10 minutes or so – until they attain a ribbony texture. Raw almonds are pulsed to a small mince with the polenta in the food processor. You definitely do NOT want almond meal – that’s too fine – this is a rustic cake with some definite tooth-bite to it. The dry ingredients are added in and the cake is baked in a 10-inch springform pan. While it’s baking you make a lemon sugar syrup – nothing more than a simple syrup with lemon juice in it and it’s poured over the hot cake – while it’s still in the springform pan – that way the sugar syrup will soak down into the cake. Once it’s cooled, you remove the pan and frost with the crème fraiche glaze. (It has lemon juice in it too.) That’s it. Tarla sprinkled candied violets over the top, but that’s purely optional.


almond_polenta_cake_side_whole

What’s GOOD: the different texture – this isn’t a layer cake kind of dessert. Expect some chew to it and it’s not overly moist either. That’s why it needs to be served with something else like whipped cream or ice cream, and definitely some sugared berries or juicy stone fruit. Really delicious flavor, though.Worth making.
What’s NOT: really nothing – it does take some time and effort to make, though. None of the steps are daunting, however.

printer-friendly PDF – created using Cute PDF Writer, not Adobe
MasterCook 5+ import file – right click to save (remember where), run MC, File|Import

* Exported from MasterCook *

Almond Cake with Lemon and Crème Fraîche Glaze

Recipe By: From Tarla Fallgatter, cooking instructor, 2013 (originally from Food & Wine, 2012)
Serving Size: 10

CAKE:
1 stick unsalted butter — melted and cooled, plus more for the pan
1 cup almonds — whole, unsalted
1 1/3 cups all-purpose flour
1/2 cup polenta — or cornmeal
1 tablespoon baking powder
Finely grated zest of 1 lemon
1/2 teaspoon salt
4 large eggs — at room temperature
1/2 cup granulated sugar
3/4 cup crème fraîche
SYRUP:
1/2 cup water
1/2 cup granulated sugar
1 tablespoon fresh lemon juice
GLAZE:
1/2 cup powdered sugar
3 tablespoons crème fraîche
1 tablespoon fresh lemon juice

1. CAKE: Preheat the oven to 350°. Butter a 10-inch springform pan.
2. Spread the almonds on a rimmed baking sheet and bake for about 4 minutes, until they are slightly fragrant. Let the almonds cool completely. In a food processor combine the almonds and cornmeal. Coarsely chop them – pulse the mixture until the almonds are finely ground but not pasty.
3. In a large bowl, whisk together the ground almond mixture, flour, baking powder, rosemary, lemon zest and salt. In the bowl of a standing electric mixer fitted with the whisk, combine the eggs and sugar and beat at medium-high speed until tripled in volume, 10 minutes, or until it’s ribbony in texture. With the mixer at low speed, add the crème fraîche, then drizzle in the melted butter just until incorporated. Using a rubber spatula, gently fold the egg mixture into the dry ingredients in 3 batches. Scrape the batter into the prepared pan and bake for about 30 minutes, until a paring knife inserted in the center of the cake comes out clean.
4. SYRUP: While the cake is baking prepare syrup. In a small saucepan, combine the water, sugar and lemon juice and boil for 3 minutes. Let cool.
5. Set the hot cake on a rimmed baking sheet and pour the syrup evenly over it. Let the cake cool completely. Remove the side and bottom of the pan and transfer the almond cake to a platter.
6. GLAZE: In a medium bowl, whisk together the confectioners’ sugar, crème fraîche and lemon juice until smooth. Spread the glaze all over the top of the cake. Let stand until the glaze sets slightly, then cut into wedges and serve.
7. Ideally, serve this with some sugared fresh fruit that has marinated for half an hour or so – like strawberries or peaches so they make a syrup. Since the cake is a bit on the dry side, you’ll enjoy the moisture from the fruit.
Per Serving: 469 Calories; 25g Fat (47.5% calories from fat); 9g Protein; 54g Carbohydrate; 3g Dietary Fiber; 130mg Cholesterol; 295mg Sodium.

Posted in Desserts, easy, on May 3rd, 2013.

rhubarb_upside_down_cake_whole

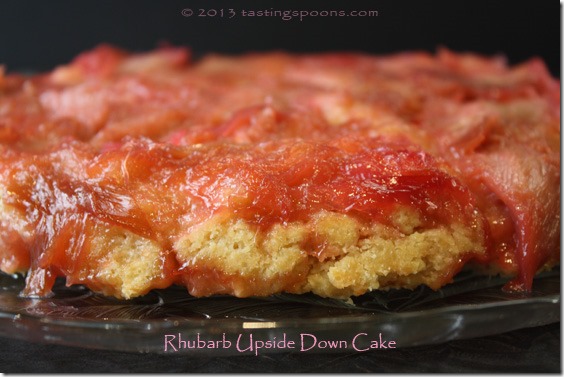
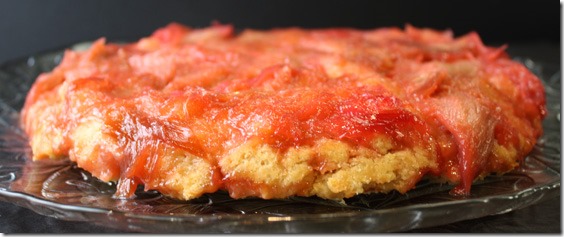
Love rhubarb, like I do? You’ll want to try this biscuit-style upside down cake that’s as easy as can be to make. You’ll just need fresh rhubarb and everything else is likely in your pantry.

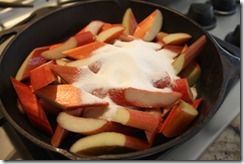
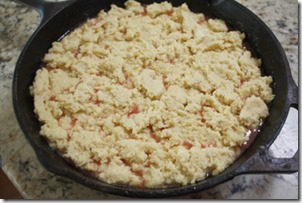
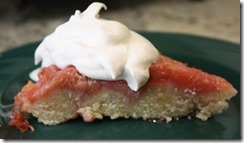
My latest issue of Saveur Magazine arrived recently and I read it cover-to-cover. An article about rhubarb captured my interest, though, when I saw some of the photos. With rhubarb in season, I decided to make this recipe first. They explained that this method of making an upside down cake is rhubarb_cookingmore reminiscent of an apple tarte tatin since you cook the juicy rhubarb in a cast iron skillet as you would with a tarte tatin (photo at left), then add the biscuit batter on top (see photo at right below) and bake it. As soon as you take it out of the oven you place a plate on top of the iron skillet and very carefully and quickly turn it upside down and plot, it all comes out as you see above. rhubarb_cake_before_bakingI used hot pads and was very quick about turning it over. There wasn’t any liquid to spill out, fortunately, or it could burn you. It’s all absorbed by the biscuit batter.

We ate it warm, which is the best way, I think. And since the cake part is more biscuit than it is cake, it’s most likely best eaten the day it’s made. I ended up with left rhubarb_upside_down_cake_sliceovers which I portioned out into 3” wedges, wrapped in plastic, then in foil. If I find out it’s not good defrosted I’ll add a note here later.

Do serve it with ice cream or whipped cream, as the mixture needs something to cut the sweet of the rhubarb and moisten the biscuit cake. It’s not overly dry – that isn’t what I mean – but left more than a day, I’d think it might. Biscuits don’t keep well.

rhubarb_upside_down_cake_whole_wide

What’s GOOD: the rhubarb, for sure. But then, I love rhubarb in most of its guises. The cake wasn’t my favorite part, but that doesn’t mean it wasn’t good. It was. It was a light dessert, I thought, although the calorie count doesn’t indicate so. Very tasty and a lovely presentation.

What’s NOT: really nothing except that you probably should eat this up the day you bake it.

printer-friendly PDF – created using Cute PDF Writer, not Adobe
MasterCook 5+ import file – right click to save file (and remember where, run MC, File|Import

* Exported from MasterCook *

Rhubarb Upside Down Cake

Recipe By: Saveur Magazine, Apr. 2013
Serving Size: 9

RHUBARB:
3/4 pound rhubarb — trimmed and cut into 1 ½” pieces on an angle
1 cup sugar
4 tablespoons unsalted butter — plus 6 tbsp. cut into ½” cubes and chilled
1 tablespoon fresh lemon juice
2 teaspoons vanilla extract
1/4 teaspoon kosher salt
BISCUIT CAKE:
2 1/2 cups all-purpose flour
1/2 cup sugar
2 teaspoons baking powder
1/4 teaspoon kosher salt
6 tablespoons unsalted butter — chilled, cut in 1/2″ cubes
1/2 cup vegetable shortening
1/3 cup milk
2 large eggs
Vanilla ice cream or whipped cream — for serving (optional)

1. Heat oven to 375°. Combine rhubarb, 1 cup sugar, 4 tbsp. butter, lemon juice, vanilla, and salt in a 9″ cast-iron skillet over medium heat. Cook, stirring occasionally, until sugar is melted and rhubarb is tender and slightly caramelized, 8-10 minutes.
2. Meanwhile, whisk together remaining sugar and salt, plus flour and baking powder in a bowl. Add remaining butter and the shortening and, using your fingers, rub into flour mixture to form coarse pea-size pieces. Add milk and eggs and stir until a soft, sticky dough forms.Using your hands, lightly flatten pieces of the sticky dough and place on top of the rhubarb. Fill in spaces as needed – it does not have to be completely smooth or covered – just do the best you can. If you want, smooth top with a nonstick spatula.
3. Bake until the crust is golden and cooked through, about 30 minutes. Remove skillet from oven; place a large flat serving platter on top of the skillet and invert very carefully and quickly. If a few pieces of rhubarb stick to the pan, use a spoon to fill in any spaces on the top. Serve warm or at room temperature with ice cream or whipped cream, if you like.
Per Serving: 503 Calories; 26g Fat (46.2% calories from fat); 6g Protein; 62g Carbohydrate; 1g Dietary Fiber; 83mg Cholesterol; 237mg Sodium.

Posted in Desserts, on April 23rd, 2013.

orange_tiramisu_orange_on_top

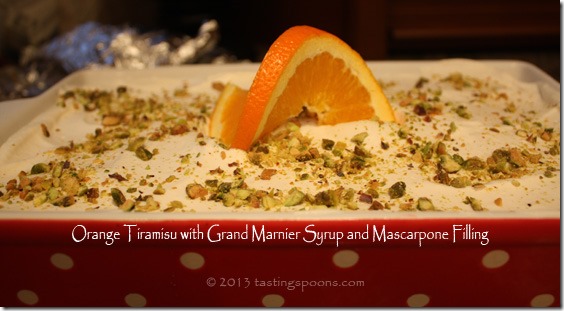
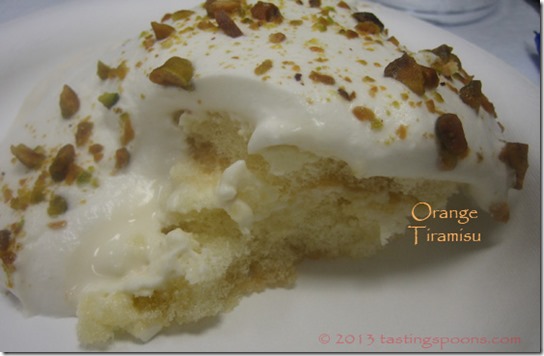
Oh my goodness is this stuff fantastic. But then, I love tiramisu – if it’s made with the right proportions of liquor/syrup/coffee and a creamy filling. This one contains no coffee – just orange, a Grand Marnier orange syrup, mascarpone, whipped cream and pistachios.

This is going to be one of those “trust me – you’ll like it” kind of recommendations. This dessert is SO delicious, and you’ll be glad when you taste it. It’s not hard to make – really it’s not – and the results, after 6-8 hours of chilling is worthy of any company meal.

When Phillis Carey made this at a class a few weeks ago, I took a bite and swooned. We’d watched her make it – it seemed really quite simple. She explained that when she can find ladyfingers in the grocery store – these are the moist ones usually right next to fresh strawberries (not the dried Italian type) – she buys a couple of packages of them and always keeps a pair in her freezer. No extra packaging required, she said. Just stick them in the freezer. Whenever she uses them, she just stocks up again, so she’ll always have some on hand. Obviously Phillis likes tiramisu as I’ve attended at least 2 other classes where she’s made different variations on a tiramisu theme.

orange_tiramisu

You make an orange scented simple syrup with Grand Marnier and that is brushed on the ladyfingers and they’re layered with a creamy orange mixture. That’s done twice and chilled for several hours. Toasted pistachios are chopped and sprinkled on top – on top of a layer of whipped cream that’s scented with some of the Grand Marnier simple syrup.

A few nights later my friend Cherrie made this (her big baking dish is shown at top) and everybody went nuts over the dessert. I brought some home and enjoyed every little tiny morsel of it. So, if that’s not enough testimony that you need to make this, I don’t know what is!

What’s good: just everything about it – the orange flavor, the Grand Marnier, the creamy texture, the comfort aspect of a soft and very tasty pudding dessert. Fabulous.

What’s not: nothing – just plan ahead. Can’t be made the day before (although the left overs I tasted 2 days later were just fine to me, but Phillis cautioned us that the cream would begin to separate).

printer-friendly PDF (created with Cute PDF Writer, not Adobe)

MasterCook 5+ import file – right click to save file (and remember where), run MC, then File|Import

* Exported from MasterCook *

Orange Tiramisu

Recipe By: Phillis Carey, cooking class 2013
Serving Size: 10

GRAND MARNIER SYRUP:
1 cup water
1 cup sugar
3 strips orange rind, removed with a vegetable peeler (not with a zester)
1/4 cup Grand Marnier

6 ounces ladyfinger cookies — the soft type, not dry Italian style
3/4 cup sweetened condensed milk
8 ounces mascarpone cheese — at room temperature
2 1/4 cups heavy cream — divided use (see below)
1 tablespoon orange zest — the microzest type
1/3 cup toasted pistachios — toasted and chopped
3 thin slices orange for garnish (use part of orange that has all the peel intact)

NOTES: Part of heavy cream is used in the filling, the remainder on top. The Grand Marnier Syrup is also divided for two uses. You will use one large orange in this preparation – the zest is used for both big strips and the microzest for another. Try to zest on only half of the orange as the other half you’ll want slices for garnish, and you’ll want the peel to be intact. You can, if desired, make this with the dry Italian-style ladyfingers, but the tiramisu must be refrigerated for at least 8 hours in order for the moisture to soften the cookies completely.
1. SYRUP: Combine water, sugar and orange strips in a small saucepan and heat until sugar dissolves, stirring constantly. Bring just to a simmer. Remove from heat and cool. Discard orange rind and stir in Grand Marnier – BUT – remove 1/4 cup of the syrup and refrigerate to use later in the topping.
2. Separate the ladyfinger sections, leaving the individual fingers attached. Lay half of the ladyfinger sections, round side down, in a 9×13 glass dish. Brush them well with half the Grand Marnier syrup to saturate the soft ladyfingers.
3. MASCARPONE FILLING: With mixer, gradually beat 3/4 cup of the sweetened condensed milk into the mascarpone. Add 1 1/4 cups of the whipping cream and the orange zest. Beat this mixture until soft peaks form. Spoon half of this creamy mixture over the ladyfingers and spread evenly (with an offset spatula if you have one).
4. Top the cream mixture with the remaining ladyfingers (rounded side down) and brush them with the remaining syrup. Spread on the remaining cream mixture, covering the ladyfingers completely. Cover tiramisu and refrigerate for at least 4 hours, or up to 8 hours ahead. Do not make this a day ahead or the creamy mixture will begin to separate (the cream deflates).
5. Up to an hour before serving, whip the remaining 1 cup of heavy cream until it has firm peaks. Add the reserved, refrigerated Grand Marnier Syrup and continue to beat until it’s incorporated. Spread this on top of the tiramisu, then sprinkle with pistachio nuts. ORANGE SLICES: Cut a slit to the center only on the thinly sliced orange slices and holding each end, twist gently. Lay this twisted piece on top of the tiramisu. Continue with other 2 pieces. Serve within an hour.
Per Serving: 549 Calories; 36g Fat (59.6% calories from fat); 7g Protein; 49g Carbohydrate; 1g Dietary Fiber; 174mg Cholesterol; 89mg Sodium.

Posted in Breads, Desserts, on March 28th, 2013.

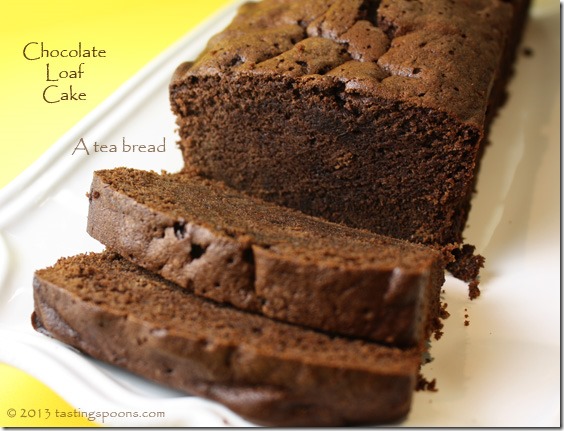
choc_loaf_cake

A tea bread. Yes. A cake? Well, perhaps, but it’s not quite as tender as one. A traditional loaf bread texture? No, not at all. More tender than that. It’s in-between. Chocolaty, yes, indeed! Delicious? Absolutely!

choc_loaf_cake_bakedOh my. Oh my. I knew, the moment I licked the beater that this bread or cake in a bread shape, was going to be sensational. The chocolate flavor – well, it’s just there. You know what I mean? If you don’t already read the blog from King Arthur Flour, you should. They have a very astute test kitchen, and of course, all they do is bake things – sweet and savory. Crackers, to doughnuts, to cakes, pies, breads of all kinds, and things like this, a tea bread. PJ Hamel was the test kitchen cook this time. I always love reading her stories – she’s witty. Here’s what she wrote in the preface to this recipe:

I brake for chocolate.

I also break for chocolate.

And bake with chocolate.

choc_loaf_cake_batter_in_panThe day I baked this had been a doozy. A little – no, a big family crisis does something to the psyche. I was feeling wrenched. At a loss. I prayed about it – have been praying about it for several days. I’m sorry, I can’t share about it; it’s not my place to share. It’s still too raw. No, it’s not about me or my dear hubby. Someone else in the immediate family. Finally, after lulling myself with some TV shows on my Tivo, and having a short glass of sangria, I just decided I should bake something. We were going to friends for dinner, so I didn’t have to cook. I thought maybe I’d get it done in time to take some to them. Also thought baking might get me out of my slump. And it did.

It had me looking back at the King Arthur blog piece because I decided to bake the loaf in the narrow tea loaf ceramic pan I have – that I love – and have only used a few times.

There was a little nugget of information on the blog about why/how we use different kinds of cocoa. This was provided in one of the comments to this recipe; it came from Frank, a pastry chef.

  • It is always best to use the cocoa called for in the recipe rather than
    making a substitution, but if you need to substitute, here is the
    ratio.
  • Dutch Cocoa:
    Substitute 3 Tablespoons natural cocoa plus 1/8 teaspoon baking soda.
  • Natural Cocoa:
    Substitute 3 Tablespoons Dutch cocoa plus 1/8 teaspoon cream of tartar,
    lemon juice, or vinegar.
  • So, when do you use each one? For recipes calling for more baking soda
    than baking powder, you use natural cocoa.
  • If the recipe has more baking powder than soda, you will want a Dutched
    cocoa due to the different alkali content. Using a natural cocoa will
    give your baked goods a heavy, soapy taste.

I’m so glad I read that because had I not, I would have used a different cocoa. As it was, I dug in my lidded bin in my pantry for Penzey’s high fat Dutch-process cocoa, exactly what I needed for this tea bread.

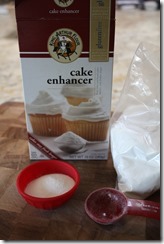
IMG_6673It took no time to mix it up. Butter, sugar, cocoa, a little jot of espresso powder (which brings out, or enhances the chocolate flavor in the loaf), baking powder, vanilla, also some of King Arthur Flour’s Cake Enhancer. Have you heard of it? It’s a type of emulsifier, and is king_arthur_cake_enhancer_bowlused a lot in professional kitchens and bakeries. It helps stabilize batters and breads and makes them or keeps them moist. So there were 2 T. of that in the batter too. Plus flour and milk. I think that was it. Nothing all that unusual, really.

Into the elongated tea loaf pan it went and baked. According to KAF, to switch to the different pan I should reduce the baking time by about 25% from a standard bread pan. It took longer than that to get the tea loaf to just the right internal temp, but it baked in about 60 minutes. I let it cool awhile, then with a little bit of rocking motion it came out of the pan easily enough. I think next time I would put a piece of parchment in the bottom. I’ve added that note to the directions.

What’s GOOD: everything about it. This is really a cake, but it’s sturdy enough (or it has a dense enough texture) that you can slice it into thin slices. But it’s absolutely NOT dense like a banana bread, for instance, or zucchini bread. Not at all. Truly it’s a cake. And delicious. If you’re a chocolate nut, it will tick all your boxes for richness, chocolate flavor, toothsome-ness, if there is such a hyphenation. In a word, this is terrific.
What’s NOT: nothing. Nary a word could I say. Hoorays for the King Arthur Flour test kitchen.

printer-friendly PDF (created using Cute PDF Writer, not Adobe)
MasterCook 5+ import file – right click to save file (and remember where you put it), run MC, then File|Import

* Exported from MasterCook *

Chocolate Loaf Cake

Recipe By: King Arthur Flour, 2013
Serving Size: 20

1/2 cup butter — (8 tablespoons) preferably at room temperature for easiest mixing
1 1/2 cups sugar
3/4 teaspoon salt
2 teaspoons vanilla extract
1/2 teaspoon baking powder
2 teaspoons espresso powder — optional, to enhance chocolate flavor
2/3 cup Dutch-process cocoa powder
2 tablespoons Cake Enhancer — optional; for moistness (King Arthur product)
3 large eggs
1 1/4 cups all-purpose flour
3/4 cup milk

1. Preheat the oven to 350°F. Lightly grease a loaf pan: either 9″ x 5″, or 8 1/2″ x 4 1/2″. The smaller pan will yield a higher-crowned loaf. [My suggestion: put parchment paper in the bottom of the pan – makes it a whole lot easier to get out.]
2. In a medium-sized mixing bowl, beat together the butter, sugar, salt, vanilla, baking powder, espresso powder, cocoa, and Cake Enhancer to make a sandy, somewhat clumpy mixture. Don’t worry; the eggs will smooth things out.
3. Add the eggs one at a time, beating well after each addition. Scrape down the sides and bottom of the bowl midway through this process.
4. Add half the flour to the bowl, beating at low speed to combine.
5. Add all of the milk, beating at low speed to combine.
6. Add the remaining flour, beating gently just until the batter is smooth.
7. Pour the batter into the prepared pan.
8. Bake the cake for 60 to 70 minutes (or more), or until a toothpick inserted into the center comes out clean. The top may look a tiny bit damp; that’s OK. If you have an instant-read thermometer, the center will register about 205°F, while just under the top will register about 195°F. If baking in an elongated tea loaf pan, bake for about 50-60 minutes.
9. Remove the cake from the oven, loosen the edges, wait 10 minutes, and turn it out of the pan onto a rack to cool.
10. Store completely cooled cake well wrapped, at room temperature.
Per Serving: 154 Calories; 6g Fat (35.7% calories from fat); 3g Protein; 23g Carbohydrate; 1g Dietary Fiber; 45mg Cholesterol; 156mg Sodium.

Posted in Brunch, Desserts, Miscellaneous, on March 12th, 2013.

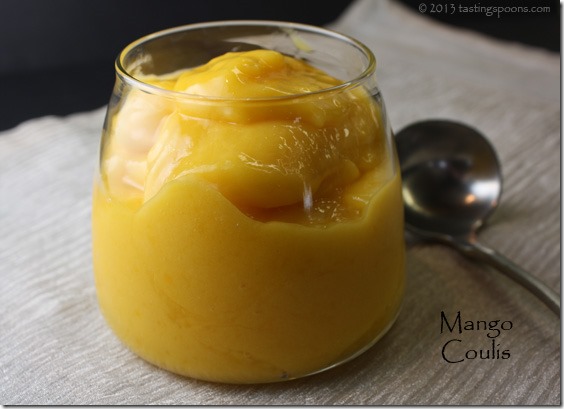
mango_coulis

The easiest of sauces – you can make it as sweet as you prefer – I made it on the tart side. It would be great on top of French toast, breakfast yogurt (I can attest to that one since the left overs have garnished several morning bowls), or as a fruit puree with a creamy dessert like cheesecake. Yum.

If you read my blog regularly, you already know that I made Lindy’s Cheesecake and wrote up a post with a very brief history of Lindy’s deli in New York City. It closed in 1957, but the famous cheesecake lives on in home kitchens, and perhaps a lot of restaurants too, since the recipe became public. It was recently listed in Saveur magazine as one of the top 100 recipes ever.

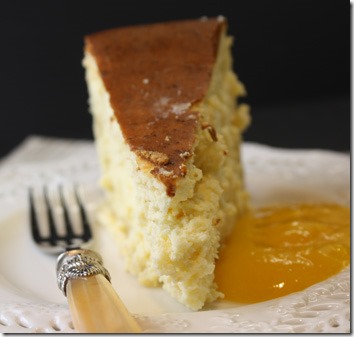
lindys_cheesecake_slice2When I made it, I decided it needed something along side – something with some color. It’s too early in the season for reliably sweet strawberries, so I decided to use mangoes. It was perfect. The recipe came straight out of the Joy of Cooking: 75th Anniversary Edition – 2006. Maybe it was in Rombauer’s earlier editions, but this is the book I own because my old one from the 1950’s was falling apart. I looked up many other recipes, and they were all the same – mangoes, sugar of some form and either lime or lemon juice. Plus just a bit of water to make the sauce almost pourable. That’s it. See? I said it was easy!

I whizzed it up in the food processor, although the blender would likely work just as well. I used the frozen mango chunks from Trader Joe’s. You could use fresh mangoes too. Do defrost the frozen ones some so they will puree. Add some citrus (the lemon juice or lime juice) and add as much sugar as you want – I used about a rounded 1/4 cup of powdered sugar. You can use regular sugar too. Either one. And then some water – the texture of the mangoes will determine how much water you’ll need – you want it thick, but not so you can’t pour it. In the photo at top you can see it’s almost the consistency of pudding, but it spread out flat once I put it on the plate with the cheesecake.

What’s GOOD: the delicious FRESH taste of mango. Citrus does that in all of its guises. I made mine on the tart side since the cheesecake was already plenty sweet, but use your own judgment based on what you’re serving it with. It keeps for several days. I think the recipe said 3, but I don’t know why it wouldn’t keep a week. It is also fantastic drizzled over Greek yogurt for our breakfast. And I just know it would taste wonderful on French toast.
What’s NOT: it was perfect for how I needed to use it, as a sauce for cheesecake.

printer-friendly PDF (created using Cute PDF Writer, not Adobe)
MasterCook 5+ import file – right click to save file (and remember where you put it), run MC, then File|Import

* Exported from MasterCook *

Mango Coulis

Recipe By: Joy of Cooking, 75th anniversary edition, 2006
Serving Size: 5

2 whole mangoes — (or use frozen chunks, about 1 1/2 cups)
1/4 cup to 1/2 cup confectioner’s sugar — or more to taste
1 tablespoon fresh lime juice — or lemon juice
About 2-3 T water

1. If using frozen mango, defrost. If using fresh, peel and core mangoes and cut into 1″ pieces.
2. In a food processor or blender combine the mangoes, lime juice and water. Blend until completely smooth, then add the sugar and blend. Add more water if it’s too thick. Taste for sweetness and add more citrus or sugar. If you’re serving this with a very sweet dessert, you can make the coulis less sweet. Refrigerate. Ideally, use up within 3 days. Add leftovers to a morning fruit smoothie or pour over fresh fruit and yogurt. Would also be delicious on top of French toast.
Per Serving (based on 1/4 cup sugar): 78 Calories; trace Fat (2.4% calories from fat); trace Protein; 20g Carbohydrate; 2g Dietary Fiber; 0mg Cholesterol; 2mg Sodium.

Posted in Desserts, on March 10th, 2013.

lindys_cheesecake_sliced

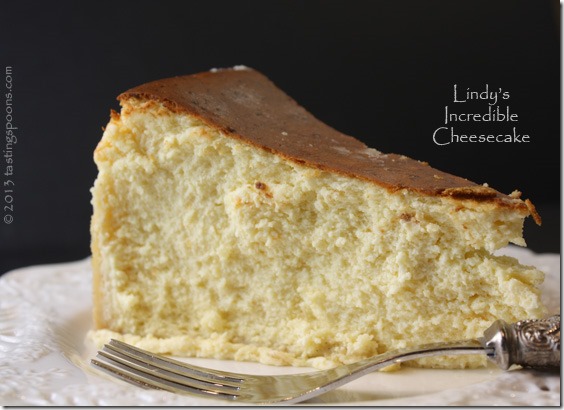
Can you just imagine the mouth-feel of a bite of that cheesecake? Smooth, rich, a little tiny bit citrusy, in between being a dry cheesecake (not a bad thing) and a wet cheesecake (some people prefer that type). This one leans more toward the dry, I suppose, but not DRY, if you get my drift.

Oh my goodness, is this cheesecake beyond delicious. It’s not something I make – hardly ever. It’s not something I even crave. Now my DH, that’s another story. Cheesecake is his #2 favorite dessert, 2nd only to carrot cake. I do have a recipe for a cheesecake here on my blog – it’s a very tall, light and airy cheesecake. I had it the first time back in about 1970, when I was living for a brief time in Oklahoma. It was called a Gourmet Cheesecake. It contains many egg whites whipped separately, so it retains height during baking. And it’s got a much different (light) texture. I do love that cheesecake. But, since I was cooking for several couples coming to dinner, I decided to try a new recipe, at Saveur.

This cheesecake, comes from the famous Lindy’s Restaurant in New York City. Not to be confused with the current-day restaurant by the same name. Lindy’s was opened in 1921 on Broadway, and it was really a Jewish deli, but they became known for sturgeon, corned beef and blintzes. And, their cheesecake. Milton Berle used to eat there nearly every day. Lots of notables ate there regularly. The owners – Lindy Lindemann and his wife Clara – ran it (and another one some blocks away) for many years.  According to Wikipedia, Lindy’s was especially well known for its cheesecake, which was at times credited as perhaps the most famous in the United States. The cheesecake was immortalized in Guys and Dolls, where Nathan Detroit and Sky Masterson sang its praises. You could even sing some of the songs from the musical while you made this. Ah, never mind. Most of you probably don’t know what Guys and Dolls was! The recipe for the cheesecake, fortunately, can live on in our own kitchens because we have the recipe. The famous recipe. The restaurant closed in 1957.

So, on to the recipe. This must – absolutely must be made in a 9-inch springform pan. Please don’t try to make it fit in an 8 incher. Or thinner in a 10-incher. In a 9-inch pan the cake rises up above the sides. When I peeked in the oven window about half way through and saw it I panicked! I thought it would spill over – not only ruining the cheesecake, perhaps, but also making a monumental mess on the floor of my oven. But no, it rose up, stayed up and peaked out about an inch above the top.

First you must make an easy crust – very similar to a pie crust – that contains the seeds from a vanilla bean, an egg yolk and lemon zest, then you chill it for an hour before pressing it with your fingertips on the bottom and all the way up the sides of the pan. The crust didn’t make it quite up to the top when I did it – but it didn’t seem to matter. Ideally, you can make the crust thin enough to go all the way up.

Then you make the filling. Do you even want to know how much cream cheese is in this? A full 2 1/2 pounds. A lot. It has a bunch of eggs and egg yolks in it too. And a little bit of orange and lemon zest. It has a little tiny amount of flour in it, vanilla and 1/4 cup of heavy cream. I can’t imagine what that little amount of cream does, but it’s added in at the very end of the mixing. Pour it into the pan and bake.

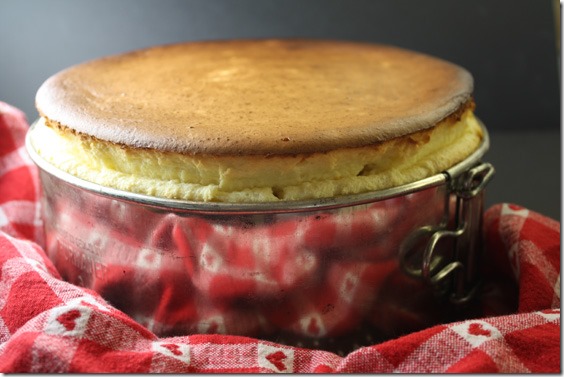
whole_cheesecake_just_baked

That was taken about 20 minutes after I took it out of the oven. I baked it to an exact 160° using an instant read thermometer. I stuck the probe into the side so there wouldn’t be a hole in the top. It took about an extra 7-8 minutes in my oven (over the 75 minutes suggested). First you bake it for about 15 minutes at 500°. Can you imagine? Yes. Then you reduce it to 200° and continue baking. The back side (you can’t quite see it in the photo above) got a little dark. I should have rotated the cake, but I was afraid it might deflate if I opened the oven door. Do try to leave ample room all around the cheesecake in the oven and don’t put it too close to the top, either.

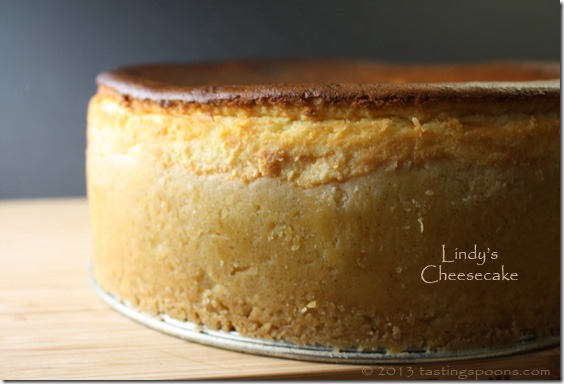
lindys_cheesecake_whole

In this photo you can see the crust is about 2/3 to 3/4 of the way up the sides. You can barely see the delineation in this photo. It took several hours to let it cool. After an hour or so, I took off the springform side – but first I used a sharp knife to make certain none of the cheesecake was sticking to the side and let it cool several more hours. The other interesting tidbit is that this cheesecake needs to chill for at least 8 hours or overnight. That was wonderful for me so I made it the day before our dinner party. I put the springform back on the cake to store it, covered well with foil.

When it’s cut, use a very thin, sharp knife and have a tall glass of hot water handy as the cheesecake wants to stick to the knife. Dip the knife in the hot water between each cut.  I used a wedge to remove it, but a knife will work too – the crust is sturdy enough to hold the piece together fairly well. The very center didn’t come out cleanly – it’s a soft filling, so a little bit of it stuck.

I made a mango puree (a coulis) to serve on it or on the side of it. I don’t think Lindy’s served it with anything. It really doesn’t need anything to adorn it, but I thought a bit of added color would be nice. I bought frozen mango pieces at Trader Joe’s and made the puree the day before also.  I’ll post that recipe tomorrow or the next day. Anyway,  dessert was all done the day ahead.

lindys_cheesecake_slice2

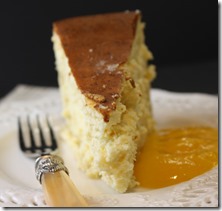
After sitting (chilling) for 24 hours the cheesecake had deflated some. It was then about level with the side of the springform, and the center sunk too. I know it was done, though the center was still slightly jiggly when I took it out of the oven. Obviously that means the center surely wasn’t as “done” as the outer parts, but when researching this on the ‘net, I read several places that a cheesecake should be at 160° so that’s exactly what I did.

What’s GOOD: there is everything good to say about this dessert – unctuous texture, smooth, decadent, rich, full of the cheesy taste you look for when ordering a cheesecake. It has the drier texture that is coveted by most cheesecake fans. It’s spectacular to serve – I showed our dinner guests the cheesecake before cutting it and asked everyone if they wanted the mango coulis on the side. We had left overs twice and oh, was it ever good then too. Maybe even better because we were eating it after an ordinary meal and the cheesecake absolutely stood out.

What’s NOT: there is nothing, whatsoever, I could say about this other than it’s fantastic.

printer-friendly PDF (created using Cute PDF Writer, not Adobe)

MasterCook 5+ import file – right click to save file (and remember where you put it), run MC, then File|Import

* Exported from MasterCook *

Lindy’s Cheesecake Recipe

By: From the NYC restaurant (closed in 1951) but printed in Saveur, Nov. 2012
Serving Size: 12

CRUST:
1 cup flour
8 tablespoons unsalted butter — cubed
1/4 cup sugar
1 teaspoon lemon zest
1/4 teaspoon salt
1 large egg yolk
1/2 vanilla bean — seeds scraped and reserved
FILLING:
2 1/2 pounds cream cheese — softened (use full fat)
1 1/4 cups sugar
3 tablespoons flour
1 1/2 teaspoons orange zest
1 1/2 teaspoons lemon zest
1/2 teaspoon vanilla extract
5 whole eggs — plus 2 yolks
1/4 cup heavy cream

Note: You MUST use a 9-inch pan for this cheesecake. No substitutions.
1. CRUST: Combine flour, butter, sugar, zest, salt, yolk, and vanilla seeds in a bowl; rub with fingers until dough forms. Form dough into 2 rounds; wrap each in plastic wrap. Chill for 1 hour. Press 1 dough round onto bottom of a 9″ springform pan; pull off pieces from remaining dough and press around sides of pan all the way to the top. Dough will be very thin – be sure to fill all holes and gently press completely up the sides as the cheesecake pan will be completely full. Set aside.
2. FILLING: Heat oven to 500°. Beat cream cheese, sugar, flour, zests, and vanilla in a large bowl on medium-high speed of a hand mixer until smooth. Add eggs and yolks, one at a time, beating after each addition, until smooth; stir in cream. Pour filling into pan. Place cake in center of oven with ample room all around and bake until top begins to brown, about 15 minutes. Reduce heat to 200°, and bake until just set, about 1 hour more until it has reached an internal temperature of 160°. Transfer to a rack, and let cool completely. Cover and refrigerate at least 8 hours or overnight. Remove cake from pan and cut into slices to serve. I served this with a mango coulis, but it doesn’t really need any adornment.
Per Serving: 594 Calories; 45g Fat (67.5% calories from fat); 11g Protein; 37g Carbohydrate; trace Dietary Fiber; 237mg Cholesterol; 357mg Sodium.

Posted in Desserts, on February 12th, 2013.

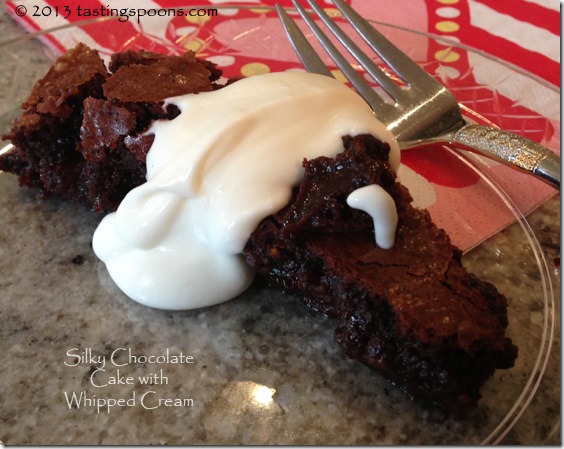
silky_choc_cake_whipped_cream

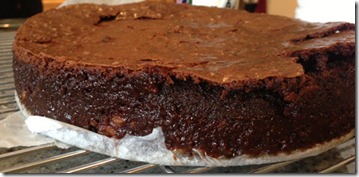
Silky = smooth and almost molten. Not quite, but nearly so. You can see that this cake doesn’t ooze, but can you see how shiny it is? It’s really, really moist – it’s not at all like candy, so don’t misunderstand my description – it’s just incredibly chocolaty and smooth.

At a cooking class last week Tarla Fallgatter served this unctuous chocolate dessert. Unbelievably chocolaty and rich. Smooth and addictive. If you’re still wondering what to serve for Valentine’s Day – if you’re cooking at home that night – this is your romantic ticket. If I were doing it, I’d likely cut the recipe in half and pour the cake into 4 ramekins and bake them individually. I don’t know how long they would take to bake that way, but maybe 15 minutes or so? That’s a guess.

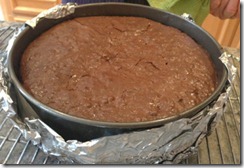
silky_choc_cake_bakedIn any case, if you’re a chocolate freak, you’ll be moaning as you spoon this into your mouth. It’s not all that difficult to make – really it’s easy – as long as you have an 8-inch springform pan – and you have bittersweet chocolate, eggs, butter, sugar, flour and a little cream to whip for the topping. It’s a 3-dish/pan dessert (saucepan to melt butter and chocolate, bowl to mix the batter in, and the springform to bake). You do have to put the springform pan (wrapped in foil) in a larger baking pan because you add hot tap silky_choc_cake_wholewater to it and it cooks in a water bath. That’s what keeps it so tender and moist – almost like pudding, except it’s definitely a cake. You’ll find this recipe in several places on the internet. This one came from Food and Wine, back some years ago.

What’s good: no question it’s the chocolaty-ness of it. Oh yes! Very decadent. Very rich. Very festive, and surely very romantic.

What’s not: as with most tortes and things of this nature, they’re not quite so good the next day. This one has to be made within about 6 hours of serving.

printer-friendly CutePDF

MasterCook 5+ import file – right click to save file (and remember where you put it), run MC, then File|Import

* Exported from MasterCook *

Silky Chocolate Cake

Recipe By: Originally from Food and Wine (2001), adapted slightly by Tarla Fallgatter, Feb. 2013
Serving Size: 8

9 ounces unsalted butter — cut into tablespoons
1 cup granulated sugar
1/2 cup water
1/2 pound bittersweet chocolate — coarsely chopped
1/2 cup all-purpose flour
3 large eggs — beaten
Confectioners’ sugar to dust top or whip 1/2 cup cream with added sugar and vanilla

Note: the cake is almost, but not quite, molten. It’s VERY soft and very wet – except the top crust which is almost crispy. This cake is all about the texture and the chocolate! Be sure to use bittersweet – if you use a semisweet, cut down on the sugar.
1. Preheat the oven to 350°. Wrap the outside of an 8-by-3-inch round springform pan in heavy-duty foil, then generously butter the inside of the pan. Set the springform in a small roasting pan.
2. In a saucepan, combine the butter with the granulated sugar and water and bring to a boil over moderate heat, stirring. Remove from the heat. Add the chocolate and stir until smooth; let cool.
3. In a medium bowl, whisk the flour with the eggs until blended. Add to the chocolate batter and whisk until smooth. Pour the batter into the prepared springform pan. Pour enough hot water into the roasting pan to reach halfway up the side of the springform. Bake the cake in the oven for about 1 hour and 15 minutes, or until the top is crusty and a cake tester inserted in the center of the cake comes out with a few very moist crumbs attached. Let the cake cool in the springform on a rack for 20 minutes. Remove the foil and the side of the pan and let the cake cool completely. Dust the cake with confectioners’ sugar or spoon whipped cream on each slice just before serving.
4. Make Ahead The cake can be prepared 6 hours ahead. Leave out at room temperature.
Per Serving: 530 Calories; 43g Fat (68.3% calories from fat); 6g Protein; 39g Carbohydrate; 5g Dietary Fiber; 149mg Cholesterol; 35mg Sodium.

Posted in Desserts, on February 8th, 2013.

creamiest_rice_pudding_ever

My husband said: “Wow, this pudding is fantastic!” Now, you have to understand that he’s a Type 1 diabetic, and he steers away from desserts 95% of the time, so any time he does eat dessert he thinks he’s in heaven. But I’ll attest – this rice pudding is fabulous.

You know how it is when you read some recipe somewhere and it just plain “speaks” to you? That’s what happened when I was reading Baking Banter, the baking blog from King Arthur Flour. I subscribe to their blog through Google Reader, and the varied bakers post several times a week. And I just love how they design a recipe – how they test and change, taste and change, until they finally get it right. And this recipe is just absolutely SPOT-ON! Kuddos to Mary Jane Robbins, who developed this recipe for King Arthur.

I have another recipe for rice pudding here on my blog. And in comparing this one to the other one, they’re very similar. And yet, I think this one is better (probably because of the cream added). Much better. I liked the creamy texture of this one. The little bit of bite to the rice (particularly you don’t want to overcook the rice, because then it would be mushy). The other aspect of this pudding is its focus on the vanilla. Two different types of (King Arthur) vanilla are called for here. I used two different types I had on my pantry shelf, neither of which are King Arthur. Use your best vanilla to stir in after the pudding is cooked.

stirrSurely, I should have taken a photo of the pudding as it was simmering away, with my handy-dandy Stirr device (now called a RoboStir – very inexpensive if you’re interested) jittering around inside the pan. Here at right is a picture I found online. I’ve written about it before, but it’s a battery-operated device that sits inside the pan, has silicone feet and once you turn it on (mine has 4 speeds), it jitters itself around the pan, turning in circles to keep the pot contents moving – stirring. It’s an automatic stirring device is all I can tell you, and it worked SO perfectly for this pudding! I also use it on the rare occasions I make risotto. It’s ideal for sauces.  Just an aside about this device – if you go online, lots of people don’t like it. Including Consumer Reports, who found it worked for very few things. A thick sauce will stop it cold. Some people think it’s a joke. Mine works well – have never used it except on the lowest speed. It doesn’t do dry ingredients (like toasting nuts) or frying onions as it just pushes the items out to the edges of the pan. It must have liquid to help it move the contents. It does require a pan with a sufficient flat surface AND the cooktop needs to be level. If it’s not level, the device will simply gravitate to the lowest spot and sit there, still jittering, but it won’t migrate around the pan as it’s designed to do. My dear hubby (DH) did level my range for me last year. I didn’t realize how “off” it was. I made this pudding in a pan with rounded edges – mine is a Caphalon nonstick pan – a saucier pan that Caphalon doesn’t make anymore, but a similar one would work because it has a gently rounded bottom edge – a Calphalon Unison Nonstick 4-Quart Pot with Lid. The key is the sloping edge – you don’t want a squared-off 90° angle as it’s very difficult to stir that corner (whether you’re using a stirring device or an ordinary spoon) and keep the pudding from burning. Or if you’re making a sauce, or a creamy soup. This particular pot is called a soup pot.

Okay, so here’s how you make it – you combine the whole milk, some of the cream, sugar (and not very much of it), some of the vanilla and Arborio rice (a short grain rice, which works best for rice pudding – you can also use sushi rice). Once you bring it to a simmer, reduce the heat and simmer very slowly, stirring very frequently, for about 30 minutes. At this point start tasting the rice – it still wants to have a little tiny bit of bite (toothsome-ness, I call it). Continue simmering until it’s just barely done. Remove, allow to cool, stirring it every so often so a skin doesn’t form on the top (or put a piece of plastic wrap directly down on the surface), and you add a little bit more cream and more vanilla. Done. Once cool you can put it into ramekins, or just store in a plastic container and dish out what you want later. I found that the pudding was still very VERY loose once I took it off the heat, but I was assured in the recipe that it would firm up. Yes, indeed it did! In fact, when I went to serve it, I needed to add milk to it to kind of thin it a bit. It was amply thick at that point.

In most respects, this pudding is made like a risotto, except you start off with all the liquid in the pan at the beginning rather than adding it now and then. It’s EASY to make – although you do have to keep your eye on it. I made this as part of a dinner we took to our pastor and his family since he’s recently had surgery. But I made a double batch and kept a little bit of it for ourselves. What a treat.

What’s good: every single solitary thing about it. A must make – if you like puddings, and especially rice pudding! The vanilla flavor predominates (in a very good way).

What’s not: well, it does take some patience and hovering (unless you have one of the stirring devices). I’ll definitely be making this again!

printer-friendly CutePDF

MasterCook 5+ import file – right click to save file (and remember where you put the file), run MC, then File|Import

* Exported from MasterCook *

Very Creamy Vanilla Rice Pudding

Recipe By: KAF Baking Banter, 1/2013 (Mary Jane Robbins)
Serving Size: 6 (1/2 cup servings)

2 cups whole milk
1 cup heavy cream — divided
1/4 cup sugar
1/2 cup Arborio rice — or sushi rice
1/2 teaspoon vanilla extract — King Arthur Pure Vanilla Extract preferred
1/2 teaspoon vanilla extract — Vanilla Bean Crush or King Arthur Pure Vanilla Plus
1 pinch salt

1. Place the milk, 3/4 cup cream, sugar, rice, and vanilla extract in a medium-sized saucepan over medium heat.
2. Bring to a simmer and cook, stirring frequently, for 30 minutes, until thickened. This is very similar to cooking risotto.
3. Taste the rice to ensure it’s done. You want a firm bite, but no crunchy center to the kernel. Remove from heat as soon as it reaches that perfect time.
4. Stir in the remaining 1/4 cup cream and the Vanilla Bean Crush or Pure Vanilla Plus, along with a pinch of salt. The pudding will firm up as it cools.
5. Serve warm; or refrigerate, well covered, and serve chilled. Sprinkle with a touch of ground cinnamon, if desired. 1/2 cup servings are sufficient. Stir in additional milk if the pudding is too thick.
Per Serving: 277 Calories; 17g Fat (56.3% calories from fat); 5g Protein; 26g Carbohydrate; 0g Dietary Fiber; 65mg Cholesterol; 80mg Sodium.
Related Posts Plugin for WordPress, Blogger...