Get new posts by email:

Archives

Currently Reading

Here are the tastingspoons players. I’m in the middle (Carolyn). Daughter Sara on the right, and daughter-in-law Karen on the left. I started the blog in 2007, as a way to share recipes with my family. I’m still doing 99% of the blogging and holding out hope that these two lovely and excellent cooks will participate. They both lead very busy lives, so we’ll see.

– – – – – – – – – – – – – – – – – – – – – –

BOOK READING (from Carolyn):

Music of Bees, Eileen Garvin. Absolutely charming book about a woman in midlife, lonely, who raises bees, also makes unlikely friends. Heart-warming and very interesting about beekeeping.

A Postcard from Paris, Alex Brown. Really cute story. Dual time line, 1940s and present day about renovating an old apartment in Paris, things discovered.

Time of the Child, Niall Williams. Oh such a good book. Very small village in Ireland, 1960s. A baby is left on the doorstep. The town all whispers and helps. I listened to an interview of the author, which made me like him and his books even more.

Sipsworth, Simon Van Booy. If you like animals you’ll swoon. An old woman who really wants to die finds a tiny mouse in her house and befriends it and finds a reason to live. Utterly charming book.

The Forger’s Spell, Edward Dolnick. True story. For seven years a no-account painter named Han van Meegeren managed to pass off his paintings as those of Johannes Vermeer.

If You Lived Here, You’d be Home by Now, Christopher Ingraham. Could hardly put it down – about a journalist who takes on a challenge to move to small town in Minnesota and write about it. He expects to hate it and the people and place, but he doesn’t. Absolutely wonderful true story.

The River We Remember, William Kent Kreuger. 1950s, Minnesota. A murder and the aftermath. Could hardly put it down. Kreuger has such a vivid imagination and writing style.

How the Lights Gets In, Joyce Maynard. An older woman returns to New Hampshire to help care for her brain-injured son. Siblings and family, lots of angst and resentments.

The Filling Station, Vanessa Miller. Every American should read this book. A novelized retelling of the Tulsa massacre in 1921. Absolutely riveting.

The Story She Left Behind, Patti Callahan Henry. Love this author. Based on a true story. A famous author simply vanishes, leaving her husband and daughter behind. She had invented a mystical language no one could translate. Present day, someone thinks he’s solved the riddle, contacts the family. Really interesting read.

The Girl from Berlin, Ronald Balson. Love anything about Tuscany. An elderly woman is being evicted from a villa there, with odd deed provenance. Two young folks go there to help unravel the mystery. Loved it.

The Island of the Colorblind, Oliver Sacks, M.D. Nonfiction. The dr is intrigued by a remote Pacific island where most of the inhabitants are colorblind. He also unravels a mystery on Guam of people born with a strange neurological problem. Medical mysteries unveiled. Very interesting.

The Bookbinder, Pip Williams. Post 1914 London. Two sisters work at a bookbindery. They’re told to not read the books. One does and one doesn’t. One has visions beyond her narrow world; the other does not. Eventually the one gets into Oxford. Lovely story.

The Paris Express, Emma Donoghue. 1895 on a train to Paris, a disaster happens. You’ll delve into the lives of many people who survived and died in the crash.

A Race to the Bottom of Crazy, Richard Grant. This is about Arizona. Author, wife and child move back to Arizona where they once lived. Part memoir, research, and reporting in a quest to understand what makes Arizona such a confounding and irresistible place.

The Scarlet Thread, Francine Rivers. A woman’s life turned upside down when she discovers the handcrafted quilt and journal of her ancestor Mary Kathryn McMurray, a young woman who was uprooted from her home only to endure harsh frontier conditions on the Oregon Trail.

A Place to Hide, Ronald Balson. 1939 Amsterdam, an ambassador has the ability to save the lives of many Jewish children. Heartwarming.

Homeseeking, Karissa Chen. Two young Chinese teens are deeply in love, but in China. Then their families are separated. Jump to current day and the two meet again in Los Angeles.

North River, Pete Hammill. He always writes such a good story. A doctor works diligently healing people from all walks of life. His wife and daughter left him years before. One day his 3-yr old grandson arrives on his doorstep.

A Very Typical Family, Sierra Godfrey. A very messed-up family. Three adult children are given a home in Santa Cruz, Calif, but only if the siblings meet up and live in the house together. A very untypical scenario but makes for lots of messes.

Three Days in June, Anne Tyler. The usual Anne Tyler grit. Family angst. This wasn’t one of my favorites, but it was entertaining and very short.

Saved, Benjamin Hall. Author is a veteran war reporter. Ukraine, 2022, he nearly loses his life to a Russian strike. Riveting story – he survives, barely.

Grey Wolf, Louise Penny. Another Inspector Gamache mystery in Quebec. She is such an incredible mystery writer.

All the Colors of the Dark, Chris Whitaker. A missing person mystery, a serial killer thriller, a love story, a unique twist on each. Could hardly put it down.

Orbital, Samantha Harvey. Winner of 2024 Booker Prize. I don’t usually like those, but I heard the author interviewed and she hooked me. This is not a normal book with a beginning, a story and an end. It’s several chapters of the day in the life of various astronauts at the ISS (Int’l Space Station). All fictional. She’s been praised by several real astronauts for “getting it” about space station everyday life.

The Blue Hour, Paula Hawkins. An island off Scotland. Inaccessible except when the tide is out. Weird goings on. An artist. A present day mystery too.

Iron Lake, William Kent Krueger. A judge is murdered and a boy is missing. Riveting mystery.

Tell the Wolves I’m Home, Carol Ricks Brunt. 1980s. A 14-yr old girl loses her beloved uncle. Yet a new friendship arises, someone she never knew about.

Four Treasures of the Sky, Jenny Zhang. 1880s, a young girl is kidnapped in China and brought to the United States. She survives with many hurdles in the path.

The Boy Who Fell out of the Sky, Ken Dornstein. Memoir, 1988. The author’s brother died in the PanAm flight that went down in Lockerbie, Scotland. A decade later he tries to solve “the riddle of his older brother’s life.”

Worse Care Scenario, T.J. Newman. Oh my. Interesting analysis of what could/might happen if a jet crashed into a nuclear plant. Un-put-downable.

Song of the Lark, Willa Cather. Complicated weave of a story about a young woman in about 1900, who has a gifted voice (singing) and about her journey to success, not without its ups and downs.

Crow Talk, Eileen Garvin. Charming story which takes place at a remote lake in Washington State, about a few people who inhabit it, the friendships made, but also revolving around the rescue of a baby crow.

The Story Collector, Evie Woods. Sweet story about some dark secrets from an area in Ireland, a bit magical, faerie life, but solving a mystery too.

A Sea of Unspoken Things, Adrienne Young. A woman investigates her twin brother’s mysterious death. She goes to a small town in California to figure it out, to figure HIM out.

The King’s Messenger, Susanna Kearsley. 1600s England, King James. About one of his trusted “messengers,” and his relationship with a young woman also of “the court.” Lots of intrigue.

In the Shadow of the Greenbrier, Emily Matchar. Interesting mystery in/around the area of the famous resort in White Sulphur Springs, West Virginia.

Isola, Allegra Goodman. Hard to describe, survival story on an island in the 1600s.

Save the Date, Allison Raskin. Rom-com, witty, LOL funny. Clever.

The Sirens, Emilia Hart. Numerous time-lines, Australia. Mysteries abound, nightmares, abandoned baby, weird allergies.

Red Clay, Charles Fancher. LOVED this book. Mostly post-Civil War story about the lives of slaves in Alabama during Reconstruction.

Stars in an Italian Sky, Jill Santopolo. Dual time line, 1946 and recent time. Love stories and a mystery.

Battle Mountain, C.J. Box. Another one of Box’s riveting mysteries. Love his descriptions of the land.

Something Beautiful Happened, Yvette Corporon. A memoir of sorts in Greece, tiny island of Erikousa, where the locals hid Jews during WWII. All elusive stories told by the author’s grandmother.

The Jackal’s Mistress, Chris Bohjalian. 1860s Virginia, about a woman who saves the life of a Union soldier. Really good story.

Song of the Magpie, Louise Mayberry. Really interesting story about Australia back in the days when it was mostly a penal colony. Gritty strength of a woman trying to thrive with her farm.

The Boomerang, Robert Bailey. A thriller that will have you gripping the book. About a lot of secrets surrounding the president (fictional novel, remember) and his chief of staff and about cancer. A cure. Such a good story.

Care and Feeding, Laurie Woolever. Really interesting memoir of a woman driven to succeed in the restaurant business. She worked for Mario Batali and then Anthony Bourdain. Gritty stories.

Everything is Tuberculosis, John Green. Maybe not a book for everyone. A real deep dive into the deadly tuberculosis infection, its history. I heard the author interviewed and found the book very interesting.

The Book Lovers Library, Madeline Martin. Fascinating read about Boots’ drug stores’ lending library. And the people who worked in them.

The Arrivals, Meg Mitchell Moore. LOL funny, about a middle-aged couple whose children (and their various family members) return to the family home and the chaos that ensues.

My Life as a Silent Movie, Jesse Lee Kercheval. About grief. A big move to Paris, finding herself a new life with a new set of real blood family.

Escape, Carolyn Jessop. Another memoir about a woman really in bondage in Utah, Mormon plural marriage.


Tasting Spoons

My blog's namesake - small, old and some very dented engraved silver plated tea spoons that belonged to my mother-in-law, and I use them to taste my food as I'm cooking.

Scroll down to the bottom to view my Blogroll

Posted in Desserts, on February 16th, 2016.

brown_sugar_apple_cobbler

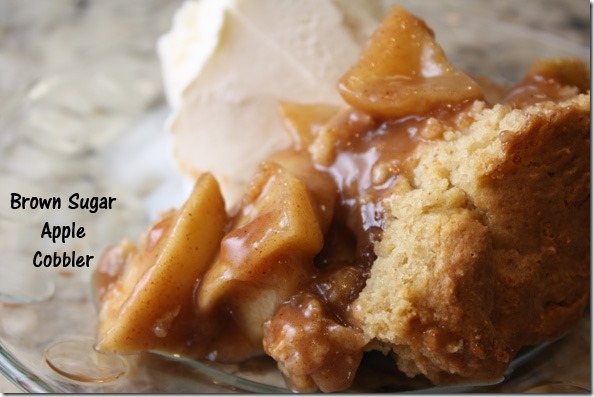
What’s there not to like about apple comfort food in a cobbler? This one’s made with brown sugar, which gives it almost a caramel flavor, and the biscuits on top are also made with brown sugar.

Recently I’d been looking through my to-try recipes, and decided I really needed to try this one – an apple cobbler made with brown sugar. And truly, this one has some very different flavors. The apples are cooked a bit in a big pan with butter and brown sugar added in, plus a bit of flour and cinnamon. The mixture has a butterscotch or caramel flavor. Granny Smith apples hold their shape, so this cobbler doesn’t disintegrate to applesauce. The recipe comes from Jennifer’s Bake or Break blog. She used different apples (Gala and Pink Lady) but I prefer Granny’s when I’m making a cobbler.

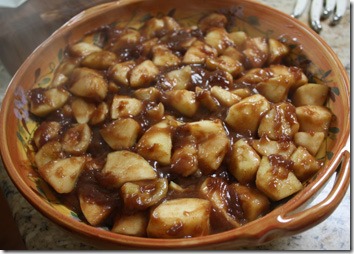
cobbler_applesOnce the apples are cooked a bit in that mixture (see photo) they’re poured into the baking dish. They’re not cooked through at all, but they have a lovely ooey-gooey wet brown sugar glaze all over them.

I could hardly not sample a piece of apple – the brown sugar, butter and cinnamon mixture makes them taste wonderful. I already knew this was going to be a great treat.

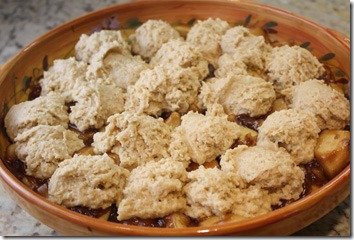
Then the biscuits needed to be made. They’re a standard kind of biscuit recipe but it does use only brown sugar, so they have a darker color from the get-go. They’re moistened with butter, milk and sour cream. brown_sugar_cobbler_before_baking

I plopped the biscuit mixture by small amounts (I used a cookie scoop so they’d be uniform in size) on top of the apples. There’s a photo of the baking dish before I put it in the oven.

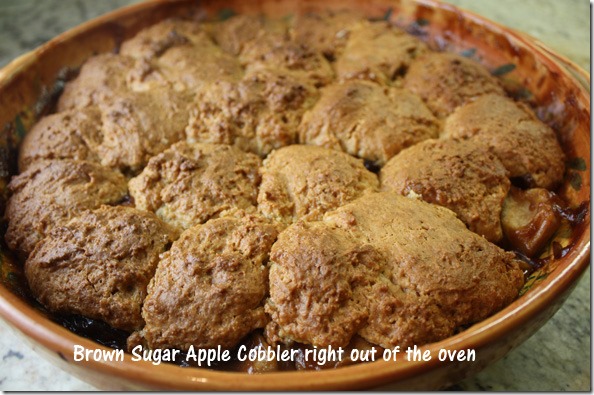
The oven temp is 400° F. I think if I made these again I would reduce it to 375° only because the biscuits get very dark colored. They weren’t burned at all – the brown sugar gives them that color, but I think they wouldn’t have gotten quite so firm on the top. Just a thought.

brown_sugar_apple_cobbler_casserole

I made this a few hours ahead of time, but it was still a little bit warm when we served it, along with scoops of vanilla ice cream. Yum.

What’s GOOD: as I said, comfort food for sure. Loved the caramely, butterscotchy taste to the apples. I think the dish needs more apples, so I’ve upped the number in the recipe below – but I didn’t increase the other ingredients. I think there is enough of the brown sugar mixture to cover 2 more apples. It was really delicious. Everybody loved it, and especially with the ice cream along with it.

What’s NOT: nothing that I can think of. It’s a great recipe. Thanks to Jennifer at Bake or Break.

printer-friendly PDF and MasterCook 14/15 file (click link to open recipe)

* Exported from MasterCook *

Brown Sugar Apple Cobbler

Recipe By: Adapted slightly from Bake or Break blog, 2014
Serving Size: 11

1/4 cup unsalted butter
8 medium Granny Smith apples — chopped
1 1/2 cups light brown sugar — packed
1/4 cup all-purpose flour
1 tablespoon ground cinnamon
BISCUITS:
1 3/4 cups all-purpose flour
1/2 cup packed light brown sugar
1 teaspoon baking powder
1/2 teaspoon baking soda
1/2 teaspoon salt
1/4 cup unsalted butter — cold and cut into small cubes
1/3 cup milk
1/3 cup sour cream
cinnamon-sugar (1 1/2 T sugar, 2 tsp cinnamon) to sprinkle on top

1. To make the filling: Place butter in a large skillet. Melt over medium heat while you assemble the apple mixture.
2. In a large bowl, stir together apples, brown sugar, flour, and cinnamon until combined and apples are coated.
3. Add apple mixture to melted butter. Cook over medium heat, stirring frequently, until mixture thickens (about 10 minutes).
4. Transfer apple mixture to a 3-quart baking dish.
5. To make the topping: Preheat oven to 375°.
6. Combine flour, brown sugar, baking powder, baking soda, and salt. Add butter and mix using a pastry blender or a fork until the largest bits of butter are about the size of small peas.
7. Add milk and sour cream, stirring just until combined. Use your hands if necessary to get the dough mixed with minimal working of the dough. Dough will be sticky.
8. Drop dough in 2-tablespoon portions over apple mixture. Sprinkle tops of dough evenly with cinnamon sugar.
9. Bake 25 to 35 minutes, or until topping is lightly browned and filling is bubbly. Serve warm or at room temperature with vanilla ice cream.
Per Serving: 335 Calories; 10g Fat (27.3% calories from fat); 3g Protein; 59g Carbohydrate; 3g Dietary Fiber; 27mg Cholesterol; 221mg Sodium.

Posted in Desserts, on January 23rd, 2016.

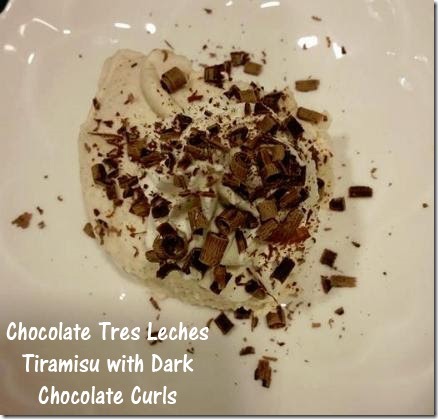
choc_tres_leches_tiramisuThat photo doesn’t do this justice. What more decadent could a dessert be with chocolate, creamy stuff, and tres leches sauce made into a tiramisu? Oh my goodness, is this dessert ever fantastic.

A disclaimer here, I haven’t actually made this – it’s from a class with Phillis Carey, who, besides being the queen of chicken breasts, also must be the crowned head of tiramisu, because she’s created so many different varieties of tiramisu I’ve lost count.

At the Diva Queens class last month, in San Diego, when Phillis and Diane Phillips did a double cooking class, Phillis prepared this dessert. It was one of the last things we had, and everyone was full, but oh gosh, was it worth every single mouthful? Yes, indeed. Make this if you have the occasion.

During some parts of the year, Trader Joe’s sells the cake-like ladyfingers – that’s what you want for this. Not the dried Italian-style ones. Lots of grocery stores carry them too – Phillis always explains that when TJ’s has them, she buys a dozen boxes and stores them in her freezer. I think I have 2 boxes down in the wine cellar. They could be all dried up by now. I suppose I should check one of these days.

The hardest part of making a tiramisu is assembling all the ingredients. Do make that effort first – get everything all set with the ingredients and the dessert dish you’ll use, etc. Then once you start, it all comes together in a jiffy. Then you must let it refrigerate for at least 4 hours, or overnight might be easier. A special occasion dessert, for sure.

This version uses a chocolate-cream-Kahlua mixture to moisten the ladyfingers. You can’t really taste the Kahlua – coffee just accents the chocolate, really. But it provides the liquor zing. Mascarpone cheese is mixed up into the “Cinnamon Cream” (sweetened condensed milk, whipping cream, cinnamon and vanilla) mixture. And those are layered in the dessert dish. That’s all there is to it – decorate the top with chocolate curls and chill. You’ll hear raves, I’m positive, unless you’re serving this to someone who doesn’t like chocolate or cream!

What’s GOOD: what’s there not to like about tiramisu? Really! It’s a wonderful dessert, and decadent for sure, so only make this for a special occasion. It’s chocolaty, creamy, Kahlua-y, and everything delicious.

What’s NOT: can’t think of anything, other than you do need to make this 4 hours ahead or the day before.

printer-friendly PDF and MasterCook 14/15 file (click on link to open recipe)

* Exported from MasterCook *

Chocolate Tres Leches Tiramisu with Dark Chocolate Curls

Recipe By: Phillis Carey class, 12/2015
Serving Size: 8

CHOCOLATE TRES LECHES:
1/2 cup heavy cream
1/3 cup cocoa powder — (unsweetened)
1/4 cup sweetened condensed milk
1/2 cup evaporated milk
1/4 cup Kahlua
TIRAMISU:
3/4 cup sweetened condensed milk
8 ounces mascarpone cheese — warmed to room temp
1 1/2 cups heavy cream
1 teaspoon ground cinnamon
1/2 teaspoon vanilla
6 ounces ladyfinger cookies — (soft type)
1/2 cup heavy cream — whipped, for garnish
1/3 cup shaved chocolate — for garnish

1. CHOCOLATE TRES LECHES: In a small saucepan whisk together the cream, unsweetened cocoa, sweetened condensed milk and evaporated milk. Bring to a simmer over medium heat. Simmer for 2 minutes. Remove pan from heat and whisk in coffee liqueur (Kahlua). Cool before using.
2. CINNAMON CREAM: In stand mixer, beat condensed milk into the mascarpone. Add whipping cream, cinnamon and vanilla. Continue to beat until soft peaks form.
3. Separate ladyfinger sections, leaving the individual fingers attached. Lay half the ladyfinger sections, round sides down, in a 9×13 glass or ceramic dish. Brush well with HALF the chocolate tres leches mixture, to saturate.
4. Spread ladyfingers with HALF the mascarpone cream and repeat with another layer of ladyfingers, brushing more tres leches mixture over every bit of the ladyfingers, then spread with remaining cinnamon cream. Cover dish and refrigerate for at least 4 hours, or up to 24 hours (no more than that, though).
5. When ready to serve, whip 1/2 cup whipping cream and spoon down the center of the tiramisu. Sprinkle top with chocolate shavings.
Per Serving: 645 Calories; 48g Fat (66.2% calories from fat); 10g Protein; 45g Carbohydrate; 2g Dietary Fiber; 236mg Cholesterol; 143mg Sodium.

Posted in Desserts, on December 28th, 2015.

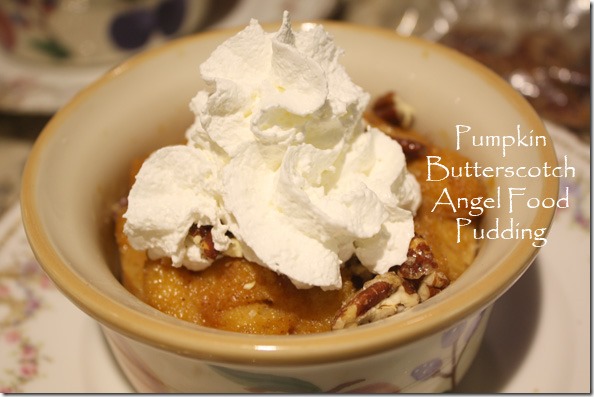
pumpkin_butterscotch_angel_food_pudding

It was a few weeks ago – we had our dinner group here at my house. I selected a menu of “fall favorites,” and asked everyone to bring a part of the meal. This is about the delicious pumpkin dessert Dianne brought.

I was going through recipes online, following all the blogs I read, and ran across this one and thought, hmmm, that sounds so good. Dianne loves to make desserts . . .. maybe she’d like to try this. So I sent her the link and suggested it as a dessert for our group. As she explained that night of our dinner, she follows directions well. If I ask, she assumes I’m telling her she has to make this, so she did. She wasn’t all that enamored with it, but everyone else at the table thought it was wonderful. She said it was kind of fussy. We said oh, but it’s really tasty. She said it’s actually kind of healthy. We said, really? We couldn’t tell. It was rich and decadent. The angel food cake cubes gave it a kind of light texture. Good texture. Dianne likes bread pudding, but had never made one with angel food cake cubes, so she doomed it to failure because of it. We all thought it was really great, and if it was a bit lower in calorie than some desserts, all the better. We made up for it with the whipped cream we put on top, probably.

The recipe came from pastrychefonline – a Jenni Field recipe. And I’d definitely make this – it satisfied my hankering for pumpkin, and I liked the fluffy texture. You mix up a pumpkin and egg mixture (a custard) and then toss it with toasted angel food cake cubes, then bake in a water bath. The recipe suggested serving it warm, but we had it at room temp and thought it was just fine. Loved the candied pecans on top – use your own simple recipe, just add a bit of pumpkin pie spice to the mixture if you can – it gives the pecans a totally different taste and a good match with this dessert. Thanks, Dianne, for making this, even if you weren’t all that crazy about it – we thought it was great!

What’s GOOD: the pumpkin flavor, of course – it’s nice to have it in something other than pumpkin pie; the texture – we all liked the lightness of it – it’s nothing like the texture of a pie – more like a light pudding, and nothing like a bread pudding either (which is heavy and dense). This was light and almost fluffy, but not quite. The crunch of the candied pecans added a nice touch. And then, well, whipped cream. That cut the richness of it.

What’s NOT: Dianne thought the recipe was more work than she liked – you do have to toast the angel food cake cubes, and using a water bath isn’t exactly every cook’s idea of  fun. But the pumpkin custard part is easy to mix up. Then you do want to make some toasted pecans – that’s another step. So, yes, I guess there are several steps to this and perhaps a big pile of dirty dishes too. But worth it.

printer-friendly PDF and MasterCook 14/15 file (click link to open recipe)

* Exported from MasterCook *

Pumpkin Butterscotch Angel Food Pudding

Recipe By: pastrychefonline blog, 2015
Serving Size: 8

8 ounces angel food cake cubes — (about 3/4 of a store bought whole one)
3 ounces butter — salted
4 1/2 ounces dark brown sugar
4 ounces pumpkin puree — (canned or homemade. If it’s very loose strain out some of the liquid until it is the consistency of apple butter)
1/2 teaspoon kosher salt — (increase slightly if you aren’t using salted butter)
1/2 teaspoon pumpkin pie spice
2 cups whole milk
2 large eggs
1 large egg yolk
Hot-to-boiling water for the water bath (about 1 1/2 quarts or so)
Candied pecans to sprinkle on top – use your own recipe, just add a bit of pumpkin pie spice
Whipped cream for serving on top

1. Place an oven rack in the middle of the oven and preheat to 350°F.
2. Spread out the cubed angel food cake on a rimmed baking sheet. Bake for 15 minutes, tossing the cubes every few minutes, until golden.
3. If you have time, let the cubes sit out for several hours or overnight until they are stale and hard. If not, just keep going. Set the cake cubes aside.
4. In a heavy-bottomed saucepan, melt the butter. Add the dark brown sugar and stir the butter and brown sugar together until bubbling and starting to increase in volume, about 3 minutes. The mixture will start out looking separated but will come together, so worry not. Add the pumpkin puree, salt, and pumpkin pie spice. Cook and stir until smooth. Remove from heat and add the 2 cups of milk.
5. Pour about 1/2-3/4 cup of the milk mixture in with the eggs, whisking constantly. Pour the eggs back into the custard and whisk until smooth. Strain into a large bowl.
6. Add the cake cubes into the custard mixture. If the cubes are stale, it will take about 20 minutes to soften. If not, it will take much less time. When finished, most of the custard will have been absorbed by the cake.
7. Pack the custard-soaked cake into buttered 1-cup ramekins or ring molds and pour in any additional custard evenly among the four. If using ring molds, line with parchment strips and wrap the bottoms with foil to prevent leaks. Place on a rimmed baking sheet in the oven. Carefully pour in the hot water into the pan to a depth of about ½”. Carefully slide the oven rack into place and bake for about 30 minutes or until a knife stuck in the center of a pudding comes out clean.
8. Turn off the oven, crack open the oven door and allow the puddings to sit an additional 10 minutes. Carefully remove the puddings from the pan (leave the pan to deal with once the oven is cool and the water won’t burn you if it sloshes) and let cool on a wire rack. Serve barely warm garnished with some chopped candied pecans and some whipped cream. You can also chill them and reheat a bit when ready to serve.
Per Serving:  555 Calories; 25g Fat (40.3% calories from fat); 12g Protein; 73g Carbohydrate; 1g Dietary Fiber; 222mg Cholesterol; 810mg Sodium.

Posted in Desserts, on December 13th, 2015.

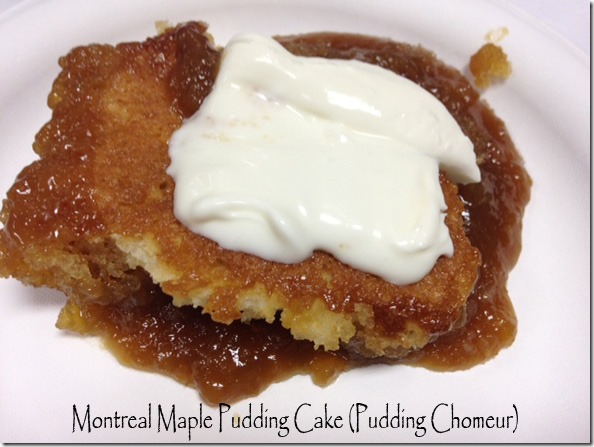
pudding_chomeur

Not such an attractive looking dessert, but oh my, is it ever good. Maple syrup heads the line-up of ingredients and its flavor dominates, in a good way.

Not so long ago I was at a Phillis Carey cooking class, and she explained that she’d been on a cruise in Canada and was served this dessert, a French dessert, more than once and when she got home she played around with it, keeping true to the original concept recipe, and created this that’s mostly like a cake, but it has this wonderful maple sauce it makes as it bakes. You’ve had pudding-cakes before, I’m sure. I have a bunch here on my blog, my favorites being a Lemon Sponge Pudding, a Sticky Chocolate Sponge Pudding, and lastly a Warm Chocolate Raspberry Pudding Cake. If you go to my recipe index page for Desserts, scroll almost to the bottom and you’ll find a listing of the various pudding cakes I’ve made over the years. The Gingerbread one is awfully good too.

Grade A Maple Syrup:

do use Grade A AMBER, the richer colored one if you can – it has a more intense flavor. Don’t use the honey colored one.

This recipe uses darker maple syrup (meaning it has a more intense, darker flavor, the darker always better in my book), plus cream, and mostly other standard baking ingredients, and it goes together quite quickly. This is an intensely flavored pudding cake – the maple flavor predominates, but it’s also very, very sweet. I didn’t make this myself, just ate it at Phillis’ cooking class, but when I make it I’m going to reduce the sugar by about half. There’s not much sugar in it – 1/3 cup – the sweet comes mostly from the maple syrup – but I’d definitely use less and see how it turned out. If you don’t mind the sweet (almost made my teeth ache) by all means use the full 1/3 cup. You need all the maple syrup because it is integral to the sauce portion. And whatever you do, DON’T substitute cheap “breakfast syrup” for the maple syrup. This is a time when you must use the real thing.

The maple syrup mixture (a cream-based concoction) is mixed up and half poured into an 8×8 glass dish. Then the batter is made – it’s  wet batter sort of like pancakes, I suppose – and you use a spoon to scoop big portions or mounds into the dish (six of them), then you pour the remaining maple mixture on top and bake it. Once baked, you do want to let it sit just a bit – that maple syrup would be VERY hot – it would burn your mouth if you ate it immediately. Serve warm with whipped cream or a dollop of crème fraîche on top. Likely you’ll hear raves and mmmm’s around the table.

What’s GOOD: the intense maple flavor is the first thing you’ll notice – it’s so good warm – do serve it that way. But I don’t imagine left overs would be bad even at room temp, either. It’s comfort food at it’s French Canadian best!

What’s NOT: nothing really – just read my note about reducing the sugar – it’s very sweet. Not good for anyone who’s averse to sugar!

printer-friendly PDF and MasterCook 14/15 file (click on link to open)

* Exported from MasterCook *

Montreal Maple Pudding Cake (Pudding Chomeur)

Recipe: Phillis Carey cooking class, 2015
Serving Size: 6

1 1/4 cups maple syrup — Grade A Amber preferred (do NOT substitute breakfast syrup)
3/4 cup heavy cream
2 teaspoons cider vinegar
1 pinch salt
6 tablespoons unsalted butter
1/3 cup sugar — [my suggestion: use half this amount]
1 large egg
1/2 teaspoon vanilla
1 cup cake flour
1 teaspoon baking powder
1/4 teaspoon salt
8 ounces creme fraiche — or whipping cream

NOTE: This could be prepared in individual ramekins (6-8 ounces each). Would probably take a little less time to bake. Serve each ramekin on a dessert plate.
1. Preheat oven to 350°F. Stir together maple syrup, cream, vinegar and salt in a small saucepan and bring to a boil and immediately remove from the heat.
2. Beat together butter and sugar with an electric mixer until light and fluffy, about a minute. Add egg and vanilla and beat until just combined. Sift flour, baking powder and salt together and fold into the egg mixture just until combined.
3. Pour 1/3 cup of the maple syrup mixture into an 8-inch square glass or ceramic baking dish. Use a pretty dish as you will want to serve this at the table. Spoon the batter into 6 mounds onto the syrup mixture, spacing the mounds as evenly as possible. Pour remaining syrup mixture over and around the mounds.
4. Bake until top is golden and firm to the touch, 25-40 minutes. Serve warm with a dollop of creme fraiche or whipped cream.
Per Serving: 605 Calories; 35g Fat (50.5% calories from fat); 4g Protein; 72g Carbohydrate; trace Dietary Fiber; 142mg Cholesterol; 240mg Sodium.

Posted in Desserts, on December 1st, 2015.

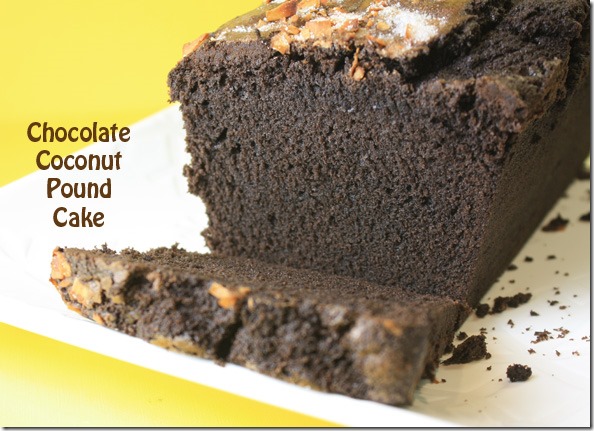
choc_coconut_pound_cake_sliced

Oh my yes! Will you please make this? Soon. Super chocolate flavor, but tempered by the coconut on it and the coconut oil in it. A fabulous and easy dessert.

It’s true. I do love baking, but you’ll see that I have all kinds of other things on my blog too – meats, veggies, appetizers. All manner of things. But I suppose if I had to say, baking is my favorite thing to do. And since Dave, my DH, passed away (it’s now been a year and 8 months), I don’t entertain as much, and my dinner menus are more simple. I eat lots of left overs. But my Bible study group comes to my house frequently, so that satisfies my need for baking. And that’s what happened a week or so ago when I decided to make this.

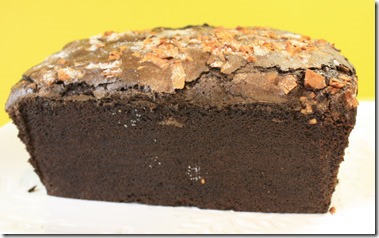
The recipe came from Bon Appetit, in 2014. It’s baked in an 8-inch loaf pan – recently I actually measured my bread pans and was surprised to choc_coconut_pound_cake_wholefind that my smallest one is actually closer to 9” instead of 8” so I bought a new one. This new one, though, is almost smaller than 8”. So this cake almost bubbled over the top. Just so you know. If you use a 9” pan, the baking time will be different, and it won’t be as high, obviously.

What’s different about this cake is the use of coconut oil – not the liquid type (is there a liquid type?) but the congealed type (that’s called virgin coconut oil) that almost has the consistency of shortening. It gets mixed with sugar, then with eggs and it whizzes up in the stand mixer until it has a very light, but thick consistency. Billowy almost, but not quite. Then you mix in the dry ingredients (flour, cocoa, salt, and baking powder) in additions along with buttermilk. Into the baking pan it goes – with waxed paper carefully placed inside so you can use it as a sling to remove the cake from the pan. You use a spatula to make a groove down the middle – an important step. Even so, my cake almost spilled over. You can’t quite see it in the photos, but one side had a big bulge – I cut it off and ate it, thank you. Yum.

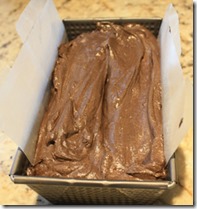
choc_coconut_batter_groove

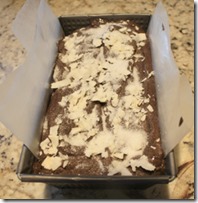
There on the right you can see the groove I made. Since the pan was so full I had difficulty doing it, and the batter was wet enough that it kind of oozed back into the center as soon as I’d done it. But do try. Then you choc_coconut_batter_in_panadd on the toppings (granulated sugar and unsweetened coconut). Into the oven it went and it baked for 80 minutes (recipes says 70-80, but mine took the full 80) until a tester inserted in the middle came out clean.

Then it’s left out to rest and cool for at least 20 minutes (I think mine cooled for an hour or so – made for easier handling), then cooled completely on a rack for another hour or two. Picture at left is the batter with the toppings, ready to go into the oven.

What’s GOOD: the chocolate flavor is absolutely wonderful (I used Hershey’s Dark cocoa), and it’s super moist. Easy to slice too, with a serrated knife. The recipe indicated it serves 8, but I got about 11 slices from mine. I served it with sweetened whipped cream. Everybody loved it. I loved it. Can’t wait to have a slice after lunch or dinner today. Or, maybe I’ll have a slice with a cup of tea this afternoon. It’s also very easy to make. The recipe says it will keep for 5 days, wrapped well, at room temp. I guarantee you it won’t last that long.  The coconut flavor is enough that you DO taste it in the cake (from using the oil). I liked the flavor a lot.

What’s NOT: nothing whatsoever. It’s a great dessert cake.

printer-friendly PDF and MasterCook15 file (click on link to open recipe)

* Exported from MasterCook *

Chocolate-Coconut Pound Cake

Recipe By: Bon Appetit, March, 2014
Serving Size: 8

4 tablespoons unsalted butter — room temperature, plus more for the pan
1 1/2 cups all-purpose flour
1/2 cup unsweetened cocoa powder
1 teaspoon kosher salt
3/4 teaspoon baking powder
1/2 cup virgin coconut oil — room temperature
1 1/2 cups sugar
3 large eggs
1 teaspoon vanilla extract
2/3 cup buttermilk
1/4 cup unsweetened coconut meat — to sprinkle on top (flake type)
1 tablespoon sugar — to sprinkle on top

1. Preheat oven to 325°. Butter an 8×4” loaf pan; line with parchment paper, leaving a generous overhang on long sides. Whisk flour, cocoa powder, salt, and baking powder in a medium bowl; set aside.
2. Using an electric mixer on medium-high speed, beat oil, butter, and sugar until pale and fluffy, 5–7 minutes. Add eggs one at a time, beating to blend between additions; beat until mixture is very light and doubled in volume, 5–8 minutes. Add vanilla.
3. Reduce mixer speed to low and add dry ingredients in 3 additions, alternating with buttermilk in 2 additions, beginning and ending with dry ingredients (do not overmix; it will cause cake to buckle and split). Scrape batter into prepared pan and run a spatula through the center, creating a canal. Sprinkle with coconut and remaining sugar.
4. Bake cake, tenting with foil if coconut browns too much before cake is done (it should be very dark and toasted), until a tester inserted into the center comes out clean, 70–80 minutes. Transfer pan to a wire rack; let cake cool in pan 20 minutes before turning out. Carefully remove paper, allow to cool completely, then slice using a serrated knife. It says it serves 8, but you can probably get about 10-11 slices if you try.
5. DO AHEAD: Cake can be baked 5 days ahead. Keep tightly wrapped at room temperature. (But I doubt this would last 5 days – I’d eat it all!)
Per Serving: 471 Calories; 24g Fat (44.1% calories from fat); 7g Protein; 62g Carbohydrate; 3g Dietary Fiber; 96mg Cholesterol; 332mg Sodium.

Posted in Desserts, on October 30th, 2015.

apple_sharlotka_whole

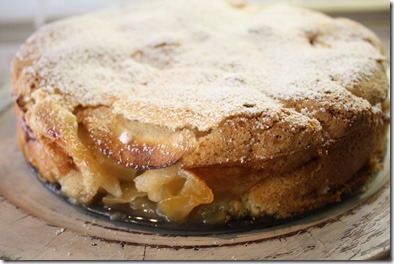
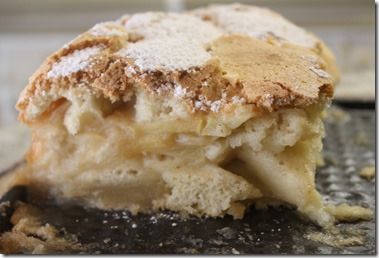
There’s a thing that happens to bloggers. Well, at least THIS blogger. When I can’t WAIT to get to my computer to write up a post about a recipe, you can pretty well be assured it’s a winner of a dish. I haven’t exactly felt that way about any recipe I’ve made in the recent past. But oh, this one, yes indeedy! A winner. Apples cloaked in the lightest of crispy crusts. Serve warm. To raves.

The day I made this I was a bit frazzled. I’ve been that way a lot as the workers are finishing up the work I’ve had done to my house. I’m so ready to have them be gone-gone. I want peace and quiet – not just at 7 am when they show up – but all day long. As I write this they’re finishing up the roofing. The compressor runs pretty much all day long. Shorting out things, tripping the circuit breakers. It’s all very frustrating. My pool filters were off for days and I didn’t even realize it. Vigilance is the word of the day. The word of the hour. Our neighborhood had a power outage the other night (nothing to do with the work at my house since this was at about 8pm), for about 30 minutes. I was watching TV, and grabbed my iPad mini, opened up the lid and it provided enough light so I could locate the flashlight. Some candles were lit. That tripped some breakers too. More frustration.

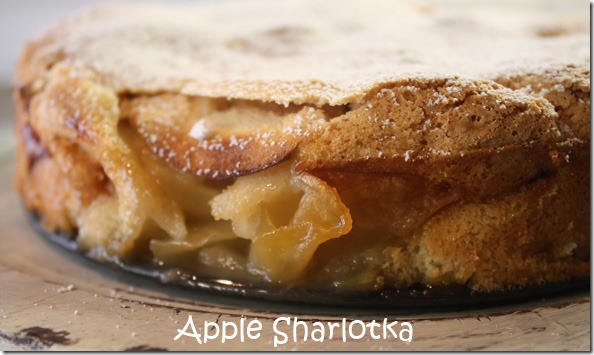
apple_sharlotka_topAnyway, I have 2 ladies that come to clean my house every 2 weeks. I’m grateful for that. Ever so grateful. But if they come later than usual, then they’re still cleaning the kitchen when I need to be in there (they arrive about 2:30 pm and are here for about 3 hours). This week they were later than that, and I was already behind schedule to prepare a dessert for my bible study group. I didn’t start on it until 6:10 and my guests were arriving at 7:00. Oh my. The cleaning ladies were still cleaning the far side of my kitchen as I began work on this. I whipped out my 8-inch springform pan, madly peeled 4 apples (the recipe calls for Granny Smith, but I had 2 of those and 2 other kinds). The apples are tossed with a bit of sugar and lemon juice, then poured into the springform pan. Meanwhile, you mix eggs, sugar and almond extract. That gets mixed until the batter is very light and ribbony, which takes about 10-11 minutes. I did that while I was prepping the apples. The batter is spread on top. The recipe said to let it sit for 5 minutes to allow the batter to ooze down into the apple layers, but I had no time for that, so I just rapped the pan on the countertop a few times and watched as the batter moved some. Into a 350° oven it went. apple_sharlotka_slice

It bakes for an hour – a long time considering the apples were thinly sliced, but I trusted the recipe (it was in Food & Wine, and is credited to Matt Danko, a superlative chef – he used to be in Cleveland). Anyway, this recipe is his Russian father’s (I love to read about recipes with that kind of heritage).

I allowed it to cool for about 15 minutes maximum, because my guests had arrived and my dessert wasn’t ready. No worries, I served it warm as we sat at my dining room table discussing the history of Paul (Romans). It needed not a smidgen of any garnish – I didn’t have enough ice cream, nor enough cream to whip, so I served it as is, plain and simple. Oh-la-la.

What’s GOOD: everything. All of it – flavor, texture, toothsomeness, sweet, tart. The top is a wonderful thin crispy crust – you top it with some powdered sugar – and some of the batter does ooze down inside. It actually oozed clear to the bottom in some places. It was easy to cut, and everyone liked it for sure. I’d definitely make this one again. It’s also VERY easy. It couldn’t have taken me more than 15 minutes total to put it together, maybe less. The oven had just reached temperature when I put it in. Do let it sit, and do serve it warm. It’s also relatively low in calorie – 200 calories per serving.

What’s NOT: I can’t think of a single thing I didn’t like about it. The original article in the magazine suggested you’d never want for another apple dessert after you’ve had this one. I tend to agree! The left overs lost their crispy crust – so try to eat it all up in the first sitting.

printer-friendly PDF and MasterCook 14/15 file

* Exported from MasterCook *

Apple Sharlotka

Recipe By: From Food & Wine, Matt Danko
Serving Size: 8

4 whole Granny Smith apples — peeled, cored, thinly sliced
1 tablespoon fresh lemon juice
1 cup sugar
3/4 cup all-purpose flour — plus 2 tablespoons
1/4 teaspoon ground cinnamon
1/4 teaspoon grated nutmeg
1 pinch kosher salt
3 large eggs
1/2 teaspoon almond extract
Confectioners’ sugar for dusting on top

1. Preheat the oven to 350° F. Grease the bottom and side of an 8-inch springform pan.
2. In a large bowl, toss the apples with the lemon juice and 2 tablespoons of the sugar and let stand for 15 minutes.
3. Meanwhile, in a small bowl, whisk the flour with the cinnamon, nutmeg and salt. In a medium bowl, using an electric mixer, beat the eggs with the almond extract and the remaining 3/4 cup plus 2 tablespoons sugar at medium-high speed until thick and pale yellow and a ribbon forms when the beaters are lifted, 8 to 10 minutes. Gently fold in the dry ingredients just until incorporated.
4. Spread the apples in the prepared pan in an even layer, then pour the batter evenly over them. Let stand for 5 minutes to allow the batter to sink in a little. Or, rap pan on countertop a few times to allow batter to sink through.
5. Bake the sharlotka for about 1 hour, until it is golden and crisp on top and a cake tester inserted in the center comes out clean. Transfer to a rack and let rest for 15 minutes. Unmold and transfer to a serving platter. Dust with confectioners’ sugar and serve warm.
Per Serving: 200 Calories; 2g Fat (9.2% calories from fat); 4g Protein; 42g Carbohydrate; 2g Dietary Fiber; 80mg Cholesterol; 43mg Sodium.

Posted in Desserts, on October 18th, 2015.

stone_fruit_tea_cake

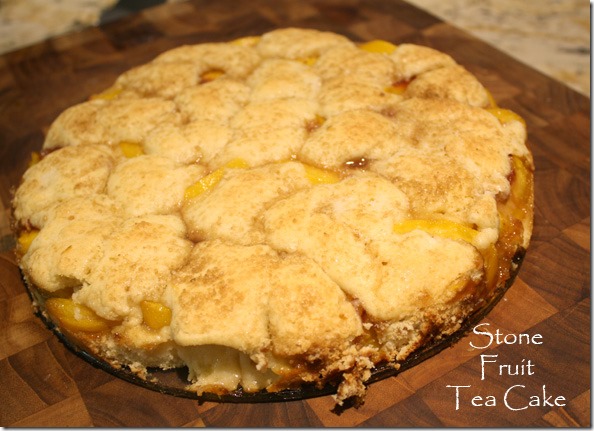
Last hurrah with peaches, made into a lovely cake style tea cake.

This could be made with any variety of stone fruit (apricots, peaches, nectarines, plums), but it was featured in Rustic Fruit Desserts: Crumbles, Buckles, Cobblers, Pandowdies, and More, the cookbook, and made with peaches. Remember, I acquired the cookbook recently. The one I said I didn’t need, but wanted anyway. And this is another winner of a recipe.

Tea cake has many meanings, depending on where you live in the world! In England a tea cake is more of a bread, sometimes with fruit and some made with yeast, but often are made into snacks or sandwiches. In Sweden it’s a soda bread to serve warm with butter and jam. In Australia and India it’s more of a sponge cake and IS served with TEA! And here in the U.S. if you’re having a tea cake in the South, it’s more like a cookie – a dense, large cookie. But elsewhere in the U.S. it’s a single-layer spiced cake. Really, I’d say this cake I made doesn’t qualify as any of those, but then I didn’t name it.

My bible study group was coming over, so it was a good occasion to bake something. I surely wouldn’t have wanted this whole cake for just me to eat, because I would have eaten it!

It was easy enough to prepare – butter and sugar are beaten together until light, eggs added in, then the dry ingredients. Only one different technique – the batter was quite sticky at that point (almost like the consistency of a cookie dough) and you stick it in the freezer for 30 minutes. That firmed up the tacky feeling and was enough to allow you to handle the dough without most of it sticking to your fingers. Half is pressed into the bottom of a 10 inch spring form pan. Then the fresh peaches are cut. I threw in a little splash of Amaretto – but actually that made the fruit too wet, I think. I won’t do that next time. Then with the remaining dough/batter, you break off little tablespoon-sized pieces of stick them all over the top. They spread out, as you can see from the picture with just an occasional peach peeking through – it makes for a pretty look. It’s baked for 30-40 minutes (and mine probably should have baked a little bit longer as the dough was a tiny bit gooey in the middle). I think I will increase the baking time of this by about 5 minutes – the top should be just golden brown. Do serve it warm, and do serve it with either pouring cream, whipped cream or ice cream. I think it needs it. It’s not overly sweet, thankfully, but it’s a cake, not a fruit torte.

What’s GOOD: the yummy peaches in a nice, warm cake. I served it with heavy cream to pour over. Very delicious. It is more cake than it is fruit, just so you know. I used 4 fairly smallish peaches (it calls for 2 1/2 cups of sliced peaches) and maybe it could have been more, but that would also increase the baking time.

What’s NOT: it’s only as good as the peaches you use in it – use nice, ripe, juicy ones only. It’s fairly easy, so I had no complaints with the making of it at all.

printer-friendly PDF and File: MasterCook 14

* Exported from MasterCook *

Stone Fruit Tea Cake

Recipe By: Rustic Fruit Desserts (cookbook)
Serving Size: 10

1 tablespoon unsalted butter — at room temperature, for pan (I used the butter wrappers to grease the pan)
2 1/4 cups all-purpose flour
1 teaspoon baking powder
1 teaspoon sea salt — fine grind
1 cup granulated sugar
3/4 cup unsalted butter — at room temperature
3 large eggs
1 tablespoon vanilla extract
2 1/2 cups peaches — or nectarines, coarsely chopped, fresh or frozen (or use all fresh peaches)
1 tablespoon turbinado sugar

1. Whisk flour, baking powder, and salt together in a bowl and set aside. Using a handheld mixer with beater or a stand mixer with the paddle attachment, cream sugar and butter together on medium-high speed for 3 to 5 minutes, until light and fluffy. Add eggs, one at a time, scraping down sides of bowl after each addition, then stir in vanilla. Add flour mixture and stir just until a smooth dough forms. It makes a sticky dough. Wrap dough in plastic wrap, flatten into a 1-inch-thick disk, and freeze for 30 minutes.
2. Preheat oven to 375 degrees. Butter a shallow 10-inch round baking pan, springform or tart pan.
3. Divide the dough into two equal portions and pat one portion evenly into the bottom of the prepared pan. Do push the dough clear to the edges. Spread fruit over the dough. Break remainder of the dough into tablespoon-size pieces and distribute atop the fruit, then sprinkle the turbinado sugar over the cake.
4. Bake for 35 to 45 minutes, or until lightly golden and firm. A toothpick poked in the middle should come out clean and not wet. Cool for 30 minutes before serving. The original recipe said it serves 12, but they’d be mighty small pieces. I’ve changed it to 10.
5. Storage: Wrapped in plastic wrap, this tea cake will keep at room temperature for up to 3 days. (The top will soften a bit.) You can also freeze the unbaked dough; if wrapped well, it will keep for up to 3 months. You can freeze a whole, unbaked cake with fruit (again, wrapped well) for 1 month.
Per Serving: 361 Calories; 17g Fat (41.5% calories from fat); 5g Protein; 48g Carbohydrate; 2g Dietary Fiber; 104mg Cholesterol; 261mg Sodium.

Posted in Desserts, on October 2nd, 2015.

creamy_coconut_tapioca_pudd

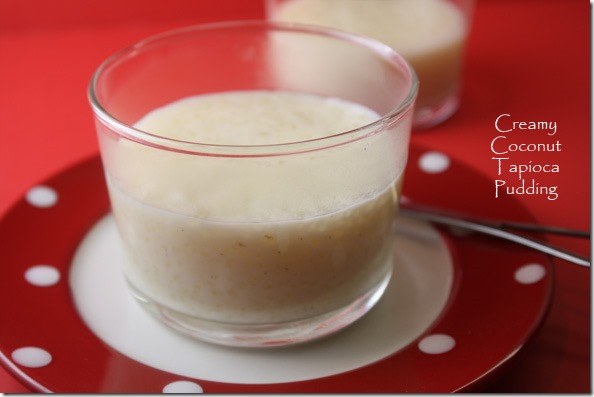
Comfort food. Soothing. Creamy.

Stress is certainly the norm these days. My days have been filled with contractors, pounding, scraping, dust, trash, hammering. It begins to wear one down. I’m starting to think about packing for that trip to Africa. I discovered my passport expires in March, and it must be valid for at least 6 months after my arrival, so am frantically trying to deal with that. I need to start a list – a long list of the things I need to do. All that tends to give one stress – at least it certainly does with me. So even though it wasn’t exactly fall weather, I felt like something soothing. A pudding of some kind. Not rich. Not fancy. Not chocolate.

This was in my “new” to-try list of recipes. Remember, in my recipe program it’s called “Internet” recipes, and I’ve had to start all over. I’ve got a couple hundred recipes in it already – it had some – those prior to 2011, but nothing  of all the recipes I’d added since. This was in that the old list. I fiddled with the recipe a little bit, and tweaked it because all I had was light coconut milk. It was serendipitous because there was exactly 1/2 cup of tapioca in the box on my pantry shelf. It was supposed to be pearl tapioca, but if I have it, I can’t find it, so the regular had to do.

The tapioca, coconut milk and a vanilla bean (with the seeds scraped out into the mixture also) are simmered together until the tapioca is cooked and thickened. Then you mix 2 egg yolks and just 5 T of sugar (it’s not an overly sweet pudding) and spoon a little of the hot tapioca mixture into the eggs, to temper them, then they all get mixed into the tapioca and that’s cooked for a little bit. I couldn’t see much of a noticeable difference after cooking it with the egg yolks (not any thicker that I could tell), then the vanilla bean is discarded and you pour it into individual serving cups or a bowl to cool. I drizzled a little tiny bit – maybe 2 tsp. of heavy cream on top when I served it. The original recipe served it with freshly cut up mango. I didn’t have any of that, either, so plain was just fine for me.

What’s GOOD: well, if I was looking for comfort food, it certainly filled the bill. It wasn’t real rich (light coconut milk, remember) and I used mostly 2% milk with just a tiny bit of heavy cream added in. It was definitely comforting. Next time I’d make it with full fat coconut milk as I couldn’t really tell there was anything coconut-y in it. Nothing fancy. Just plain good.

What’s NOT: nothing, really.

printer-friendly PDF and MasterCook 14 (click link to open in MC14)

* Exported from MasterCook *

Creamy Coconut Tapioca Pudding

Recipe By: My own concoction, but loosely based on a recipe from Food & Wine
Serving Size: 6

1/2 cup tapioca
2 1/4 cups 2% low-fat milk
1/4 cup heavy cream
1 whole vanilla bean — halved lengthwise and seeds scraped
1 pinch Kosher salt
14 ounces light coconut milk — unsweetened (use full fat for more coconut flavor)
2 large egg yolks
5 tablespoons sugar

1. In a large saucepan, combine the tapioca, milk, vanilla bean and seeds and a pinch of salt. Bring to a simmer over moderate heat and cook, whisking occasionally, until the tapioca is translucent and tender, about 20 minutes. Whisk in the coconut milk.
2. In a small bowl, whisk the egg yolks with the sugar. Gradually whisk in half of the warm tapioca in a steady stream. Continue whisking and pour the egg yolk mixture back into the saucepan. Cook the pudding over moderate heat, stirring occasionally, until thickened, about 5 minutes. Transfer the pudding to a bowl or individual cups and let cool to room temperature. Discard the vanilla bean. Chill for 2-3 hours. You might pour a little smidgen of heavy cream on top and garnish with a mint leaf.
Per Serving: 225 Calories; 11g Fat (41.3% calories from fat); 5g Protein; 29g Carbohydrate; trace Dietary Fiber; 91mg Cholesterol; 89mg Sodium.

Posted in Desserts, on August 29th, 2015.

peach_blackberry_almond_crisp

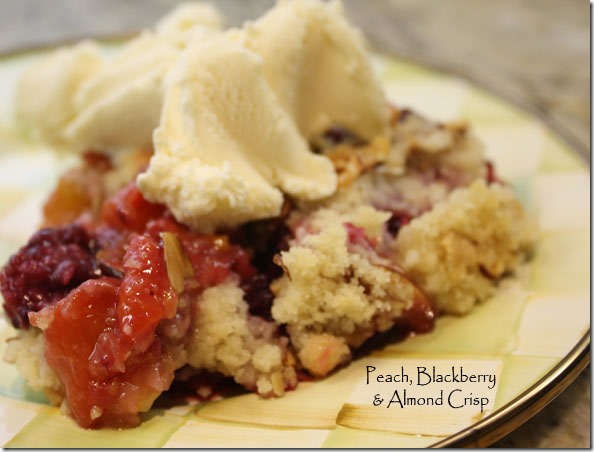
If a CRISPY crisp is what you like, you’ll not be disappointed with this one. A layer of peaches and blackberries on the bottom and the topping (crispy, but no oatmeal) sprinkled liberally on the top and baked. Wonderful!

A few months ago I purchased another cookbook. I’m a sucker. I’d read that the book was so worth buying and very few of the recipes have shown up yet on the ‘net, so I decided to spring for it. Rustic Fruit Desserts: Crumbles, Buckles, Cobblers, Pandowdies, and More, written by Cory Schreiber and Julie Richardson. I had a big crowd over for dinner recently – it was a cool evening (although ever-so humid what with this oddball weather we’re toppinghaving) and I even lit the outdoor fireplace for some of the younger dinner guests. Anyway, I bought a small flat of peaches (not nectarines) and we generally don’t find boysenberries at our markets, so I bought blackberries instead. Otherwise I followed the recipe.

Since I used peaches, I peeled them. I have a great Messermeister Pro Touch Swivel Peeler that works like a charm on soft fruit. The recipe calls for tossing the fruit with cornstarch and a dash of salt. I thought the fruit was sweet enough, so I eliminated the 1/2 cup tossed into the fruit. I’ve noted it in the recipe as optional.

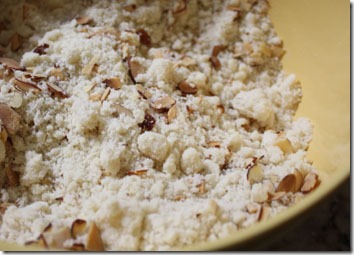
The topping is easy to make – you combine everything (adding in the sliced toasted almonds later) in a food processor (or do by hand if preferred) and once out into a bowl you kind of manhandle the dough until it makes shards or clumps and that are sprinkled all over the fruit.

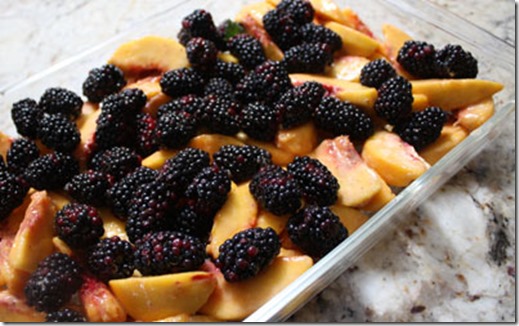
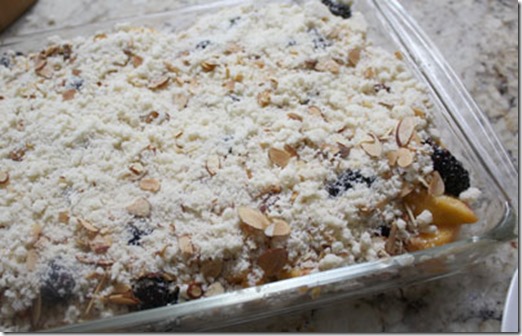
Down below  you’ll see photos of the Pyrex dish with just fruit, and then with the topping. I increased the recipe to feed more people, so ended up baking it in 2 different dishes. One of the suggestions was to bake this in flatter, wider dishes so the moisture from the fruit will do some evaporation and so the topping will have plenty of space to “crisp.” That’s what I did.

fruit_before_topping

crisp_ready2_bake

The crisp is baked for 55 minutes (the recipe says 45-55 and the tops weren’t quite brown enough so I baked it the full 55 minutes). Ideally, serve this warm – you can reheat it for 10 minutes at 325° if you make it earlier in the day. I served it with vanilla ice cream. But, when we had left overs, I served it at room temp 2 days later and it was just fine.

What’s GOOD: this recipe is a real keeper. I LOVED-LOVED the crispy topping – and especially because it contained no oatmeal. I’ve never been a fan of oatmeal crusted cobblers. So I really liked this topping which IS crunchy and tasty. Really liked the almonds in the mixture too (toasted prior to baking the crisp).  Altogether a delicious dessert, and it wasn’t all that much work to make. Peeling the peaches wasn’t a whole lot of fun, but the peeler makes it pretty quick work. Nectarines don’t require peeling, and peaches probably could have been left unpeeled. Your choice, I guess.

What’s NOT: The blackberries I used were huge, so their seeds were quite large (chewy). If I had anything to complain about it would be that – and that’s not the fault of the recipe, just the fruit selection. I’d choose younger blackberries, or substitute raspberries. That, however, was the only thing I could possible comment on. The dish was wonderful, worth making.

printer-friendly PDF and Files: MasterCook 5+ and MasterCook 14 (click link to open in MC)

* Exported from MasterCook *

Nectarine, Boysenberry, and Almond Crisp

Recipe By: Rustic Fruit Desserts (cookbook)
Serving Size: 8

1 1/4 cups all-purpose flour
3/4 cup granulated sugar
1 teaspoon salt
1/2 cup unsalted butter — cold, cut into 6 cubes
3/4 cup sliced almonds — toasted
1/2 cup granulated sugar (optional – if fruit is really sweet you can leave this out)
2 tablespoons cornstarch
1/2 teaspoon fine sea salt
6 whole nectarines — or peaches each cut into 10 to 12 slices (3 pounds prepped)
1 pint boysenberries — or blackberries
1 tablespoon pure vanilla extract
Optional for serving: ice cream or whipped cream

Cook’s notes: You will want to use a wide dish for this recipe so the filling can spread out in a shallow layer, which allows more water (from the fruit) to evaporate. Almonds are the first choice to complement the combination of nectarines and boysenberries, but walnuts or hazelnuts also work well.
1. Preheat the oven to 400°F. Butter a 3-quart baking dish (see cook’s notes).
2. Prepare topping: Mix flour, sugar, and salt together in a bowl. Add butter and toss until evenly coated. Using your fingertips or a pastry blender, cut in butter until mixture resembles crumbs. (Alternatively, you can put the dry ingredients in a food processor and pulse to combine. Add the butter and pulse until crumbly, then transfer to a bowl and squeeze the mixture between your fingers to make crumbs.) Add the almonds and mix gently; try not to break the almond slices. Put the topping in the freezer while you prepare the fruit filling.
3. Prepare fruit filling: Rub the sugar, cornstarch, and salt together in a large bowl. Add nectarines and boysenberries, toss until evenly coated, then gently stir in the vanilla.
4. Pour the fruit into prepared baking dish and scatter topping over the fruit. Bake for 45 to 55 minutes, or until topping is golden and fruit is bubbling. Cool for 30 minutes before serving, topped with ice cream or whipped cream, if desired. Wrapped in plastic wrap, the crisp will keep at room temperature for up to 3 days. Reheat in a 325-degree oven for 10 minutes before serving.
Per Serving: 452 Calories; 19g Fat (37.3% calories from fat); 6g Protein; 67g Carbohydrate; 4g Dietary Fiber; 31mg Cholesterol; 388mg Sodium.

Posted in Cookies, Desserts, on July 10th, 2015.

classic_brownies_best_ever

Do you have food in the freezer that calls out to you? That sings your name and says “come hither?” Well, there’s a little box of these in my freezer and in the mid-afternoon when I need a pick-me-up, I swear, they start beckoning.

Not really, but they certainly could sing to me. These brownies. Oh my goodness. I’d forgotten all about these, about how fantastic they are, how chocolaty they are. I cut them into small pieces so I wouldn’t get carried away and I do take just ONE of them. I baked them for an event recently and hoped most of them would be eaten, but alas, there were about 15 of them left over. Oh, sigh. They’re in my freezer.

I posted this recipe back in 2007, a couple of months after I started writing this blog, and I waxed glorious about them then, and hadn’t made them since. It’s a recipe from Cook’s Illustrated – according to my notes it was published in 2004 and I think they call them Classic Brownies. The link at left is to my original post. The only thing different about this one is that I used walnuts instead of pecans.

There is one important point – DO use really good quality chocolate. I’m not sayin’ that these won’t be good if you use grocery store, cheaper chocolate. I had a chunk of Valrhona in my pantry and that’s what I used. It calls for unsweetened chocolate. Nothing about the preparation of these is difficult. There are dry ingredients.There are eggs, and then chocolate and butter that are melted together.

You can bake these in a 9×13 pan. Mine?: I used an odd shaped one. One of my cooking teachers recommended brownies_ready_to_bakeMagic Line, a U.S. company that produces real solid aluminum pans. They’re available on amazon in oodles of shapes and sizes. This one I used is a jelly roll pan, but I wasn’t making a jelly roll, obviously. What’s unique about Magic Line is the nice little lip they put on the edges, which makes it much easier to grab the hot pan out of the oven. Anyway, Parrish Magic Line 10 x 15 x 1 Inch Jelly Roll/Cookie Sheet is the one. In the photo at left I’ve lined the pan, both directions, with foil, with edges sticking out, to make it easier to remove once the brownies are cooled.

I wanted to have thinner brownies and more of them; hence I decided to use the larger pan. I baked them slightly less time, about 29 minutes, rather than 30-40 in the 9×13 pan. I used my Thermapen to check the internal temp and took them out when they reached 200° F. And, I used walnuts. I didn’t toast them – I was running low on time that day, so I took a shortcut. But toasting walnuts, or any nuts, before baking with them is a good idea.

What’s GOOD: everything about these is good, providing you like chocolate. The brownies are dense, but not gummy, and they’re just overflowing with good chocolate flavor. Now I remember why they’re called “best ever.” That was a designation from the folks at Cook’s Illustrated. You’ll hear raves, I promise you.

What’s NOT:  nothing, unless you don’t have any good unsweetened chocolate on hand. These are worth making a trip to a specialty store to find the Valrhona. Or Scharfenberger  would be fine too. Just use good chocolate, that’s all I ask!

printer-friendly PDF

Files: MasterCook 5+ and MasterCook 14 (click on link to open recipe in MC)

* Exported from MasterCook *

Classic Brownies (the best classic brownie ever)

Recipe By: Erika Bruce & Adam Reid, Cook’s Illustrated, 2004
Serving Size: 24 (or about 40 if you use the different pan size)

4 ounces walnuts — or pecans, chopped and toasted
1 1/4 cups cake flour
1/2 teaspoon salt
3/4 teaspoon baking powder
6 ounces unsweetened baking chocolate — chopped fine [I used Valrhona brand]
1 1/2 sticks unsalted butter
2 1/4 cups sugar
4 large eggs
1 tablespoon vanilla extract

1. Adjust oven rack to middle position; heat oven to 325°. Cut 18-inch length foil and fold lengthwise to 8 inch width. Fit foil into length of 13 x 9 inch baking dish (preferably glass), pushing it into corners and up sides of pan; allow excess to overhang pan edge. Cut 14-inch length foil and, if using extra-wide foil, fold lengthwise to 12-inch width; fit into width of baking pan in same manner, perpendicular to first sheet. Spray foil-lined pan with nonstick cooking spray. If using nuts, spread nuts evenly on rimmed baking sheet and toast in oven until fragrant, about 4-8 minutes. Set aside to cool. Whisk to combine flour, salt and baking powder in medium bowl. Set aside.
2. Melt chocolate and butter in large heatproof bowl set over saucepan of almost simmering water, stirring occasionally, until smooth. (Alternatively, in microwave, heat butter and chocolate in large microwave safe bowl on high for 45 seconds, then stir and heat for 30 seconds more. Stir again, and if necessary, repeat in 15-second increments; do not let chocolate burn.) When chocolate mixture is completely smooth, remove bowl from saucepan and gradually whisk in sugar. Add eggs one at a time, whisking after each addition until thoroughly combined. Whisk in vanilla. Add flour mixture in 3 additions, folding with rubber spatula until batter is completely smooth and homogenous.
3. Transfer batter to prepared pan; using spatula, spread batter into corners of pan and smooth surface. Sprinkle toasted nuts (if using them) evenly over batter and bake until toothpick or wooden skewer inserted into center of brownies comes out with few moist crumbs attached, 30-35 minutes, or until the brownies are at about 200° F on an instant-read thermometer. Cool pan on wire rack at room temperature about 2 hours, then remove brownies from pan by lifting foil overhang. Cut brownies into 2-inch squares and serve. Store leftovers in airtight container at room temperature up to 3 days (they won’t last that long!). NOTE: I used a 10x15x1 jelly roll pan to bake these, so it made about 40 brownies. When using that sized pan, they baked for about 29 minutes.
Per Serving (if making 24): 224 Calories; 13g Fat (50.2% calories from fat); 3g Protein; 26g Carbohydrate; 1g Dietary Fiber; 51mg Cholesterol; 73mg Sodium.

Related Posts Plugin for WordPress, Blogger...