Oh my yes! Will you please make this? Soon. Super chocolate flavor, but tempered by the coconut on it and the coconut oil in it. A fabulous and easy dessert.
It’s true. I do love baking, but you’ll see that I have all kinds of other things on my blog too – meats, veggies, appetizers. All manner of things. But I suppose if I had to say, baking is my favorite thing to do. And since Dave, my DH, passed away (it’s now been a year and 8 months), I don’t entertain as much, and my dinner menus are more simple. I eat lots of left overs. But my Bible study group comes to my house frequently, so that satisfies my need for baking. And that’s what happened a week or so ago when I decided to make this.
The recipe came from Bon Appetit, in 2014. It’s baked in an 8-inch loaf pan – recently I actually measured my bread pans and was surprised to 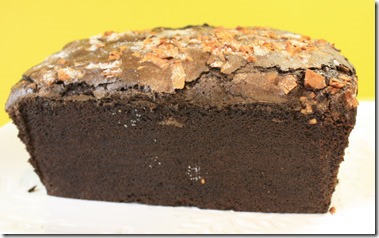 find that my smallest one is actually closer to 9” instead of 8” so I bought a new one. This new one, though, is almost smaller than 8”. So this cake almost bubbled over the top. Just so you know. If you use a 9” pan, the baking time will be different, and it won’t be as high, obviously.
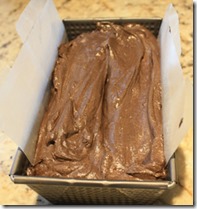
What’s different about this cake is the use of coconut oil – not the liquid type (is there a liquid type?) but the congealed type (that’s called virgin coconut oil) that almost has the consistency of shortening. It gets mixed with sugar, then with eggs and it whizzes up in the stand mixer until it has a very light, but thick consistency. Billowy almost, but not quite. Then you mix in the dry ingredients (flour, cocoa, salt, and baking powder) in additions along with buttermilk. Into the baking pan it goes – with waxed paper carefully placed inside so you can use it as a sling to remove the cake from the pan. You use a spatula to make a groove down the middle – an important step. Even so, my cake almost spilled over. You can’t quite see it in the photos, but one side had a big bulge – I cut it off and ate it, thank you. Yum.
There on the right you can see the groove I made. Since the pan was so full I had difficulty doing it, and the batter was wet enough that it kind of oozed back into the center as soon as I’d done it. But do try. Then you 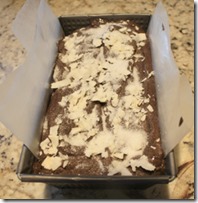 add on the toppings (granulated sugar and unsweetened coconut). Into the oven it went and it baked for 80 minutes (recipes says 70-80, but mine took the full 80) until a tester inserted in the middle came out clean.
Then it’s left out to rest and cool for at least 20 minutes (I think mine cooled for an hour or so – made for easier handling), then cooled completely on a rack for another hour or two. Picture at left is the batter with the toppings, ready to go into the oven.
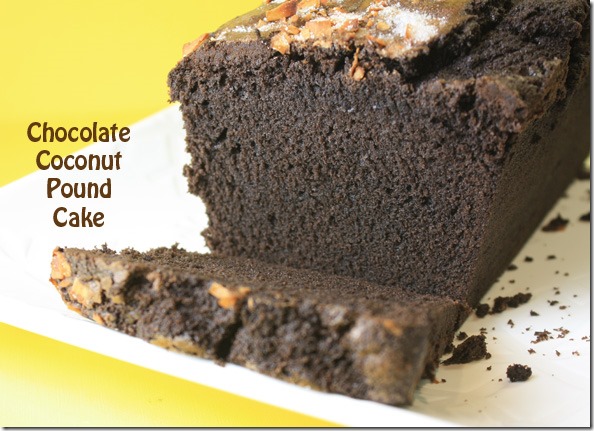
What’s GOOD: the chocolate flavor is absolutely wonderful (I used Hershey’s Dark cocoa), and it’s super moist. Easy to slice too, with a serrated knife. The recipe indicated it serves 8, but I got about 11 slices from mine. I served it with sweetened whipped cream. Everybody loved it. I loved it. Can’t wait to have a slice after lunch or dinner today. Or, maybe I’ll have a slice with a cup of tea this afternoon. It’s also very easy to make. The recipe says it will keep for 5 days, wrapped well, at room temp. I guarantee you it won’t last that long. The coconut flavor is enough that you DO taste it in the cake (from using the oil). I liked the flavor a lot.
What’s NOT: nothing whatsoever. It’s a great dessert cake.
printer-friendly PDF and MasterCook15 file (click on link to open recipe)
* Exported from MasterCook *
Chocolate-Coconut Pound Cake
Recipe By: Bon Appetit, March, 2014
Serving Size: 8
4 tablespoons unsalted butter — room temperature, plus more for the pan
1 1/2 cups all-purpose flour
1/2 cup unsweetened cocoa powder
1 teaspoon kosher salt
3/4 teaspoon baking powder
1/2 cup virgin coconut oil — room temperature
1 1/2 cups sugar
3 large eggs
1 teaspoon vanilla extract
2/3 cup buttermilk
1/4 cup unsweetened coconut meat — to sprinkle on top (flake type)
1 tablespoon sugar — to sprinkle on top
1. Preheat oven to 325°. Butter an 8×4” loaf pan; line with parchment paper, leaving a generous overhang on long sides. Whisk flour, cocoa powder, salt, and baking powder in a medium bowl; set aside.
2. Using an electric mixer on medium-high speed, beat oil, butter, and sugar until pale and fluffy, 5–7 minutes. Add eggs one at a time, beating to blend between additions; beat until mixture is very light and doubled in volume, 5–8 minutes. Add vanilla.
3. Reduce mixer speed to low and add dry ingredients in 3 additions, alternating with buttermilk in 2 additions, beginning and ending with dry ingredients (do not overmix; it will cause cake to buckle and split). Scrape batter into prepared pan and run a spatula through the center, creating a canal. Sprinkle with coconut and remaining sugar.
4. Bake cake, tenting with foil if coconut browns too much before cake is done (it should be very dark and toasted), until a tester inserted into the center comes out clean, 70–80 minutes. Transfer pan to a wire rack; let cake cool in pan 20 minutes before turning out. Carefully remove paper, allow to cool completely, then slice using a serrated knife. It says it serves 8, but you can probably get about 10-11 slices if you try.
5. DO AHEAD: Cake can be baked 5 days ahead. Keep tightly wrapped at room temperature. (But I doubt this would last 5 days – I’d eat it all!)
Per Serving: 471 Calories; 24g Fat (44.1% calories from fat); 7g Protein; 62g Carbohydrate; 3g Dietary Fiber; 96mg Cholesterol; 332mg Sodium.




Leave a Comment!