
Here are the tastingspoons players. I’m in the middle (Carolyn). Daughter Sara on the right, and daughter-in-law Karen on the left. I started the blog in 2007, as a way to share recipes with my family. I’m still doing 99% of the blogging and holding out hope that these two lovely and excellent cooks will participate. They both lead very busy lives, so we’ll see.
– – – – – – – – – – – – – – – – – – – – – –
BOOK READING (from Carolyn):
Music of Bees, Eileen Garvin. Absolutely charming book about a woman in midlife, lonely, who raises bees, also makes unlikely friends. Heart-warming and very interesting about beekeeping.
A Postcard from Paris, Alex Brown. Really cute story. Dual time line, 1940s and present day about renovating an old apartment in Paris, things discovered.
Time of the Child, Niall Williams. Oh such a good book. Very small village in Ireland, 1960s. A baby is left on the doorstep. The town all whispers and helps. I listened to an interview of the author, which made me like him and his books even more.
Sipsworth, Simon Van Booy. If you like animals you’ll swoon. An old woman who really wants to die finds a tiny mouse in her house and befriends it and finds a reason to live. Utterly charming book.
The Forger’s Spell, Edward Dolnick. True story. For seven years a no-account painter named Han van Meegeren managed to pass off his paintings as those of Johannes Vermeer.
If You Lived Here, You’d be Home by Now, Christopher Ingraham. Could hardly put it down – about a journalist who takes on a challenge to move to small town in Minnesota and write about it. He expects to hate it and the people and place, but he doesn’t. Absolutely wonderful true story.
The River We Remember, William Kent Kreuger. 1950s, Minnesota. A murder and the aftermath. Could hardly put it down. Kreuger has such a vivid imagination and writing style.
How the Lights Gets In, Joyce Maynard. An older woman returns to New Hampshire to help care for her brain-injured son. Siblings and family, lots of angst and resentments.
The Filling Station, Vanessa Miller. Every American should read this book. A novelized retelling of the Tulsa massacre in 1921. Absolutely riveting.
The Story She Left Behind, Patti Callahan Henry. Love this author. Based on a true story. A famous author simply vanishes, leaving her husband and daughter behind. She had invented a mystical language no one could translate. Present day, someone thinks he’s solved the riddle, contacts the family. Really interesting read.
The Girl from Berlin, Ronald Balson. Love anything about Tuscany. An elderly woman is being evicted from a villa there, with odd deed provenance. Two young folks go there to help unravel the mystery. Loved it.
The Island of the Colorblind, Oliver Sacks, M.D. Nonfiction. The dr is intrigued by a remote Pacific island where most of the inhabitants are colorblind. He also unravels a mystery on Guam of people born with a strange neurological problem. Medical mysteries unveiled. Very interesting.
The Bookbinder, Pip Williams. Post 1914 London. Two sisters work at a bookbindery. They’re told to not read the books. One does and one doesn’t. One has visions beyond her narrow world; the other does not. Eventually the one gets into Oxford. Lovely story.
The Paris Express, Emma Donoghue. 1895 on a train to Paris, a disaster happens. You’ll delve into the lives of many people who survived and died in the crash.
A Race to the Bottom of Crazy, Richard Grant. This is about Arizona. Author, wife and child move back to Arizona where they once lived. Part memoir, research, and reporting in a quest to understand what makes Arizona such a confounding and irresistible place.
The Scarlet Thread, Francine Rivers. A woman’s life turned upside down when she discovers the handcrafted quilt and journal of her ancestor Mary Kathryn McMurray, a young woman who was uprooted from her home only to endure harsh frontier conditions on the Oregon Trail.
A Place to Hide, Ronald Balson. 1939 Amsterdam, an ambassador has the ability to save the lives of many Jewish children. Heartwarming.
Homeseeking, Karissa Chen. Two young Chinese teens are deeply in love, but in China. Then their families are separated. Jump to current day and the two meet again in Los Angeles.
North River, Pete Hammill. He always writes such a good story. A doctor works diligently healing people from all walks of life. His wife and daughter left him years before. One day his 3-yr old grandson arrives on his doorstep.
A Very Typical Family, Sierra Godfrey. A very messed-up family. Three adult children are given a home in Santa Cruz, Calif, but only if the siblings meet up and live in the house together. A very untypical scenario but makes for lots of messes.
Three Days in June, Anne Tyler. The usual Anne Tyler grit. Family angst. This wasn’t one of my favorites, but it was entertaining and very short.
Saved, Benjamin Hall. Author is a veteran war reporter. Ukraine, 2022, he nearly loses his life to a Russian strike. Riveting story – he survives, barely.
Grey Wolf, Louise Penny. Another Inspector Gamache mystery in Quebec. She is such an incredible mystery writer.
All the Colors of the Dark, Chris Whitaker. A missing person mystery, a serial killer thriller, a love story, a unique twist on each. Could hardly put it down.
Orbital, Samantha Harvey. Winner of 2024 Booker Prize. I don’t usually like those, but I heard the author interviewed and she hooked me. This is not a normal book with a beginning, a story and an end. It’s several chapters of the day in the life of various astronauts at the ISS (Int’l Space Station). All fictional. She’s been praised by several real astronauts for “getting it” about space station everyday life.
The Blue Hour, Paula Hawkins. An island off Scotland. Inaccessible except when the tide is out. Weird goings on. An artist. A present day mystery too.
Iron Lake, William Kent Krueger. A judge is murdered and a boy is missing. Riveting mystery.
Tell the Wolves I’m Home, Carol Ricks Brunt. 1980s. A 14-yr old girl loses her beloved uncle. Yet a new friendship arises, someone she never knew about.
Four Treasures of the Sky, Jenny Zhang. 1880s, a young girl is kidnapped in China and brought to the United States. She survives with many hurdles in the path.
The Boy Who Fell out of the Sky, Ken Dornstein. Memoir, 1988. The author’s brother died in the PanAm flight that went down in Lockerbie, Scotland. A decade later he tries to solve “the riddle of his older brother’s life.”
Worse Care Scenario, T.J. Newman. Oh my. Interesting analysis of what could/might happen if a jet crashed into a nuclear plant. Un-put-downable.
Song of the Lark, Willa Cather. Complicated weave of a story about a young woman in about 1900, who has a gifted voice (singing) and about her journey to success, not without its ups and downs.
Crow Talk, Eileen Garvin. Charming story which takes place at a remote lake in Washington State, about a few people who inhabit it, the friendships made, but also revolving around the rescue of a baby crow.
The Story Collector, Evie Woods. Sweet story about some dark secrets from an area in Ireland, a bit magical, faerie life, but solving a mystery too.
A Sea of Unspoken Things, Adrienne Young. A woman investigates her twin brother’s mysterious death. She goes to a small town in California to figure it out, to figure HIM out.
The King’s Messenger, Susanna Kearsley. 1600s England, King James. About one of his trusted “messengers,” and his relationship with a young woman also of “the court.” Lots of intrigue.
In the Shadow of the Greenbrier, Emily Matchar. Interesting mystery in/around the area of the famous resort in White Sulphur Springs, West Virginia.
Isola, Allegra Goodman. Hard to describe, survival story on an island in the 1600s.
Save the Date, Allison Raskin. Rom-com, witty, LOL funny. Clever.
The Sirens, Emilia Hart. Numerous time-lines, Australia. Mysteries abound, nightmares, abandoned baby, weird allergies.
Red Clay, Charles Fancher. LOVED this book. Mostly post-Civil War story about the lives of slaves in Alabama during Reconstruction.
Stars in an Italian Sky, Jill Santopolo. Dual time line, 1946 and recent time. Love stories and a mystery.
Battle Mountain, C.J. Box. Another one of Box’s riveting mysteries. Love his descriptions of the land.
Something Beautiful Happened, Yvette Corporon. A memoir of sorts in Greece, tiny island of Erikousa, where the locals hid Jews during WWII. All elusive stories told by the author’s grandmother.
The Jackal’s Mistress, Chris Bohjalian. 1860s Virginia, about a woman who saves the life of a Union soldier. Really good story.
Song of the Magpie, Louise Mayberry. Really interesting story about Australia back in the days when it was mostly a penal colony. Gritty strength of a woman trying to thrive with her farm.
The Boomerang, Robert Bailey. A thriller that will have you gripping the book. About a lot of secrets surrounding the president (fictional novel, remember) and his chief of staff and about cancer. A cure. Such a good story.
Care and Feeding, Laurie Woolever. Really interesting memoir of a woman driven to succeed in the restaurant business. She worked for Mario Batali and then Anthony Bourdain. Gritty stories.
Everything is Tuberculosis, John Green. Maybe not a book for everyone. A real deep dive into the deadly tuberculosis infection, its history. I heard the author interviewed and found the book very interesting.
The Book Lovers Library, Madeline Martin. Fascinating read about Boots’ drug stores’ lending library. And the people who worked in them.
The Arrivals, Meg Mitchell Moore. LOL funny, about a middle-aged couple whose children (and their various family members) return to the family home and the chaos that ensues.
My Life as a Silent Movie, Jesse Lee Kercheval. About grief. A big move to Paris, finding herself a new life with a new set of real blood family.
Escape, Carolyn Jessop. Another memoir about a woman really in bondage in Utah, Mormon plural marriage.



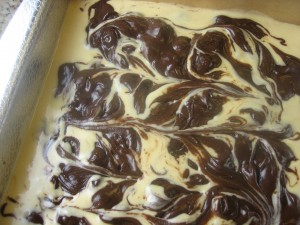
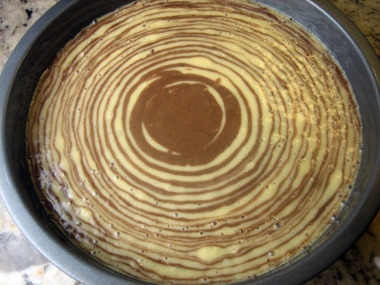 Here’s a photo of the batter before baking. Fun, huh? This recipe is in several places on the internet, I found, with a few variations (one mixture has Sprite in it). The recipe I used came from Ferida at
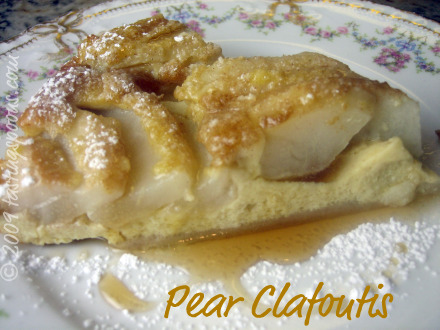
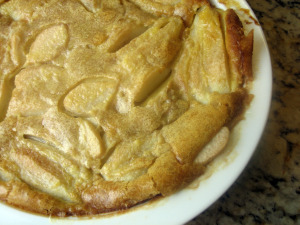 If you’ve never made a clafoutis (I think it’s pronounced cla-foo-tee), it’s really very, VERY easy. It doesn’t exactly make a pastry bottom, but sort of. You whisk up a thin batter of eggs, sugar (I used Splenda so my husband could have some), melted butter, a bit of flour, flavorings (cinnamon, vanilla and maple) and some milk. The fruit is sliced up into the bottom of a buttered tart, pie or cake pan, preferably in a decorative pattern, then the batter is poured on top. The egg custardy batter settles down in between the fruit and bakes nicely in the oven for nearly an hour. If you glance at the top picture you can see the custardy mixture that creates a sort-of eggy pastry on the bottom.
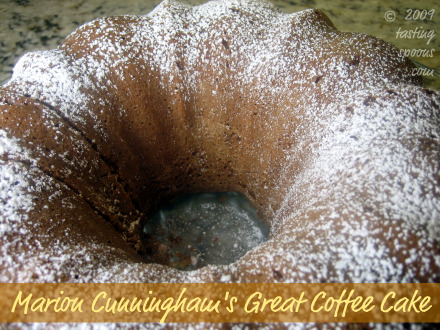
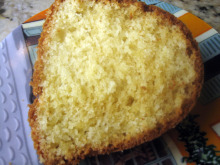 The recipe also included a number of variations (raisin and spice, dried fig and almond, apple and walnut, and vanilla). Those are in the PDF recipe you will get if you print it out from the link at the bottom. But for the first time around I wanted to make this true to the original. The coffee cake was plain. Good kind of plain. A very tender crumb. Next time I make this I’ll try one of the variations.

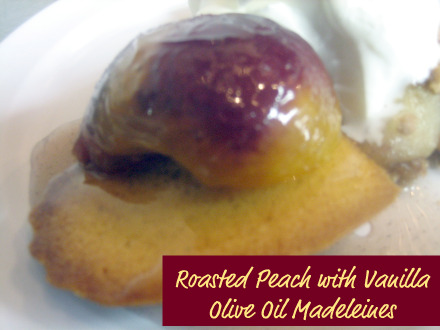
 The recipe here was from the vanilla class I attended last week. The chef thought it came from a Nancy Silverton cookbook. I couldn’t find it online, nor anything close to it, so I couldn’t verify its origin. Nevertheless, it’s a very nice use of either peaches or plums (or apricots, for that matter, but they’re such a tender fruit I’m not sure they’d hold up). The fruit is roasted in a sugar-vanilla-chamomile syrup until tender and golden. This time of year we used imported peaches from the Southern Hemisphere. Meanwhile, you make a cookie dough using olive oil, and bake them in tartlet molds (big enough to hold the fruit), or in Madeleine pans, coated lightly with additional olive oil. Unfortunately, at the class, the instructor had forgotten to get the chamomile for the syrup, so we ate it without. I’d try it with, however, since it sounds like such a gentle combination.





Leave a Comment!