Get new posts by email:

Archives

Currently Reading

Here are the tastingspoons players. I’m in the middle (Carolyn). Daughter Sara on the right, and daughter-in-law Karen on the left. I started the blog in 2007, as a way to share recipes with my family. I’m still doing 99% of the blogging and holding out hope that these two lovely and excellent cooks will participate. They both lead very busy lives, so we’ll see.

– – – – – – – – – – – – – – – – – – – – – –

BOOK READING (from Carolyn):

Music of Bees, Eileen Garvin. Absolutely charming book about a woman in midlife, lonely, who raises bees, also makes unlikely friends. Heart-warming and very interesting about beekeeping.

A Postcard from Paris, Alex Brown. Really cute story. Dual time line, 1940s and present day about renovating an old apartment in Paris, things discovered.

Time of the Child, Niall Williams. Oh such a good book. Very small village in Ireland, 1960s. A baby is left on the doorstep. The town all whispers and helps. I listened to an interview of the author, which made me like him and his books even more.

Sipsworth, Simon Van Booy. If you like animals you’ll swoon. An old woman who really wants to die finds a tiny mouse in her house and befriends it and finds a reason to live. Utterly charming book.

The Forger’s Spell, Edward Dolnick. True story. For seven years a no-account painter named Han van Meegeren managed to pass off his paintings as those of Johannes Vermeer.

If You Lived Here, You’d be Home by Now, Christopher Ingraham. Could hardly put it down – about a journalist who takes on a challenge to move to small town in Minnesota and write about it. He expects to hate it and the people and place, but he doesn’t. Absolutely wonderful true story.

The River We Remember, William Kent Kreuger. 1950s, Minnesota. A murder and the aftermath. Could hardly put it down. Kreuger has such a vivid imagination and writing style.

How the Lights Gets In, Joyce Maynard. An older woman returns to New Hampshire to help care for her brain-injured son. Siblings and family, lots of angst and resentments.

The Filling Station, Vanessa Miller. Every American should read this book. A novelized retelling of the Tulsa massacre in 1921. Absolutely riveting.

The Story She Left Behind, Patti Callahan Henry. Love this author. Based on a true story. A famous author simply vanishes, leaving her husband and daughter behind. She had invented a mystical language no one could translate. Present day, someone thinks he’s solved the riddle, contacts the family. Really interesting read.

The Girl from Berlin, Ronald Balson. Love anything about Tuscany. An elderly woman is being evicted from a villa there, with odd deed provenance. Two young folks go there to help unravel the mystery. Loved it.

The Island of the Colorblind, Oliver Sacks, M.D. Nonfiction. The dr is intrigued by a remote Pacific island where most of the inhabitants are colorblind. He also unravels a mystery on Guam of people born with a strange neurological problem. Medical mysteries unveiled. Very interesting.

The Bookbinder, Pip Williams. Post 1914 London. Two sisters work at a bookbindery. They’re told to not read the books. One does and one doesn’t. One has visions beyond her narrow world; the other does not. Eventually the one gets into Oxford. Lovely story.

The Paris Express, Emma Donoghue. 1895 on a train to Paris, a disaster happens. You’ll delve into the lives of many people who survived and died in the crash.

A Race to the Bottom of Crazy, Richard Grant. This is about Arizona. Author, wife and child move back to Arizona where they once lived. Part memoir, research, and reporting in a quest to understand what makes Arizona such a confounding and irresistible place.

The Scarlet Thread, Francine Rivers. A woman’s life turned upside down when she discovers the handcrafted quilt and journal of her ancestor Mary Kathryn McMurray, a young woman who was uprooted from her home only to endure harsh frontier conditions on the Oregon Trail.

A Place to Hide, Ronald Balson. 1939 Amsterdam, an ambassador has the ability to save the lives of many Jewish children. Heartwarming.

Homeseeking, Karissa Chen. Two young Chinese teens are deeply in love, but in China. Then their families are separated. Jump to current day and the two meet again in Los Angeles.

North River, Pete Hammill. He always writes such a good story. A doctor works diligently healing people from all walks of life. His wife and daughter left him years before. One day his 3-yr old grandson arrives on his doorstep.

A Very Typical Family, Sierra Godfrey. A very messed-up family. Three adult children are given a home in Santa Cruz, Calif, but only if the siblings meet up and live in the house together. A very untypical scenario but makes for lots of messes.

Three Days in June, Anne Tyler. The usual Anne Tyler grit. Family angst. This wasn’t one of my favorites, but it was entertaining and very short.

Saved, Benjamin Hall. Author is a veteran war reporter. Ukraine, 2022, he nearly loses his life to a Russian strike. Riveting story – he survives, barely.

Grey Wolf, Louise Penny. Another Inspector Gamache mystery in Quebec. She is such an incredible mystery writer.

All the Colors of the Dark, Chris Whitaker. A missing person mystery, a serial killer thriller, a love story, a unique twist on each. Could hardly put it down.

Orbital, Samantha Harvey. Winner of 2024 Booker Prize. I don’t usually like those, but I heard the author interviewed and she hooked me. This is not a normal book with a beginning, a story and an end. It’s several chapters of the day in the life of various astronauts at the ISS (Int’l Space Station). All fictional. She’s been praised by several real astronauts for “getting it” about space station everyday life.

The Blue Hour, Paula Hawkins. An island off Scotland. Inaccessible except when the tide is out. Weird goings on. An artist. A present day mystery too.

Iron Lake, William Kent Krueger. A judge is murdered and a boy is missing. Riveting mystery.

Tell the Wolves I’m Home, Carol Ricks Brunt. 1980s. A 14-yr old girl loses her beloved uncle. Yet a new friendship arises, someone she never knew about.

Four Treasures of the Sky, Jenny Zhang. 1880s, a young girl is kidnapped in China and brought to the United States. She survives with many hurdles in the path.

The Boy Who Fell out of the Sky, Ken Dornstein. Memoir, 1988. The author’s brother died in the PanAm flight that went down in Lockerbie, Scotland. A decade later he tries to solve “the riddle of his older brother’s life.”

Worse Care Scenario, T.J. Newman. Oh my. Interesting analysis of what could/might happen if a jet crashed into a nuclear plant. Un-put-downable.

Song of the Lark, Willa Cather. Complicated weave of a story about a young woman in about 1900, who has a gifted voice (singing) and about her journey to success, not without its ups and downs.

Crow Talk, Eileen Garvin. Charming story which takes place at a remote lake in Washington State, about a few people who inhabit it, the friendships made, but also revolving around the rescue of a baby crow.

The Story Collector, Evie Woods. Sweet story about some dark secrets from an area in Ireland, a bit magical, faerie life, but solving a mystery too.

A Sea of Unspoken Things, Adrienne Young. A woman investigates her twin brother’s mysterious death. She goes to a small town in California to figure it out, to figure HIM out.

The King’s Messenger, Susanna Kearsley. 1600s England, King James. About one of his trusted “messengers,” and his relationship with a young woman also of “the court.” Lots of intrigue.

In the Shadow of the Greenbrier, Emily Matchar. Interesting mystery in/around the area of the famous resort in White Sulphur Springs, West Virginia.

Isola, Allegra Goodman. Hard to describe, survival story on an island in the 1600s.

Save the Date, Allison Raskin. Rom-com, witty, LOL funny. Clever.

The Sirens, Emilia Hart. Numerous time-lines, Australia. Mysteries abound, nightmares, abandoned baby, weird allergies.

Red Clay, Charles Fancher. LOVED this book. Mostly post-Civil War story about the lives of slaves in Alabama during Reconstruction.

Stars in an Italian Sky, Jill Santopolo. Dual time line, 1946 and recent time. Love stories and a mystery.

Battle Mountain, C.J. Box. Another one of Box’s riveting mysteries. Love his descriptions of the land.

Something Beautiful Happened, Yvette Corporon. A memoir of sorts in Greece, tiny island of Erikousa, where the locals hid Jews during WWII. All elusive stories told by the author’s grandmother.

The Jackal’s Mistress, Chris Bohjalian. 1860s Virginia, about a woman who saves the life of a Union soldier. Really good story.

Song of the Magpie, Louise Mayberry. Really interesting story about Australia back in the days when it was mostly a penal colony. Gritty strength of a woman trying to thrive with her farm.

The Boomerang, Robert Bailey. A thriller that will have you gripping the book. About a lot of secrets surrounding the president (fictional novel, remember) and his chief of staff and about cancer. A cure. Such a good story.

Care and Feeding, Laurie Woolever. Really interesting memoir of a woman driven to succeed in the restaurant business. She worked for Mario Batali and then Anthony Bourdain. Gritty stories.

Everything is Tuberculosis, John Green. Maybe not a book for everyone. A real deep dive into the deadly tuberculosis infection, its history. I heard the author interviewed and found the book very interesting.

The Book Lovers Library, Madeline Martin. Fascinating read about Boots’ drug stores’ lending library. And the people who worked in them.

The Arrivals, Meg Mitchell Moore. LOL funny, about a middle-aged couple whose children (and their various family members) return to the family home and the chaos that ensues.

My Life as a Silent Movie, Jesse Lee Kercheval. About grief. A big move to Paris, finding herself a new life with a new set of real blood family.

Escape, Carolyn Jessop. Another memoir about a woman really in bondage in Utah, Mormon plural marriage.


Tasting Spoons

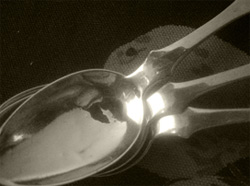
My blog's namesake - small, old and some very dented engraved silver plated tea spoons that belonged to my mother-in-law, and I use them to taste my food as I'm cooking.

Scroll down to the bottom to view my Blogroll

Posted in Breads, Brunch, on March 19th, 2011.

meyer_lemon_scone_lemon_curd

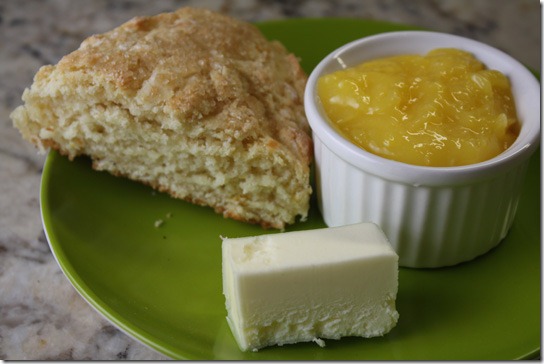
Really, I didn’t think I’d ever want another scone recipe since I have a favorite one I’ve been making forever and ever. Mine, Buttermilk Scones, are a very rich biscuit type, laden with butter, cut into cute little rounds. But when I read this recipe over at one of my favorite blogs, Farmgirl Fare, where Susan explained all about these scones, the very recipe she used when she used to own a bakery here in California . . . well, I just couldn’t resist trying them. Especially because they’re made with Meyer lemon juice and zest. A lot of it, actually. Anything that utilizes a lot of lemon juice is good in my book right now since we have lemons coming out the yin-yang.

This scone version is more cake-like. And they’re tall and BIG. Susan does explain that you can make two rounds of dough and make smaller, thinner ones, but I was intrigued to make one big, fat one and cut them into wedges. Susan’s are less sweet than most scones, i.e. there’s not a lot of sugar in the dough. You do add turbinado sugar on top, and you might want to be generous with it. If you like eating a scone that’s less sweet, you’ll love this one. I loved the texture, actually. And loved the lemony taste, big time. She uses an egg wash on top – which would help the sugar stick to the scone. I didn’t do that part, but you sure can. If you’re serving these with a sweet jam or jelly, then the less sweet scone is just perfect. And what can I say, but these were delicious with my homemade lemon curd I made just last week.

printer-friendly PDF

Meyer Lemon Scones

Recipe By: Susan at Farmgirl Fare blog, Feb. 2011
Serving Size: 8
NOTES: Susan from Farmgirl Fare makes these with Meyer lemons, but they can be made with regular lemons as well. These are NOT overly sweet – if you prefer, add just a bit more sugar and/or be very generous with the turbinado sugar topping. The egg glaze is optional (I didn’t use it), but it will help the sugar to stick!

3 1/2 cups all-purpose flour
1/2 cup granulated sugar
1 tablespoon baking powder — + 1 teaspoon
1/2 teaspoon baking soda
1 teaspoon salt
2 teaspoons lemon zest — finely chopped or grated Meyer lemon or regular lemon zest, rubbed with a little sugar to bring out the flavor
1/2 cup butter — chilled & cut into small pieces
1/2 cup lemon juice — (from about 2 Meyer lemons) or regular lemon juice
1/2 cup milk — preferably whole
2 tablespoons yogurt
2 large eggs
1/2 teaspoon vanilla extract
EGG GLAZE (optional):
1 egg — beaten well with a fork with the milk
2 tablespoons milk Coarse sugar — such as turbinado, for sprinkling on top
3/4 cup currants — or raisins (optional)

1. Heat the oven to 400°.
2. In a large bowl, combine 3½ cups of the flour, the sugar, baking powder, baking soda, salt, and Meyer lemon zest. Using a fork, pastry blender, or your fingers, cut the butter into the flour mixture until it forms coarse crumbles with some larger pea-sized chunks. Add the currants or raisins if using and toss gently until combined.
3. In a small bowl or large measuring cup, combine the Meyer lemon juice, milk, yogurt, eggs, and vanilla and beat with a fork until blended.
4. Gently fold the milk mixture into the dry ingredients, mixing lightly with a rubber spatula just until blended. Add up to 1/4 cup additional flour if it’s too sticky to work with.
5. On a floured surface, gently pat the dough into a 1-inch thick circle (about 9 inches in diameter). With a sharp knife (I use a large serrated knife dipped in flour), cut the circle into 8 wedges and place them on a heavy duty baking sheet lined with unbleached parchment paper.
Per Serving: 435 Calories; 15g Fat (30.1% calories from fat); 10g Protein; 67g Carbohydrate; 3g Dietary Fiber; 114mg Cholesterol; 685mg Sodium.

A year ago: Blueberry Sour Cream Tart
Two years ago: Pork Tenderloin with Onion, Orange Pan Sauce
Three years ago: Cilantro Chicken

Posted in Breads, Desserts, on February 19th, 2011.

lemon_choc_chip_loaf_cake

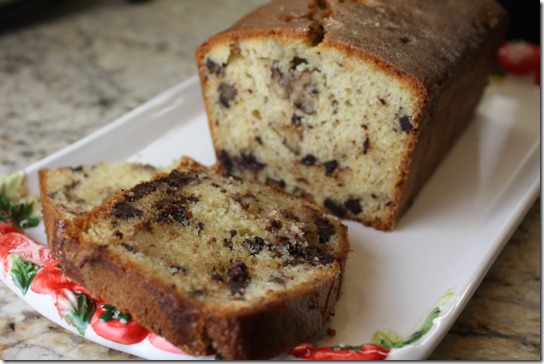
With oodles of Meyer lemons around my house these days (from our trees), I needed to use up some juice and zest. I’d read a recipe for a lemon and chocolate loaf cake – oh, did that sound good to me. I’d recently purchased a new pan – an elongated loaf pan – narrower and longer than a traditional bread pan. It’s a ceramic dish, pan shaped, but not metal, and it’s 12” x 4” x 2 1/2”. A lovely, bright glazed finish. And it holds the equivalent of a regular loaf pan quantity. So this gave me a perfect opportunity to try it out. image

The recipe came from Marie, over at A Year From Oak Cottage. She writes two blogs – that one, and another one that’s just recipes (where this one came from), called The English Kitchen. Marie said that you might not think lemon and chocolate go all that well together. Oh, but she’s right, they do!

So I dug out the new pan – see the photo at right. It’s from King Arthur Flour. I love the shape of this pan – they call it a tea loaf pan. Makes for really pretty slices.

lemon_choc_chip_loaf_cake_slice

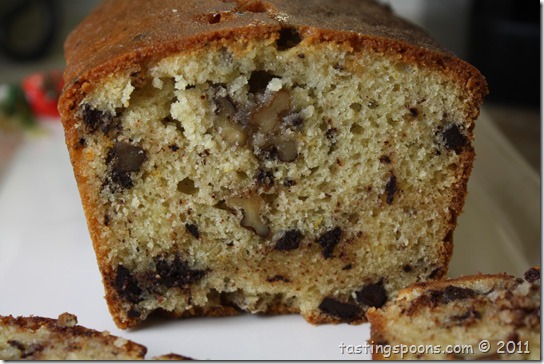
The cake was a cinch to make – the usual kind of cake-baking ingredients (butter, flour, eggs, leavening, yogurt). Then you veer off course and add lemon zest and chocolate chunks or chips and some walnuts. And after it bakes you pour some sweetened lemon syrup on top. A drizzle, if you will.

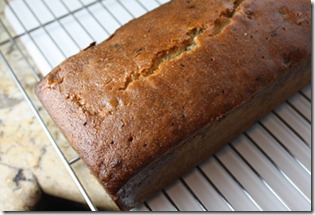
lemon_choc_chip_loaf_cake_wholeThis recipe is not a bread-type texture. It’s more a cake-type-texture. But baked in a loaf pan. The cake/bread is very, very tender. Like a sponge cake, even. So once I removed the bread from the pan (using greased parchment as a sling and moved very carefully, I’ll add) and it cooled off, I did discover that you can’t cut narrow slices as you would for a banana bread, for instance – it was just so soft – too soft for that. But gosh, it’s delicious. Very tasty. So I cut wider slices – about 3/4 of an inch each. And did I tell you it was delicious? Oh yes. If you happen to have a lemon tree and need an excuse to use up some juice and zest, try this recipe. Thanks, Marie, for a great addition to my recipe box.

printer-friendly PDF

Lemon Chocolate Chip Cake

Recipe By: From Marie at The English Kitchen blog
Serving Size: 10

4 ounces unsalted butter — room temperature (1/2 cup)
7 ounces sugar
3 large eggs the finely grated zest of one unwaxed lemon
8 1/2 ounces flour — (about 2 cups)
1 tsp baking soda
1 tsp baking powder
1/4 tsp salt
250 ml yogurt — (1 cup)
6 ounces bittersweet chocolate — chopped into bits (1 cup)
2 1/4 ounces walnuts — 1/2 cup (optional) chopped, toasted
TOPPING:
3 1/2 ounces sugar
the juice of 1/2 lemon
2 tablespoons orange liqueur, or limoncello
— (Can use the juice of one whole lemon and leave out the liqueur)

1. Preheat the oven to 180*C/350*F/gas mark 5. Butter a 9 by 5 inch loaf tin. Line with parchment paper, leaving an overhang for ease of removal. Butter the paper. Set aside.
2. Cream together the butter and sugar until light and creamy. Beat in the eggs, one at a time, beating well after each addition. Sift the flour into a bowl. Remove 2 T. and add to the chocolate chips and nuts if using. Whisk the remaining flour together with the lemon zest, soda, baking powder and salt. Add at once to the creamed mixture along with the yogurt. Beat on high speed for several minutes. Fold in the chocolate and nut mixture. Spread into the prepared pan, leveling the top with a spatula.
3. Bake for 60-70 minutes, until well risen and a toothpick inserted in the center comes out clean. Let cool on a wire rack for 10 minutes while you make the topping.
4. Place all the topping ingredients in a small saucepan. Bring to the boil over low heat, stirring to dissolve the sugar. Pour this slowly over the hot cake, poking a few holes in the top, allowing it to soak in. Lift out and allow to cool completely before cutting into thick slices to serve.
Per Serving (probably serves more than 10 slices, so the nutrition count is likely too high): 461 Calories; 25g Fat (46.3% calories from fat); 9g Protein; 56g Carbohydrate; 4g Dietary Fiber; 92mg Cholesterol; 265mg Sodium.

A year ago: Salmon Steaks with Soy Maple Glaze (a favorite)
Two years ago: A write-up about my (then new) Kindle
Three years ago: Coriander Lime Shrimp (a great appetizer)

Posted in Breads, on January 26th, 2011.

chocolate_breakfast_muffins

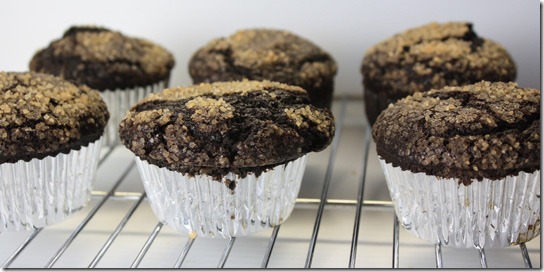
Oh yes. Oh my. Decadent. Comforting, especially if you’re a chocolate lover like I am. A chocolate high, so to speak. About 321 calories each (not as bad as you might think). Made with Dutch process cocoa, so it’s not as full of fatted chocolate as you might think, either. The whole recipe contains a cup of chocolate chips, so not all that much per muffin. All that to justify why you need to make these.

This recipe comes from the files at King Arthur Flour. I read their blog regularly, and it was a post sometime last year. I printed it out at the time and it went into my to-try file. The particular morning when I needed to make these, it just jumped out at me. You know how that is.

Easy to make, really, as long as you have all the ingredients. There’s nothing special about these unless you don’t usually have espresso powder on hand. My daughter-in-law gave me a small jar of King Arthur’s granulated espresso powder for Christmas, so I got to use my first 3/4 teaspoon of it in this recipe. And it does call for Dutch process cocoa, as I mentioned above. I had some of Hershey’s “Special Dark,” which is a combo of Dutch and regular cocoa. But you can use one or the other, really.  Dutch process cocoa is a slightly muted flavor, that’s all.

The batter is mixed up in a bowl – you don’t use a mixer – which makes it a tad easier to put together. You mix up the dry ingredients separately, then the wet ingredients separately, and combine them, also pouring in the melted butter at the same time. I used my big cookie scoop to blob batter into the 12 muffin cups and after sprinkling the top with raw sugar, into a hot oven they went. The recipe indicated 20-25 minutes, but mine were done in 20. I’d recommend you check them no later than 20 minutes. You don’t want to over bake them. They cool for 5 minutes before you remove the muffins from the pan, cool slightly, and serve warm, if at all possible! They won’t last but a few minutes if you have hungry eaters in your house. I took them to my morning Scrabble group and we all devoured one apiece. They are rich and very satisfying. A keeper. If you have leftovers, do freeze them so they’ll be as fresh as possible when you need them a few days later. These can be served as cupcakes – I noticed that a few readers of King Arthur’s website recipe said they’d reduced the sugar a bit. They are just the best when they’re still barely warm.

printer-friendly PDF

Chocolate Breakfast Muffins

Recipe By: King Arthur Flour website (blog)
Serving Size: 12
NOTES: These muffins are rich and tender, high-rising, and deep chocolate, both in color and flavor.

2/3 cup dutch-process cocoa powder — (2 ounces)
1 3/4 cups all-purpose flour — (7 1/4 ounces)
1 1/4 cups light brown sugar — (9 3/8 ounces)
1 teaspoon baking powder
3/4 teaspoon espresso powder — optional
1 teaspoon baking soda
3/4 teaspoon salt
1 cup chocolate chips — (6 ounces)
2 large eggs
1 cup milk — (8 ounces)
2 teaspoons vanilla
2 teaspoons vinegar
1/2 cup butter — (4 ounces, 1 stick) melted
about 3 T. raw sugar or Turbinado sugar for topping (optional)

1. Preheat the oven to 400°F. Line a standard muffin pan with paper or silicone muffin cups, and grease the cups.
2. In a large mixing bowl, whisk together the cocoa, flour, sugar, baking powder, espresso powder, baking soda, salt and chocolate chips. Set aside.
3. In a large measuring cup or medium-sized mixing bowl, whisk together the eggs, milk, vanilla and vinegar. Add the wet ingredients, along with the melted butter, to the dry ingredients, stirring to blend; there’s no need to beat these muffins, just make sure everything is well-combined.
4. Scoop the batter into the prepared muffin tin; the cups will be heaped with batter, and the muffin will bake into a “mushroom” shape. Sprinkle with pearl sugar, if desired.
5. Bake the muffins for 20 to 25 minutes, or until a cake tester inserted in the center of a muffin comes out clean. Remove the muffins from the oven, and after 5 minutes remove them from the pan, allowing them to cool for about 15 minutes on a rack before peeling off the muffin papers or silicone cups. Yield: 12 muffins.
Per Serving: 321 Calories; 16g Fat (42.0% calories from fat); 5g Protein; 44g Carbohydrate; 2g Dietary Fiber; 59mg Cholesterol; 390mg Sodium.

A year ago: Creamy Broccoli Cheddar Soup with Croutons
Two years ago: Curry Pasta Salad (from Namibia)

Posted in Breads, Brunch, on October 14th, 2010.

You ever get hungry for breakfast food at dinner time? Since we don’t eat eggs and bacon except on rare occasions, I decided one night that breakfast food appealed to me. I was going to make yeast waffles, but that takes an overnight sit in the refrigerator for the batter. No time for that. In my stack of to-try recipes I had this one for oatmeal pancakes, that I’d read over at Smitten Kitchen blog. She got the recipe from Good to the Grain: Baking with Whole-Grain Flours (a cookbook that makes grains and other healthy foods much more appealing). I’d read something about the book at another blog too.

The pancakes were easy to make, although I did have to make oatmeal as part of the recipe. If you happen to have leftover oatmeal on hand you’ll save an extra 10 minutes or so, and dirtying up another pot! First, though, you have to make some oat flour in the food processor (just whiz up enough dry oatmeal until it’s flying all around in the workbowl). That gets mixed with the other dry ingredients (flour, sugar, salt, baking powder).

Then you mix up the wet stuff: the cooked oatmeal, milk, eggs, melted butter. That gets poured into the dry mixture and you very gently fold and whisk lightly (use a heavy hand with it and the pancakes will be heavy and tough).

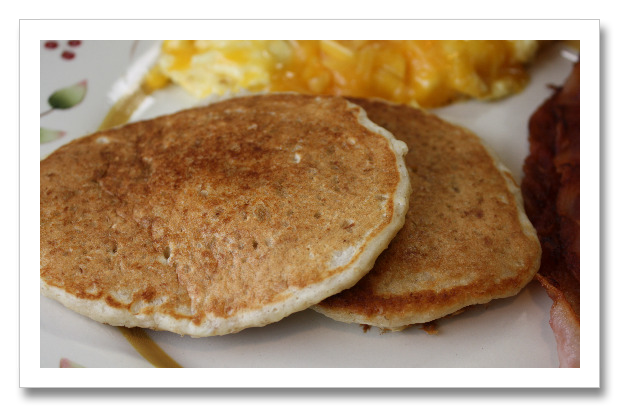
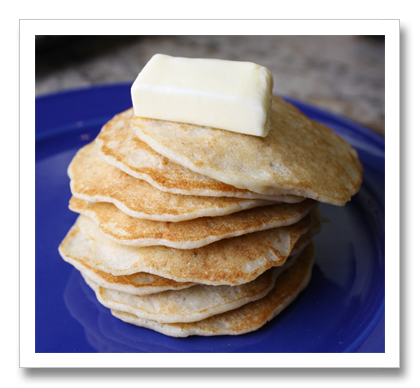
Confession time: I didn’t re-read the directions as I was doing it and I added in ALL the cooked oatmeal – the recipe indicated making two cups worth and you only needed to use one. So I had to thin down the batter some. The recipe you see below is my convoluted version, which made those lovely thin double-sized dollar pancakes in the photo above. The recipe made way too many for the two of us, so I placed the extras in between pieces of waxed paper and put several  stacks into bags in the freezer. They microwave (to reheat) just fine. Be careful and don’t overdo the time, though. They were fine with just a bit of butter, but sublime with some real maple syrup. The bigger ones (top photo) were thicker, more chewy, with more of an oatmeal texture. The thinner ones I liked better, actually. But either way, they’re very tasty. Very oatmeal-y, if you will.

printer-friendly PDF

Oatmeal Pancakes

Recipe By: Adapted from Smitten Kitchen blog, via cookbook Good to the Grain
Serving Size: 9
NOTES: Adapted from Smitten Kitchen’s blog; she tweaked it some from the cookbook version. To make oat flour – pulse rolled oats in a food processor or spice grinder until finely ground (3/4 cup of oats yields about 1/2 cup oat flour). To make oatmeal bring 2 cups of water, 1 cup of rolled oats and a pinch of salt to a boil and simmer on low for 5 minutes. Let cool. Add milk (more) if needed to get a perfect batter. Sample one to see what you get, then adjust.

1/2 cup oat flour — (see notes)
1 cup all-purpose flour
2 tablespoons sugar
2 teaspoon baking powder
3/4 teaspoon Kosher salt
3 tablespoons unsalted butter — melted and cooled slightly (plus extra for the pan)
1 1/3 cups whole milk
2 cups cooked oatmeal — (see notes) cooled to room temp
1 tablespoon molasses — or 1 tablespoon honey
2 large eggs

1. Whisk the dry ingredients (oat flour, flour, sugar, baking powder and salt) together in a large bowl. In a smaller bowl, whisk the melted butter, milk, cooked oatmeal, honey and eggs together until thoroughly combined. Gently fold the wet ingredients into the dry ingredients. Using a light hand is important for tender pancakes; the batter should be slightly thick with a holey surface.
2. Heat a 10-inch cast-iron pan or griddle (or electric skillet to 350) over medium heat until water sizzles when splashed onto the pan. Lower to medium-low. Rub the pan generously with butter; the author says this is the key to crisp, buttery edges. Working quickly, dollop mounds of batter onto the pan, 2 or 3 at a time. Once bubbles have begun to form on the top side of the pancake, flip the pancake and cook until the bottom is dark golden-brown, about 3-5 minutes total, depending on the thickness of the batter. Wipe the pan with a cloth before griddling the next pancake. Continue with the rest of the batter.
3. Serve the pancakes hot, straight from the skillet or keep them warm in a low oven. They will reheat, again in a low oven or a few at a time in the microwave for just 10 seconds or so.
4. Do ahead: Although the batter is best if used immediately, it can sit for up to 1 hour on the counter or overnight in the refrigerator. When you return to the batter, it will be very thick and should be thinned, one tablespoon at a time, with milk. Take care not to over mix.
Per Serving: 224 Calories; 8g Fat (32.0% calories from fat); 7g Protein; 31g Carbohydrate; 2g Dietary Fiber; 62mg Cholesterol; 386mg Sodium.

A year ago: Pork Tenderloin with Maple Mustard Vinegar Sauce
Three years ago: Whole Wheat Pizza Dough

Posted in Breads, on October 10th, 2010.

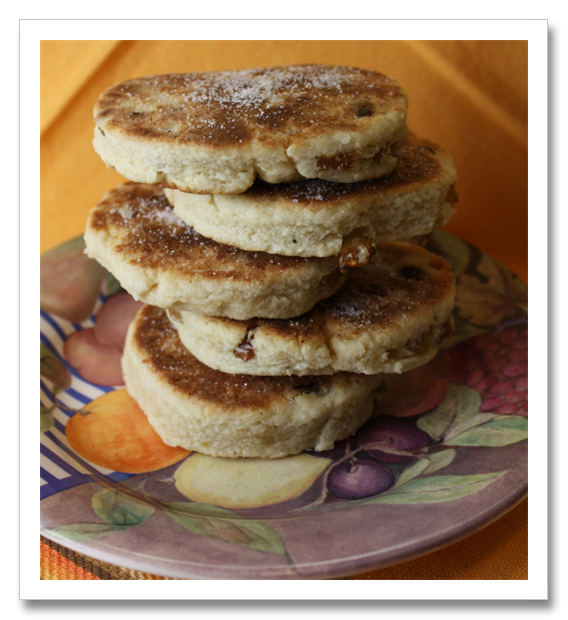
There’s a long, meandering story to tell about this recipe. When we were in Britain in August we stayed in Wales for several days. And after a really interesting (and different) Welsh dinner at a pub one night, the chef served us a few Welsh cakes. Having never had them before (or ever heard of them) I was intrigued. He brought us four. We ate two and took the other two with us, which we enjoyed the next day. I almost always keep a small plastic bag in my purse. You just never know when you might need one. It was perfect for my little stash of Welsh Cakes. (And say, speaking of what kind of stuff women keep in their handbags – did any of you watch Nate Berkus on his new TV show, where he wanted to know what women keep in their purses – why we feel naked without one – and one audience member he interviewed actually pulled out a black bra from hers? THAT was weird!)

Traditionally, I’d guess a Welshman would not eat a Welsh Cake after dinner. And why the chef did for us, I’m not sure, except that he made us a typical Welsh meal. They’re more like a little treat to have with a cup of tea or coffee. Probably eaten mid-morning or mid-afternoon. The dessert I ordered, banofee pie – oh so good – was delicious, but it’s not Welsh particularly. So I guess he wanted us to end our meal on a Welsh high note.

We tasted them, and I fell in love with them. Being a scone aficionado, I quizzed our waitress about them. How were they made, I asked? In a dry skillet – cast iron preferred, she said. They were just lightly sweet, with a little sprinkling of sugar on the top of each one. They were warm, light and scrumptious. Right then and there I determined I’d learn how to make them once I got home. As we left the pub that evening the chef scribbled out his recipe and handed it to me. Comparing it in my mind with scones, I didn’t see any liquid on the list. I asked him about milk or cream, and he said no, the butter was sufficient. His instructions were so succinct as to be non-existent, so I figured I’d best figure it out later. I didn’t think any more about it then.

Within 24 hours of our arrival home I was searching my cookbooks (first I went to my EYB site – and yes, EYB told me I owned one cookbook with a recipe – and if you don’t know EYB, you can read my post about it). I went online and found several recipes too – many of them  identical. I made a kind of Welsh Cake spreadsheet, so to speak, of the different ingredients from all the recipes I found. Some had more butter (in proportion to flour) than others. Some had spices (like mace, nutmeg, cinnamon, or “mixed spice,” which is a combination jar sold in Britain). Some called for cream or milk. But every recipe called for an egg. Except the chef’s. Here’s the chef’s entire recipe: 5 ounces butter, 10 ounces self-raising flour, 3 ounces caster sugar, 1 pinch mixed spice, 4 ounces currants or raisins. 1/2 hour fridge, griddle no oil. Isn’t that a kick? That was it. He was doing it from memory as he scribbled onto a tiny piece of paper, and I think he must have forgotten the EGG.

SO, the next day I decided to try one of the recipes (not the chef’s) that included an egg and I’d see where it led me. I was pleased with the taste, but I followed a method that said to pat out the rounds by hand. I knew the chef’s had been much more structured, more precise than that. I didn’t know what temperature to cook them, either, although I quickly determined that using my nonstick electric skillet would be the best choice. I have an cast iron skillet, but the electric skillet would be more heat-consistent. I watched a precious video online of a dear, little Welsh grandmother named Betty making Welsh Cakes for her grandchildren. I didn’t try her recipe, but I watched the technique carefully. So next I tried the chef’s recipe – and decided with the quantity of flour  – that I should add two eggs. Mistake. Probably one would have been sufficient. But I didn’t think they were quite right, either, although I did use my rolling pin and got perfect rounds. And incidentally, my friend Marie, who writes A Year From Oak Cottage has a recipe on her other blog, about Welsh Cakes. Hers calls for lard, though. Take a look if you’re interested.

Now we fast-forward a couple or three weeks. I wasn’t sure which recipe I’d try next. Coincidentally, I’d had a couple of email exchanges with one of my readers, Toni-Anne, who lives in England (we’ve been emailing occasionally for the last couple of years). Just on chance I asked her whether she knew Welsh Cakes. Well, yes, indeed she did. She was raised in Wales, and recalled her mother making them often. Sadly, Toni-Anne’s mother died when she was 10, and she doesn’t have her mum’s recipe. Toni-Anne said she’d see what she could do, though.

A few days went by and then I got another message from Toni-Anne. She’d remembered that in the early 80’s she’d spent a few weeks in North Carolina and she’d made Welsh Cakes while she was there. North Carolina, I thought? From a magazine recipe, she said. And would you believe it? She still had the recipe. And the magazine! From the December, 1981 Redbook. The Welsh Cakes were credited to a woman named Blodwyn Lewis. Blodwyn? Yup. Blodwyn, a very Welsh name, I’ve learned.

Promptly, I made this recipe, and am so happy to say that this will be my go-to recipe for Welsh Cakes, thank you very much! I did make one change – I used cream instead of milk, but either will work. And I used my food processor to cut in the butter. They taste very similar to my buttermilk scones, but these have no buttermilk in them. I’ll have to make an ingredient by ingredient comparison of the two. Or maybe I’ll have to try my scone recipe cooked on a griddle. Maybe later. For now I’m sticking with this recipe. So here, my friends, is the Redbook magazine Welsh Cake recipe, from 1981, thanks to Toni-Anne and her amazing archives! Thank you, cyber-friend!

printer-friendly PDF

Welsh Cakes

Recipe By: Adapted from Redbook Magazine, December, 1981 (a recipe from Blodwyn Lewis) via one of my readers, Toni-Anne, who lives in Buckinghamshire
Serving Size: 13
NOTES: If you only get 10-11 Welsh cakes, you may have made them thicker than mine, so they’ll take another minute or so per side. You’ll get the hang of it after you’ve done one batch of these. You can also add in a pinch of mixed spices (mace, cinnamon and nutmeg) if you’d like.

2 cups all-purpose flour
1/2 cup sugar
1/2 teaspoon salt
2 teaspoons baking powder
1/2 cup butter — cold, diced
1/2 cup golden raisins — or currants
1 large egg
1/3 cup heavy cream — or more if needed (or milk)
About 1/4 cup flour to sprinkle on the work surface
About 2 T. granulated sugar for sprinkling on top

1. In the bowl of a food processor combine the flour, sugar, baking powder and salt. Pulse a few times to mix and lighten the mixture.
2. Add the cold, cubed butter and pulse until the mixture is coarse crumbs, with some small pieces of butter still visible.
3. Pour this mixture out into a medium-sized bowl. Add raisins and mix gently.
3. Whisk the egg, stir in the heavy cream and add to the flour mixture. Using a wooden spoon, stir to combine and if needed, add more liquid (a teaspoon at a time) until the mixture will come together into a ball.
4. Gently pat the dough into a large oval, then use a rolling pin to roll it out flat, using as few strokes as possible. The less you handle the dough the more light the cakes will be. Roll the dough until it’s about 1/4 to 3/8 inch thick and use a 3-inch cookie or biscuit cutter to make uniform pieces.
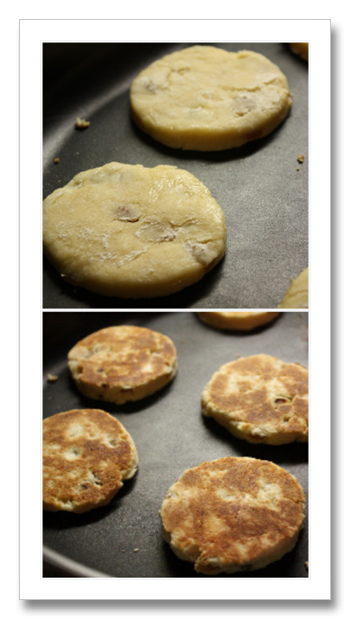
5. Meanwhile, preheat an electric skillet (or a flat griddle on your stove) to 350°. Place the cakes on the hot pan and leave them alone for about 3-4 minutes, depending on the temperature, until one side is golden brown. Gently turn them over and continue cooking on the second side for another 3-4 minutes. Break one in half to make sure they’re done in the middle.
6. Remove to a cooling rack and sprinkle a little pinch of granulated sugar on the top of each Welsh cake. Serve immediately, or cool and freeze. Ideally, serve them just barely warm. I make them ahead and when I’m ready to serve I slip them back into the electric skillet for about one minute, lid on, just to barely heat them through. They require no adornment (no butter or jam needed).
Per Serving: 209 Calories; 10g Fat (42.2% calories from fat); 3g Protein; 28g Carbohydrate; 1g Dietary Fiber; 44mg Cholesterol; 238mg Sodium.

A year ago: Olive Oil Orange Madeleines
Three years ago: Anise Pound Cake

Posted in Breads, Restaurants, on July 13th, 2010.

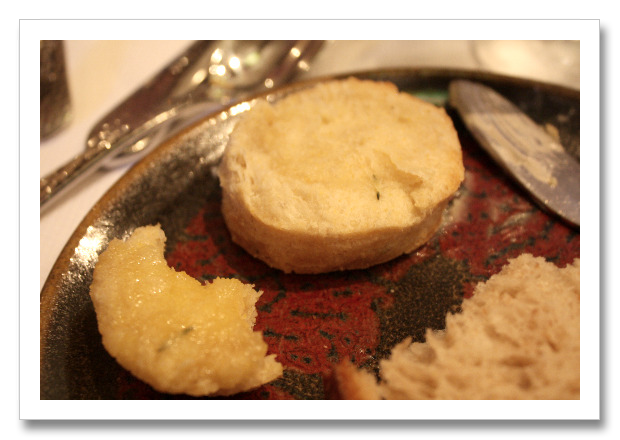
It’s amazing what photo software can do to a picture taken in almost complete darkness! I couldn’t even see the biscuits in my viewfinder, hardly. And yet, even though the photo was taken without flash, hand-held for at least 2 seconds, it came out! So I brightened it up, decreased the yellow saturation, and voila!

Read the rest of this entry »

Posted in Breads, Brunch, on June 28th, 2010.

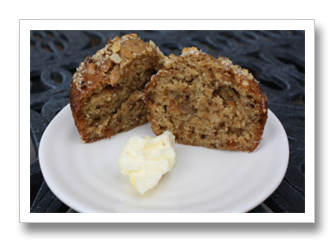
A week or so ago when we had a lot of houseguests to feed for breakfast  two mornings in a row, I made the Mimi’s Cafe Buttermilk Spice Muffins, and I also made these. Old fashioned bran muffins. Both muffins got gobbled down with happy smiles on everyone’s faces. Now, I’ve tried a variety of different recipes for bran muffins over the years – some recipes that contain whole bran, whole wheat and probably other kinds of unusual flours or grains. These muffins don’t qualify for that type at all. These are the kind containing raisin bran cereal (I only use Kellogg’s brand Raisin Bran for these), some canola oil, some added golden raisins, sugar, baking soda, flour and buttermilk. The cereal gets mushed up with some boiling water first. Once that cools you add everything to a big bowl that goes into the refrigerator. Any time within a week just scoop out some more and bake. With the last batch of four I made the other day I added some nuts to the batter, and I sprinkled some finely chopped walnuts on top too.

I do think these are my favorite bran muffins and I’ve been making these since about the late 1960’s. When bran muffins kind of became a popular item – when people started paying attention to fiber. But it wasn’t called fiber then, it was just called health food. We were told that eating sugar-sweetened bran muffins would make us healthy. It was also when we were told that substituting margarine (yuk!) or vegetable oil for butter was also going to make just about everything we ate healthier.

You can cut down on the sugar if you’d like, but not by much. These are easy. And they’re just perfect breakfast comfort food. I’ve tried some other brands of raisin bran. They’re okay, but not right. I’ve tried it with All-Bran, and they’re way too heavy on the bran for me. Not because of what it does to my digestive system but because it’s too strong on the bran flavor. So I learned a long time ago to trust Kellogg’s on this one. If your box of Kellogg’s doesn’t have enough raisins in it (or they’ve sunk to the bottom of the package), that’s fine – just add some more. I almost always have some golden raisins on hand in my pantry, so I add some more of those. If you like cinnamon, add just a little bit – about 1/2 teaspoon to the dry ingredients. These muffins aren’t in the least bit gourmet. They’re quick, and downright tasty. They’d also make a great item for a holiday morning when you’ve got lots of other things cooking . . . if you have the batter already prepared, you just have to spoon it into the cups and bake. Easy.
printer-friendly PDF

Refrigerator Raisin Bran Muffins

Recipe By: Adapted from a friend’s recipe, from the 1960’s
Serving Size: 30
NOTES: This whole batter mixture will keep in the refrigerator for at least a week if you want to bake them fresh in the morning. They’re really quite low in calories and fat. If you like cinnamon, add 1/2 tsp to the flour mixture.

3 cups raisin bran — cereal (Kellogg’s brand only)
1 cup boiling water
2 whole eggs — lightly beaten
2 cups buttermilk
1/2 cup vegetable oil
2 1/2 teaspoons baking soda
1/2 teaspoon salt
1 cup sugar
2 1/2 cups flour
1/2 cup golden raisins — optional
1/2 cup walnuts — minced

1. Preheat oven to 425°.
2. In a large bowl mix bran cereal with boiling water, stirring to moisten evenly. Allow to cool, then mix in eggs, buttermilk, oil and stir well.
3. Stir together (separately) the soda, salt, sugar and flour, then stir into the bran mixture along with the added golden raisins. If using walnuts, add some to the batter.
4. Spoon batter into muffin tins, filling it nearly to the top. Sprinkle the optional nuts on top. Bake for 20 minutes. Makes 2 1/2 dozen.
Per Serving: 144 Calories; 5g Fat (33.3% calories from fat); 3g Protein; 22g Carbohydrate; 1g Dietary Fiber; 15mg Cholesterol; 199mg Sodium.

A year ago: Review of Placerville’s Heyday Cafe
Two years Ago: Israeli Couscous Salad with Tomato
Three years ago: Panna Cotta with Strawberries

Posted in Breads, Brunch, on June 18th, 2010.

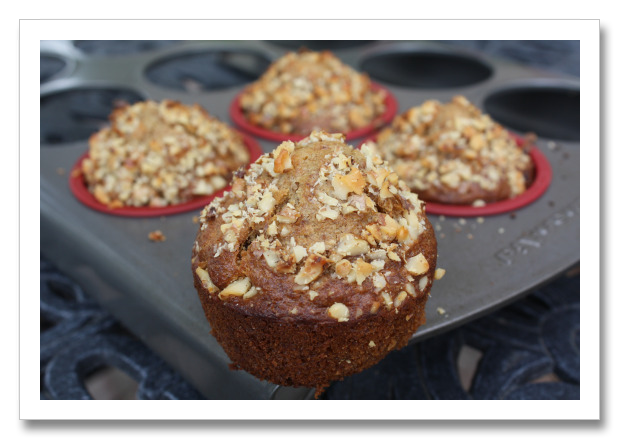
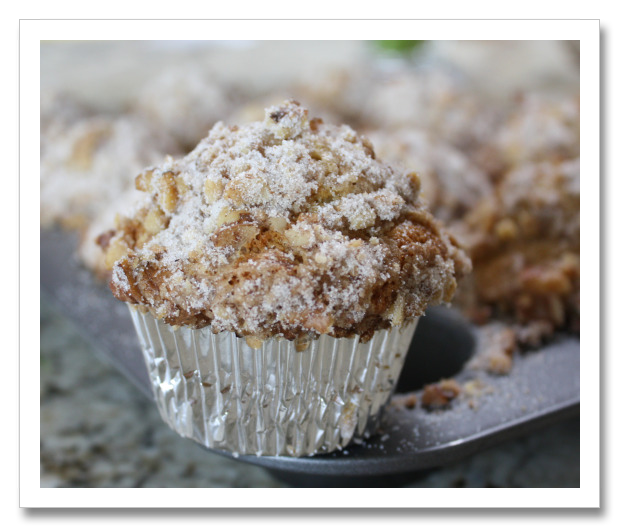
Oh, I do like that photograph! Just the right amount of blur, and the muffin front and offset from the center. Did you know that, in the art world, it’s a no-no to ever place your object/subject in the center? It’s always supposed to be off center. Even portraits. And usually you should have some kind of angle/triangle in your picture too (see the muffin tin edge on the right?). So I set this picture up with that in mind. With the crumbs still sitting there on the side. I didn’t pose the crumbs – they were just there when I extracted that one muffin. Dave and I promptly ate the muffin.

Back years ago, when my DH and I were still career folks, we used to leave early some workday mornings, in separate cars, and stop for breakfast at Mimi’s Cafe, a restaurant that’s right on the route we both took to work. And mostly we ordered their crock of oatmeal that came with a little bitty bowl of brown sugar and another of raisins, plus a pitcher of milk. We’d do this at least once a week, sometimes twice. And when you order some breakfasts at Mimi’s, you also get a choice of juice and/or a muffin. And they have a couple of muffins on their menu, but this buttermilk spice one was the one I always ordered. Heaven’s knows how many calories are in one of theirs (they’re much bigger than the one above). It always came with a huge, wide falling-off-the-edges top, smothered in those nutty cinnamony crumbs. Once in a great while I’d buy a few of them and take them to the office to share. They’ve always been a big favorite.

So it was with great glee a year or so ago that I read over at Culinary Concoctions by Peabody (one of my favorite blogs) that the recipe is online at Mimi’s website. I was astounded! Really? Yes. I promptly copied it over into my recipe software, thinking for sure they’d take that sucker down momentarily – that they’d been way too hasty giving away that famous recipe. Surprise – it’s still there! Meanwhile, I’ve looked at the recipe many times but never had the reason to make them.

I’d considered just running down to Mimi’s and buying them, but my recollection was that the price was considerable, even 15 years ago. So since I had the recipe, and I needed a bunch of muffins for a breakfast we had for a big group of houseguests, why not make them myself. Totally easy. It’s just an ordinary muffin batter, and ordinary ingredients in the topping. But put them together and they’re a wow in my book.

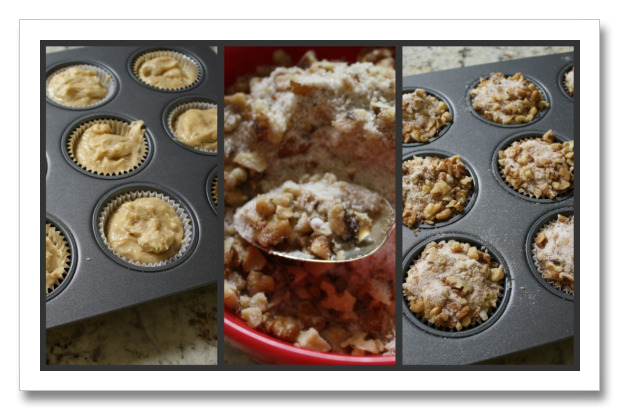
There you can see the batter in the paper cups. The topping mixture is in the center (sugar, walnuts, cinnamon and a drizzle of buttermilk to hold it together). On the right are the muffins ready to pop in the oven. The only caution I read was that you must put the muffins in the oven immediately after you add the topping – otherwise the topping sinks down into the batter. You definitely don’t want that to happen.

So even if you don’t have a Mimi’s in your neighborhood, you can try these wonderful muffins yourself! I definitely DO recommend them. Eat them right away, or freeze them. They will keep for a day, but I’d suggest you freeze them instead.
printer-friendly PDF

Buttermilk Spice Muffins

Recipe By: Mimi’s Cafe
Serving Size: 12
NOTES: Recipe yields 12 standard-size muffins, or six jumbo size muffins. If using the jumbo muffin pans, reduce the oven temperature by 25° and increase the baking time 5-10 minutes.

1 cup sugar
1/2 cup butter
3 whole eggs
1/2 teaspoon cinnamon
2 1/2 cups flour
2 teaspoons baking soda
1 teaspoon nutmeg
3/4 cup buttermilk — plus 1 tablespoon
TOPPING:
1/2 cup sugar
1 cup walnuts — finely chopped
1/2 teaspoon nutmeg
1/2 teaspoon cinnamon

1. Grease the baking tins with butter. Or you can also use paper liners.
2. Preheat oven to 375°. In a mixing bowl, cream the sugar and the butter together with an electric mixer. When they are thoroughly mixed, add eggs and beat one more minute.
3. Sift the flour into a separate bowl, together with the baking soda, nutmeg and the cinnamon. Add the flour and the buttermilk to the first mixture, mix at low speed until smooth. To avoid lumps in the batter, add the wet and dry ingredients alternately, in small amounts.
4. Make the nut topping: Mix all ingredients together in a small bowl.
5. Fill each cup 3/4 full of batter. Add a full, rounded tablespoon of nut topping on top of each muffin cup of batter. Bake immediately or the topping will sink to the bottom of the muffin.
6. Bake at 375° for 20-25 minutes, until golden brown. A toothpick inserted in the middle of the muffin should come out dry. Home ovens heat differently from commercial ovens so you may need to adjust the temperature or the baking time accordingly.
Per Serving: 349 Calories; 15g Fat (38.6% calories from fat); 7g Protein; 47g Carbohydrate; 1g Dietary Fiber; 74mg Cholesterol; 322mg Sodium.

A year ago: Madeira Onions (made from sweet Noonday onions from Noonday, Texas)
Two years ago: Pork Tenderloin with Mango Sambal (sambal is like a salsa)
Three years ago: Pesto Pea (and Spinach) Salad (an Ina Garten recipe)

Posted in Breads, Brunch, on June 9th, 2010.

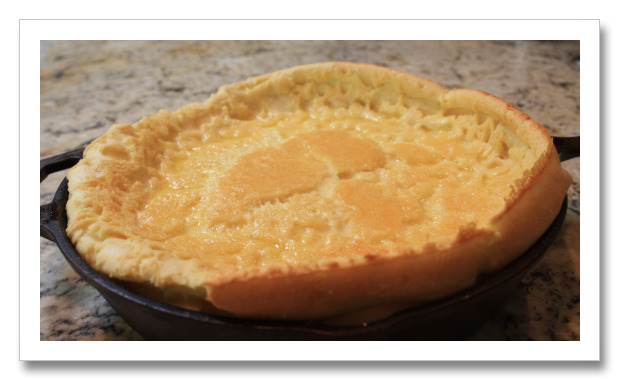
Years ago, in the 1960’s, at a pancake restaurant in Denver, I had my first Dutch Baby. I was in awe of it. They served it in individual medium-sized black cast iron pans, a serving for one or two. It came out crusty brown, with lemon juice and powdered sugar sprinkled over it. I’ve never forgotten it. And yet, all these years have gone by and I’d never made one. They’re not difficult in the least. In fact, they’re very easy. With some breakfast sausage, they were a complete breakfast for the two grandkids we have visiting.
Read the rest of this entry »

Posted in Breads, Brunch, on June 5th, 2010.

Last weekend our daughter Sara and her family were with us for an overnight, sandwiched in between the numerous softball league games our granddaughter Sabrina was in. But they made it to our house for dinner, overnight and breakfast the next morning. Getting up early, I came downstairs, tiptoeing past the downstairs guest room only to find Sara sitting out in our patio reading a magazine. She’d risen early because our grandson had wiggled his way into bed with Sara and John at about 5 am, kind of pushing Sara out of bed. Sara and I had a nice, quiet visit over some hot tea before the family got up.

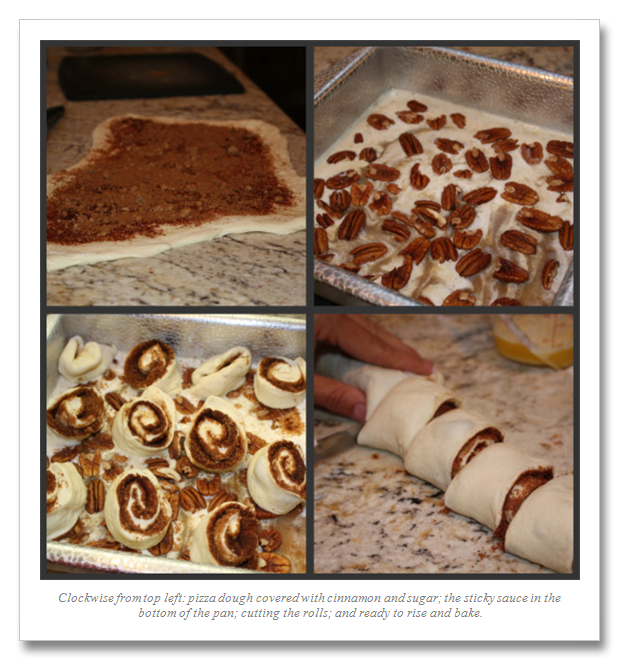
Anyway, Sara was telling me about the favorite sticky buns she makes regularly at home, using Bridgeford frozen bread dough. I said, well, I have a 1-pound package of Trader Joe’s raw pizza dough. Did she think that might work? She thought about it and said why not? So, with both of us working at it (me mostly taking notes as I watched her), we managed to find all the necessary ingredients in my kitchen pantry. This version is so easy. What’s different about these is the addition of heavy cream in the bottom (that becomes the top if you invert the whole thing after baking). I hunted all over the internet and didn’t find a single recipe using this method.

To tell you the truth, sticky buns aren’t something I crave. I know they’re loaded with sugar and probably full of fat, and the resulting calories have a direct conduit from my mouth to my hips. Besides, with Dave a diabetic, he shouldn’t have any of these (he didn’t, I did). So thankfully, I’ve been able to resist every single one of those mall bakeries who hawk sticky buns like they’re nothing but the equivalent of a couple of cookies.

But Sara’s version was so darned easy. And they were ever-so tasty. We didn’t frost them – that seemed over the top, we thought. They had plenty of sugar in them as it was.

Sara didn’t have the recipe with her, but she thought she could remember it by heart. She makes them often enough she doesn’t even use a recipe anymore. She thinks the recipe came from a Better Homes & Gardens magazine from 1989. It’s not on the magazine’s website (probably because it’s from too long ago).

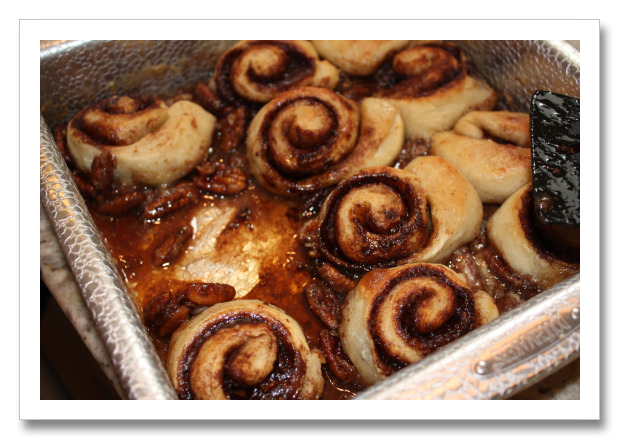
First of all, try to allow time for the dough to rise some. We didn’t have the luxury of that, so they only rose for about 15 minutes before we had to put them in the oven. And do put this in an 8×8 pan, not a 9×9 (as I did). Plus, it’s possible that the Bridgeford bread dough may be more quantity . . . we didn’t know. In either case, they didn’t really fill up the 9×9 pan quite enough. But it didn’t matter one bit to the taste!

In the bottom of the pan you mix whipping cream and brown sugar, then sprinkle the whole pecans over it. The dough is rolled or spread out into a rectangle (guessed at about 10×14), it’s brushed with most of a half a cube of melted butter, then sprinkled with a mixture of brown sugar and cinnamon. You roll it up, try to seal the edges a bit, then cut into 12 equal pieces and they’re gently laid in on top of that creamy pecan stuff. Cover and allow to rise if you can, then bake for 25-30 minutes. I ended up turning on the broiler for just a few minutes to brown the top. And so very good. With a bunch of hungry mouths to feed, the 12 little buns were gone in a flash. Thanks, daughter!

printer-friendly PDF

Pecan Sticky Buns (using pizza dough)

Recipe By: Daughter Sara’s recipe that she’s adapted from an ancient Better Homes & Gardens magazine
Serving Size: 8
NOTES: If you don’t have pizza dough, use a frozen bread dough (defrosted) instead.

BASE:
1/3 cup brown sugar
3/4 cup heavy cream
1 cup pecans — left whole

DOUGH:
1 pound pizza dough — (raw, readymade)
4 tablespoons unsalted butter — melted
1/3 cup brown sugar
2 teaspoons cinnamon

1. In the bottom of an 8×8 pan, add the brown sugar and heavy cream. With a spoon stir it together until mostly mixed.
2. Sprinkle the top with the pecans and set aside.
3. Preheat oven to 350°.
4. Using extra flour to keep down the stickiness, spread the pizza dough into a rectangle (about 10 x 14 approx).
5. Melt the butter in the microwave and using a pastry brush, brush the butter over the dough, leaving a 1/2 inch border around all 4 edges. Reserve just a bit of butter to add later.
6. Mix the brown sugar and cinnamon in a small bowl and sprinkle (use a spoon, it’s easier) all over the dough, still leaving the border around the edges. Roll up the dough from the long side, and attempt to seal the edge with water, if possible. Using a serrated knife, cut the dough roll into 12 equal pieces. Place the pieces over the base, leaving space between each bun so they have room to spread and rise. Brush the tops with any of the remaining butter. Cover lightly and allow to rise about 30 minutes (or more if you have time).
7. Bake for 25-30 minutes or until golden brown on top. If the tops aren’t brown, turn on the broiler for just a few minutes – that’s all it will need. Watch that it doesn’t burn.
8. Allow to cool at least 5 minutes. You can turn the entire pan over onto a serving plate, or use a spatula to serve each bun with some of the bottom sauce drizzled over the top.
Per Serving: 389 Calories; 25g Fat (55.5% calories from fat); 5g Protein; 39g Carbohydrate; 2g Dietary Fiber; 46mg Cholesterol; 16mg Sodium.

A year ago: Chocolate Pudding (Dorie Greenspan’s)
Two years ago: Rosemary Pork Loin

Related Posts Plugin for WordPress, Blogger...