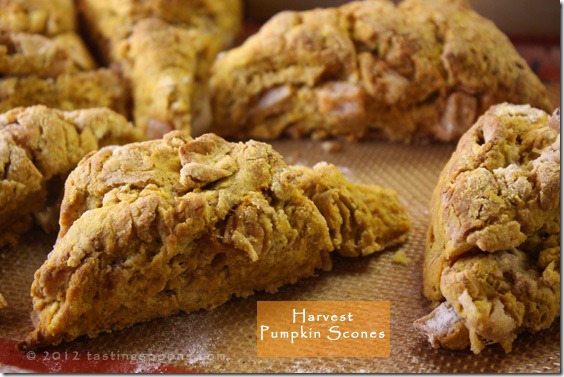
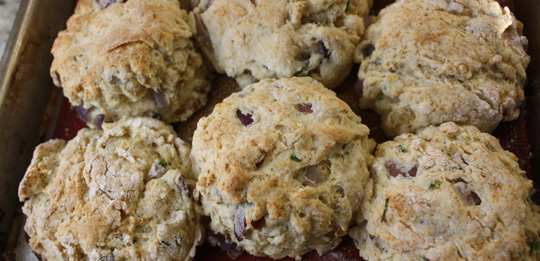
Are all scones beautiful? Certainly not if you look at mine! But, these have a nice rich, tender scone texture with all those lovely spices (similar to pumpkin pie), some crystallized ginger, and pumpkin puree.
Can you just tell these scones are craggy? I love that word – craggy. Means rugged and uneven: a craggy face, for instance. These are not your more common – pretty, perfectly formed triangular scones with smooth tops and edges. The dough is raggedy and slightly bumpy. Even a tad on the difficult to form. But I didn’t over-handle it just so it wouldn’t get tough. I needed a breakfast bread for my DH’s men’s Bible Study group, and went to my internet file, and there was this one. It came from King Arthur Flour about 2 years ago, and if you want to see their version, click here.
My pantry shelf still had two large cans of pumpkin puree from 2010. Long past its use by date, but I know those dates are just suggestions. Canned goods usually don’t have a problem for several years. But I only used 2/3 of a cup of the pumpkin, so I’ll have to find something else to use some of the remainder. I could freeze it, but that’s taking up valuable real estate in my freezer. Not what I want to do with it for sure! If I had 3 freezers, they’d all be full. I just know it. But those kinds of confessions are for another post . . .
The scones were cinchy easy to make – flour, baking powder, sugar, some spices (cinnamon, allspice, ginger and nutmeg), a cube of butter, a couple of eggs and the pumpkin puree. That’s all there is in it. As I mentioned the dough was a little on the dry side – I ended up adding a couple of tablespoons more pumpkin to help bring it together. I could have added some milk instead, but with so little pumpkin in it, I knew a little more wouldn’t hurt. You could easily makes these in rounds, or the triangles – whatever you prefer. I molded the dough into a kind of rectangle and cut the wedges easily enough.
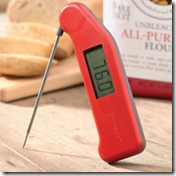
One unusual step was putting the baking sheet (with raw scones on it) in the freezer for 30 minutes. I’d guess that’s to freeze the butter – or at least chill it a lot – helps to make tender pastry products. Into an oven it went. I looked up what the finished temp is supposed to be (the internal temp) for scones, and found out it was 200°, so that’s exactly how long I baked them. Actually it went a couple degrees over that.
Right out of the oven one of those scones yelled out to me – I had to taste one, right – this is quality control! They’re delicious. I made half a recipe (6) so those were mostly eaten by the guys. I knew if I wanted to know how they tasted I needed to eat one. Actually I cut them slightly smaller and had 7, so eating one was just right!
What I liked: the very tender crumb. The pumpkin flavors – the pumpkin itself, but also the spices. AND the crystallized ginger. Love that stuff! I’m a fan of crystallized ginger, so I loved the little bit of sweet-tart crunch from the little nuggets. Worth making.
What I didn’t like: the dough was a bit hard to shape – not un-do-able, just craggy, as I mentioned. Didn’t make a whit of difference to the taste, which was really good!
MasterCook 5+ import file – right click to save file, run MC, then File|Import
Harvest Pumpkin Scones
Recipe By: King Arthur Flour blog
Serving Size: 12
NOTES: If the mixture is dry, add a tablespoon more canned pumpkin puree. If too wet, add just a bit of flour until it’s malleable.
2 3/4 cups all-purpose flour
1/3 cup sugar [I used Splenda]
1 tablespoon baking powder
3/4 teaspoon salt
3/4 teaspoon ground cinnamon
1/4 teaspoon ground ginger
1/4 teaspoon ground nutmeg
1/4 teaspoon ground allspice
1/2 cup cold butter
1 cup crystallized ginger — minced, or cinnamon chips, or chocolate chips, or up to 2 cups
2/3 cup canned pumpkin
2 large eggs
coarse white sparkling sugar — for topping, optional
1. In a large mixing bowl, whisk together the flour, sugar, baking powder, salt, and spices.
2. Work in the butter just until the mixture is unevenly crumbly; it’s OK for some larger chunks of butter to remain unincorporated.
3. Stir in the ginger and/or chips, if you’re using them.
4. In a separate mixing bowl, whisk together the pumpkin and eggs till smooth.
5. Add the pumpkin/egg to the dry ingredients and stir until all is moistened and holds together.
6. Line a baking sheet with parchment; if you don’t have parchment, just use it without greasing it. Sprinkle a bit of flour atop the parchment or pan.
7. Scrape the dough onto the floured parchment or pan, and divide it in half. Round each half into a 5″ circle (if you haven’t incorporated any add-ins); or a 6″ circle (if you’ve added 2 cups of fruit, nuts, etc.). The circles should be about 3/4″ thick.
8. Brush each circle with milk, and sprinkle with coarse white sparkling sugar or cinnamon sugar, if desired.
9. Using a knife or bench knife that you’ve run under cold water, slice each circle into 6 wedges.
10. Carefully pull the wedges away from the center to separate them just a bit; there should be about 1/2″ space between them, at their outer edges.
11. For best texture and highest rise, place the pan of scones in the freezer for 30 minutes, uncovered. While the scones are chilling, preheat the oven to 425°F.
12. Bake the scones for 22 to 25 minutes, or until they’re golden brown (to an internal temp of 200° or a toothpick inserted into the center of one comes out clean, with no wet crumbs). If you pull one of the scones away from the others, the edges should look baked through, not wet or doughy.
13. Remove the scones from the oven, and serve warm. Wrap any leftovers airtight, and store at room temperature. Reheat very briefly in the microwave, if desired.
Per Serving: 260 Calories; 9g Fat (30.4% calories from fat); 4g Protein; 41g Carbohydrate; 1g Dietary Fiber; 56mg Cholesterol; 355mg Sodium.



Leave a Comment!