Get new posts by email:

Archives

Currently Reading

Here are the tastingspoons players. I’m in the middle (Carolyn). Daughter Sara on the right, and daughter-in-law Karen on the left. I started the blog in 2007, as a way to share recipes with my family. I’m still doing 99% of the blogging and holding out hope that these two lovely and excellent cooks will participate. They both lead very busy lives, so we’ll see.

– – – – – – – – – – – – – – – – – – – – – –

BOOK READING (from Carolyn):

Music of Bees, Eileen Garvin. Absolutely charming book about a woman in midlife, lonely, who raises bees, also makes unlikely friends. Heart-warming and very interesting about beekeeping.

A Postcard from Paris, Alex Brown. Really cute story. Dual time line, 1940s and present day about renovating an old apartment in Paris, things discovered.

Time of the Child, Niall Williams. Oh such a good book. Very small village in Ireland, 1960s. A baby is left on the doorstep. The town all whispers and helps. I listened to an interview of the author, which made me like him and his books even more.

Sipsworth, Simon Van Booy. If you like animals you’ll swoon. An old woman who really wants to die finds a tiny mouse in her house and befriends it and finds a reason to live. Utterly charming book.

The Forger’s Spell, Edward Dolnick. True story. For seven years a no-account painter named Han van Meegeren managed to pass off his paintings as those of Johannes Vermeer.

If You Lived Here, You’d be Home by Now, Christopher Ingraham. Could hardly put it down – about a journalist who takes on a challenge to move to small town in Minnesota and write about it. He expects to hate it and the people and place, but he doesn’t. Absolutely wonderful true story.

The River We Remember, William Kent Kreuger. 1950s, Minnesota. A murder and the aftermath. Could hardly put it down. Kreuger has such a vivid imagination and writing style.

How the Lights Gets In, Joyce Maynard. An older woman returns to New Hampshire to help care for her brain-injured son. Siblings and family, lots of angst and resentments.

The Filling Station, Vanessa Miller. Every American should read this book. A novelized retelling of the Tulsa massacre in 1921. Absolutely riveting.

The Story She Left Behind, Patti Callahan Henry. Love this author. Based on a true story. A famous author simply vanishes, leaving her husband and daughter behind. She had invented a mystical language no one could translate. Present day, someone thinks he’s solved the riddle, contacts the family. Really interesting read.

The Girl from Berlin, Ronald Balson. Love anything about Tuscany. An elderly woman is being evicted from a villa there, with odd deed provenance. Two young folks go there to help unravel the mystery. Loved it.

The Island of the Colorblind, Oliver Sacks, M.D. Nonfiction. The dr is intrigued by a remote Pacific island where most of the inhabitants are colorblind. He also unravels a mystery on Guam of people born with a strange neurological problem. Medical mysteries unveiled. Very interesting.

The Bookbinder, Pip Williams. Post 1914 London. Two sisters work at a bookbindery. They’re told to not read the books. One does and one doesn’t. One has visions beyond her narrow world; the other does not. Eventually the one gets into Oxford. Lovely story.

The Paris Express, Emma Donoghue. 1895 on a train to Paris, a disaster happens. You’ll delve into the lives of many people who survived and died in the crash.

A Race to the Bottom of Crazy, Richard Grant. This is about Arizona. Author, wife and child move back to Arizona where they once lived. Part memoir, research, and reporting in a quest to understand what makes Arizona such a confounding and irresistible place.

The Scarlet Thread, Francine Rivers. A woman’s life turned upside down when she discovers the handcrafted quilt and journal of her ancestor Mary Kathryn McMurray, a young woman who was uprooted from her home only to endure harsh frontier conditions on the Oregon Trail.

A Place to Hide, Ronald Balson. 1939 Amsterdam, an ambassador has the ability to save the lives of many Jewish children. Heartwarming.

Homeseeking, Karissa Chen. Two young Chinese teens are deeply in love, but in China. Then their families are separated. Jump to current day and the two meet again in Los Angeles.

North River, Pete Hammill. He always writes such a good story. A doctor works diligently healing people from all walks of life. His wife and daughter left him years before. One day his 3-yr old grandson arrives on his doorstep.

A Very Typical Family, Sierra Godfrey. A very messed-up family. Three adult children are given a home in Santa Cruz, Calif, but only if the siblings meet up and live in the house together. A very untypical scenario but makes for lots of messes.

Three Days in June, Anne Tyler. The usual Anne Tyler grit. Family angst. This wasn’t one of my favorites, but it was entertaining and very short.

Saved, Benjamin Hall. Author is a veteran war reporter. Ukraine, 2022, he nearly loses his life to a Russian strike. Riveting story – he survives, barely.

Grey Wolf, Louise Penny. Another Inspector Gamache mystery in Quebec. She is such an incredible mystery writer.

All the Colors of the Dark, Chris Whitaker. A missing person mystery, a serial killer thriller, a love story, a unique twist on each. Could hardly put it down.

Orbital, Samantha Harvey. Winner of 2024 Booker Prize. I don’t usually like those, but I heard the author interviewed and she hooked me. This is not a normal book with a beginning, a story and an end. It’s several chapters of the day in the life of various astronauts at the ISS (Int’l Space Station). All fictional. She’s been praised by several real astronauts for “getting it” about space station everyday life.

The Blue Hour, Paula Hawkins. An island off Scotland. Inaccessible except when the tide is out. Weird goings on. An artist. A present day mystery too.

Iron Lake, William Kent Krueger. A judge is murdered and a boy is missing. Riveting mystery.

Tell the Wolves I’m Home, Carol Ricks Brunt. 1980s. A 14-yr old girl loses her beloved uncle. Yet a new friendship arises, someone she never knew about.

Four Treasures of the Sky, Jenny Zhang. 1880s, a young girl is kidnapped in China and brought to the United States. She survives with many hurdles in the path.

The Boy Who Fell out of the Sky, Ken Dornstein. Memoir, 1988. The author’s brother died in the PanAm flight that went down in Lockerbie, Scotland. A decade later he tries to solve “the riddle of his older brother’s life.”

Worse Care Scenario, T.J. Newman. Oh my. Interesting analysis of what could/might happen if a jet crashed into a nuclear plant. Un-put-downable.

Song of the Lark, Willa Cather. Complicated weave of a story about a young woman in about 1900, who has a gifted voice (singing) and about her journey to success, not without its ups and downs.

Crow Talk, Eileen Garvin. Charming story which takes place at a remote lake in Washington State, about a few people who inhabit it, the friendships made, but also revolving around the rescue of a baby crow.

The Story Collector, Evie Woods. Sweet story about some dark secrets from an area in Ireland, a bit magical, faerie life, but solving a mystery too.

A Sea of Unspoken Things, Adrienne Young. A woman investigates her twin brother’s mysterious death. She goes to a small town in California to figure it out, to figure HIM out.

The King’s Messenger, Susanna Kearsley. 1600s England, King James. About one of his trusted “messengers,” and his relationship with a young woman also of “the court.” Lots of intrigue.

In the Shadow of the Greenbrier, Emily Matchar. Interesting mystery in/around the area of the famous resort in White Sulphur Springs, West Virginia.

Isola, Allegra Goodman. Hard to describe, survival story on an island in the 1600s.

Save the Date, Allison Raskin. Rom-com, witty, LOL funny. Clever.

The Sirens, Emilia Hart. Numerous time-lines, Australia. Mysteries abound, nightmares, abandoned baby, weird allergies.

Red Clay, Charles Fancher. LOVED this book. Mostly post-Civil War story about the lives of slaves in Alabama during Reconstruction.

Stars in an Italian Sky, Jill Santopolo. Dual time line, 1946 and recent time. Love stories and a mystery.

Battle Mountain, C.J. Box. Another one of Box’s riveting mysteries. Love his descriptions of the land.

Something Beautiful Happened, Yvette Corporon. A memoir of sorts in Greece, tiny island of Erikousa, where the locals hid Jews during WWII. All elusive stories told by the author’s grandmother.

The Jackal’s Mistress, Chris Bohjalian. 1860s Virginia, about a woman who saves the life of a Union soldier. Really good story.

Song of the Magpie, Louise Mayberry. Really interesting story about Australia back in the days when it was mostly a penal colony. Gritty strength of a woman trying to thrive with her farm.

The Boomerang, Robert Bailey. A thriller that will have you gripping the book. About a lot of secrets surrounding the president (fictional novel, remember) and his chief of staff and about cancer. A cure. Such a good story.

Care and Feeding, Laurie Woolever. Really interesting memoir of a woman driven to succeed in the restaurant business. She worked for Mario Batali and then Anthony Bourdain. Gritty stories.

Everything is Tuberculosis, John Green. Maybe not a book for everyone. A real deep dive into the deadly tuberculosis infection, its history. I heard the author interviewed and found the book very interesting.

The Book Lovers Library, Madeline Martin. Fascinating read about Boots’ drug stores’ lending library. And the people who worked in them.

The Arrivals, Meg Mitchell Moore. LOL funny, about a middle-aged couple whose children (and their various family members) return to the family home and the chaos that ensues.

My Life as a Silent Movie, Jesse Lee Kercheval. About grief. A big move to Paris, finding herself a new life with a new set of real blood family.

Escape, Carolyn Jessop. Another memoir about a woman really in bondage in Utah, Mormon plural marriage.


Tasting Spoons

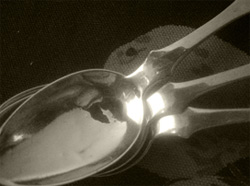
My blog's namesake - small, old and some very dented engraved silver plated tea spoons that belonged to my mother-in-law, and I use them to taste my food as I'm cooking.

Scroll down to the bottom to view my Blogroll

Posted in Appetizers, Breads, on August 10th, 2022.

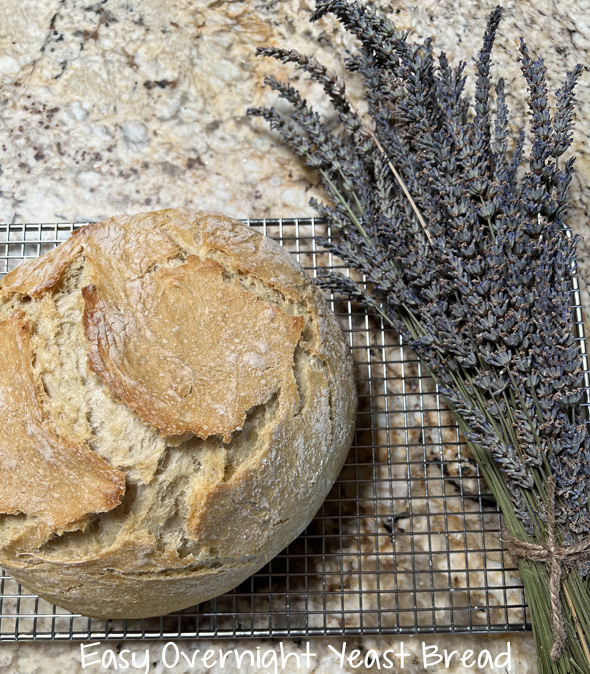
So very easy, you will hardly believe it. No, there isn’t any lavender in it – Taylor was using photo props to make the picture more beautiful.

A post from Carolyn. My dear granddaughter Taylor will only be living with me for another week or so by the time this recipe posts. Oh sigh. I’ll miss her so much! She made this bread. Four ingredients. During her last clinical hospital work (12-hour shifts at a local hospital, in their post-partum department) she befriended all of the nurses in the department and wanted to do something nice for them on her last day. She’d made this bread before (a recipe from her friend Quinn – thanks, Quinn!), and it’s so very easy.

The dough is mixed up in a stand mixer (with dough hook if possible). I couldn’t FIND my dough hook. (Where in the heck has it disappeared to?) So she used the metal paddle for awhile until it got to be labored in mixing, then she kneaded it a bit by hand. It sat out on the kitchen counter (covered with plastic wrap) for about 15 hours until it had more than doubled in bulk. She punched it down, then formed it into a nice big loaf shape (on the counter is fine, just cover it with a big bowl or a damp tea towel). When she was ready to bake it, she preheated the oven to 450°F AND put the big ceramic Dutch oven into that cold oven so it heated up while the oven did. You could use a cast iron Dutch oven too, or a regular lidded pan – just grease the container so it pops out easily.

Then she very carefully picked up the loaf and put it in the hot-hot Dutch oven, with the lid. It baked for 15 minutes. Then the oven temp is turned down to 350°F for 20-30 minutes. Then you remove the lid from the bread and allow it to bake further for 10 minutes until the crust has turned a golden brown. Once out of the oven you can carefully tip over the Dutch oven to let the bread pop out, then right it and let it sit on a rack until cool. Wait at least an hour before trying to slice it.

She was serving it with artichoke dip, so I cut up the bread for her into thicker slices, then into elongated cubes, about 3/4″ side and 2 inches long. I ate a few edges with a little butter. Yum. I think back to decades ago when I used to bake bread every week (sourdough, with a starter) and the hours it took. This is just so easy to do, letting the overnight rise do all the heavy lifting, so to speak!

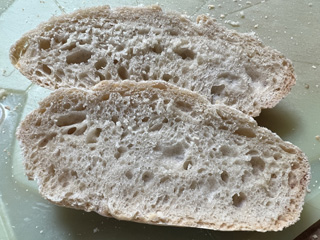
What’s GOOD: how easy this is to make, and when fresh and warm, altogether delicious. You could use this as a bread bowl too. Am sure this could be made into 3 smaller boules also as long as you have the containers to do them in. Adjust the baking time, obviously. The bread texture is on the firmer side – this isn’t a tender bread (no fat or milk in it, notice!). So a French style, rustic texture.

What’s NOT: only that you need to be at home when the 12-18 hour window is up, and continue to be there for the 2nd rising and then the baking time.

printer-friendly PDF and MasterCook file (click link to open recipe)

* Exported from MasterCook *

Easy Overnight Yeast Bread

Servings: 12 (or more)

6 cups all-purpose flour
1/2 teaspoon yeast — not rapid rise
2 teaspoons salt
2 2/3 cups cold water

1. Mix all ingredients well (use dough hook of stand mixer if available). It should come together in a big ball. Place in a large bowl and cover with plastic wrap. Set aside (on kitchen counter) overnight and let it rise to double in bulk, about 12-18 hours.
2. Remove dough to a floured surface, sprinkle with some additional flour and knead for a minute, to mold it into a ball shape.
3. Leave dough on the counter, cover with a dampened tea towel or a huge bowl, and let it rise until the dough has risen for 1 1/2 hours.
4. Preheat oven to 450°F. Place a Dutch oven (with lid) in the oven and allow it to heat as the oven heats up. Once oven reaches temperature, remove Dutch oven, remove lid and carefully transfer dough inside. Replace cover and bake for 15 minutes.
5. Turn heat down to 350°F and continue baking for another 20-30 minutes, then uncover the bread and continue baking for another 10 minutes until top is golden brown.
6. Remove from oven and carefully turn Dutch oven over to remove bread. Set bread upright on a wire rack to cool. Allow to cool at least an hour before trying to cut. Use a serrated knife.
Per Serving: 228 Calories; 1g Fat (2.5% calories from fat); 7g Protein; 48g Carbohydrate; 2g Dietary Fiber; 0mg Cholesterol; 389mg Sodium; trace Total Sugars; 0mcg Vitamin D; 11mg Calcium; 3mg Iron; 69mg Potassium; 69mg Phosphorus.

Posted in Appetizers, on July 25th, 2022.

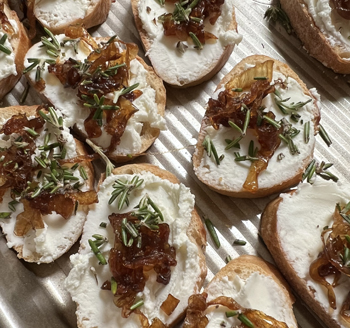
Make most of this ahead, then just spread them up at the last minute.

A post from Carolyn.  You’ll recall I had a wine tasting at my house awhile back – this was another of the appetizers made that evening. I’d found the recipe online and my good friend Linda made them, then she and I quickly put them together just before serving.

Caramelized onions aren’t hard to make – but as anyone who has made them knows, it takes a whole lot of onions to make a batch that yields about 3/4 cup of so, as onions are comprised of a lot of water. As they simmer and sizzle away, they wilt and then become golden brown, then deep mahogany brown. Be careful you don’t cook them too long (they will burn eventually), but make sure they are dark golden.

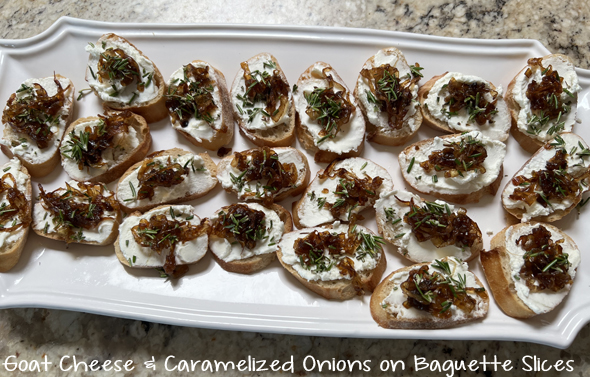
In this case, we spread the toasted baguette slices with goat cheese (a soft, spreadable type), then carefully added some of the caramelized onion on top, then sprinkled chopped up rosemary on top of that. Went beautifully with the rose wine sangria we served.

If you happen to have Boursin on hand, you could easily substitute that for the plain goat cheese, although I’d go really easy on the rosemary in that case, since the garlic/herb Boursin is already seasoned well. Maybe substitute a bit of parsley on top instead.

What’s GOOD: if you have all the ingredients on hand, this is a very easy appetizer to make. Double the batch of onions – they’re good on so many other things.

What’s NOT: only that it requires a bit of spreading and prep just before serving.

printer-friendly PDF and MasterCook file (click link to open file)

* Exported from MasterCook *

Goat Cheese and Caramelized Onion Tapas

Recipe By: adapted from Spanish Sabores blog
Servings: 24

2 tablespoons EVOO
3 large onions — thinly sliced
2 pinches salt
1 1/2 tablespoons brown sugar
1 1/2 tablespoons sherry vinegar — or balsamic vinegar
36 slices baguette — thinly sliced
10 ounces goat cheese — Chevre, warmed to room temp
1/4 cup fresh rosemary — finely minced
Balsamic glaze for garnish

NOTE: If you have Boursin goat cheese (herb/garlic) you could use it instead of the plain goat cheese. If using, garnish toasts with chopped parsley instead of rosemary.
1. Heat a large skillet over medium-high heat and add EVOO. When heated through, stir in the onions and cook, stirring frequently, for 10 minutes.
2. Reduce the heat to medium-low and add the salt, sugar, and vinegar. Cook for about 30 minutes, stirring every 4-5 minutes, or until the onions are a deep, dark brown and taste sweet and soft. If you are going to leave the onions to caramelize while you do other things, leave a splash of water in the pan so they don’t burn. Set aside to cool for at least 10 minutes.
3. Meanwhile, heat the oven to 325°F. Spread the baguette slices on a baking tray and bake for 6-8 minutes or until lightly toasted.
4. To prepare the tapas, generously spread each slice of toasted baguette with the softened goat cheese, then add a heaping teaspoon of the caramelized onion. Garnish with a few rosemary leaves. Drizzle a little bit of balsamic glaze on top. Taste one to make sure you’re using the right proportion of cheese–onion-rosemary-glaze. Adjust quantities as your taste dictates.
Per Serving (not including baguette): 61 Calories; 5g Fat (69.4% calories from fat); 3g Protein; 2g Carbohydrate; trace Dietary Fiber; 9mg Cholesterol; 62mg Sodium; 1g Total Sugars; trace Vitamin D; 40mg Calcium; trace Iron; 42mg Potassium; 49mg Phosphorus.

Posted in Appetizers, Pork, on June 19th, 2022.

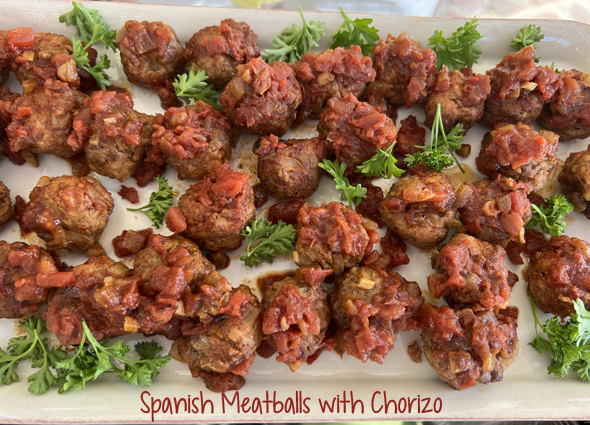
Another recipe from the wine tasting event last month. So good.

A post from Carolyn. So there’s a little story to go along with this recipe. If you’ll recall, the wine tasting event (a fundraiser for my PEO chapter) at my house was kind of a Spanish wine and tapas affair. Not strictly, but mostly. First we had a Spanish sangria made with a cava rose wine. I have yet to post that recipe . . . and Lois made these wonderful appetizer meatballs, among other Spanish tidbits we served.

Just so you know, there’s a difference between Mexican chorizo and Spanish chorizo. The Spanish variety is more like cured sausage – it IS a cured, dry sausage. I’d found the recipe online and gave the recipe to Lois. I’d cautioned her to make sure she bought Spanish chorizo which would require cutting the sausage into tiny little (dry) cubes and incorporating them into the meatball mixture. I recommended Lois go to Whole Foods, as I knew they (usually) have Spanish chorizo. She went to the specialty meat counter and pointed to the chorizo in the case and asked the butcher if it was Spanish chorizo. My guess is the butcher was Hispanic, and thought she was asking if it was “Mexican” chorizo, although she said “Spanish.” Semantics. Perhaps he didn’t know there was a difference. So she bought Mexican chorizo (which is a raw meat product) and made these wonderful meatballs.

Meaning that these meatballs weren’t authentically Spanish, but a Mexican version. I didn’t know how they’d turn out . . . but I can categorically say they were fantastic. Everyone loved them. So did I! It’s not as if the recipe was wrong, or bad, just that we didn’t cleave to the original. We all laughed about it. The blog where the recipe originated is written by a young couple who live in Spain and all their recipes are authentic (and in English).

There are two parts to the recipe – the meatballs (ground pork and chorizo) and a tomato based sauce (with smoked paprika) that is spooned over the top of the hot, cooked meatballs. If these were served in a tapas bar in Spain, they’d probably be warm, not piping hot. They might even be at room temp (not a good thing bacteria-wise). We served them hot (picture at top) with toothpicks.

If you wanted to make these into a meal, serve with a side veg, and some Spanish rice version of some kind. And maybe a green salad.

What’s GOOD: these were really delicious. Not authentically Spanish, but very tasty. Very much worth making.

What’s NOT: only that you should seek out good quality chorizo. NOT the kind from your local grocery store as it’s usually very fatty and you don’t really know what’s in it.

printer-friendly PDF and MasterCook file (click link to open recipe)

* Exported from MasterCook *

Spanish Meatballs

Recipe By: adapted from Spanish Sabores blog
Serving Size: 12

MEATBALLS:
3 tablespoons EVOO
2/3 pound Mexican chorizo
2/3 pound ground pork
1 medium onion — finely chopped
2 cloves garlic — finely chopped
1 teaspoon paprika
1 sprig thyme
1/2 cup bread crumbs
1 large egg
1 pinch salt
1 pinch black pepper
SAUCE:
1 tablespoon extra virgin olive oil
1/2 medium onion — finely chopped
2 cloves garlic — finely chopped
1 teaspoon smoked paprika
2 whole bay leaves
1/2 cup white wine — or dry sherry
1/2 cup chicken broth — or vegetable stock
14 ounces crushed tomatoes — or diced tomatoes
Salt and pepper to taste
1/2 cup fresh parsley leaves — chopped, a few larger pieces for decoration

1. MEATBALLS: Heat a heavy skillet over medium-high heat and add a tablespoon of the EVOO. When it’s hot, add the chorizo and sauté to release the fat, for 5 minutes or until the meat turns a darker, golden color. Add the diced onion and sauté for 3 minutes or until translucent.
2. Add the garlic and sauté together until aromatic (about 1 or 2 minutes). Take off the heat and set aside to cool to room temperature.
3. Meanwhile, combine the ground pork, breadcrumbs, paprika, thyme leaves, egg, salt, and pepper in a large mixing bowl. Add the onions, garlic, and chorizo and mix until well-combined.
4. Wet your fingers lightly with water, then roll the mixture into 1-inch balls. Makes about 30.
5. Preheat oven to 400°F. Place meatballs on two parchment-lined large sheetpans, leaving space in between each one. Bake for 15 minutes.
6. SAUCE: place a separate saucepan over medium-high heat and add the olive oil. Sauté the diced onion until translucent, then add the garlic and paprika. Continue to sauté for a further two minutes, until the aromas are strong.
7. Deglaze the pan with the white wine and cook for 4-5 minutes until the wine is reduced. Add the chicken broth, as well as the tomatoes and bay leaves. Bring to the boil, then reduce to a simmer. Cook, stirring occasionally, for 10-15 minutes or until it reaches a sauce-like consistency. Season with salt and pepper as desired.
8. To serve, garnish the meatballs with tomato sauce and fresh parsley. Both meatballs and sauce can be made ahead and refrigerated. Reheat meatballs and sauce separately and proceed as above.
Per Serving: 196 Calories; 13g Fat (59.4% calories from fat); 11g Protein; 9g Carbohydrate; 1g Dietary Fiber; 46mg Cholesterol; 368mg Sodium; 3g Total Sugars; trace Vitamin D; 37mg Calcium; 1mg Iron; 305mg Potassium; 120mg Phosphorus.

Posted in Appetizers, Soups, Vegetarian, on June 16th, 2022.

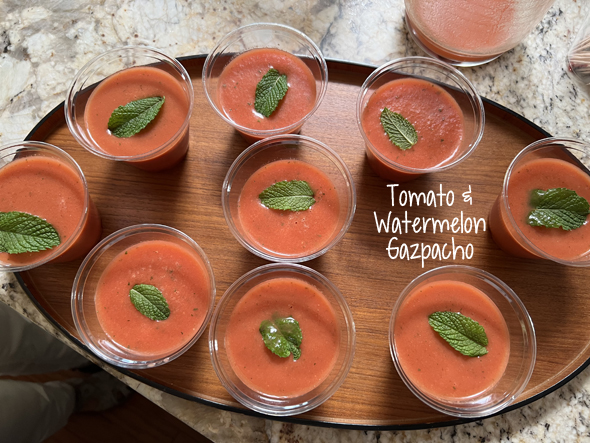
Simply the best kind of refreshing first course for summertime. If you haven’t got good, ripe tomatoes or watermelon yet, save this to make in a month or two.

A post from Carolyn. So, a couple of weeks ago I hosted a small fund-raising event at my home. It’s the third time or fourth time we’ve had a wine tasting fund-raiser on my patio. I think we skipped a year, 2020, when we were all housebound from Covid lockdowns. About 10 of my dear PEO sisters bid on attending the event this year. The money all goes to philanthropies to help young women get an education; and we who host pay for the food or activities and the bid money goes to the philanthropies.

I had two co-hostesses, Linda and Lois, and they made most of the food. I made sangria (recipe coming up) and I also made another batch of the tres leches cake I posted a few weeks ago. The one made with pineapple, coconut milk, rum, etc. I made some asparagus appetizers, then we had some Spanish meatballs, and also a baguette slice appetizer. All those recipes coming up soon.

The weather was okay – maybe we should be happy it wasn’t blisteringly hot as that would have been miserable. It was about 70, and we sat outside the whole time. I’d figured out the menu some months ago and decided to go with a Spanish wine and tapas theme. After having the sangria (from Spanish rose cava), we moved on to an appetizer, then we served this lovely gazpacho. I love gazpacho. I found a great website just chock full of tapas recipes, called Spanish Sabores. Most of the recipes came from that website, however all of them had a few modifications so I feel quite comfortable posting them. If you’re ever wanting to do a tapas night, do go to that website for ideas. The couple who post are just the cutest!

So, this recipe. I told Lois to buy really good tomatoes, and to find a ripe watermelon. That’s not always easy, and this was in May, so it’s possible neither would be great, but I sent Lois to my favorite independent grocery store where I can rely, always, on their good produce. She talked to the produce guy and he helped her pick out the best. When in doubt, buy Roma tomatoes as they generally have good flavor year-around.

The gazpacho is so easy to make – whiz up most of the ingredients in a blender, put it through a fine-mesh sieve (or not, if you want more texture) and then add the watermelon and mint, then taste for seasoning. After Lois made it, I tasted it and decided it needed a tiny bit more salt, a bit of sugar (because I could taste the bitterness of the green bell pepper) and then I added some balsamic vinegar. A tetch. Really just a tetch. Oh, perfection. In this soup, you really can taste the tomatoes, the watermelon, the bell pepper. The other ingredients just add layers of flavor.

What’s GOOD: so fresh, and refreshing. Easy to make. Do taste it at the end to add salt, maybe, or a bit of sugar, or the balsamic vinegar (very little). You can make it ahead, too.

What’s NOT: only that you need to seek out and find really ripe (tasty) produce to go into it. Don’t compromise on that or the soup won’t be great.

printer-friendly PDF and MasterCook file (click link to open recipe)

* Exported from MasterCook *

Watermelon Mint Gazpacho

Recipe By: Adapted from Spanish Sabores blog
Serving Size: 8

6 large tomatoes — very ripe, roughly cut into large chunks
1/2 cup green bell pepper
2 small cloves garlic — cut into a few pieces
1 small onion — roughly chopped
3 cups watermelon — ripe, roughly chopped with seeds removed
Salt to taste
2 tablespoons EVOO
4 teaspoons sherry vinegar
1 teaspoon balsamic vinegar — or maybe up to 2 tsp
1 teaspoon sugar — or more to taste (optional)
2/3 cup fresh mint leaves — plus more for garnish

NOTE: If you prefer your gazpacho thicker, do not strain, or use a wider-mesh strainer to retain more of the tomato pulp. You can also top each glass with a little sherry vinegar, olive oil, sea salt, a watermelon ball and a mint leaf.
1. Wash and chop the tomatoes, pepper, and onion. Make sure you are using the best quality fruits and vegetables possible since gazpacho is a raw dish.
2. Blend the tomatoes, green pepper, onion, and garlic until completely pureed.
3. Strain the blended vegetable juice through a fine mesh strainer. (Or not, if you prefer a thicker consistency.)
4. Everything should pass through except for a layer of seeds and skin. Discard this.
5. Add the vegetable juice back to the blender and add the watermelon. Blend again until completely pureed.
6. Add salt to taste (go easy, you can always add more later), and sherry vinegar and blend. Suit your own taste on how much vinegar – and it depends upon the ripeness of the fruit and vegetables used.
7. Finally, slowly add in the EVOO (better olive oil means better gazpacho) as the blender is running. Add balsamic vinegar and sugar and blend until smooth.
8. Taste the gazpacho for salt and vinegar and adjust if necessary. Then, add two to four ice cubes (depending on how thin you like your gazpacho – when we made it we used no ice). Let them melt for a few minutes in the blender and then add a handful of fresh mint and blend for the last time. Can be made the day before; keep chilled.
9. Taste for salt and serve ice cold in glasses, garnished with a mint leaf.
Per Serving: 87 Calories; 4g Fat (35.8% calories from fat); 2g Protein; 13g Carbohydrate; 2g Dietary Fiber; 0mg Cholesterol; 9mg Sodium; 9g Total Sugars; 0mcg Vitamin D; 36mg Calcium; 1mg Iron; 392mg Potassium; 44mg Phosphorus.

Posted in Appetizers, on June 2nd, 2022.

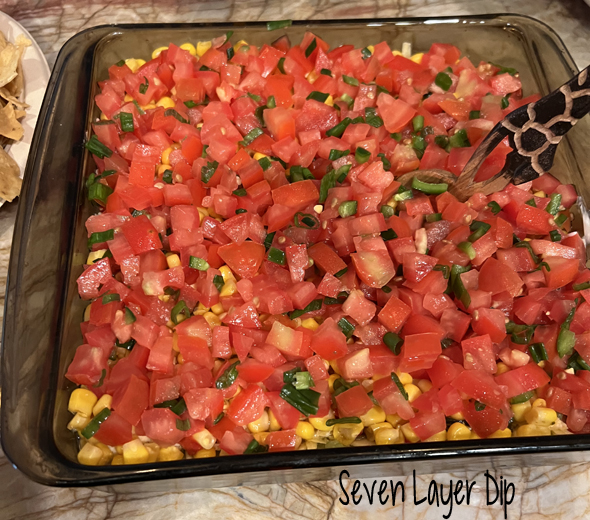
A really delicious dip to serve about 8-10-12 or so. Similar to many recipes out there, but there are a couple of things different about this one.

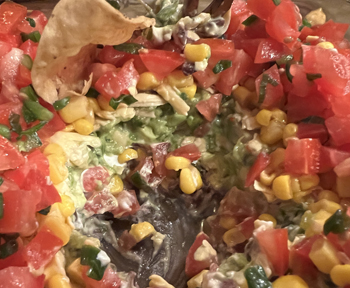
A post from Carolyn. If you go online and hunt for seven layer dip, you’ll find hundreds of recipes. Literally hundreds. It’s certainly popular and well deserved, since it’s so delicious. Haven’t we all made seven layer dip for decades? I sure have. There are a few things that are different about this one – the bean layer requires some cooking (and mashing) with some good flavorings added in, and there’s a corn layer to this one.

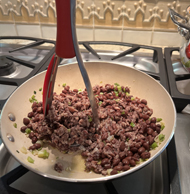
I started with a recipe on the ‘net, and changed it by adding the kind of canned corn that contains peppers (Fiesta, Mexicorn type) instead of either fresh corn or ordinary canned corn. I also added more ground cumin. The first layer in the 9×9 pan was the beans (see photo at left) – black beans in this case, and they’re drained well, then added to some of the green onions and garlic sautéed with some EVOO. Some cumin is added too. The beans are mashed (either with a fork or a potato masher) and some water is added – they need to be spreadable (i.e., not too dry). Finally, they’re smeared into the dish.

Then a layer (not much) of sour cream is added. There’s some shredded cheddar cheese, the guacamole you’ve made, some more cheese, the can of corn, then lastly you add the freshly made salsa. I used fresh Roma tomatoes, which were nicely ripe. I didn’t peel them, but they were chopped finely and I removed the center part with most of the seeds. Lime juice gives accent to the salsa and guacamole, ground cumin adds piquancy to both the beans and the guacamole, and garlic is added to the beans and guac. The salsa should be drained (of liquid that generates from the tomatoes) before it’s spread on the top.

I made this 24 hours ahead, letting those flavors meld a bit, then served it with a lot of crispy tortilla chips. I buy a brand of tortilla chips that are actually freshly fried (Las Golondrinos) available at a few of my local stores. If you can, seek out a place that makes home made chips – they’re so much better! Just before serving I sprinkled a bit of salt on the top of the tomatoes – use your own judgment after tasting it.

What’s GOOD: all those good, fresh flavors – the beans, cheese, guac, corn and salsa. Altogether delish. There is no heat to this dip – you could add some chili powder if you prefer. Loved that I could make it ahead.

What’s NOT: nothing at all, except you need to start a few hours ahead.

printer-friendly PDF and MasterCook file (click link to open recipe)

* Exported from MasterCook *

Seven-Layer Dip – with corn

Recipe By: adapted from a recipe on the internet
Serving Size: 8 (maybe more if they don’t eat too much of it!)

2 cups tomatoes — cored, diced (Roma)
1 bunch green onions — thinly sliced, light and dark parts separated
1 jalapeño pepper — seeded and finely diced (divided)
4 tablespoons lime juice — from 2 limes (divided)
1 teaspoon salt — and more to taste
1/2 teaspoon sugar
3 tablespoons EVOO
3 cloves garlic — minced (divided)
15 ounces canned black beans — drained and rinsed
1 1/2 teaspoons ground cumin — divided use
A tablespoon or two of water
3 medium avocados — halved, pitted and diced
8 ounces sharp Cheddar cheese — shredded (divided)
1 cup sour cream
1 1/4 cups corn — canned, drained – with peppers (Del Monte Mexicorn, Fiesta, Green Giant)
Tortilla chips — for serving

1. SALSA: In a medium bowl, combine the tomatoes, half of the dark part of the green onions, half of the minced jalapeño, 2 tablespoons lime juice, 1/4 teaspoon of salt, and the sugar. (If your tomatoes are sweet, omit the sugar.) Set aside.
2. BEANS: Heat EVOO in a medium skillet over medium heat. Add all of the light part of the green onions and cook, stirring frequently, until softened, about 2 minutes. Measure out 1/4 teaspoon of the minced garlic and set aside in a medium bowl (you’ll use this for the guacamole). Add the remaining garlic to the skillet and continue cooking for 30 seconds more. Do not brown. Add the black beans, 1/2 teaspoon salt, 3/4 teaspoon of the cumin, and water and continue cooking for about one minute. Off the heat, mash the beans with a fork or potato masher until they have a chunky puréed texture. Add a tablespoon or two of water to make the beans spreadable. Spread the beans into an 8×8 or 9×9-inch glass baking dish into an even layer. Set aside. Don’t be dismayed if the bean layer tastes salty – the dish needs salt.
3. GUACAMOLE: To the medium bowl with the reserved garlic, add the avocados, the remaining dark green scallions, the remaining jalapeño, 1/2 teaspoon salt, the remaining 3/4 teaspoon cumin, and the remaining 2 tablespoons lime juice. Mash with a large, wide-tined fork until blended but still a bit chunky.
4. ASSEMBLY: Spread the sour cream evenly over the black bean layer. If you have one, use an offset spatula. Sprinkle half of the cheese over the sour cream, followed by all of the guacamole, and then the remaining cheese. Sprinkle the corn over the cheese.
5. Transfer the salsa to a fine sieve and drain for about 5 minutes. Then pour the salsa on top of the corn corn layer, using a spoon to spread evenly. Cover with plastic wrap and refrigerate for 2-3 hours, or overnight if possible. Remove from refrigerator about an hour before serving, and serve with a spoon and heaps of tortilla chips. If made ahead, liquid might possibly rise up to the surface – use a paper towel to blot the liquid before serving.
Per Serving: 415 Calories; 31g Fat (64.3% calories from fat); 14g Protein; 25g Carbohydrate; 10g Dietary Fiber; 42mg Cholesterol; 566mg Sodium; 5g Total Sugars; trace Vitamin D; 268mg Calcium; 2mg Iron; 810mg Potassium; 285mg Phosphorus.

Posted in Appetizers, on October 31st, 2021.

Post by Sara – What can you do with celery leaves?

I know…we all add them to our stock or soups, maybe even salads.  But seriously, what else can be done?  I started researching this very thing because I was given a box of fruit and veggies from a local organic grower.  And the celery was twice as big as you see in the stores plus it had this gorgeous head of leaves.   When I buy celery at the grocery store, it is trimmed of the leaves.  To be honest, I was shocked at how large the bunch of celery was with its leaves intact.  So…what can we do with celery leaves?  Make pesto, of course!

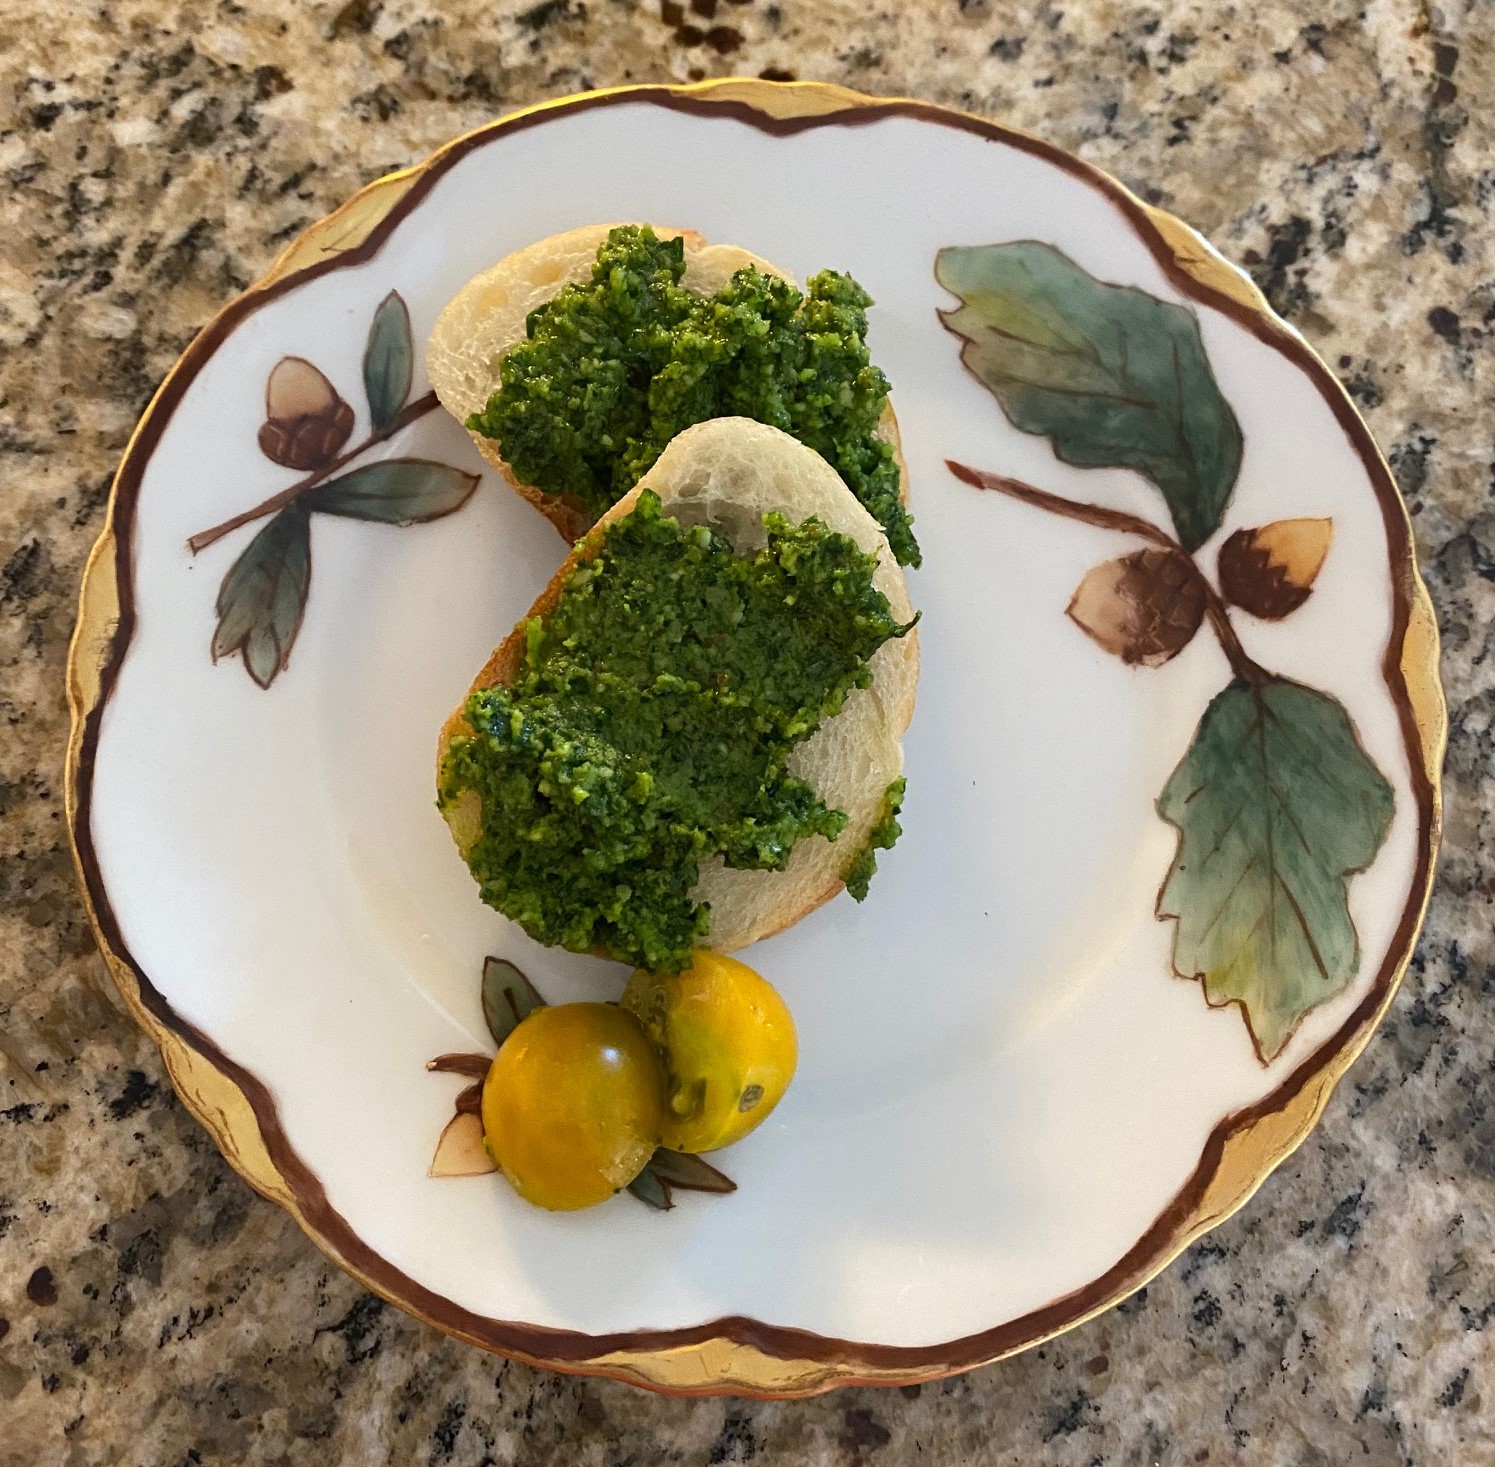
There is a very unique taste to this pesto.  It’s not as strong as you might expect.  Not so overwhelmingly celery flavored.  I served it as an appetizer on toasted baguette slices at a family BBQ.  It was topic of conversation while being a big hit.  I plan to use some of the (very little) remaining as a sauce on my halibut I’ll be grilling this week.
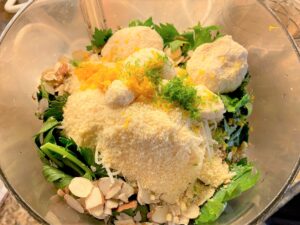
Ingredients pictured left in food processor before processing into paste and adding olive oil.

printer-friendly PDF and MasterCook file (click link to open recipe)

* Exported from MasterCook *

Celery Leaf Pesto

Serving Size: 8

5 cups celery leaves — loosely packed, leaves only
zest of a half an orange and zest of 1 whole lime
2 cloves garlic
1 1/2 cups parmesan cheese — grated
1/2 cup sliced almonds
1/2 cup olive oil — plus 2 tablespoons

1. Wash celery leaves in cold water and lightly pat them dry.
2. Add all ingredients to the food processor EXCEPT olive oil. Pulse until a thick paste forms.
3. Add the olive oil and pulse the sauce at lowest speed until well combined.
4. Season with salt and pepper. Be careful about the salt – some Parm is very high in sodium. Taste before adding.
Per Serving: 246 Calories; 23g Fat (81.6% calories from fat); 8g Protein; 3g Carbohydrate; 1g Dietary Fiber; 12mg Cholesterol; 300mg Sodium.

Posted in Appetizers, on June 13th, 2021.

What? I’ve never posted this recipe on the blog? That needs to be rectified as of now!

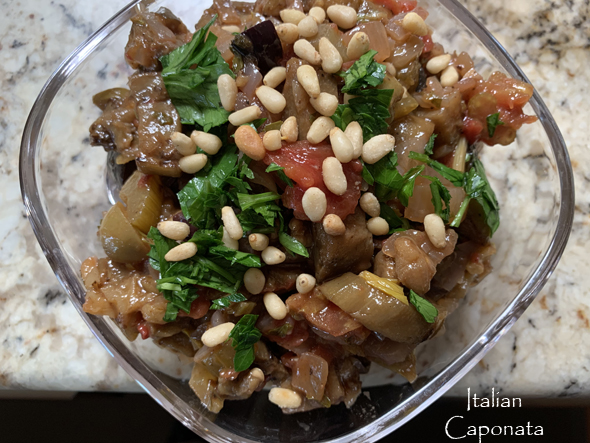
A post from Carolyn. Where this recipe came from, I’m not sure. I thought it was from Evan Kleiman, but having gone on the ‘net to look, my recipe isn’t quite like hers. Similar, but not the same. I suppose ALL caponata recipes are similar – containing eggplant, onions, celery, capers, tomatoes and olives. I’ve been making this caponata for well over 40 years.

So, what makes a great caponata? It’s Italian. It’s a combination: chewy of some textures (eggplant, olives and celery), softness of others (onions), a meld of sweet (a tiny bit of sugar and the tomatoes) and sour (some red wine vinegar) and for sure, a burst of fresh flavors. I know caponata can be purchased ready-made, and I’ve done that from time to time. But I’m here to tell you, there is nothing quite like home made caponata.

Know from the get-go that you need a couple of hours to make this. There’s a goodly amount of chopping going on (eggplant, onions, celery) but first you have to peel most of the eggplant. You can peel all of them if you prefer, but the recipe I have suggested leaving the peel on some of them to give the finished caponata an additional layer of color. Japanese eggplant are called for here (they’re supposed to be sweeter), and it’s a bit tedious to peel 2 pounds of them, I’m just sayin’.

The tomatoes need to be peeled and seeded, too, which of and by itself isn’t that much trouble, but it takes time to heat a pot of water, dunk the tomatoes in there, then remove the peel, cut them just so to remove all the seeds, then to chop up finely. The eggplant likes to sit awhile – with salt – to extract a little bit of the liquid. I have to say, maybe I got a tablespoon of discolored liquid underneath the colander after sitting for about an hour. Not much. The onion (both a yellow and a red), celery and garlic were simmered for awhile with some olive oil, until tender. All that was removed to a big bowl and then the drained and blotted-dry eggplant was added to several successive batches to be briefly browned. Finally, everything is added into the pot – along with some parsley, tomato paste, the red wine vinegar plus some water, and the little bit of sugar. That whole mixture was simmered for about 10 minutes. You do NOT want the vegetables to break down to mush – the flavor would be fine, but you want the texture of all those various ingredients to be seen and sensed on your tongue.

Taste it for salt (I ended up adding just a little) and pepper. A tablespoon of sugar was all the batch needed, and it makes about 3-4 cups when you’re all finished.

As I mentioned in my last post, I had a wine tasting event at my home (a fund-raiser), with two other friends co-hosting with me, and we served several appetizers to go along with the variety of wines. I made a special trip to go buy Cloudy Bay’s sauvignon blanc, which is a favorite of mine – if I’m going to drink white wine. Mostly I drink red. When my DH Dave and I visited New Zealand, we fell in love with Cloudy Bay wines, but particularly the sauvignon blanc. I asked the guests to taste the wine with the various appetizers, though the caponata goes better with red wine. I still have about 200 bottles of wine in the wine cellar – nearly all of them ones Dave bought – and he’s been gone for 7 years now. I gift them to friends when they invite me over, and I’ve done several wine tastings. The reds, mostly, keep for  years, although I have had to pour out a few bottles of reds that didn’t cellar well. Pinot Noir and Cabs keep well. Italian reds not so much.

My friend Lois made shrimp cocktail which went well with the whites. Linda made my Crostini with Pea Puree and Yogurt & Mint. I served some cheeses, some lighter, some heavier, and the caponata will be served with pita crackers (Trader Joe’s are great). With a can of smoked albacore on hand, I also made a favorite EASY appetizer, Smoked Albacore with Red Onion. And I’ve already posted the recipe for the Outrageous Brownies which were served with the last of the darker reds. I offered to open a bottle of after-dinner wine if our guests wanted some, but everyone was topped up. The cellar has about 10 after-dinner bottles and I just don’t open those. Except for a party, I guess!

So, once you’ve made the caponata, do chill it for a day if you can spare the time. Caponata improves with a day or two of chilling – letting those flavors meld. Caponata keeps well – I’d guess it’ll keep in the refrigerator for at least 2 weeks. You could freeze it, but my guess is once thawed, the veggies would turn to mush.

What’s GOOD: the flavors are just so special. Nothing unusual in this – but the combo? Oh gosh, yes it’s good. Keeps for a couple of weeks, though eating it within 3-5 days would be best. Good to make it ahead. In fact, it’s better made a day or two ahead.

What’s NOT: only the time spent – there’s a lot of chopping and prepping of vegetables. You’ll be at or near the range for about 1 1/2 hours for sure.

printer-friendly PDF and MasterCook file (click link to open recipe)

* Exported from MasterCook *

Italian Caponata

Recipe By: unknown
Serving Size: 10

2 pounds eggplant — Japanese type
1 pound Roma tomatoes
1/2 cup olive oil
1 medium onion — chopped
1 medium red onion — chopped
1 1/2 cups celery — chopped
1 large garlic clove — minced
1/4 cup parsley — minced
12 whole olives — Mediterranean, pitted
2 tablespoons capers
1/4 cup red wine vinegar
2 tablespoons water
1 tablespoon sugar
1 1/2 tablespoons tomato paste
salt and pepper — to taste
2 tablespoons pine nuts — toasted

1. With a sharp paring knife, peel 2 eggplants; leave other eggplant unpeeled to add color and texture to the dish.
2. Cut all eggplant into 1-2-inch cubes; place cubes in colanders over paper towels, salt well and mix eggplant with your hands. Allow to drain about 30 minutes, preferably 1-2 hours, while preparing other ingredients. Peel the tomatoes by dipping a few at a time in boiling water for 5-15 seconds and then into cold water. Carefully remove skins and cut tomatoes in half. Remove and discard seeds, then dice tomatoes.
3. In a large, heavy skillet heat about 3 T olive oil and add onions. Cook about 8 minutes, until onions are soft, but not browned, stirring occasionally. Add celery, garlic and mix thoroughly. Continue cooking until all vegetables are soft and tender, about 5 minutes. With slotted spoon, remove vegetables to a large Dutch oven or roasting pot. Pat eggplant dry with paper towels to remove salt and liquid. In the same skillet, cook a single layer of eggplant, adding olive oil as needed and stir constantly for about 8 minutes, until soft, tender and slightly browned. Remove eggplant to Dutch oven and brown succeeding batches, adding oil as needed. Add diced tomatoes, parsley, olives and capers to cooked vegetable mixture in skillet; mix well and cook over low heat for a few minutes.
4. In a bowl combine the vinegar, water, sugar and tomato paste and stir until sugar is fully dissolved. Pour mixture into Dutch oven and stir thoroughly. Cover and cook over low heat for 15 minutes, stirring often. Be careful not to break up mixture to a mush; the vegetables need to retain their shape and texture and not become soupy. Season to taste with salt and pepper.
5. Remove from heat and refrigerate, covered, for at least one day to let all the flavors mellow. To serve, spoon mixture into a salad bowl or plate (wood is recommended) and garnish top with toasted pine nuts. Serve with toasted pita triangles or baguette slices or crusty Italian bread.
6. TO TOAST PINE NUTS: Place nuts in a single layer in a dry Teflon coated skillet over low heat and toast until lightly brown, stirring and WATCHING CONSTANTLY.
Per Serving: 176 Calories; 13g Fat (65.0% calories from fat); 2g Protein; 14g Carbohydrate; 4g Dietary Fiber; 0mg Cholesterol; 137mg Sodium; 8g Total Sugars; 0mcg Vitamin D; 42mg Calcium; 1mg Iron; 459mg Potassium; 63mg Phosphorus.

Posted in Appetizers, Veggies/sides, on July 3rd, 2020.

asparagus_appetizer_secret_sauce

Most likely you’re going to laugh. Secret sauce? Eh-what?

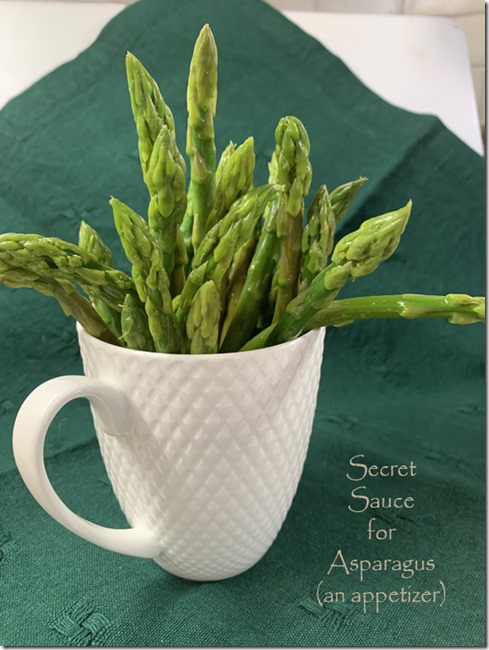
Making this appetizer is so very simple – other than having to cook the asparagus to just that right al-dente bite. You don’t want limp asparagus. You want them barely cooked through, but not so they’d totally fall over in a stand-up container. Part of the fun of this is using some kind of fun vertical container. If I had a glass cylinder that wasn’t too tall, I’d use that, just so you can see the asparagus full length.

It’s been decades since I first read or heard about this method of offering asparagus as an appetizer. To tell you the truth, I don’t remember where I got it. It could have been at a Weight Watcher’s meeting. It might have been from some old-old cookbook. It might have been at a cooking class. I didn’t even have a recipe written up for this – like a real, honest to goodness recipe to follow. I had to write one for this post. Asparagus, some salt, water, and then the secret ingredient. And a tad of sesame seeds as a garnish.

First, you just have to steam or simmer the trimmed asparagus in salted water until they’re just barely tender. Sorry, I’m repeating myself here. It’s important you not overcook them, so they stand up. Drain them and let them dry. If you’re in a hurry, put them out on paper towels or a tea towel and gently dry them off. I prefer these cool or cold, but that’s up to you.

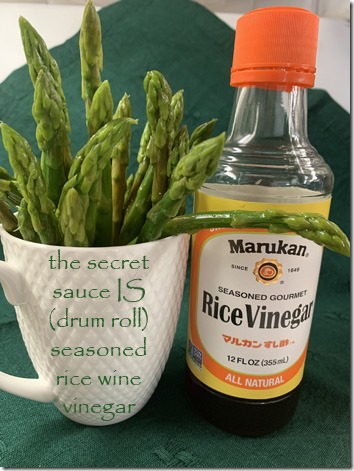
Then, ta-da, you merely roll them in some seasoned rice wine vinegar and sprinkle them with the sesame seeds. That’s it. You DO NOT make this ahead (the acid in the rice wine vinegar will make the asparagus turn an insipid canned-asparagus-color). Not good. So JUST before you’re ready to serve them, you put them in a flat dish or flat bowl, sprinkle a bit of the seasoned rice wine vinegar over them, roll them around with your fingers. If I’m feeling adventurous, I also sprinkle toasted secret_sauce_rice_wine_vinegarsesame seeds around the top of the asparagus, picking up a bunch in my hand. Then stand them up in your chosen vertical vessel. Coffee mugs are just about the right height. I took this to my a family dinner a week or so ago. They were gone in a flash. Even my grandson Vaughan, who professes to not like asparagus very much, had a bunch.

I forgot to take the sesame seeds when I served them last time, so you can’t see them sticking to the tops. I’m making them again today, so am going to put out the sesame seeds – so I don’t forget!

What’s GOOD: so easy and extremely low calorie. Nice for a picnic although do take a wet paper towel to wipe off your fingers after you’ve used the vinegar. The vinegar has some sugar in it (that makes it “seasoned”) so it’ll make your fingers sticky. I guarantee you, they’ll be a hit. One of the fun things is serving this in a vertical container.

What’s NOT: only that you have to do the seasoning (finger-rolling in the vinegar) at the last minute, but truly it’ll take you less than one minute to do it.

printer-friendly PDF and MasterCook file (click link to open recipe)

* Exported from MasterCook *

Asparagus Appetizer with Secret Sauce

Recipe By: Can’t remember; I’ve been making these for 40+ years
Serving Size: 6

1 pound asparagus — not too thin, not too thick
salted water to cook the asparagus
1 tablespoon seasoned rice wine vinegar
1/2 teaspoon sesame seeds — toasted, garnish

NOTE: This is meant as an appetizer, but it can also be served as a side dish.
1. Trim asparagus of woody stems. You do not want them to be all the same length.
2. Using a wide saucepan, bring a cup or so of water to a simmer (just enough to cover the asparagus), add some salt to taste, then add the asparagus. Bring the water back to a simmer again, watching it carefully and cook for 3-5 minutes, until the asparagus is just barely al-dente, stirring and rolling the asparagus around so all the stalks are under the water line. Do not overcook them. They need to be firm enough they’ll stand up in a mug or tall container.
3. Remove asparagus and cool, then blot dry with paper towels or tea towel. Chill if you have the time.
4. Into a shallow dish place the asparagus and sprinkle the rice wine vinegar over the top, drizzling back and forth. Using your fingers, roll the asparagus so all of them have been in contact with the vinegar. DO NOT make this ahead as the asparagus will turn yellow. Holding the asparagus in one hand, gently sprinkle the sesame seeds on the tops of the asparagus, as you turn the asparagus around. Stand the asparagus into a vertical container (coffee mug or similar shape) and serve immediately. If you’re not sure you’ll eat all the asparagus it’s wise to season some of it, serve, then if you need more you can always add more to the vinegar and serve more of them.
Per Serving: 21 Calories; trace Fat (7.8% calories from fat); 2g Protein; 4g Carbohydrate; 2g Dietary Fiber; 0mg Cholesterol; 89mg Sodium; 1g Total Sugars; 0mcg Vitamin D; 21mg Calcium; 2mg Iron; 154mg Potassium; 41mg Phosphorus.

Posted in Appetizers, Gundry-friendly, on October 25th, 2019.

zucchini_hummus

A variation on a hummus theme. So delicious. You’d never know it was made with zucchini!

I’ve kind of begun to tire of hummus. Actually – no, I AM tired of hummus. Seems like it’s become so commonplace, and so popular, nearly every hostess serves it. Therefore, I got tired of it. But then, now that I’m on this anti-lectin thing, regular hummus or garbanzo beans are out. Besides the calories (although I know – I know – beans are good for us – I just can’t eat them unless they’ve been pressure cooked, which kills the lectins), I’m kind of past the taste of garbanzo – they do have a unique flavor.

So, when I saw this recipe for hummus made from zucchini, I knew I could adapt it to fit my lectin-free diet. I just had to peel and seed the zucchini. Everything else in this was fine. And the taste? Oh gosh. It was fabulous! Even though I’m tired of hummus, somehow, eating this I felt differently about it – just knowing it was zucchini. It has the texture of hummus. It has the flavor of hummus. But better, by far.

If you make this, you don’t have to peel and seed the zucchini like I do – but I think taking off the green skin will keep this looking more brown, like hummus – with the green skin, I’m not sure about the color. What’s on top – black sesame seeds, some good EVOO, some ground cumin, and I’d forgotten the smoked paprika (I added it after I took the photo).

Everyone ate it – that bowl was gone by the time I served dinner. I have a little bit left in my frig, and I still have a few of the fresh-cut carrots and celery. Maybe I’ll have that for my lunch.

The only time-consuming thing was roasting the zucchini. It took longer than the recipe indicated – and you definitely do not want to roast these to the point of drying out. That would not be good. Into the food processor everything else goes (garlic, cumin, oil – maybe water, although I didn’t add any) and some tahini – sesame seed paste). That last part is what gives it the hummus taste. Sesame seed paste is, in and of itself, a very unique flavor. So when my guests ate it, they thought it was garbanzo hummus. Everyone was intrigued – even the guys in the group – and liked it.

What’s GOOD:  it’s lower in calorie than regular hummus, that’s for sure. Tastes as good if not better than. You’re eating vegetables instead of beans . . .altogether deliciousness. Yes, I’ll make it again.

What’s NOT: maybe just the time it takes to make – you can buy ready made hummus inexpensively, but this tastes so much better.

printer-friendly PDF and MasterCook 15/16 file (click link to open recipe)

* Exported from MasterCook *

Roasted Zucchini Hummus

Recipe By: Adapted slightly from Keto Diet App
Serving Size: 10

3/4 pound zucchini
1/4 cup EVOO — divided use
sea salt — to taste
black pepper — to taste
1/4 cup tahini
2 medium garlic cloves
3 tablespoons fresh lemon juice — or more to taste
1/2 teaspoon ground cumin
2 tablespoons water — (2 to 3) optional
GARNISHES:
1 1/2 tablespoons EVOO
1/2 teaspoon both smoked paprika and cumin
2 teaspoons black sesame seeds (or white if that’s what you have)
fresh parsley leaves
SERVE: crackers, raw vegetables

NOTE: If eating lectin-free, peel and seed the zucchini before roasting.
1. Preheat the oven to 375°F, or 350°F (convection). Cut the ends off the zucchini, and quarter them.
2. Arrange on a baking sheet cut side up and drizzle with EVOO, using your hands to massage oil over all edges. Sprinkle with salt and pepper. Bake for 30-40 minutes or until browned on top. Do not overcook them as you do not want them to dry out.
3. To make the hummus, add all ingredients (including the remaining olive oil) except the water to a food processor and blend until smooth. Add the water if you think the mixture is too thick, using a tablespoon at a time. Taste for seasonings (lemon juice? salt?). Chill to allow flavors to meld.
4. To serve, pour into a flatter shaped bowl and use the tip of a teaspoon to create a whorl in the hummus. Drizzle with oil, and sprinkle with spices and seeds.
5. Serves 6-8 as a side served with crackers, fresh carrots and celery. Store in a sealed container in the fridge up to 5 days.
Per Serving: 108 Calories; 11g Fat (84.8% calories from fat); 1g Protein; 3g Carbohydrate; 1g Dietary Fiber; 0mg Cholesterol; 8mg Sodium.

Posted in Appetizers, lectin-free, on June 14th, 2019.

cauliflower_hummus

Truly a miracle – hummus (sort of) using roasted cauliflower plus all the other ingredients that make it taste like hummus.

Tomorrow I’m going to San Diego to celebrate with my grandson John as he graduates from high school. His mom and dad, Sara and John, are having a big family gathering. My job is to bring appetizers. I’ve got a big hunk of Manchego cheese to take along, some crackers, and will be making a Brussels sprouts appetizer too. If it’s really good, I’ll post that recipe too. It has to be made at the last minute, obviously.

So, this recipe came from a blog I follow, As Easy as Apple Pie. Elena developed it (thank you, Elena) and I’m just so glad she did. Although the texture of this isn’t exactly like bean-hummus, I would be surprised if anyone could tell. With the additions (lemon juice, tahini, garlic, olive oil, cumin, S&P) you really don’t notice. Trust me when I say certainly you won’t think cauliflower when you eat this. You will think hummus, through and through.

The cauliflower florets get roasted for about 20 minutes; then cooled. Into the food processor they went along with all the other ingredients and whizzed it up until smooth. I added a bit more ground cumin. Done. I made a double batch (used a small head) since we’re having a bunch of people at the party. I’m sure this will keep for several days – I made it 2 days ahead and am sure it will hold up well. For the photo I didn’t put on any of the toppings – I’ll do that when I serve it. You could easily use some chopped parsley or cilantro too. Or even some chopped walnuts.

When I took this to my daughter’s I had two of the family members taste it – they didn’t like it at all. They recognized the cauliflower, and although they both like cauliflower, they didn’t like this. SO, it got pureed with one can of garbanzo beans (drained and rinsed) and it was much better. But then, that took away the low-carb aspect of this. They thought the garlic was too much (it had a very sharp zing to it) and just didn’t care for the taste. I agreed about the garlic – so be careful how much you add in. I still liked it. Make a small batch first and see if you like it!

What’s GOOD: easy to make; lower in calorie; very tasty; healthy.

What’s NOT: not a thing.

printer-friendly PDF and MasterCook 15/16 file (click link to open recipe)

* Exported from MasterCook *

Cauliflower Hummus

Recipe By: Blog- as easy as apple pie
Serving Size: 5

CAULIFLOWER:
3 cups cauliflower — cut in florets
a drizzle of EVOO
salt and pepper
HUMMUS:
3 tablespoons tahini
2 small garlic cloves
1 1/2 tablespoon extra virgin olive oil
1 1/2 tablespoon water — plus more if needed
1/4 cup lemon juice
1/2 teaspoon salt
1/2 teaspoon ground cumin
TOPPINGS:
1 tablespoon EVOO — drizzle on top
1 tablespoon sunflower seeds, or sesame seeds
1/4 teaspoon red chili flakes — minced

1. Preheat the oven 400° F. Arrange cauliflower florets on parchment-lined baking sheet, sprinkle liberally with olive oil and add salt and pepper. Bake for 20-30 minutes or until tender and lightly browned around the edges. Cool cauliflower.
2. Into a food processor add the cooled cauliflower with olive oil, water, lemon juice, tahini, garlic, salt, and cumin. Puree to your liking. If it’s too thick, add more water in very small amounts to get the desired consistency. Taste for salt, pepper and cumin.
3. Chill, then spoon into a serving bowl and garnish as you’d like: olive oil, nuts or seeds, red pepper flakes. Serve with raw vegetables.
Per Serving: 144 Calories; 13g Fat (73.6% calories from fat); 3g Protein; 7g Carbohydrate; 3g Dietary Fiber; 0mg Cholesterol; 242mg Sodium.

Related Posts Plugin for WordPress, Blogger...