


On one hand I can count the number of times I’ve made fried chicken. And I just about never order it when we’re out. I’m totally indoctrinated with the chicken skin=fat, fat=bad. Of course, here in Southern California, very few restaurants would even serve fried chicken. But it is making a resurgence in food circles. It’s been featured in several of the foodie magazines in the last year too. So I finally succumbed.
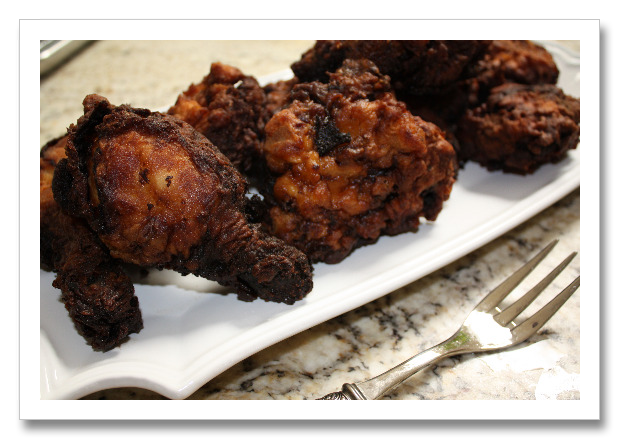
And the answer is yes, I cooked them a tad too long. But, it didn’t make a whit of difference to the taste – they were tender and juicy. The coating was crispy and tender.
My only trouble was I couldn’t control the temperature of the deep fat. I used my tall-sided Le Creuset pot (recommended, or a Dutch oven) because it would splatter less that way and help hold the oil temp. I have a candy thermometer and it perched on the edge of the pan with no difficulty. But the temp on the thermometer was either way up or way down. I think I didn’t have enough oil in the pot, so the temp meter wasn’t submerged sufficiently. I finally gave up and just used my gut feel about it. The recipe was quite specific about what temp the finished thigh or drumstick meat should be – 175°. Well, in trying to cook enough for 11 people I had no time to be testing temps.
Trusting the folks at Cook’s Illustrated as I do, I had turned to their America’s Test Kitchen TV cookbook and found a long, explanatory recipe. The recipe is not available online except by premium membership. I did change it slightly, but not noticeably.
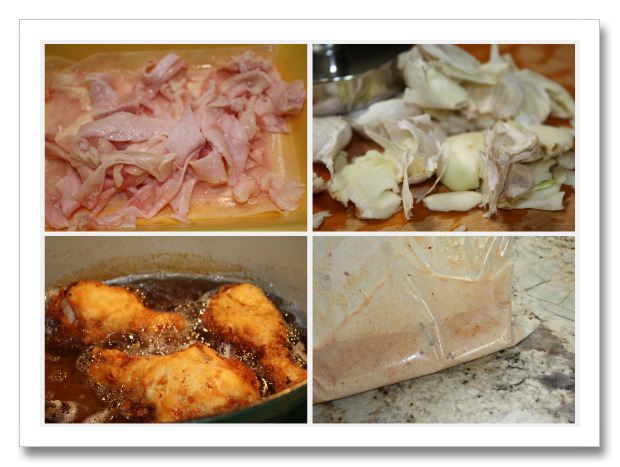
First thing was to snip off all the excess fat from the drumsticks and thighs (top left). Then I made the buttermilk marinade (oodles of garlic, top right, and the finished mixture in a plastic bag, bottom right). I managed to snap one photo of the first batch of frying drumsticks (bottom left).
The chicken pieces are marinated for 2-3 hours, is all. But the marinade contains a lot of mashed garlic, sugar, salt, paprika, and crumbled bay leaves. It’s a cross between a marinade and a brine (there was a lot of table salt in it!). The pieces are removed and placed on a rack to drain for awhile. Then they’re dipped into flour, then an egg/baking soda/baking powder/buttermilk mixture (different than the marinade, which is tossed out), and again back into the flour before being plopped (carefully) into the boiling fat. You were supposed to maintain the oil temp at 325. And if you cooked only 3 pieces at a time you were able to maintain that fairly well.
Initially you heat the oil to 375° because once you add the room temp chicken it lowers quickly to 325°. If you let the oil reheat briefly between frying batches, you hopefully won’t have too much trouble. BUT, the whole process (marinating, draining/drying, dipping, draining again, and frying) will take you a fair number of hours (up to about 6). None of it is intense (well, except the frying part – I got a bit frantic then), but there just are a number of steps to making it.
What I changed about the recipe was the volume of the marinade/brining. It called for 7 cups of buttermilk for 4 pounds of chicken pieces. I had 5 pounds and divided the chicken between two freezer bags and was fine with half that marinade quantity. So I’ve changed the recipe below.
And the result? Well, as I mentioned above – it was VERY juicy and tasty. I know there is some magical temperature that if you deep fry, you’ll have almost no absorption of oil. I’d guess that’s at about 350° or as low as 325°. I don’t know if I hit that number or not. I’d like to try making this again when I’m not so pressed for time (I made this for a lunch we had, and there weren’t enough hours from the time I started the marinating in the early morning to getting it all done by 12:30 when our guests arrived). I did slip the fried chicken into a 200° oven (on a rack over a tray) for about half an hour before we served the lunch at about 1:00. They kept perfectly warm. According to the recipe, maintaining that deep fat temp is key to the success. If I were to make this very often, I’d need to invest in a deep fryer. But since fried chicken is a big treat, I won’t be doing that! I could try it in my electric skillet – it has fairly high sides. Maybe I’ll just have to do that . . . and I’ll let you know.
Old Fashioned Crispy Fried Chicken
Recipe By: Adapted slightly from America’s Test Kitchen Cookbook
Serving Size: 6
CHICKEN:
1/4 cup table salt
1/4 cup sugar
1 tablespoon paprika
3 1/2 cups buttermilk
1 1/2 heads garlic — cloves separated and smashed
1 1/2 whole bay leaves — crumbled
2 pounds chicken drumsticks
2 pounds chicken thighs
3 quarts peanut oil or vegetable oil for frying
COATING:
4 cups unbleached flour
1 large egg
1 teaspoon baking powder
1/2 teaspoon baking soda
1 cup buttermilk
1. Into 2 freezer-type plastic bags divide the salt, sugar, paprika, garlic and bay leaves. Divide the buttermilk into each bag and seal, rolling it around to dissolve the sugar and salt. Add the chicken pieces. Seal well and refrigerate for 2-3 hours.
2. Rinse the chicken well and place the pieces in a single layer on a wire rack set over a rimmed baking sheet. Refrigerate the pieces for 2 hours. At this point the chicken can be covered with plastic wrap and refrigerated for up to 6 more hours.
3. Adjust an oven rack to the middle position and heat the oven to 200°.
4. In a large Dutch oven heat 2 inches of oil over medium-high heat to 375°.
5. COATING: Place the flour in a shallow dish. In a separate bowl or plate whisk the egg, baking powder and soda together, then whisk in the buttermilk. Mixture will bubble and thicken.
6. Working with 3 pieces at a time, dredge the chicken in the flour, then in the egg mixture, then back in the flour, covering each piece well and shaking off the excess. Return to the wire rack.
7. When the oil is hot add the 3 chicken pieces, skin side down, cover, and fry until deep brown, 7-11 minutes, adjusting the heat as necessary to maintain the 325° temp. Rearrange pieces and turn to brown all the pieces evenly. Check the chicken temperature – breasts, if you were to use them, must be cooked to 160° – drumsticks and thighs to 175°. Drain the chicken briefly, then transfer the pieces to a clean wire rack set over a rimmed baking sheet and keep warm in the oven.
8. Continue cooking remaining chicken in small batches, bringing the oil temp back up to 375° in between batches. Serve while warm.
Two years ago: Chicken with Poblano Peppers
Three years ago: Balsamic Fig Sorbet


Leave a Comment!