Get new posts by email:

Archives

Currently Reading

Here are the tastingspoons players. I’m in the middle (Carolyn). Daughter Sara on the right, and daughter-in-law Karen on the left. I started the blog in 2007, as a way to share recipes with my family. I’m still doing 99% of the blogging and holding out hope that these two lovely and excellent cooks will participate. They both lead very busy lives, so we’ll see.

– – – – – – – – – – – – – – – – – – – – – –

BOOK READING (from Carolyn):

Music of Bees, Eileen Garvin. Absolutely charming book about a woman in midlife, lonely, who raises bees, also makes unlikely friends. Heart-warming and very interesting about beekeeping.

A Postcard from Paris, Alex Brown. Really cute story. Dual time line, 1940s and present day about renovating an old apartment in Paris, things discovered.

Time of the Child, Niall Williams. Oh such a good book. Very small village in Ireland, 1960s. A baby is left on the doorstep. The town all whispers and helps. I listened to an interview of the author, which made me like him and his books even more.

Sipsworth, Simon Van Booy. If you like animals you’ll swoon. An old woman who really wants to die finds a tiny mouse in her house and befriends it and finds a reason to live. Utterly charming book.

The Forger’s Spell, Edward Dolnick. True story. For seven years a no-account painter named Han van Meegeren managed to pass off his paintings as those of Johannes Vermeer.

If You Lived Here, You’d be Home by Now, Christopher Ingraham. Could hardly put it down – about a journalist who takes on a challenge to move to small town in Minnesota and write about it. He expects to hate it and the people and place, but he doesn’t. Absolutely wonderful true story.

The River We Remember, William Kent Kreuger. 1950s, Minnesota. A murder and the aftermath. Could hardly put it down. Kreuger has such a vivid imagination and writing style.

How the Lights Gets In, Joyce Maynard. An older woman returns to New Hampshire to help care for her brain-injured son. Siblings and family, lots of angst and resentments.

The Filling Station, Vanessa Miller. Every American should read this book. A novelized retelling of the Tulsa massacre in 1921. Absolutely riveting.

The Story She Left Behind, Patti Callahan Henry. Love this author. Based on a true story. A famous author simply vanishes, leaving her husband and daughter behind. She had invented a mystical language no one could translate. Present day, someone thinks he’s solved the riddle, contacts the family. Really interesting read.

The Girl from Berlin, Ronald Balson. Love anything about Tuscany. An elderly woman is being evicted from a villa there, with odd deed provenance. Two young folks go there to help unravel the mystery. Loved it.

The Island of the Colorblind, Oliver Sacks, M.D. Nonfiction. The dr is intrigued by a remote Pacific island where most of the inhabitants are colorblind. He also unravels a mystery on Guam of people born with a strange neurological problem. Medical mysteries unveiled. Very interesting.

The Bookbinder, Pip Williams. Post 1914 London. Two sisters work at a bookbindery. They’re told to not read the books. One does and one doesn’t. One has visions beyond her narrow world; the other does not. Eventually the one gets into Oxford. Lovely story.

The Paris Express, Emma Donoghue. 1895 on a train to Paris, a disaster happens. You’ll delve into the lives of many people who survived and died in the crash.

A Race to the Bottom of Crazy, Richard Grant. This is about Arizona. Author, wife and child move back to Arizona where they once lived. Part memoir, research, and reporting in a quest to understand what makes Arizona such a confounding and irresistible place.

The Scarlet Thread, Francine Rivers. A woman’s life turned upside down when she discovers the handcrafted quilt and journal of her ancestor Mary Kathryn McMurray, a young woman who was uprooted from her home only to endure harsh frontier conditions on the Oregon Trail.

A Place to Hide, Ronald Balson. 1939 Amsterdam, an ambassador has the ability to save the lives of many Jewish children. Heartwarming.

Homeseeking, Karissa Chen. Two young Chinese teens are deeply in love, but in China. Then their families are separated. Jump to current day and the two meet again in Los Angeles.

North River, Pete Hammill. He always writes such a good story. A doctor works diligently healing people from all walks of life. His wife and daughter left him years before. One day his 3-yr old grandson arrives on his doorstep.

A Very Typical Family, Sierra Godfrey. A very messed-up family. Three adult children are given a home in Santa Cruz, Calif, but only if the siblings meet up and live in the house together. A very untypical scenario but makes for lots of messes.

Three Days in June, Anne Tyler. The usual Anne Tyler grit. Family angst. This wasn’t one of my favorites, but it was entertaining and very short.

Saved, Benjamin Hall. Author is a veteran war reporter. Ukraine, 2022, he nearly loses his life to a Russian strike. Riveting story – he survives, barely.

Grey Wolf, Louise Penny. Another Inspector Gamache mystery in Quebec. She is such an incredible mystery writer.

All the Colors of the Dark, Chris Whitaker. A missing person mystery, a serial killer thriller, a love story, a unique twist on each. Could hardly put it down.

Orbital, Samantha Harvey. Winner of 2024 Booker Prize. I don’t usually like those, but I heard the author interviewed and she hooked me. This is not a normal book with a beginning, a story and an end. It’s several chapters of the day in the life of various astronauts at the ISS (Int’l Space Station). All fictional. She’s been praised by several real astronauts for “getting it” about space station everyday life.

The Blue Hour, Paula Hawkins. An island off Scotland. Inaccessible except when the tide is out. Weird goings on. An artist. A present day mystery too.

Iron Lake, William Kent Krueger. A judge is murdered and a boy is missing. Riveting mystery.

Tell the Wolves I’m Home, Carol Ricks Brunt. 1980s. A 14-yr old girl loses her beloved uncle. Yet a new friendship arises, someone she never knew about.

Four Treasures of the Sky, Jenny Zhang. 1880s, a young girl is kidnapped in China and brought to the United States. She survives with many hurdles in the path.

The Boy Who Fell out of the Sky, Ken Dornstein. Memoir, 1988. The author’s brother died in the PanAm flight that went down in Lockerbie, Scotland. A decade later he tries to solve “the riddle of his older brother’s life.”

Worse Care Scenario, T.J. Newman. Oh my. Interesting analysis of what could/might happen if a jet crashed into a nuclear plant. Un-put-downable.

Song of the Lark, Willa Cather. Complicated weave of a story about a young woman in about 1900, who has a gifted voice (singing) and about her journey to success, not without its ups and downs.

Crow Talk, Eileen Garvin. Charming story which takes place at a remote lake in Washington State, about a few people who inhabit it, the friendships made, but also revolving around the rescue of a baby crow.

The Story Collector, Evie Woods. Sweet story about some dark secrets from an area in Ireland, a bit magical, faerie life, but solving a mystery too.

A Sea of Unspoken Things, Adrienne Young. A woman investigates her twin brother’s mysterious death. She goes to a small town in California to figure it out, to figure HIM out.

The King’s Messenger, Susanna Kearsley. 1600s England, King James. About one of his trusted “messengers,” and his relationship with a young woman also of “the court.” Lots of intrigue.

In the Shadow of the Greenbrier, Emily Matchar. Interesting mystery in/around the area of the famous resort in White Sulphur Springs, West Virginia.

Isola, Allegra Goodman. Hard to describe, survival story on an island in the 1600s.

Save the Date, Allison Raskin. Rom-com, witty, LOL funny. Clever.

The Sirens, Emilia Hart. Numerous time-lines, Australia. Mysteries abound, nightmares, abandoned baby, weird allergies.

Red Clay, Charles Fancher. LOVED this book. Mostly post-Civil War story about the lives of slaves in Alabama during Reconstruction.

Stars in an Italian Sky, Jill Santopolo. Dual time line, 1946 and recent time. Love stories and a mystery.

Battle Mountain, C.J. Box. Another one of Box’s riveting mysteries. Love his descriptions of the land.

Something Beautiful Happened, Yvette Corporon. A memoir of sorts in Greece, tiny island of Erikousa, where the locals hid Jews during WWII. All elusive stories told by the author’s grandmother.

The Jackal’s Mistress, Chris Bohjalian. 1860s Virginia, about a woman who saves the life of a Union soldier. Really good story.

Song of the Magpie, Louise Mayberry. Really interesting story about Australia back in the days when it was mostly a penal colony. Gritty strength of a woman trying to thrive with her farm.

The Boomerang, Robert Bailey. A thriller that will have you gripping the book. About a lot of secrets surrounding the president (fictional novel, remember) and his chief of staff and about cancer. A cure. Such a good story.

Care and Feeding, Laurie Woolever. Really interesting memoir of a woman driven to succeed in the restaurant business. She worked for Mario Batali and then Anthony Bourdain. Gritty stories.

Everything is Tuberculosis, John Green. Maybe not a book for everyone. A real deep dive into the deadly tuberculosis infection, its history. I heard the author interviewed and found the book very interesting.

The Book Lovers Library, Madeline Martin. Fascinating read about Boots’ drug stores’ lending library. And the people who worked in them.

The Arrivals, Meg Mitchell Moore. LOL funny, about a middle-aged couple whose children (and their various family members) return to the family home and the chaos that ensues.

My Life as a Silent Movie, Jesse Lee Kercheval. About grief. A big move to Paris, finding herself a new life with a new set of real blood family.

Escape, Carolyn Jessop. Another memoir about a woman really in bondage in Utah, Mormon plural marriage.


Tasting Spoons

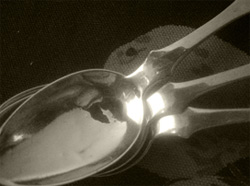
My blog's namesake - small, old and some very dented engraved silver plated tea spoons that belonged to my mother-in-law, and I use them to taste my food as I'm cooking.

Scroll down to the bottom to view my Blogroll

Posted in Breads, on January 18th, 2008.

Think back to the 1960’s. We were just starting to eat more cereal, rather than bacon and eggs every morning. Grape Nuts. Corn Flakes. Oatmeal hadn’t hit the big time yet as a cholesterol fighter. We didn’t even know about cholesterol back then. We hardly knew about yogurt – it was a kind of “health food” as I recall. But the cereal manufacturers had produced both All-Bran and Raisin Bran, so sure enough, somebody came up with a variation other than consuming it in your cereal bowl. I’m sure this recipe made the rounds of most home cooks of the era. It may be a recipe devised by Kellogg’s for all I know, although I got it from a friend of my mother’s. It originally called for All Bran, but it was too, too much fiber and not all that tasty, so I substituted the bran flakes instead. Much improved and have made them that way ever since. You mix it up in a big bowl, refrigerate it and plop batter into a muffin tin in the morning. Voila. Fifteen minutes later you have freshly baked muffins. The batter keeps for weeks in the refrigerator. The marketing of the day convinced us this kind of muffin was healthy for us because it contained bran. And raisins. Never mind the sugar – it was considered an energy source. That mentality hasn’t changed – just look in the case at any Starbuck’s and you’ll see these humongous bran muffins – probably 500 or more calories and loads of fat. Hmmm.

These aren’t going to wow your next breakfast. But, they’re just plain and good. DH decided that our plain (unflavored, but sweetened) yogurt was just wonderful with these, and indeed they are. Something about the creaminess of the yogurt – like eating cream cheese with them, or something.
printer-friendly PDF

Refrigerator Bran Muffins

Recipe: Mary Wilfert, a San Diego friend from the 1960’s
Serving Size: 30 (small)
Cook’s Notes: Doctor these up with some additional dried fruits (dried cranberries, for instance, or chopped up apricots or some crystallized ginger) if you’d like some variety. I added some more golden raisins because the brand of Raisin Bran flakes was a little light on the fruit, in my opinion. It’s wasn’t Kellogg’s, but somebody else’s label. You can also add some cinnamon and ginger to the batter too, if you’d like a spicy variation. I substituted 1/3 Splenda for the sugar, and these are not overly sweet even so. If you like a sweeter muffin, add another 2 to 3 tablespoons of sugar. After making one batch of these the other day, I decided they were not quite sweet enough (I’d put in less sugar than in the recipe below). So, I added about 2 T. sugar to the wet batter, stirred it around a bit, then once plopped into the muffin tin, I sprinkled just a tad of sugar on top of each muffin. Oh. Very good. I’ll do that again because the ouside of the muffin had just a bit of caramelization from the late-added sugar. I liked the texture. This whole mixture will keep in the refrigerator for several weeks if you want to bake them fresh in the morning.

3 cups Raisin bran — cereal
1 cup boiling water
2 whole eggs — lightly beaten
2 cups buttermilk
1/2 cup vegetable oil
2 1/2 teaspoons baking soda
1/2 teaspoon salt
1 cup sugar
2 1/2 cups flour

1. Preheat oven to 425°.
2. In a large bowl mix bran cereal with boiling water, stirring to moisten evenly. Allow to cool, then mix in eggs, buttermilk, oil and stir well. Stir together (separately) the soda, salt, sugar and flour, then stir into the bran mixture.
3. Scoop batter into muffin tins and sprinkle tops with just a little bit of sugar. Bake for 20 minutes (small muffins). If using larger muffin tins, bake about 25 minutes.
Per Serving: 123 Calories; 4g Fat (30.9% calories from fat); 3g Protein; 19g Carbohydrate; 1g Dietary Fiber; 15mg Cholesterol; 199mg Sodium.

Posted in Breads, on December 3rd, 2007.

bishops bread slices

I’ve been waiting for months and months to give you this recipe. Since I only make this at Christmas-time, I didn’t think it appropriate to share it when the temps outside were in the 90’s. Although this is not my original recipe, I will tell you I’ve been making this for about 40 years, and this is one of those recipes – if you’re a regular reader of my blog – that I say – “now, listen up! I’m about to share something important.” Hence it is. Important. My mother’s friend Mary gave me this recipe, back in about 1969 or 1970. We had a group of us – 4 women: my mother, Fay, and two of her friends, Esther and Mary, both near her age. And me. We played the Japanese version of Mah Jong about every 2 weeks or so, and one of us provided lunch. It had to coincide with when my daughter, Dana, went down for her nap, so more often than not, it was at my house. After eating the repast we’d then play the game for a couple of hours.

So, Mary brought this, one Mah Jong day, when it was close to Christmas. My mother (and dad both) liked fruitcake. But I never did. Still don’t. I’ve been known to try a nibble, with somebody’s prized recipe, thinking that maybe my taste buds have changed, that I’ve matured somehow. Or that somebody has found some unique new way to make fruitcake palatable. Sorry. No. I still don’t like fruitcake. I detest citron, and anything close to it. So, when Mary brought this over, explaining that it was something like fruitcake, I was suspicious. However, she quickly said she didn’t like fruitcake, either. Oh good. I became a bishop’s bread convert from the first bite. SO:

• I do like maraschino cherries. Certainly I don’t eat them 11 months of the year. I mean, where do we ever even SEE maraschino cherries anymore except on some caterer’s platter or in a Shirley Temple. I went through a stage in the 1970’s when red dye was an anathema, but that didn’t keep me from making bishop’s bread, I’m sorry to say. So much for my dedication to the shrine of a healthy body! But now they don’t use the bad red dye (supposedly), so I hope that since this is only consumed by me for these few, short weeks, maybe I’ll live another day.

• And, I like chocolate too. You all already know that. You can use Nestle’s chips, or cut up your own, or use some other brand. The better the brand the better the bread. You could use milk chocolate too, I suppose.

• And, I like walnuts.

• But, I don’t like fruitcake.

• Enter, ta da: Bishop’s Bread!

So, on to this recipe. If you’re going to be a stickler for detail, I suppose this does bear some resemblance to fruitcake – it has a similar consistency – chunks of goodies glued together with a basic cake recipe. Kind of like pound cake. But, instead of citron and dried fruit (lemon, lime, orange, red candied cherries, dates, figs, etc) this has nothing but chocolate chips, walnuts and maraschino cherries. The cherries maintain their moistness, and you combine them with walnuts and chocolate, and it’s a marriage made in heaven, I say. Yes, it’s a bread-like shape, and you slice it like fruitcake, but it isn’t. I promise. On my honor.

Here’s how it’s made:
bishops bread mixThere’s the walnuts, chocolate chips and masarschino cherries all mixed with all the dry ingredients (flour, baking powder and salt). The sugar goes into the egg mixture, which is added next.

bishops bread eggsYou add in the eggs and sugar mixture to the dry ingredients. Stir with a spatula until everything is well coated AND you can’t see any white flour bits anywhere.

bishops bread in pansThere’s the raw batter spooned into the pans – this time I used pretty paper pans, so I didn’t have to use the buttered waxed paper on the bottom because you tear off the “box.”

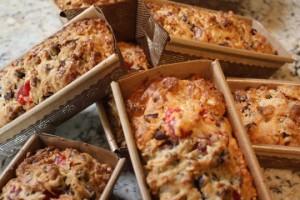
bishops bread baked 540There they are, just baked and cooled. They make lovely gifts for people at this time of year.
You can bake it in bread pans, so you’ll have just one loaf using the recipe below. Or, if you’re a Bishop’s Bread lover, then you bake in large quantity. Today I made a quadruple batch. It would make 4 bread pans full, but I had some smaller, cute little cardboard ones that are perfect for giving away (picture above). I made seven of them and one loaf pan. I’ll keep the loaf sized one and very judiciously give away the others. Only to very special friends. You can interchange nuts if you’d prefer something different. And if you don’t like maraschino, then substitute apricots, perhaps, or dried cranberries maybe. But it won’t be the same.

bishops bread fruitnuts closeup

Over the years I’ve tried to find out the history of this bread/cake. The internet hasn’t been of much help other than to give me several similar recipes (purportedly dating to the 1950’s) with candied cherries, sometimes almonds or pecans, chocolate, and dates. I did see a couple with maraschino cherries, so this must have been somebody’s interpretation. Obviously, the way-back origin must be religious in some way with the word “bishop” in the title. I did find this, though:

Any purchased or homemade cake decorated with the bishop’s name and a tiny mitre can be used on the feast of a bishop-saint, the traditional cake is Bischofsbrot or “Bishop’s Bread.” (this was from a Catholic Church website)

It probably did have candied cherries in it at one time. Whatever it is, I adore this bread. And if you’re a regular reader of my blog, and you like my recipes, then I sincerely request that you make this bread. Post Haste.
printer-friendly CutePDF
Files: MasterCook 5+ and MasterCook 14 (click link to open in MC)

Bishop’s Bread

Recipe: a dear friend from the 1970’s, Mary Wilfert
Servings: 20 (slices)

FLOUR MIXTURE:
1 1/2 cups flour
1 1/2 teaspoons baking powder
1/4 teaspoon salt
CHOCOLATE, NUT & FRUIT MIXTURE:
1 1/2 cups chocolate chips
2 cups walnuts — chopped
1 cup maraschino cherries — drained, halved
1 cup sugar
3 whole eggs

NOTES:  You could also make these in smaller pans (and bake a shorter time) and give as gifts to friends and neighbors. The proportion of nuts, chips and cherries can vary to your taste. If you don’t like maraschino cherries, substitute dried cranberries, for instance. Prefer pecans? Or maybe macadamia nuts? The original recipe I was given also included dates.
1. Preheat oven to 350°F. Grease a bread pan and line the bottom with waxed paper (yes, it’s important). Sift dry ingredients (this is to make certain the baking powder and salt are evenly distributed) into a large bowl. Add chocolate chips, walnuts and cherries and stir to coat the items, particularly the cherries.
2. With an electric mixer combine eggs and sugar and beat until thoroughly mixed, then add to fruit-flour mixture and stir gently, but well, until combined. You don’t want to see any pockets of flour. Pour into prepared pan(s) and place on middle rack in the oven. Reduce oven temp to 325°F. Bake for 60-75 minutes, testing in center with an instant read thermometer, until it reaches about 210°F. If you use a toothpick to test for done-ness, and the tester goes into a chocolate chip, it’s hard to tell it’s done. Continue baking as needed and test at 5-minute intervals. Remove pan(s) to a rack and allow to cool in the pan. When cool, remove from pan, remove waxed paper from the bottom, then wrap well in plastic wrap and foil, or preferably in plastic bags and refrigerate. Slice about 1/4 inch thick. Eat with gusto. [Makes 1 regular sized bread pan loaf; more if using miniature bread pans .]
Per Serving: 255 Calories; 13g Fat (42.8% calories from fat); 6g Protein; 33g Carbohydrate; 2g Dietary Fiber; 32mg Cholesterol; 82mg Sodium.

Posted in Breads, on November 29th, 2007.


Sometimes my DH doesn’t give me much notice that the guys are coming to our home the next morning for Bible Study. He knew two weeks ago but neglected to tell me. So, yesterday afternoon about 3:00 he just happened to mention it in passing. I said, when were you going to tell me about this, dearest? He said, well, I just did [big, apologetic grin].

So, wanting to do something new (the guys have had all of my regular repertoire of morning coffee cakes more than once) I swiftly turned to my latest favorite baking book, Dorie Greenspan’s Baking: From My House to Yours. I do love that book. Not wanting to make a trip to the grocery store, I actually found several “Morning Cakes” I could make, but settled on this one.


Out came all the ingredients and this pulled together fairly quickly. I liked the crumb topping – it’s a bit different – well, similar to others – but different because of the orange zest – and the espresso powder in it. Oops, I opened my jar of espresso powder that’s been languishing in the pantry for at least a year without any use, and uh, it’s a solid mass. Oh, da–! Usually I’ll just make some very strong espresso instead to substitute in a recipe, but this was in a dry topping, so I couldn’t do that. What to do? I had no instant coffee (we don’t drink the stuff). So, out came the Dutch-process cocoa. It worked just fine, although I suppose Dorie might not like my substitution. She obviously was going for a cardamom and coffee pairing here. The batter is hand mixed, which gives the finished cake a little bit of irregular texture – not a bad thing. It’s not like a dessert cake that’s beat with a mixer until totally smooth.

The coffeecake/crumb cake was very nice. This isn’t a wow kind of cake – just good home made flavors, perfect with a hot cup of coffee. Luckily there were leftovers, so when the boys come next week I’ll pop it in the oven for a little re-heat.
printer-friendly PDF

Cardamom Crumb Cake

Recipe: Dorie Greenspan – Baking: From My House to Yours
Servings: 9
NOTES : This cake is best served warm the day it’s baked. If you must make it ahead, freeze it. Defrost and reheat in a 350 degree oven for a few minutes to warm it.

CRUMB TOPPING:
1/2 cup all-purpose flour
1/2 cup walnuts — coarsely chopped
1/3 cup sugar
1 tablespoon orange zest — finely grated
1/2 teaspoon instant coffee granules — preferably espresso [or cocoa]
1/2 teaspoon ground cardamom
4 tablespoons unsalted butter — at room temperature
CAKE BATTER DRY INGREDIENTS:
2 cups all-purpose flour
2 teaspoons baking powder
1/4 teaspoon salt
1 1/4 teaspoons ground cardamom
1 teaspoon instant coffee granules — preferably espresso [or cocoa]
2/3 cup sugar
CAKE BATTER WET INGREDIENTS:
2 tablespoons orange zest — finely grated
8 tablespoons unsalted butter — melted and cooled
2 large eggs
1/2 cup whole milk
1/2 cup espresso coffee — cooled
1 1/2 teaspoons vanilla extract

1. Preheat oven to 400 and arrange rack in center of oven. Butter an 8-inch square baking pan, dust the inside with flour and tap out the excess. Put the pan on a baking sheet.
2. CRUMBS: Put all the ingredients except butter in a bowl and toss them together with a spatula just to blend. Add the butter, in small little pieces, and using your fingers or spatula, mix everything together until you’ve got crumbs of different sizes. It’s nice to have a few big pieces, so don’t overdo it. Set the crumbs aside (up to 3 days ahead).
3. CAKE: Whisk together the flour, baking powder, salt, cardamom and espresso powder in a large bowl. Turn the dry ingredients out onto a sheet of waxed paper, and put the sugar and zest in the bowl. Rub them together with your fingers until the sugar is moist and the fragrance of orange strong, then return the dry ingredients to the bowl and whisk to blend.
4. Put the remaining ingredients in another bowl and whisk them to blend. Pour the wet ingredients over the dry and stir – DON’T BEAT – to mix. Stir ONLY until you’ve got an evenly moistened batter. Scrape the batter into the prepared pan and top with a thick, even layer of the crumbs. Pat the crumbs ever so gently into the top of the batter.
5. Bake for 30-35 minutes, or until the cake has risen (it will crown the pan), the crumbs are golden brown and a thin knife inserted into the center comes out clean.
6. Transfer to a rack to cool in the pan, before serving warm or at room temperature.
7. You can unmold the cake if you want to, but you’ll lose some of the crumbs when you turn it over. I prefer to cut the cake in the pan, taking care not to nick the surface of the pan with my knife. Use a silicone spatula if possible.
Per Serving: 422 Calories; 21g Fat (44.6% calories from fat); 7g Protein; 52g Carbohydrate; 1g Dietary Fiber; 90mg Cholesterol; 195mg Sodium.

Posted in Breads, on November 28th, 2007.

While our whole family was here over last week, there were a lot of meals and snacks being prepared at all hours. Our grandchildren spent many, many hours in and out of our large, heated jacuzzi, and would beg for snacks like apples and cheese, soft drinks, juice (and towels, oh my, the towels). The refrigerator was bursting at the seams with leftovers and other stuff for a variety of meal types. And early on Saturday morning, our daughter Sara was already baking. She loves to bake. I mean it. SHE. LOVES. TO. BAKE. Sara usually prefers to bring desserts or baked items when we have a potluck meal. She’s a very good cook in general, and her daughter Sabrina, aged 11, is already a very good baker too. She’s been helping her mom since she stood next to her mom’s elbow on a stool at the kitchen counter.

My standby Buttermilk Scones are more like a very rich biscuit. The ingredients, however, are very, very similar. Mine have less sugar, less butter (which surprised me), but more buttermilk. Amazing what a little addition of buttermilk can make to a baked good. Sara’s have a little drier crumb (guess that’s the buttermilk at work there), but they were absolutely delicious. I may try her recipe next time I bake scones. There are a precious few of these in the freezer, which we’ll dole out for special occasions in the next couple of weeks. Thank you, Sara.
printer-friendly PDF

Sara’s Cranberry Orange Scones

3 c flour
1/3 c sugar
2 t baking powder
3/4 t baking soda
½ t salt
3/4 c cold butter
½ c dried cranberries
zest from 1 orange
1 c buttermilk
milk
a little cinnamon and sugar

Preheat oven to 425. Mix together the flour, sugar, baking powder and salt, then add the cold butter. Blend with knives or a pastry blender. Then add in the cranberries and orange zest. Pour in the cold buttermilk and gently stir dough until it holds together. Pour out onto a floured surface and press dough to about a 12 inch round and cut into shapes and place on a large baking sheet. Brush tops with milk and sprinkle lightly with cinnamon and sugar. Bake for 10-12 minutes until golden brown. Remove to cool for about one minutes. Serve immediately.
Per Serving: 247 Calories; 12g Fat (43.8% calories from fat); 4g Protein; 31g Carbohydrate; 1g Dietary Fiber; 32mg Cholesterol; 389mg Sodium. The nutrition count depends on how large you make the scones. This recipe makes about 14 or 15 large scones.

Posted in Breads, on October 14th, 2007.

This is the tried and true recipe I’ve used for years in my bread machine. I’m posting it here to accompany the pizza recipe I posted today, my favorite home made pizza recipe. Look at your own bread machine cookbook to verify amounts of yeast and water. They may vary according to the manufacturer’s directions. In my machine it takes about 55 minutes to mix, knead and rise once.
printer-friendly PDF

Whole Wheat Pizza Crust

Recipe: from “Pizza, California Style”
Servings: 4

2 cups all-purpose flour
1 cup whole wheat flour
1 teaspoon salt
2 teaspoons honey
2 tablespoons canola oil
1 1/2 cups water
1 tablespoon yeast

In bread machine: place all dry ingredients in pan, then add water last. Set for dough. Watch during the initial kneading to make sure the dough has the right consistency – too wet or too dry.
Per Serving: 409 Calories; 8g Fat (17.6% calories from fat); 12g Protein; 74g Carbohydrate; 6g Dietary Fiber; 0mg Cholesterol; 540mg Sodium.

Posted in Breads, on October 8th, 2007.

It was just a couple of weeks ago I mentioned how FUN it is (for me, anyway) when I discover a new method for making some heretofore ordinary dish. That was the green beans with garlic and olive oil. So, now, I have a great new recipe for you. This one is compliments of Cooks Illustrated, the bi-monthly magazine. I’ve subscribed to this gem for many years. And I think I’ve mentioned before (also) that I truly enjoy reading the long treatises on individual subjects. It could be gravy for pork chops, or just the right texture for fudgy brownies. You get the drift.

The subject of this article was : “The Best Drop Biscuit,” by Sandra Wu. The writer (food developer) explained the steps and stages she used to refine a favorite, the lowly drop biscuit. I don’t make drop biscuits very often. Why? I don’t know . . . I think I prefer the kind that you knead just a little bit, then pat out the dough and cut with a biscuit cutter. Plus, they’re perhaps a bit easier to break apart without falling apart. And sometimes drop biscuits are unevenly baked because they’re not all the same size or shape. An inherent problem with a drop biscuit. But this new method solves most of those problems.

The only thing you need for this recipe is butter (the real stuff) and buttermilk. (Although, to be fair, the recipe does indicate how to make clabbered milk instead of buttermilk.) I try to have buttermilk on hand. Once I’ve used whatever I needed it for, I freeze it in 1-cup freezer cups. My scones require exactly one cup. So do these biscuits, which will now become part of my regular repertoire. Now, whether this method for drop biscuits would work with defrosted buttermilk, I’m not sure. So, for now I won’t recommend that until I try it. Once defrosted, buttermilk gets a bit watery. It works fine for my scones, but, as I explain below, it might not work for these biscuits.

I won’t belabor all the explanation the author went through to finally GET to the final product. I found it very interesting. You might not. But, what’s unusual is: you pour slightly cooled, but melted butter INTO the one cup of buttermilk before adding that to the dry ingredients. Who woulda thunk that coulda make such a difference? Certainly not me! Here’s a picture of the clumpy buttermilk.

The writer is enough of a baking chemist to know that you need to stabilize – or equalize the temperatures of the butter and the usually cold buttermilk. She kept getting this clumpy mass (see picture), and probably threw away countless efforts of that combination. But one time she decided to go ahead and use that clumpy mess in the biscuit anyway. Voila! As you stir the moderately warm/hot butter into the cold buttermilk the little clumps in buttermilk that are there naturally attach themselves to all the little molecules of butter. And you have this heaping cup full of lumps. It’s such an incongruous pile of stuff.

But anyway, you pour all that into the dry ingredients, stir just until mixed thoroughly (no kneading) and you’re ready to make quick drop biscuits. She recommended using a greased 1/4-cup measuring cup. I used cooking spray, which didn’t work all that well, I must say. Keep the waxed paper the butter is wrapped in and grease the measuring cup with that. The 2nd time I made these I used a narrow metal sandwich spreader to kind of scoop out the batter. Buttering the 1/4-cup measure didn’t work any better than cooking spray. Whichever method you use, you scoop equal 1/4-cup measures of the batter and drop onto parchment on a baking sheet. Then you gently reshape any that aren’t uniform.

Now, there’s a side story (a sidebar) in the article about the use of parchment vs. a Silpat. I have bunches of and I use them constantly. In the usual Cooks Illustrated’s style, they did a study of these biscuits using both. They far prefer parchment because they believe silicone mats (silpats or others) can impart some off-flavors. Mostly that wouldn’t bother me, but since biscuits are such a delicate flavored item, I took their advice and used paper. Then, I straightened all of the biscuits on the sheet – to make sure none were too high, or short, etc. That made a big difference – all the biscuits were perfectly, evenly browned.

Need I say they were a big hit? A BIG hit. These biscuits are so very light and tender. The master recipe is for a plain biscuit, but they also gave variations for both Black Pepper and Bacon Biscuits, and Rosemary and Parmesan Biscuits. I made the bacon and pepper version. We had leftovers of soup last night, and made the biscuits again, but also added some sharp cheddar cheese, at my son-in-law’s request. Any way you make them, they’re good.
printer-friendly PDF

Best Drop Biscuits

Recipe: Sandra Wu, Cooks Illustrated
Servings: 12

2 cups all-purpose flour — unbleached, if possible
2 teaspoons baking powder
1/2 teaspoon baking soda
1 teaspoon sugar
3/4 teaspoon salt
1 cup buttermilk — COLD
8 tablespoons unsalted butter — melted and cooled slightly
2 tablespoons butter — melted, for brushing tops

Bacon/Pepper Variation: cut 6 slices bacon into small pieces and fry until crisp. Crumble. Add bacon and 1 tsp. coarsely ground pepper to the dry mixture in step 1.
Rosemary/Parmesan Variation: add 3/4 cup grated Parmesan cheese and 1/2 tsp. minced rosemary to the flour mixture in step 1.
1. Adjust oven rack to middle position and heat oven to 475. Whisk flour, baking powder, baking soda, sugar and salt in a large bowl. (Or, you can sift it together.)
2. In a medium bowl (at least 1 1/2 cups or larger) combine the cold buttermilk and the melted and slightly cooled butter. Stir until buttermilk forms clumps.
3. Add buttermilk mixture to dry ingredients and stir with rubber spatula until just incorporated and batter pulls away from side of the bowl.
4. Using a greased 1/4-cup measure, scoop level amounts of batter and drop onto a parchment-lined baking sheet, approximately 2 1/4 inches across and 1 1/4 inches high. Repeat with remaining batter, spacing biscuits about 1 1/2 inches apart. Bake until tops are golden brown and crisp, approximately 12-14 minutes.
5. Brush biscuit tops with remaining 2 T. melted butter. Transfer to a wire rack to cool, or serve immediately.
Per Serving: 171 Calories; 10g Fat (52.4% calories from fat); 3g Protein; 17g Carbohydrate; 1g Dietary Fiber; 27mg Cholesterol; 309mg Sodium.

Posted in Breads, on October 3rd, 2007.

Today’s posting is going to involve a bit of history trivia about me. This is a traditional yeast bread recipe. To date I haven’t posted any of those to my blog yet. Eventually I’ll probably post several yeast breads, but here’s the first regular type. I wrote up the No-Knead bread recently, but that hardly counts.

Some cooks get stage fright when the subject of yeast is even mentioned. I guess I was too young or naive to listen to such wives’ tales. I just dug in and did it. I started making bread regularly in the mid 60’s, when I was in my early 20’s. In fact, once I learned the techniques, and found several recipes that I really liked, I began making all of my own bread. Sandwich bread (mostly buttermilk), cornmeal bread (a raised version), and a wheat bread too. At Christmas I made Stollen, and a few times a year I made this Portuguese Sweet Bread.

Growing up, we had a Portuguese family living across the street from us. Point Loma, a peninsula and a suburb in San Diego, is the home to thousands of Portuguese families, most of whom make their living by deep sea fishing. Although we didn’t ever know this family well, one year the matriarch brought over a round globe of this bread on Good Friday. Maybe it was a silent peace offering because their dog barked incessantly, hour upon hour morning to night and during the night. Whatever the reason, it was nice that she shared a loaf with us. We enjoyed it.

Portuguese Sweet Bread is traditional only at Easter, apparently. I asked her about the recipe one day when she was chasing her barking dog in the street, but she seemed disinclined to share it. A few years later I saw a Portuguese cookbook at the library and sure enough, there was a recipe!

So in the early 1970’s I was a stay-at-home mother of a very young child. Money was tight. So I began baking bread and selling it to friends. Most of my hard-earned money was used for babysitting, so I could get out a little bit. Many of my mother’s friends were kind enough to buy bread from me every week. Bless them! My recollection is that I charged about $1.00 a loaf for the buttermilk type. Up to $2.00 for the richer breads and a bit more for Stollen. Every week my kitchen heated up for hours on end as I made what seemed like endless loaves of bread. I bought 100 pound bags of flour through a local bakery and kept it in a special trash can in the garage (lined with a two layers of heavy-duty plastic bags and sealed very tight).

I didn’t have a business, a license, or any of that kind of thing; it was just word of mouth. I bought one pound blocks of fresh yeast (the cube, cake kind) from the same bakery and froze it in small batches. And I bought 1000-piece boxes of bread-sized clear plastic bags (the kind bakeries use). I still have what was left of the last box I bought, believe it or not. Those bags are over 40 years old and they’re still just fine. Amazing. No wonder we have problems with our landfills and plastic grocery bags.

The buttermilk bread was the hands-down favorite of all my customers. But every few weeks I made this bread too. Usually only a few loaves. These take more time to make (longer rising times) and can be a bit temperamental if not given the right rising environment. But if the signs are right and the gods smile, you’ll be blessed with a wonderfully fragrant loaf of soft, eggy bread. It would be ideal for the Pineapple French Toast I posted recently (click here) if you don’t have the King’s Hawaiian Bread used in that recipe.

In those days of busy bread baking, I combed through lots of bread cookbooks from the library and gathered ideas from anywhere I could find them. In my own recipe archives I have a funny shaped envelope that still contains all of my yeast recipes from those bread-baking days, with notes about costs, all written on 3×5 or 4×6 cards. And in some book – no recollection where – I read a long dissertation about the molecular action of yeast. I’ve never forgotten those words of advice about how yeast needs to climb, but if it’s mixed only in water the molecules are slippery and have a hard time doing their job. So, this book recommended making the first yeast mixture (where you proof the yeast) with a little addition of sugar and ground ginger. I decided to try it, and believed then, as I do now, that that step does a lot for yeast. Now I use dry, granulated yeast, but it’s the same process. No change, just dry yeast for cubed, fresh yeast.

A word about proofing. Maybe some of you have never even heard the expression of “proofing the yeast.” The goal is to PROVE that the yeast is good, viable, and that it’s working; therefore, proof that the yeast is alive and well. You will always want to do that step.

If you use a bread machine, that step is skipped. You don’t want the yeast to be dissolved in liquid in a bread machine recipe as the machine process relies on the use of dry, granular yeast which dissolves slowly, and some not at all during the mix and sit, mix and sit series. I have a bread machine that I don’t use very often anymore. It was a great timesaver when I was working, but I was never very satisfied with the wheat varieties I made in the machine. We rarely eat white bread anymore, so the machine has been relegated to a shelf in the laundry room.

Don’t attempt to make this bread in a bread machine – it won’t work because the dough needs longer rising periods. Now if you want to tinker with the yeast (adding more) to make it rise faster, either conventionally, or in the bread machine, by all means try it. Or if you just want to use the bread machine to accomplish the first mixing and kneading, that’s fine.

So, back to Portuguese Sweet Bread. This bread is a sweet dough. And if you’re a bread novice, you need to know that when you add some sugar to bread, it helps the yeast to grow (rise), but the sweeter the dough, the longer it will take to rise. Don’t, under any circumstances, be in a hurry when you make this. This bread needs long, slow rising times (actually two) and if it doesn’t rise nearly double in volume it probably wasn’t kneaded enough. Because this bread contains so much sugar, the yeast struggles to do its job – to double in volume. That’s why it’s temperamental and if the yeast molecules aren’t dispersed and kneaded well enough in the beginning, it just won’t rise sufficiently. Then you’ll be left with a kind of heavy, leaden bread. Not tasty at all.

You can try rising it in a slightly higher temperature (turn the oven on for a few minutes, then turn it off and put the dough in the oven to continue to rise). But when it’s done and you slice into this, you’ll be amazed at the perfume. Glorious. And you don’t have to wait until Easter to make it.
printer-friendly PDF

Portuguese Sweet Bread

Recipe Source: unknown
Servings: 20
NOTES: You can make this more festive by putting it into a large springform pan (full recipe) and after the second rising, brush with egg white and sprinkle with granulated sugar. Bake for about 45-50 minutes at 350°.
Serving Ideas: In Portuguese homes, this is served on Easter morning as part of a traditional breakfast.

1/2 cup evaporated milk
1/4 cup water
4 tablespoons butter
2 packages dry yeast
1 teaspoon sugar
1/4 teaspoon ground ginger
1/2 cup warm water
3/4 cup sugar
1 teaspoon salt
3 whole eggs
5 cups bread (hard wheat) flour

1. In a saucepan, melt the butter with the evaporated milk and water. In a large bowl place the 3/4 cup sugar, salt and eggs. Pour in the milk/butter mixture and stir to dissolve the sugar. Allow to cool while gathering the other ingredients for the bread. In a small, glass measuring cup, combine the warm water, ground ginger, sugar and add the packages of yeast. Stir briefly and set aside for only about 5-10 minutes. (Do not do this step ahead).
2. When the egg and sugar mixture is cool, add about one cup of flour and stir. Add the yeast once it has become bubbly, then stir in additional flour. The mixture may take a bit more flour than the ingredient list shows since adding flour to yeast bread is never an exact science. But, be careful you don’t add too much. Sweet breads can sometimes take more flour, but then the bread will be heavy and tough. Only add as much flour as you must to keep the stickiness under control. Roll the dough out onto a floured board and knead until the dough is elastic and smooth. Put into a greased bowl and allow to rise in a warm place until double in bulk. My notes say this takes about 2 hours.
3. Punch the dough down and pour out onto the floured board again and knead until there are no air bubbles in the dough. Cut in half and shape into bread shapes, place in bread pans and allow to rise again. This dough does not rise very fast, so wait until it’s nearly ready before you preheat the oven. You can also mold these into rounds – and use round cake pans.
4. Heat oven to 375°. Bake bread for 25 minutes. Remove from oven, cover the pans lightly with foil, then reduce temperature to 350° and bake an additional 8-10 minutes.
5. Remove bread from the oven and IF it’s stable enough, set loaves out on a rack to cool. If made correctly, this bread is very tender, so it may require cooling for 10-15 minutes in the pans before you remove them to a rack.
Per Serving: 196 Calories; 4g Fat (19.1% calories from fat); 6g Protein; 34g Carbohydrate; trace Dietary Fiber; 40mg Cholesterol; 149mg Sodium.

(photo from maryssweetbread.com)

Posted in Breads, on September 12th, 2007.

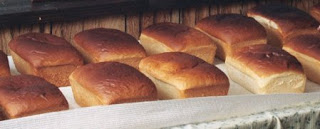
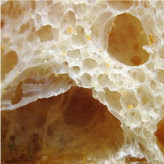
It was late last year that I first read about the No-Knead Bread on one of the food blogs I watch regularly. Since I have and do make homemade yeast bread (not often, but on occasion), it was not a big deal to think about it and do it, although I could hardly believe it could be THAT good when making it is THAT easy. Truly it is.You need little more than flour, salt, water, yeast, a heavy-duty iron pot (like Le Crueset) with a lid, and about 24 hours. Of that 24, only about 5 minutes of it requires any hands-on work. The rest of the time the bread is just sitting, doing its thing. And really, you absolutely do not knead it. I love the ciabatta bread from Il Fornaio or La Brea Bakery. But I had no idea making that kind of holey moist bread could be such a cinch. I’ve made it for guests several times. And just for us several times too. It keeps just fine for a day at room temp. I usually slice it up on the 2nd day (if there is any left over, that is), wrap the slices in foil, then pop them in a ziploc plastic bag and into the freezer.

If you head over to Jaden’s Blog – Jaden’s Steamy Kitchen, you’ll find a long and beautifully photographed blog posting all about this bread. And how her 4-year old son (who is adorable besides) made it. If he can do it, you can do it. A fellow named Jim Lahey, of the Sullivan Street Bakery in New York (photo at top is from the bakery’s website), developed this recipe. I found watching the video of making this very helpful. It’s on the New York Times’ website. Hope it’s still there. Here’s the link to it. I’m glad I did because I might have done a couple of things differently. I used an oval Le Crueset pan (with lid) and it worked just perfectly. I will say that the bottom crust is VERY firm, which requires a firm hand to slice through. You can use a smaller pot and you’ll likely have a higher-rising bread. By the way, Le Crueset does not guarantee the black knobs on their pots will survive in an oven over 400°. However, several other people who have made this bread say they have had no problem with the knob. I used one with side handles and no black knobs. You may also use any other kind of pot – with a lid. If the dough comes out too moist, remove the lid sooner in the baking process. In my Dacor oven (runs a bit hot) I bake this at 425° for 30 minutes, then remove lid and continue baking for another 15. Each oven is different. Initially the crust was too hard, which is why I reduced the temperature and removed it earlier from the oven. I also mix the flour – half bread, half regular all-purpose. Others who have made this say you can vary flours in small quantities. If you add too much whole wheat, however, it most likely will not rise sufficiently.

printer-friendly PDF

No-Knead Bread (yes, really)

Recipe: Jim Lahey of Sullivan Street Bakery, New York
Serving: 10

3 cups all-purpose flour — or mixture with bread flour
1/4 teaspoon rapid rise yeast
1 5/8 cups water — plus 1-2 tablespoons
2 teaspoons salt Cornmeal or wheat bran as needed

1. In a large bowl combine flour, yeast and salt and stir to distribute dry ingredients before adding the water. Add 1 5/8 cups water, and stir until blended; dough will be shaggy and sticky. If it’s not sticky, add another tablespoon of water if you have any idea it’s too dry. Cover bowl with plastic wrap. Let dough rest at least 12 hours, preferably about 18, at warm room temperature, about 70 degrees.
2. Dough is ready when its surface is dotted with bubbles. Lightly flour a work surface and place dough on it; sprinkle it with a little more flour and fold it over on itself once or twice. Cover loosely with plastic wrap and let rest about 15 minutes.
3. Using just enough flour to keep dough from sticking to work surface or to your fingers, gently and quickly shape dough into a ball. Generously coat a cotton towel (not terry cloth) with flour, wheat bran or cornmeal; put dough seam side down on towel and dust with more flour, bran or cornmeal. Cover with another cotton towel and let rise for about 2 hours. When it is ready, dough will be more than double in size and will not readily spring back when poked with a finger.
4. At least a half-hour before dough is ready, heat oven to 450 degrees. Put a 6- to 8-quart heavy covered pot (cast iron, enamel, Pyrex or ceramic) in oven as it heats. When dough is ready, carefully remove pot from oven. Slide your hand under towel and turn dough over into pot, seam side up; it may look like a mess, but that is O.K. Shake pan once or twice if dough is unevenly distributed; it will straighten out as it bakes. Cover with lid and bake 30 minutes, then remove lid and bake another 15 to 30 minutes, until loaf is beautifully browned. Cool on a rack.
Per Serving: 137 Calories; trace Fat (2.5% calories from fat); 4g Protein; 29g Carbohydrate; 1g Dietary Fiber; 0mg Cholesterol; 428mg Sodium.

Posted in Breads, easy, on September 9th, 2007.

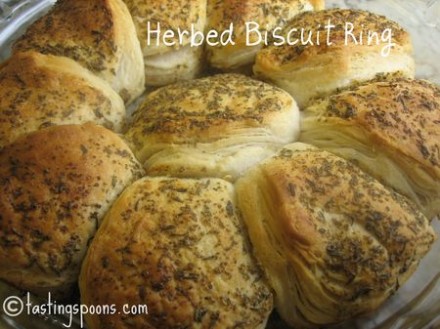
herbed-biscuit-ring-450

This recipe doesn’t even begin to qualify as gourmet. It’s nothing but cinchy easy. I don’t buy Pillsbury biscuits much anymore. They probably have transfats in them. But they sure do make it easy to provide some bread for a company meal.

The combination sounds a bit odd – butter, herbs and lemon juice. And when the instructions suggest you MIX this together, just remember that an acid and butter are kind of like oil and water – they just don’t blend. The herbs stir in just fine, but it’s difficult to get the lemon juice to incorporate in the butter mixture. Just keep trying and it will absorb most of it.

So you get all that done ahead. Heat the oven. Spread each biscuit (top) with some of the butter/herb mix and arrange them into a 8-inch round cake pan with an edge of each biscuit overlapping the previous one. That way you kind of make a spiral. Use a Teflon pan if possible. If there’s some lemon juice left over in the mixing bowl just pour it over the biscuits anyway. Will make them more tangy.

Likely these would be even better made with a regular homemade biscuit – even Bisquick ones rather than the Pillsbury rolls. But I never remember these unless I see the Pillsbury tubes at the grocery store. So won’t somebody try those and let me know? They’re probably even better than this recipe. I’ve had this recipe for years – it was given to me by a friend, so I don’t know the origin. I even looked on the Pillsbury site and this recipe was not there. Kind of surprising, actually.

printer-friendly CutePDF

Files: MasterCook 5+ and MasterCook 14 (click link to open in MC – 14 contains photo)

Herbed Refrigerator Biscuit Ring

NOTES: The mixture can be made up ahead and you just have to spread it on and bake the biscuits. Don’t refrigerate it, though, as it needs to be at room temp.
Servings: 6

3 tablespoons butter — softened
1 teaspoon lemon juice — fresh
1 dash paprika
1/8 teaspoon sage — rubbed
1/2 teaspoon celery seed
1/4 teaspoon thyme — crushed
1 can biscuits — refrigerator type, buttermilk

Preheat oven to 400. In a small bowl combine the butter, juice, paprika, celery seed, thyme and sage. The lemon juice really doesn’t blend in well, but do your best. Open the canned biscuits and separate, spreading tops with the butter/juice mixture. In an 8-inch pie pan, arrange the biscuits, buttered side up and form into a ring, overlapping slightly. Bake for 15-18 minutes or until golden brown on top. Serve while they’re hot.
Per Serving: 36 Calories; 4g Fat (86.1% calories from fat); trace Protein; 1g Carbohydrate; trace Dietary Fiber; 9mg Cholesterol; 53mg Sodium.

Posted in Breads, on August 21st, 2007.

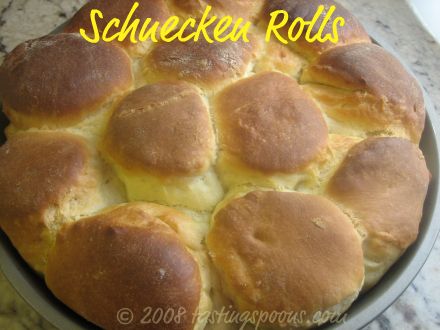
schnecken-rolls
I probably wouldn’t ever have known about Schnecken had I not lived next door to a woman who was German by heritage, and she made these rolls often. Very often. The couple invited us for dinner one night and these were served with dinner.

Now anybody reading this who has a German-Jewish heritage, you may leap all over me to tell me that Schnecken are NOT dinner rolls. They’re sweet rolls that are a standard, but special occasion, sweet roll, usually filled with nuts or a caramel nut mixture. And generally they’re eaten in the morning, at breakfast, like biscuits, a doughnut, or a bear claw. And actually, I found out that Schnecken is a Yiddish word. And here in the U.S. there seem to be lots of bakeries in the Cincinnati area that offer them. Must be a big German/Jewish population there who know about a good thing when they find it.

I did a google search for these guys, hoping that now that the internet has “everything” I’d find something about Schnecken ROLLS. Nay. Nada. Just a bunch of recipes for sweet dough with a sweet, nut filling. And believe it or not there’s even a blog out there dedicated to Schnecken memories. No recipes, just reminiscences. Really. That’s where I learned about Cincinnati’s love affair with Schnecken. But, I truly don’t know whether these are authentic, other than my neighbor was German, and she served these with dinner. They need no added butter as they’re layered with some before the second rise.

What these are, are sweet. Certainly sweeter than regular dinner rolls. They’re kind of like King’s Hawaiian Bread, if you have that where you live. Also kind of like Hot Cross Buns, but without the frosting/glaze on top. But the dough is very tender. Once I got the technique down, and did some research about them, I discovered that they’re akin to the Refrigerator Yeast Rolls of old. For those of you young’uns, Refrigerator Yeast Bread came into high esteem after the advent of . . . well, refrigerators. Duh. But no, really, you need to understand a bit more yeast fact and lore. Yeast dough likes a warm rising environment. It needs the time to rise too – that’s what we like about raised bread, it has all those tiny little holes in it filled with air. But, homemakers couldn’t always stay home all day waiting to work on the dough just when the dough said so. Probably some housewife had to take her children to the lake to swim, or she needed to help weed the south 40, so in desperation, she stuck the dough in the refrigerator. When she returned hours later and removed the dough, and let it come to room temperature she discovered the dough had risen anyway, even being chilled. But it was delayed. Perfect. Hence, Refrigerator Rolls were born. That’s my explanation and I’m sticking to it!

The refrigerator thing is what makes these so fun and easy to do. You mix up the dough and let it do its thing in the frig. A couple of hours before you need them, remove from the refrigerator, roll out and cut with a biscuit cutter, set aside, lightly covered in a semi-warm place, and give them 1 – 1 1/2 hours to rise and pop them in the oven. The most heavenly fragrance will perfume the air. Betcha you can’t not eat one right away!
printer-friendly PDF

Schnecken Rolls

Recipe: from a neighbor I knew in Washington, D.C. (1963)
Servings : 24
COOK’S NOTES: I actually used to make these a lot because they could be made in the morning, put into the refrigerator to chill the dough, then about 2 hours before guests arrived I’d roll it out, cut them, allow them to rise, and bake them just as guests arrived. It made the house smell wonderful! And they’re absolutely delicious.

YEAST MIXTURE:
2 packages dry yeast
1/4 cup warm water
1 teaspoon sugar
1/4 teaspoon ground ginger
BREAD MIXTURE:
3/4 cup warm water
1 cup sugar (or less)
1 cup butter — room temperature
1 teaspoon salt
1 cup boiling water
2 whole egg — slightly beaten
6 1/3 cups bread flour — approximately

1. In a glass measuring cup combine the 1/4 cup water, sugar and ground ginger; then add the yeast packages, stir and set aside until bubbly.
2. In a large bowl combine the water, sugar, butter and salt. Add the boiling water and stir until the butter melts. Add 2 cups of the flour and beat well.
3. Add the eggs and yeast mixture, stir well, then add all the remaining flour. Beat with a wooden spoon until the mixture is smooth. Chill for 4 hours.
4. Roll the dough out onto a floured board and use a rolling pin to roll it into a 10″ by 18″ rectangle. Spread the dough with a little bit of butter all over. Fold the dough in half.
5. Cut the folded dough with a biscuit cutter and place in metal pans with the rolls almost touching. Allow to rise for about 1-1 1/4 hours.
6. Preheat oven to 375° and bake rolls for 20-25 minutes.
Per Serving: 243 Calories; 9g Fat (32.4% calories from fat); 5g Protein; 36g Carbohydrate; trace Dietary Fiber; 38mg Cholesterol; 174mg Sodium.

Related Posts Plugin for WordPress, Blogger...