


 If you’re a fan of chocolate . . . cherries . . . mascarpone cheese . . .whipped cream and cake, you’ll want to make this.
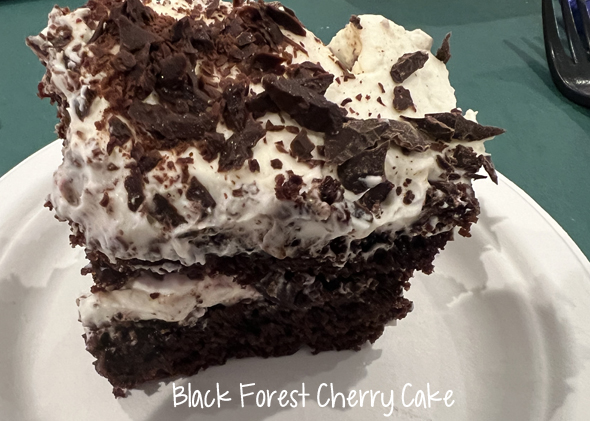
Another recipe from the double cooking class a few weeks ago. Sorry I don’t have a better photo of it. Daughter Sara and I both swooned over this cake, and have decided we need to make it some time over the holidays. Decadent? Oh yes. Chocolatey? Absolutely. Smooth and tender? Yes, indeed. If you’re a fan of chocolate, cherry and a tender cake, this will float your boat.
There are three different steps to making this: (1) marinating the cherries; (2) baking the cake; and (3) making the frosting and obviously then frosting the cake. First you need to do the cherries – you can use frozen cherries, no problem. Defrost first, then heat with cherry brandy or kirsch and some sugar and let it simmer for 10 minutes or so. Cool and chill. That part can be made up to five days ahead of time.
Next, the cake. You need two 9-inch cake pans here with nonstick cooking spray all over the inside. Making the cake batter isn’t difficult – it’s one of those hot water cakes (makes for a very tender cake). The only chocolate is unsweetened cocoa powder. Everything else is the normal stuff for making a cake. The batter, however, is quite thin. Don’t be concerned. Pour into the two pans, bake for 30-35 minutes, let the cakes cool in the pans for 10 minutes then gently remove them and cool completely on racks. You can make the cake layers 2 days ahead or if you want to, freeze them, several weeks ahead is fine.
The frosting is a combo of heavy cream and mascarpone cheese. So good. Sturdy with the mascarpone in it. The cakes need to be sliced in half to make four layers. Diane had a great idea – if you cut a tiny little V in the side of each cake, you can be certain you’ll put those two thinner slices back together so they lay flat if you line up the V. The cherries are halved and you use about 1/2 cup on each layer. The cake needs chilling time, at least 4 hours or up to 24. Makes it even easier – make it the day ahead (and refrigerate it, of course).
What’s GOOD: the cake is so chocolatey and tender. The frosting is not ordinary – loved the combo of whipped cream and mascarpone. The cherry element is unexpected and a nice complement to the chocolate. Hence the name, black forest! Altogether fabulous.
What’s NOT: only that there are three steps. A bit time consuming. But worth it. Do a lot of it ahead – easier for the hostess. The finished cake wants to be refrigerated at least 4 hours or overnight.
printer-friendly PDF and MasterCook file (click link to open recipe)
Black Forest Cherry Cake
Recipe By: Diane Phillips, cooking class 12/2023
Servings: 12 (or up to 16)
CAKE:
2 cups sugar
1 3/4 cups unbleached flour
3/4 cup cocoa powder — unsweetened
1 1/2 teaspoons baking powder
1 1/2 teaspoons baking soda
1 teaspoon salt
2 large eggs
1 cup whole milk
1/2 cup vegetable oil
2 teaspoons vanilla extract
1 cup boiling water
CHERRIES:
3 cups sweet cherries — pitted, either frozen and defrosted, or fresh
1/4 cup cherry brandy — or kirsch
1/4 cup sugar
FROSTING:
2 cups heavy cream
1 1/2 cups mascarpone cheese
1/2 cup sugar
1 cup dark chocolate shavings — for garnish
10 maraschino cherries — pitted, for garnish
NOTE1: The juice (vodka) used to soak the cherries is used to brush on each layer of the cake. Don’t discard it.
NOTE2: For the class, Diane cut about a 4″ circle in the center of the cake. She cut small wedges from the side of the cake and once those were plated, the center provided another 3-4 servings, so the cake would feed about 16 people.
1. CAKE: Preheat oven to 350°F. Coat two 9″ baking pans with nonstick cooking spray.
2. In a large bowl whisk together sugar, flour, cocoa, baking powder and soda, and salt. Stir in eggs, milk, oil and vanilla. With an electric mixer beat on medium speed for 2 minutes. Stir in boiling water and mix until blended, about 2 more minutes. Batter is very thin. Divide batter equally between the two pans and bake until a skewer inserted in the center comes out clean, 30-35 minutes.
3. Remove pans and cool on a wire rack for 10 minutes. Remove the cakes from the pans and let cool completely on wire racks. You can make these ahead to this point and refrigerate for up to 2 days, or freeze for up to 6 weeks. Defrost before proceeding.
4. CHERRIES: In a saucepan combine the ingredients, bring to a simmer and cook for 10 minutes.
5. Drain the cherries, saving the juices and allow to cool before assembling the cake. Cut the cherries in half if you have time.
6. The cherries and juice can be cooled, covered and refrigerated (separately) for up to 5 days.
7. FROSTING: In a large bowl beat the cream until stiff peaks form. Add the mascarpone cheese and beat until smooth.
8. Cut each cake layer in half horizontally. TIP: cut a tiny notch on the side of each cake so when you re-assemble the cake with the frosting you can line up the cake the way it should be (and hopefully level).
9. Lay strips of waxed paper or paper towels on the outside of the cake plate (to catch crumbs and drips). Set a cake half on serving plate. Brush cake with some of the cherry/cherry brandy juice. Spread with some of the cream mixture and top with some of the cherries.
10. Continue to layer with cake, juice, cream frosting, cherries and repeat. If there is enough frosting leftover, spread on the top and sides of the cake.
11. Decorate the top and sides of the cake with chocolate shavings and arrange maraschino cherries around the top of the cake. Refrigerate cake for at least 4 hours, or up to 24 hours ahead.
Per Serving: 668 Calories; 40g Fat (52.1% calories from fat); 8g Protein; 74g Carbohydrate; 3g Dietary Fiber; 118mg Cholesterol; 559mg Sodium; 55g Total Sugars; 1mcg Vitamin D; 114mg Calcium; 2mg Iron; 266mg Potassium; 181mg Phosphorus.


Leave a Comment!